I just finished-up the two antique heating grates last night (for the Office and Living Room). The new casting for the missing latch was brought back to me this week, and I painted it over the past few days (primer, followed by black on the back end, then white on the front). And they are now installed and functional again.
The casting ended up being quite expensive (nearly the price of buying an entire salvaged grate), but I had never gotten an actual quote for the casting, and it's over and done now.
I wanted to share photos, but I forgot my camera at work, so I will post those next week.

Showing posts with label Heating. Show all posts
Showing posts with label Heating. Show all posts
Friday, June 27, 2014


Monday, April 21, 2014
Small Project Updates
So as I mentioned the other day, I did some stripping for a few small projects, and here they are!
First off, it's nothing too exciting, but it was a *LOT* of work, and I want to show it off: the living room heating grate. It still needs the thumb latch, and I'm getting a copy cast for it:

Next is the inlay maple desk/table. I can't tell you how thrilled I am to finally have some semblance of a proper desk after 4 years of dealing with a rickety card table. I also took the opportunity to thoroughly vacuum the floor, clean out the computer (inside) case, and clean all the wires.
The desk turned out pretty well. The finish isn't perfect (since it's hand-brushed), but it should be quite durable. I like the edge a lot better without the brown paint, and I also fixed the drawer and replaced the runner boards.
The only problem now, is that my office chair (which I reupholstered last week) is now too low (the lift on it is broken). So I need to fix it, since the desk is now about 2" taller than before. Two inches doesn't sound like much, but it's a big difference.

You can see the office's matching heating grate in these next two photos.


Additional notes: There was a bit of a burn mark in the wood which is still a bit noticeable in the photo above, but it's not enough to bother me. I also decided not to do any modifications to the top (I had thought of routing another profile on the edges, or sanding it flush to eliminate the double bead, etc. I also didn't bother to do any veneer repairs (there was one large-ish chip). Instead, I just used wood filler in a light golden yellow, and it was a close enough match to do all the little chip and nick repairs.
First off, it's nothing too exciting, but it was a *LOT* of work, and I want to show it off: the living room heating grate. It still needs the thumb latch, and I'm getting a copy cast for it:
Next is the inlay maple desk/table. I can't tell you how thrilled I am to finally have some semblance of a proper desk after 4 years of dealing with a rickety card table. I also took the opportunity to thoroughly vacuum the floor, clean out the computer (inside) case, and clean all the wires.
The desk turned out pretty well. The finish isn't perfect (since it's hand-brushed), but it should be quite durable. I like the edge a lot better without the brown paint, and I also fixed the drawer and replaced the runner boards.
The only problem now, is that my office chair (which I reupholstered last week) is now too low (the lift on it is broken). So I need to fix it, since the desk is now about 2" taller than before. Two inches doesn't sound like much, but it's a big difference.
You can see the office's matching heating grate in these next two photos.
Additional notes: There was a bit of a burn mark in the wood which is still a bit noticeable in the photo above, but it's not enough to bother me. I also decided not to do any modifications to the top (I had thought of routing another profile on the edges, or sanding it flush to eliminate the double bead, etc. I also didn't bother to do any veneer repairs (there was one large-ish chip). Instead, I just used wood filler in a light golden yellow, and it was a close enough match to do all the little chip and nick repairs.
Saturday, April 19, 2014
Stripping
Most of yesterday was spent stripping. Not the sexy kind of stripping, though, the messy kind.
I have several projects that need stripping, and I've been putting them off for a while (mainly due to the weather, since I need SOME ventilation).
Some of the projects include:
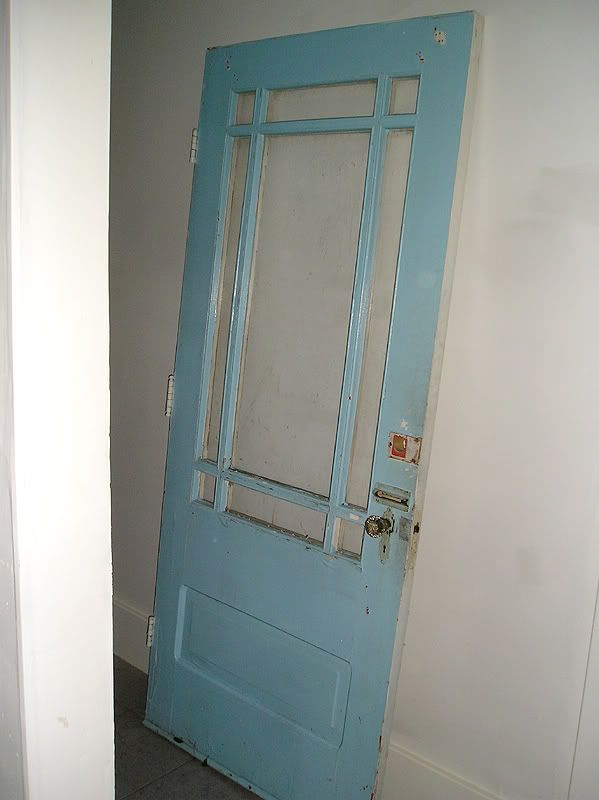
- Antique front door
- Two antique chairs (needing new upholstery)
- The living room heat grate
- An antique (1920s or 30s) cedar chest
- The maple table/desk
- The antique Eastlake walnut desk
- Several clocks
- Etc., etc., etc...
There's no way I could handle all these in just one day (it takes hours), so I worked on a few items that have been driving me nuts, namely the maple inlay table/desk, and the living room heating grate (which you might remember had a TON of old paint sloppily applied).
No photos on the table yet, but that was a fairly simple stripping job, since everything comes apart into many small flat pieces (4 legs, 4 aprons, the drawer, and the top). The grate, however, was another story.
The grate was a huge pain in the rear to strip because of all the nooks and crannies. I had to mostly slather it in stripper, and cover it with cellophane to sit for a while. Considering how strong the chemical stripper is, I'm surprised that the cellophane doesn't melt into goop, but I've seen this trick elsewhere, and it worked well.
Grate before (as purchased from an antiques salvage store):

And after stripping, and new paint. I should have taken a photo of the grate stripped (it was a beautiful flashed copper look and in decent shape), but I was tired and looking forward to getting it DONE.


Note: The interior is flat black, with the front parts in gloss white. These are just standard oil based spray paints, applied in several coats.
Not shown are the 2 interior flaps (lever operated shutter), which also had to be stripped, buffed clean of rust, and repainted (also in flat black). Next, I will need to have a new latch cast for the one that's missing. I hope this won't be too expensive, but at work we know a guy who knows a guy who does casting, and he had done a few copies of antique dresser pulls for us, and they were gorgeous. The set of 2 pulls (with back rosettes) was something like 60$ for the 4pcs. I only need one piece, so I'm hoping it will be under 50$, since I can buy a whole other grate for 50$.
I have several projects that need stripping, and I've been putting them off for a while (mainly due to the weather, since I need SOME ventilation).
Some of the projects include:
- Antique front door
- Two antique chairs (needing new upholstery)
- The living room heat grate
- An antique (1920s or 30s) cedar chest
- The maple table/desk
- The antique Eastlake walnut desk
- Several clocks
- Etc., etc., etc...
There's no way I could handle all these in just one day (it takes hours), so I worked on a few items that have been driving me nuts, namely the maple inlay table/desk, and the living room heating grate (which you might remember had a TON of old paint sloppily applied).
No photos on the table yet, but that was a fairly simple stripping job, since everything comes apart into many small flat pieces (4 legs, 4 aprons, the drawer, and the top). The grate, however, was another story.
The grate was a huge pain in the rear to strip because of all the nooks and crannies. I had to mostly slather it in stripper, and cover it with cellophane to sit for a while. Considering how strong the chemical stripper is, I'm surprised that the cellophane doesn't melt into goop, but I've seen this trick elsewhere, and it worked well.
Grate before (as purchased from an antiques salvage store):
And after stripping, and new paint. I should have taken a photo of the grate stripped (it was a beautiful flashed copper look and in decent shape), but I was tired and looking forward to getting it DONE.
Note: The interior is flat black, with the front parts in gloss white. These are just standard oil based spray paints, applied in several coats.
Not shown are the 2 interior flaps (lever operated shutter), which also had to be stripped, buffed clean of rust, and repainted (also in flat black). Next, I will need to have a new latch cast for the one that's missing. I hope this won't be too expensive, but at work we know a guy who knows a guy who does casting, and he had done a few copies of antique dresser pulls for us, and they were gorgeous. The set of 2 pulls (with back rosettes) was something like 60$ for the 4pcs. I only need one piece, so I'm hoping it will be under 50$, since I can buy a whole other grate for 50$.
Friday, October 07, 2011
Ducts
I've been working on some more duct work. Namely the cold air return in the living room. What a total disaster that was (the previous job). I've got it sorted out, but now I'm left wondering if I have enough venting for the cold air return on my furnace. Basically, I have 13 hot air ducts (12 are 5" diameter, and one is 4"), and the only cold air return is from one 6" and one 5" duct. It seems to REALLY suck the air when the furnace is running, which makes me think that I might need another return. That's not a problem, though, since I CAN connect a second 5" duct right along side the current one (going upstairs) but I just don't know if I *SHOULD* or not. Heating systems are usually carefully calculated and balanced for every house, but I'm not entirely convinced that it was done properly in mine.
I want to get an expert in, to have a look, but the place I want to use isn't open on weekends. :(
Other than this, I haven't done much on the house lately (though the duct work job was quite messy and isn't done yet).
I want to get an expert in, to have a look, but the place I want to use isn't open on weekends. :(
Other than this, I haven't done much on the house lately (though the duct work job was quite messy and isn't done yet).
Subscribe to:
Posts (Atom)