Friday, March 08, 2013

Another Frame Restoration & Art Post

I decided to get out of the house the other day and go thrifting at Value Village. I often walk away empty-handed, but on this trip, I found a few treasures.

I was there mainly to look for more old frames to frame some of the art from a few posts ago. I ended up finding this:


I initially liked it mainly for the frame, and I didn't think much of the painting, but as I turned it over, I got more interested. Althought it was professionally framed, someone had torn the back open.

The canvas has a sticker on it with an eagle from the "American Photo Supply Co." of Chicago. I was only able to find ONE other photo of a similarly labeled canvas on the web, and that painting was dated 1949. The top also shows a stamp from the "American Art Co. - Distinctive Pictures - Picture Framing - Quality Artist's Materials, Tacoma Wash." This company is actually still in business.


I'm fairly sure that it's oil, but it's not very shiny, so it's either been left unvarnished, or it could also be gouache. Either way it's a pretty decent painting, and I only paid 5.99$ for it. The frame will need just a few touch-ups to the gold paint.

***

Last night, I stumbled onto another old frame that I had in a box in the basement. I don't remember where I got this one, but it was probably a yard sale find. It looks exactly like a gilt antique mirror (the kind with the fragile gesso/plaster decorations), but it's actually FOAM. It must have been cast directly from a mold made from an original frame because it has all the details you would expect to find on the real deal.

The original paint was gold, but then someone painted it white (and did a sloppy job of it). As purchased:


I wanted it "antique gold" again, but stripping it was out of the question, so I just sanded-down the paint blobs, and gave it 2-3 light coats of cheap, bright gold spray paint.


Obviously the new gold paint is too bright and fake looking (especially if you put it next to an old antique gold frame), so I remedied this by rubbing-on a medium brown glaze with a paintbrush and a rag.

SO MUCH BETTER:


It looks like it might have taken a lot of time, but the entire thing was done in just a few hours (most of the time was waiting in between the thin coats of spray paint, since I was doing one side at a time, and rotating the frame every 15-20 minutes. The glazing process only took about 15-20 minutes. The last step was a light coat of satin varnish (also aerosol).

This frame will go on the church litho print.


Detail:


I also scored some curtains for the Office, which need slight modifications to work, so stay tuned for those soon (ish).

Saturday, March 02, 2013

Living Room Duct Work - DONE

Alright, I got a bit productive yesterday and I finally finished-up the duct work in the living room.

I had to put quite a few bends in the duct work in order to be able to use the existing (original) location. Because of this, the air flow to this particular vent isn't the best, but the living room has 2 vents (this one and the wall one), and I hardly use the room, so it's not a big deal.

Here's the new/modified run. It curves up from the main plenum (directly behind the large cold air plenum visible in the shot), up over the cold air, back down to pass under the trunk beam, and back up to the duct, so it kind of makes a twisted "W" shape.


I got this all done yesterday, but I only taped all the seams with the foil tape this afternoon (after I had already taken the photos this morning).

I originally wanted to make a full tin box, like I did for both cold air returns in the master bedroom, but since I didn't do that in the kitchen, and they didn't originally do it for the cold air in the main hallway, etc, I decided to just make a plain wood/tin combo box like in the dining room. I used antique (scrap) pine and spare tin. I made the box the same height as the dining room one, which turned out to be a nice size to clear around the main gas line.


I was very lucky to come across another piece of old barn wood that was 1 1/8" thick to fix this small 4x10 floor hole. The hardwood is the main support, since I cut it to overlap the sub-floor on both sides, but I added the extra wood for a strong and durable repair.


Patched living room floor:


Thursday, February 21, 2013

Cherry Bookcase Project

I recently started working on a project that’s been sitting around in the basement for ages. I’m pretty sure I only acquired it after I bought the house, so it’s been sitting around less than 3 years, but it’s still just been sitting around patiently (as is the case with many other projects I’ve got).

The project in question is sort of a recycling effort, really. What I took home was formerly the massive upper section of a TV entertainment centre armoire. When I say massive, I mean it (see photos farther down). The main body of the cabinet was 28 3/4" deep 55" high, and 44 1/2" wide (plus the 2" crown around the top). It may not seem that big when you're just reading numbers on a page (or on a screen in this case), but trust me, this is a monster. Some of the biggest armoires I ever put together rarely exceeded 24" deep. This cabinet wouldn’t even fit through a regular 30" wide door. This top part sat on a matching base cabinet, and the full height was probably 7 feet or more (I don't really remember - the owners had cathedral ceilings so it didn't matter). The owners also had 2 matching bookcases.

The cabinet was brought into our workshop for some modifications. Basically, I can’t even remember exactly what the client wanted us to do to it, but it was easier for us to just rebuild a new one than to take it apart and re-cut/modify it. EDIT: Actually now I remember what they wanted us to do, and I have a photo of the new cabinet. Basically they wanted the 55" top cabinet chopped down to something like 20" high with a single fold-down door like a barrister’s bookcase. The original cabinet had two front doors that were on tracks (pocket doors). There were just too many reconfigurations and modifications needed, which is why we made a complete new cabinet.

The new cabinet we made, which has a drop down door, divider, and 2 adjustable shelves.


The “leftover” original cabinet was basically trash, and if none of us wanted it, it was going to be cut-up and tossed in the wood stove.

Since this was a SOLID CHERRY cabinet (with just a few parts in cherry veneered particle board), I decided to salvage it. The only problem was that since it was so big, I had to sort of quickly butcher it and knock it apart to get it home in my coworker’s truck.

Some of the pieces (2 sides, top, bottom, and several bits of mouldings):


This was the top moulding or "crown". Also note how ugly and dreary the floors in the dining room look in comparison.


So then it sat in the basement gathering dust. Until now.

I knew exactly what I wanted to do with it, it was just a matter of having the time and motivation to work on it. Basically, I wanted to transform it into a bookcase. The sides were wide enough to be cut down the middle into perfect bookcase width (12 1/2" interior shelf size) and the height was pretty good at about 5 feet once I put some feet on it. The only issues are that I only have so much material that I can reuse, and I want to try to rebuild the entire thing without needing to buy any new cherry ($$$$). So far so good, but I am going to be missing shelves, and probably also a top, since this cabinet didn’t have a finished top on it originally. I can either make pine or plywood shelves, or MAYBE get some cheap cherry particle board from work (which I’ll need to do for the top). We happen to have a bunch of “less than perfect” cherry veneer stuff that my boss bought on sale years ago for dirt cheap. Otherwise pine will be fine too, since I’ll probably be installing a pine beadboard back.

Work so far:


OK, here's one of the original uncut side panels. The height of the cabinet and width are the same, but this is how deep it was before:


The original knob locations are here:


But I'd much prefer them here:


The holes aren't drilled yet, but what I might do is install the knobs like above, and use the old holes for locks on each door. It will depend if I can find some locks with a usable backset that matches (that means that the keyhole is the right distance from the edge of the door).

The existing leftovers from this cabinet are not the best quality. The joinery is rough, the cuts are uneven, and the sanding job is poor, but I’m not going to make too much efforts to fix it. The finished bookcase will remain a bit “rustic”. It should still look pretty awesome, since it’s relatively hard to make cherry look bad.

I’m really looking forward to having the extra storage for my books. I actually have quite a lot of books, and this one will end up housing all my clock repair books, and probably the woodworking ones as well.

Monday, February 18, 2013

Art

Not a whole lot has been going on here lately. I've been anticipating framing a few of my art pieces (some will be getting custom made mahogany veneered frames) but while I'm at it, I thought I'd also rummage through all my other art, and see what else I had lying around that was worthy of finally getting framed.

So for the past few days, I've been unpacking some of the framed ones, and going through all my unframed and "loose" art that are in a few different places (huge "under bed" rolling box and 2 portfolios).

The one that "started it all" is a piece of pen and ink done by my best friend from high school. I've had this piece for a few years, and I've been meaning to get it framed since I got it. I thought I was going to need a specially cut matte for it, but I found one that fits perfectly. This is one of the pieces that will get a custom frame. This one will probably be done in a light coloured wood. Perhaps bird's eye maple or curly maple.

She does AMAZING work. She takes commissions, and has had gallery exhibits. You can get her contact info here if you're interested:
http://www.etsy.com/shop/Violettebird


The other two pieces that I really want to get framed are the two in this photo with the tan background. They are two fairly large sized architectural prints that I got for an absolute STEAL at a yard sale a few years ago.

The black framed print is from 1836 and shows the "Radcliffe Camera" (part of Oxford University in London). The building (library) is still standing and is jaw-droppingly beautiful. You should definitely Google photos of it.

The upper print of a church is an old one that I picked up at a second hand store for 5$, and the one matted in teal is from Value Village.


These are most of my framed pieces. Some of these were hung in my apartment, while others have been in storage, or are more recent finds.

The embossed brass ship is fairly new (Salvation Army find), and the unframed oil painting in the lower right is also a fairly recent acquisition.

The Parliament pen and ink is one that I particularly like, since I have toured the Parliament buildings dozens of times. The artist is F Schanberger, and I don't see a date, but I've had this piece since the mid to late 90s.

The robins are a print, and the back has a stamp from a gallery in Milton Ontario. My Mom and I found it at a yard sale, and we both wanted it, but I let her have it. For the longest time it was on the dresser in her bedroom (on a little stand), but when she moved out, she gave it to me.

The blue jay print is named "Winter Vigil" and it is a signed and numbered artist's proof 46/54 by Pierre Francis Surtés (1987). All of those are yard sale finds (under 10$).

The photo in the lower left is a Lupin (a type of flower) with a water drop suspended between the leaves. It's a photo by a friend of mine that I met on LiveJournal many years ago from Sweden. Her name is Jeanette Astrand. I think this was taken around 2002 or 2003.

The sailboat with the grey/pink matte is unsigned but dated 1980 on the back paper.


There's actually a short and funny story about the oil painting. I originally saw it at a yard sale. I quite liked it, but it was slightly damaged, looked really "old fashioned" and I wasn't sure if it would fit-in or where I'd put it, so I passed on it. Later in the day, I regretted the decision.

Several weeks later, I got my second chance at it when it turned up in Value Village. I kind of kicked myself (because it was priced for probably double what I would have paid at the yard sale), but I was happy to get it.

It's not super old. The wooden frame behind the canvas is put together with routed tracks in the corners, and the wood is pretty clean/light. The paint is old enough to be fully crackled though. If I had to guess, I'd say it's from anywhere between 1950-1980. It's not signed, but one side of the canvas has Patenaude written in pencil on it. There are some Patenaudes in Cornwall, so the piece could be local (or from the area).


These are the ones I turned up today. They're sort of a hodge-podge of styles.

In the upper left is a painting I did a few years ago (2003) of a Buddha on a lotus. It was originally a Photoshop stamp/brush and I liked the design, and I made it into a painting. The hard part was making the background red, which is a mix of several different reds, spots, and a salt technique.

The butterfly next to it is also one of mine, also done in 2003, and it's a Painted Lady butterfly. It was a watercolour version of a photo by my friend Jeanette (from Sweden).

The pen and ink over it, is a piece that I'm not even sure where it came from. It's an original (since some of the pen strokes scratched the paper surface), and it's signed by Dwayne St Louis 1978. I don't know anything about it, but it's pretty well done. I probably picked it up at a yard sale.

Next to it, a "Water Pig" Chinese ink calligraphy panel (a gift).

In the lower left, a pen and ink drawing done by my Mom! Yup, I have a bunch of her old art stuff from high school and some from a course she was taking, and this is one of the ones I really like. It's not perfect, and you can tell she was having trouble with the pen, since the paper is torn away in several places, but I definitely want to get this one framed. We have several artists in the family, but I don't really have much art done by any of them. My Mom is pretty good (these days she's into card making/stamping) we also have an aunt (deceased) who was a pretty good painter (oil paint), and one of my uncles is an incredibly gifted carver. He was featured in Canadian Woodworking magazine a few times. I also have an aunt who does tole painting, an uncle who is a blacksmith, and my Dad does professional photo retouching in Photoshop in his spare time - and not dinky simple stuff either).

Lastly, two very colourful prints by an Ottawa artist Diane June Arnold. Both are "around or before 1998" as far as I can tell (based on the info card on the back). I really like the one with the birds. The lady is a bit odd (and kind of Picasso influenced) but I liked the bright colours. I don't remember paying very much for these; maybe 10-15$ for the pair?

Also in the upper right you can see some of my many antique frames (small ones).


I also have this huge piece. The sheet is 18" x 24". I photographed it on top of the previous pieces to show the scale a bit. It was a fairly early piece I did in high school art class (1999). It's an oil pastel on "construction paper". I've always been a bit pissed that it was done on such crappy paper, but that's what we were given. It's not an acid free paper, and even though I've had it carefully stored for years, the paper is very brittle and tears easily. I'd like to frame it, but it could be tricky/expensive, since I'd definitely need special UV filtering glass on this one to help keep it from disintegrating. I would probably crop-off the sides a bit. I'm also not sure what colour of matte would look nice with the charcoal grey background.

Note: some of the segments in the wings and chest are crooked and different sizes, but that's how it was on the original piece, which is a 1000+ year old Egyptian artifact.


So yeah, that's some of my art. I have more (mostly drawings), and some of these will be grouped together (gallery wall) while others will be stand-alone pieces. I haven't really decided what's going where, but now I have a better inventory of what I have to work with.

I also went through my entire "under bed box" full of art and paper, and I've realized that I have a sh*tload of watercolour paper, and about 4-5 blank hardboard canvases (like the Buddha one). I really should do some more watercolours & gouache.

Sunday, February 10, 2013

Furniture and Drywall

Nothing too exciting to report, but I at least have some photos.

I just did another small batch of drywall repairs in 3 rooms.

Around the new vent in the Office:


The corner seams on the Living Room cold-air returns (to Master Bedroom):


And the long seam in the kitchen.


The furniture portion is the "sprucing-up" of the little Art Deco night table trash find. Here was the "as found" photo:


Step 1 was to remove the awful Mac-Tac stuck to the bottom shelf. It was pretty well stuck down, but with a little bit of heat from a heat gun (on low), it softened the plastic film enough to get it started, and most of it came off fairly easily. The finish under the Mac-Tac turned out to be in near perfect shape, so that was a big bonus. With old furniture, sometimes you just never know. There could have been a big stain, scratches, failed finish, or all kinds of other horrors under a later covering (or paint), but sometimes you get lucky.

The drawer handle was removed and cleaned (just warm water and dish soap). It's a cheap die-cast alloy metal with a gold paint finish. The upper part is a semi-transparent celluloid plastic with marbling.

While I was working on the drawer, I noticed one side was unglued. I just coated the mating surfaces with a bit of carpenter's glue, and clamped it back together. If this were a heavier wearing item, I would have taken more time to scrape out any old glue first.


The back plywood along the bottom shelf was warped and loose, so that was nailed-in with additional new nails.


If this were a more high-quality item, I would have taken the time to also repair the loose veneer along the back of the bottom apron (near hammer tip in photo), but it wasn't worth the trouble on this guy. This area is never visible.

The top had a few issues as well. There were two smallish holes through the veneer, and the side pieces, which are made of a cheaper wood that was painted (it was done this way originally on many pieces) a brownish red colour to match the Walnut veneer, was chipped along most of the length on both sides. The original shellac was also chipped and damaged over the entire top surface.


The holes were filled with a dark red (matching) wax, and the chipped edges were touched-up with a specialty furniture touch-up marker.

The entire piece was given a rub-down with a stain/scratch cover polish.

If I wanted the top to look new, I would have stripped it, and refinished it (just the top not the entire piece), but I wanted only a minimal (quick) restoration on this piece. The stain covered most of the imperfections, and I went over this with a light spray of satin varnish (aerosol). The spray varnish was done ONLY on the top. All the rest of the finish on the piece was fine.

This is the finished piece. It still needs a quick coat of wax polish (which won't take long) but I'm waiting for the top varnish to fully cure (it could take several more days). The final waxing won't make any noticeable difference in the photos, though.


Note: there were also a whole bunch of chipping/raw wood edges that were showing on the rail over the drawer, and along the bottom shelf. Those were also touched-up with the marker.

The top. Not perfect, but very serviceable. Can you spot the two holes? I can't.

Monday, February 04, 2013

News

Hey blog buddies! It's been a little while since I wrote-in with an update, so I thought I'd take a few minutes to do that.

I've been kind of lazy lately, so I haven't gotten a lot done (big surprise), but I did do SOME work.

I started fixing the electrical in the kitchen and living room. The living room already had all the outlets fixed, but I still had to move the light switch over to the left so that it would clear the new casing. So I started doing the mudding on that. Actually, I think I already posted photos of that. Oops! - short memory. I also patched those two unsightly holes in the upper corner near the new cold air stacks. Those were large holes from when they blew-in the wall insulation. They had been patched over only with paper drywall seam tape, which is why I opened them up to redo them. I suspect that many of the other insulation holes are equally poorly patched, but I’m not going through all the trouble to fix all of them (there would be one every two feet along all the exterior walls on both floors - not worth it).

The kitchen electrical is eventually going to be a big job, but I just started with moving the light switch for now, and combining it with the outlet that was only a few inches away in a separate box. I also left a centre spot for another switch for the hanging fixtures that will eventually go over the sink (maybe) and peninsula. I didn't run the wiring for that yet, but it will be ready once I get to that point.

Here are some photos of that.

This is a photo when I had just started. I was really excited about finally being able to yank off that unsightly baseboard "being used as a chair rail and poor excuse not to do the drywall seam".


The main reason for needing to move the switch and plug are threefold. In the next photo, you can see A, B, and C. A is a mark showing where the bottom of the upper cabinet will finish (18 inches up from the counter top), B is the approximate height of the backsplash, and C will be the countertop height (36"). Based on this, both outlets were too high. Because of the fire stops, they were also over the average switch height (the average height for a light switch is 48" from the floor, or lower). Some new houses have light switches closer to 36" high for handicap accessibility, but it's up to you. Most of the outlets on both floors of my house are around 50"-54" because of the fire stops, which is a bit higher than normal, but I'm only moving the ones that really need it.


Cutting the drywall (a "minute or less" job if you’re using a multi-tool):


I also moved the whole box farther away from the casing, because depending on what I use for the backsplash, I don't want the box to be right on the edge of it. I want the switches to be "in" the backsplash, with a bit of a wall-paint stripe before the casing starts.


The dimmer isn't wired yet, but it's filling the opening while I need to use the circuit (main kitchen lights).

A quick safety note: when putting two different circuits in one box, make sure that both breakers are tied together (for safety). You can use special dual breakers, or tie-bars for this.


While I was working on this circuit (the main kitchen lights circuit), I decided to finally fix the rest of it, which is just a single plug (formerly 3 of them) and a switch & light for the power room (the power room light and kitchen light(s) are on the same circuit). This proved to be a very frustrating exercise. I won’t go into all the details, since it’s long, complicated, and confusing, but basically, I got some help from my Dad (who knows way more about residential electrical and electronics than I do), and we fixed the problem.

Once I had the “power room” part of the circuit done, I returned my focus to cleaning-up and re-tacking the mess of electrical wires. I got quite a lot done.

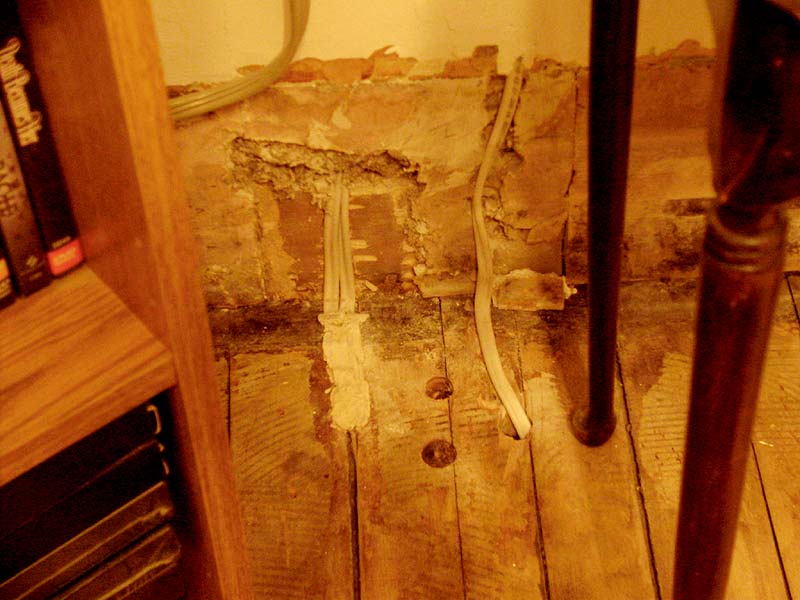
I drilled a new hole in the floor to PROPERLY run these two wires (which were running over the edge of the basement stair opening).

Before:
A: This is a rather large and slightly alarming crack in the log. The other side is solid (no crack), and it’s not really sagging, but it’s borderline.
B: These two wires needed to be moved.
C: This is the miniature Vienna clock hanging in my Office/PC room!


And after (viewed from the opposite side):


These are all the wires that I fixed and re-tacked on some new boards/runners (B). The section marked A were done previously (about a year ago).


This last photo shows A: the new plug and light/switch that replaced the old wiring that used to be in the power room, before I demolished it, and B: newly reorganized/tacked wires. There’s still a lot left to clean-up, but it’s getting there. It’s quite time-consuming.


Next will be more drywall work, or I might do a few small woodworking projects.

OH! One last note.

If you noticed the drywall in the kitchen, you saw that they installed it horizontally. I’ve seen a few places where they recommend installing it this way, but DON’T. Here’s why:

The better way to install drywall on walls is vertically, butted-up to the ceiling. When you install it this way, all three edges are screwed to wood, and the entire perimeter is solid. The only edge with minimal support, is along the bottom, and your baseboard protects it.

When you install the drywall horizontally, however, that entire middle seam has very little support in between each stud. If you push in the wrong spot, you can easily pop the seam, or break through the drywall. It’s also at elbow height, which doesn’t help.

But the main reason NOT to install it this way is because seasonal shifting will give you a nice, permanent, and unfixable crease all the way down the wall. I took two photos from 2 rooms to show you what I mean:

This is the Office wall, just over my computer (other side of the hallway wall with the large black photo frames):


And this is the load-bearing centre wall in the dining room:


There really isn’t any good way to fix it. I can scrape it, sand it, and re-mud it, but next year it will look the same again.

Sunday, January 27, 2013

Art!

I bought these two very appropriately themed canvas pieces a while back at Winners. These were actually drastically reduced from around 20$ all the way down to 5$ for the pair!

I wanted some art, but I'm one of those artist types that worries about possible moisture damage, so I opted to use these "cheapies".

I hung the bottom one first, and I measured it so that it would be in line with the antique mirror.


I quite like them, and I can always easily swap them later if I find something nicer.

Thursday, January 24, 2013

More Floor Repairs and Electrical

After a bit of a lull, I've started more small jobs around the house. I've patched more of the floors, and I'm nearly done. I had pretty much just enough wood to do all the needed repairs. The only one I didn't do, and probably won't do, is that narrow gap along the bathroom duct in the Dining Room (see here: http://i1018.photobucket.com/albums/af308/clockmaker15/HOUSE/P1190028.jpg). Once the baseboard is in place, it may only show about 1/8" crack, and if I put a 1/4 round it won't show at all. I'd rather not have all the short bits of patched wood and nail holes.

At this point, I had done just the Dining Room, and this is ALL the hardwood I had on hand for repairs:


But keep in mind that I still had all these repairs left to do:


As well as a few other small areas.

I decided to start with what I could use out of the really scrappy pieces. One was perfect for this repair:


It had a broken back half, but was wide enough to cover the repair (the portion near the wall will be completely hidden by the baseboard).

Next, I tackled this guy:


Note how they passed the wire for the exterior plug.


Rather than reuse the already huge hole that they made for the other plug, they just drilled a series of holes (one which goes clear to the outside of the house for the plug box), and then just patched over it with drywall. For now, I left that one alone, since I'll need to rewire the exterior box, and it's around -25C (-13F) outside right now.

While fixing the floor, I also had to rewire and re-secure the electrical box. As with every other one in the house (with VERY FEW exceptions), it was crooked, and rattly. You can KIND of see that the plate and the outlet fitting aren't flush.


You can never really tell in photos how crooked something really is, so here's the same photo, but with the cover plate next to it. The plate is around 1/4 inch thick. The box is flush on the right side, but about 1/2 inch out on the left. FAIL. You really need the metal electrical box to be as flush as possible with the drywall. Even if it's sticking out a hair from the drywall, that's fine, but it can't be this crooked. It was also BARELY attached to the wood. This box was only secured to the exterior t-g wood, and not to a stud (which is fine if it's SOLID, which it wasn't).


I could not get a good grip on the wood from the existing holes in the box, so I had to drill 2 new ones, closer to the edge of the box. This is pretty easy, you just need a drill with a 3/16" bit. The finished box is now sturdy, flush, and unfortunately in need of a bog patch job because the huge hole that they had made and patched, cracked.


Here's another shot:


The next repair that really needed attention was the old duct work hole in the Office floor. If you remember, last year, I moved the duct work over into the corner by about a good 7-8 inches. This gave me a lot more space in the room (wall space), but left me with 2 large holes to patch. One was in the ceiling: https://blogger.googleusercontent.com/img/b/R29vZ2xl/AVvXsEhykJO6gtzQY__IvftcnXQjWwxu3uS6Gh0XbDuc5hkiTRs7OoD4NvYbIHesrn6gA_mUhIzjryt3WgzVUIVblNh5E1vu-ridQ61A7dWoO5rcSR7rDXanE4f6AYP3U75wUa8Xj1mMUUuMp00g/s800/P2020164.jpg, and the other was in the floor:


I started by cutting out a staggered pattern for the boards.


Because this is the exterior wall against the foundation, I had to cut a notch for my support piece to sit.


The support piece sits on the cement on one side, and on a support brace under the floor from when I reinforced the corner (after moving the duct). You can see this diagonal floor brace in the upper right of this photo: https://blogger.googleusercontent.com/img/b/R29vZ2xl/AVvXsEgf0tXpZU4DDYhJiRxthoOmyVyiCqjPrP7zbWBHnI4Sw9mqkJiHc-285EgQRaJAZrnghWS26YavRxXCFtqSNrum884aWDO5kLJ3MnHhoNWlw2hI_PChX5mZYQOD-Hl2IIdCruKh7q7-qiuq/s800/P2020162.jpg.


The brace was secured into place, and then my floor pieces added. Pretty cool, right?


I just wanted to point out that I did not escape injury with this project. Nothing major, but it HURT.

When I was cutting the floor board of this repair:


My reproduction lantern clock fell from my DVD tower right onto the back of my hand. All the vibrations from the cutting tool made it slip off the top. I'm lucky the clock did not break or get badly dented (since my hand will heal, but the clock repair could be very hard to fix). Lesson learned.


Since I had a bunch of wood left, and more than enough to patch-over that floor register, I decided to re-repair the floor grate patch. I REALLY didn't like how those two boards in the middle had turned out, and the floor was also uneven at this spot.

Before:


During:


After (holy crap this makes ALL THE DIFFERENCE!):


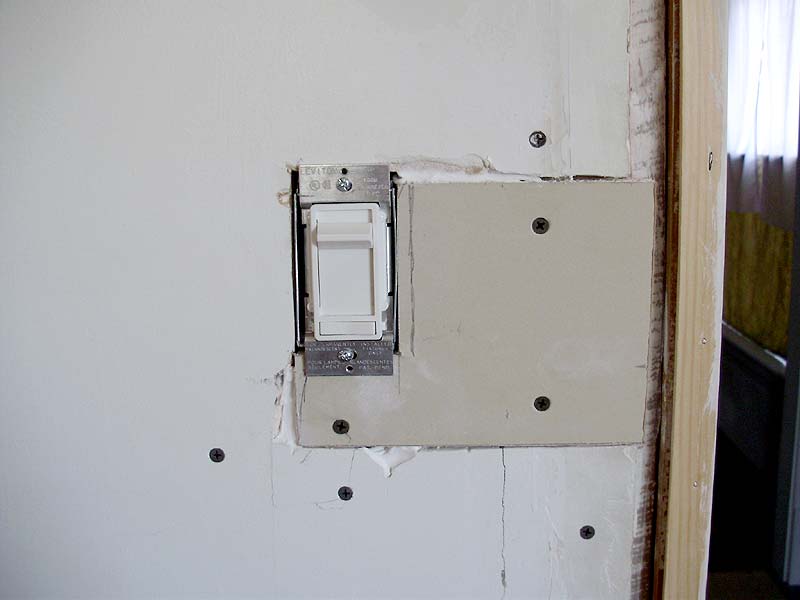
Today, I continued fixing electrical boxes in the Living Room. I redid the one next to the cold air returns, the one next to the bookcase (which was FINE! The only one so far! It was solid, AND flush! A true miracle!), then the one next to the old floor grate, and finally, I also had to move the main light switch. The switch was fine with the old crappy casing they had thrown on, but with the correct repro casings, it's too close to the door frame, and there wouldn't be enough room for the cover plate (unless I would cut it, which you can do (and I've had to do it before). I wanted it moved over.

I removed the switch (a dimmer that I had installed a while back), and then remembered how amazingly bad this box was. Again, this is like the one above, where it's hard to see just how crooked it really was. Sticking out 1/4" on the left, and sunk-in about 1/4" on the right. AWFUL. The photo is taken pretty much "head-on".


I added a new wood block, and re-screwed the box. It looks a bit crooked, but it's only because the switch is not actually hooked on yet.


More soon!

I hope to get a bunch of mudding done.