I just came across this video for the upcoming Historic House Tour happening ins Spring City Utah and I had to share. I'm nowhere near there, but the video is wonderful, and if you can make the drive, it would be a wonderful opportunity to see some beautiful historic homes.
https://www.kued.org/video/contact-the-community-spring-citys-heritage-day-celebration

Friday, May 25, 2018


Sunday, April 01, 2018
Changes... And One Last Upholstery Project
It's been a little while since I posted here, and I thought I should catch everyone up with what's been happening in my life lately. It's nothing earth-shattering or tragic, so there's no need to worry, but there has been one major life change that I wanted to share with my readers. The change has to do with my job/work situation, but ultimately it will affect the home renovations as well... for the better!
As most of you know, I've been working at an upholstery shop for the past 4-5 years. As of Jan 1st, however, I no longer work there. I don't want to go into too many details or in to too much of the drama that lead up to this, but ultimately it was not an amicable break-up on my employer's part, and I was left pretty sad about how everything boiled down. The primary reason I was dismissed was that the minimum wage was set increased to 14$/hour in Ontario, and my boss was not willing to pay me this new rate. I had been working for the past few years "by contract" (a fixed price on a "per project" basis) but the new minimum wage would have required him to still cover the new minimum wage based on hours worked, which he did not want to do. That was ultimately his choice, and I respect that, but some of what happened afterwards was completely uncalled for.
Anyhow, in late December, after I raised my concerns about the new minimum wage increase, he asked me to call him after the holidays to let him know what I wanted to do for 2018. I called him on Jan 2nd, and he expressed once more that he did not want to pay the extra hourly difference, which was what I had expected to hear. A few days later I received my unemployment papers in the mail from him. Up to this point, I thought everything was fine between us.
By chance, maybe 2 weeks after this, I heard that they were hiring where my dad works, so he put in a reference for me and after several interviews I got in! However, on the last week just before I would be starting, I still had to complete my 'back check' and there was a conflict with my last employer because I said on my application that I was dismissed, and he was saying that I quit. He refused to provide a release letter, and they had to call him directly. Apparently he was not very cooperative with the recruiter, and he made some derogatory remarks about me. Without mentioning what was said, I'll just say that I was shocked. Especially since it was coming from a man who was saying a few months earlier that he'd want to sell me the business when he retires. Lucky for me, because of the way my unemployment papers were filled out with an "A Code" (which means that there was either a shortage of work, an end of contract, or a termination), my recruiter believed my side of the story. I really don't know what I did to upset my former boss enough that he would try to sabotage a potential job offer. I would have been happy to keep sending him clients, and promote his business, but now I'm just left with an awful feeling about how I was treated and I just want to put it all behind me.
On with the good news! So what's this new job? Well, it's quite a departure for me, since it's in a completely different field and it's unlike anything I've ever done so far, but I think I will like it. It's customer service for a bank at a call centre. The call centre is just a few blocks away from my house, the pay is more than double what I made the past few years, and it comes with benefits, a pension, employee perks (free bank account, lower rates on products and other special perks), an annual bonus, and the people there are just wonderful. I'm currently on week 7 of 10 for the training (which is INCREDIBLY INTENSE), and it's going well. I've been on the phone for 2 weeks out of the 7 so far, and most of our clients are actually really nice and pleasant to talk to.
So yeah, a better job, paying a much better salary, will mean that I'll be able to afford more materials and supplies for home renovations! I might even be able to finally get a car. And maybe even a cell phone! (Yeah I'm one of those rare people who does NOT own a cell phone).
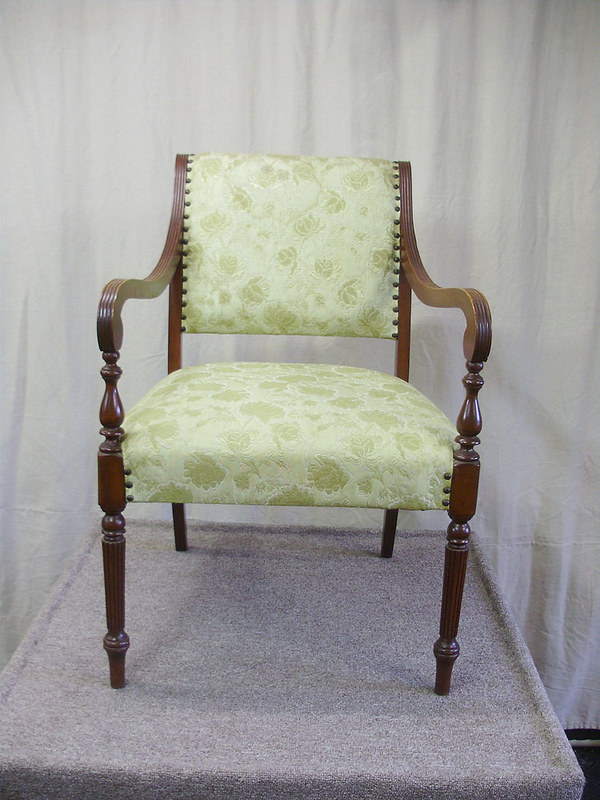
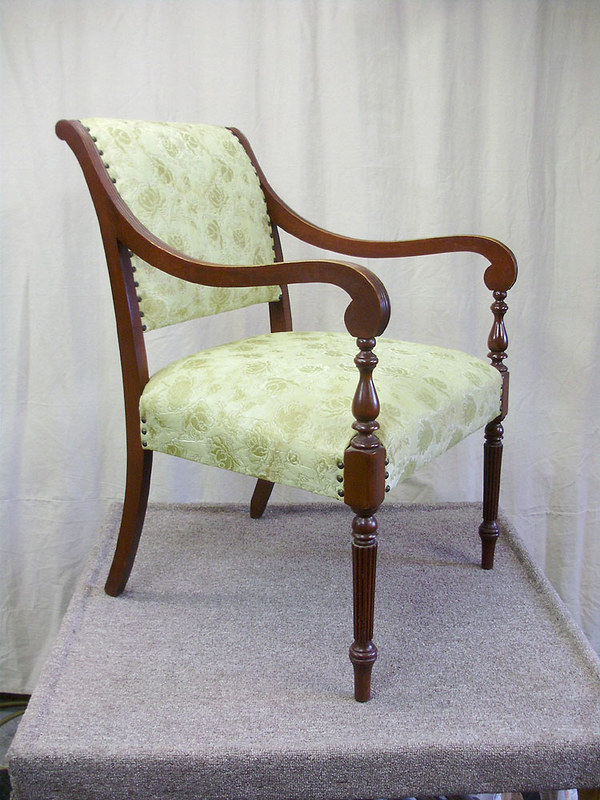
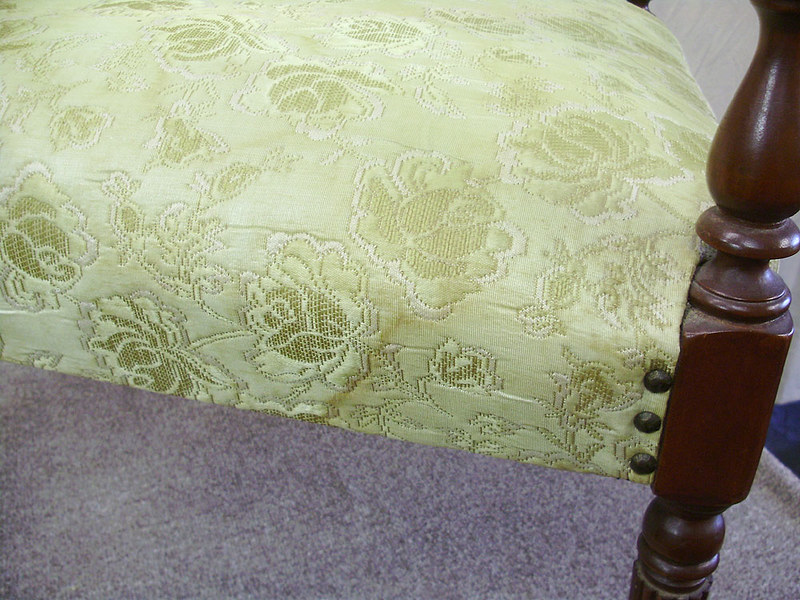
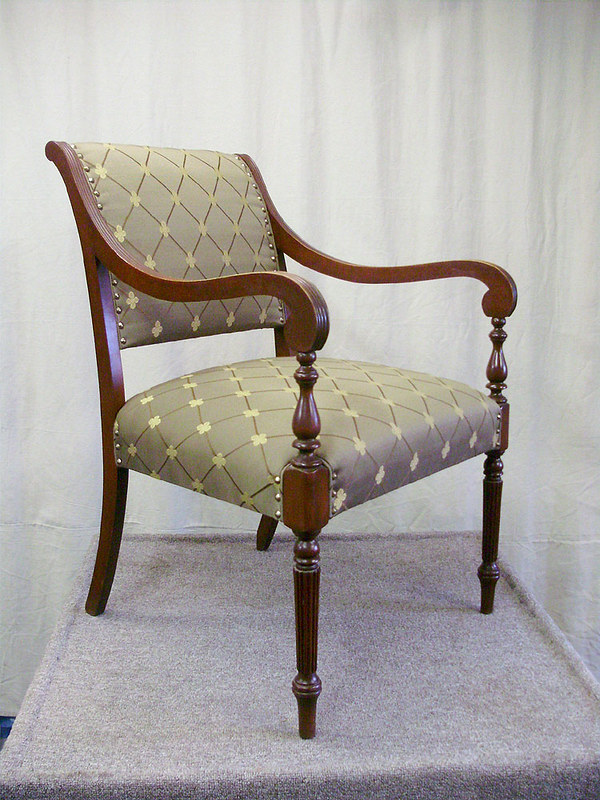
So all that said, I wanted to post one last project that I did at the shop, which was one of my chairs. This is an antique chair that I picked up shortly after I bought the house (so maybe 2010 or 2011). It was from a yard sale, and I liked the shape of it. The fabric wasn't great, but it wasn't too horrible either. I always knew that I wanted to redo it at some point, but it wasn't high on my to-do list. The old fabric was a sort of greenish yellow with roses, and there were a few light stains on it. I really liked the tacks on it, but not with this particular fabric.
About a year ago a fabric store went out of business and I was able to find a PERFECT fabric for this chair.
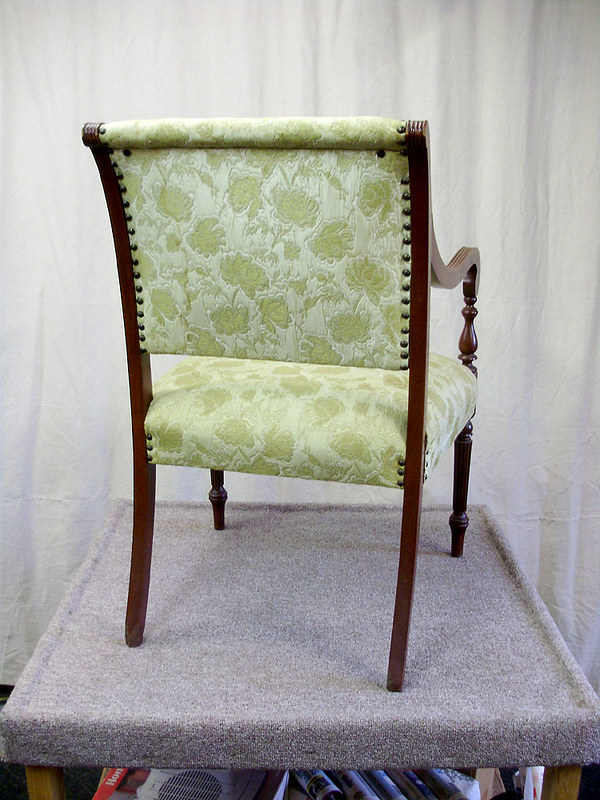
BEFORE:
I'm not sure why there were extra tacks off to the side here:
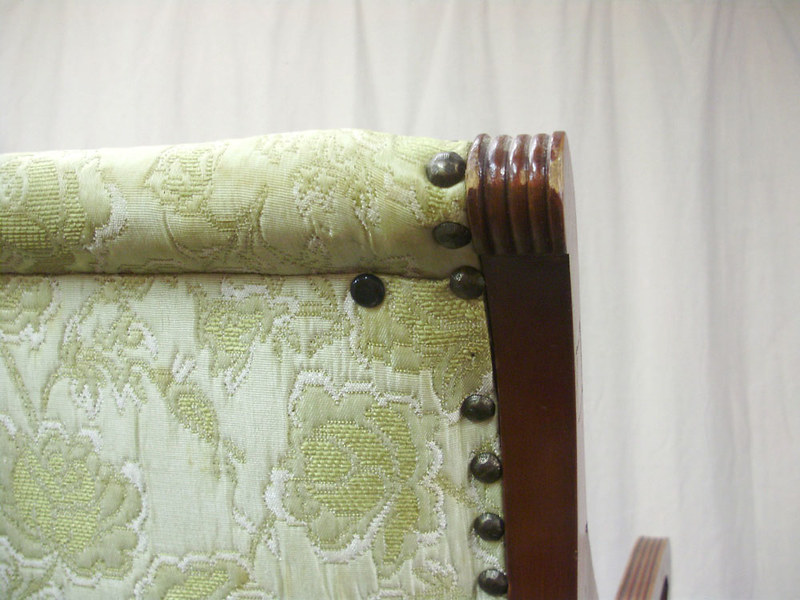
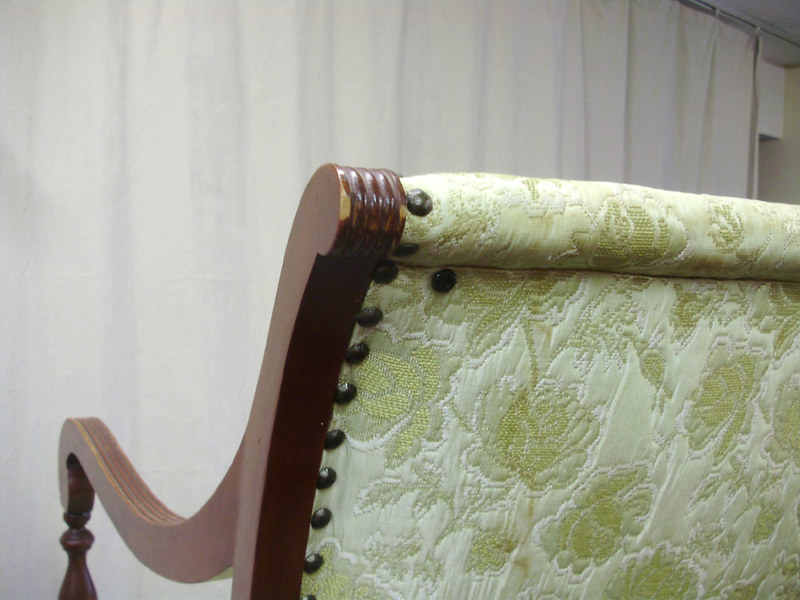
Note faint water stain:
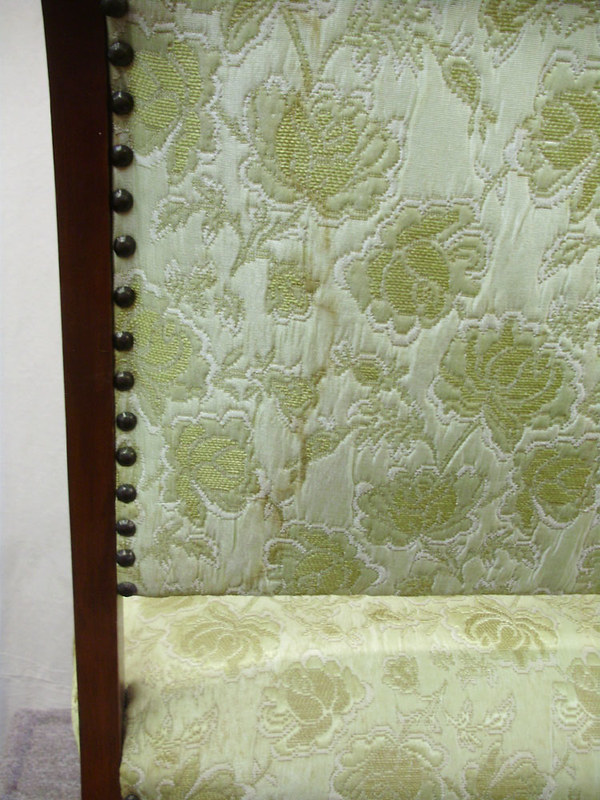
This is the back, which had two circular stains near the top. I tried cleaning these, which left an additional large circular water mark on the fabric.
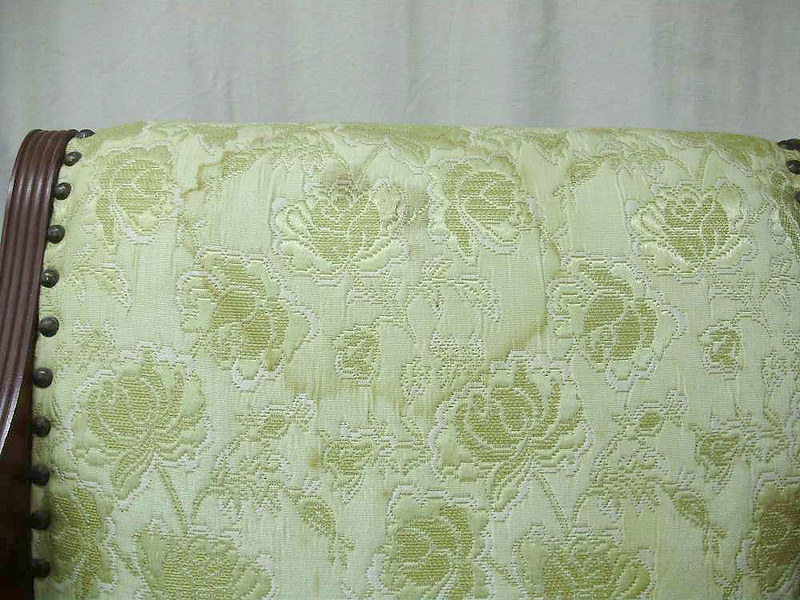
Yet another stain:
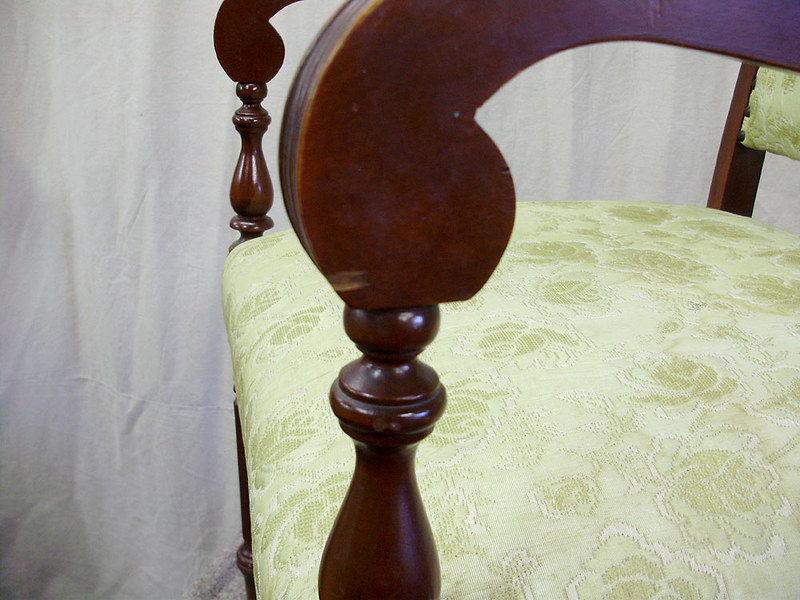
A small chip in the wood. I decided not to repair it.
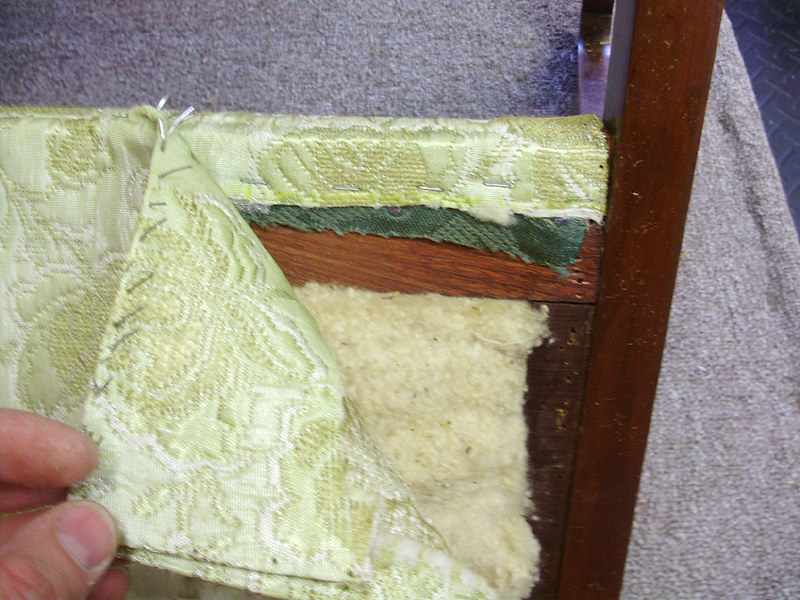
Starting to remove the back already shows that this is not the original upholstery, as there's a green fabric visible.
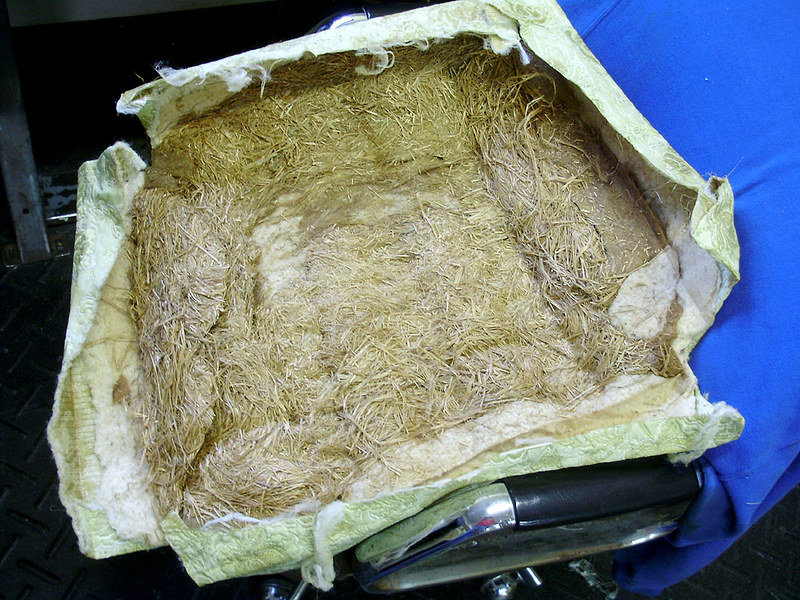
When I took this chair apart, I was really surprised to see that it was a fair bit older than I thought it was. I had assumed that it wasn't that old, and that it was maybe from the 1960s or 1970s, but it is probably closer to 1930s or 1940s. The original stuffing in it is straw and cotton!
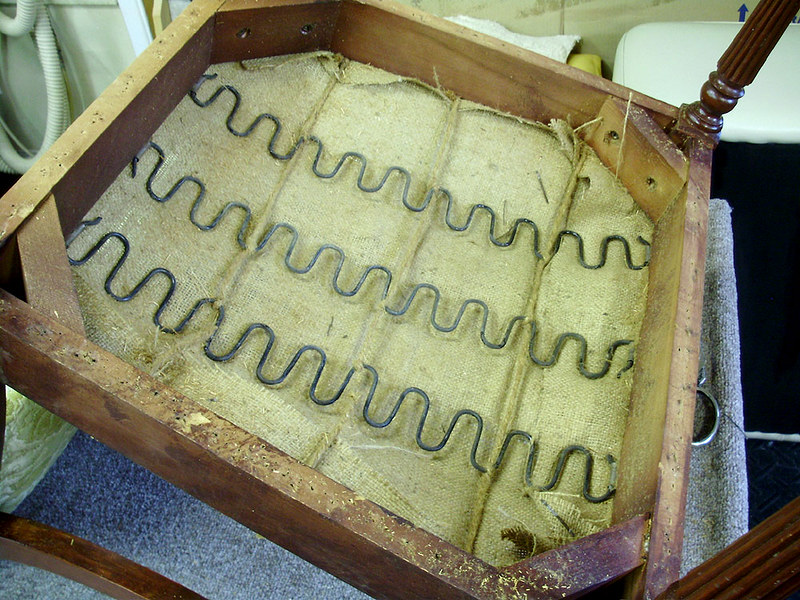
Current covers and stuffing removed, showing what might be the original green fabric on the back rest.
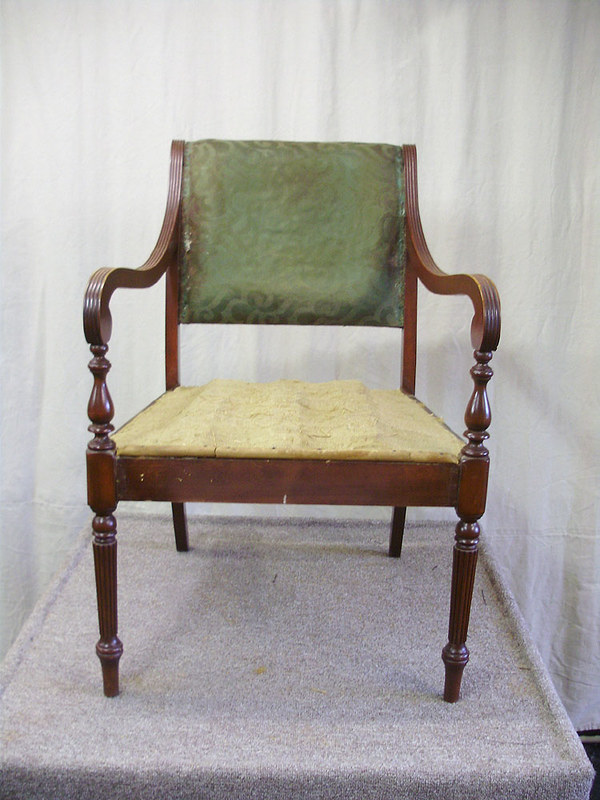
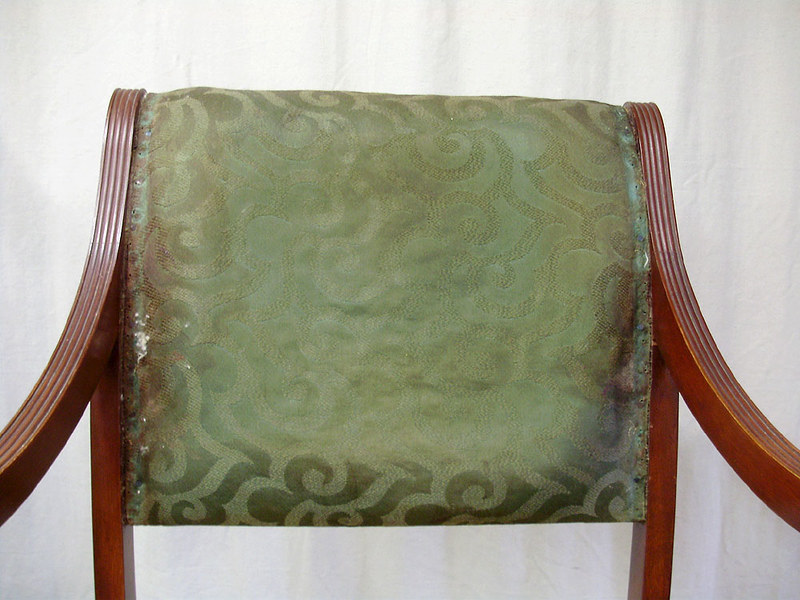
This is a rather interesting looking pattern. It's a solid green colour with a pattern in it that shows up depending on the angle. The pattern is almost on trend with modern geometric prints.
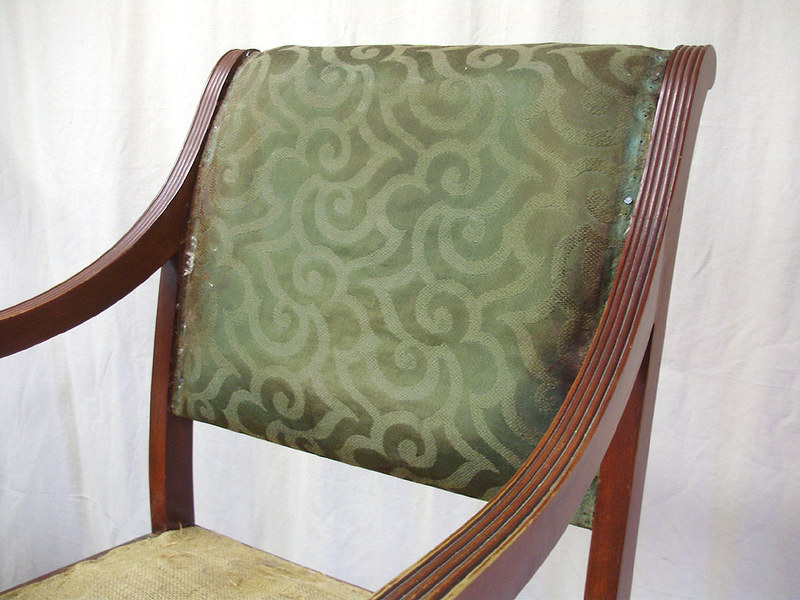
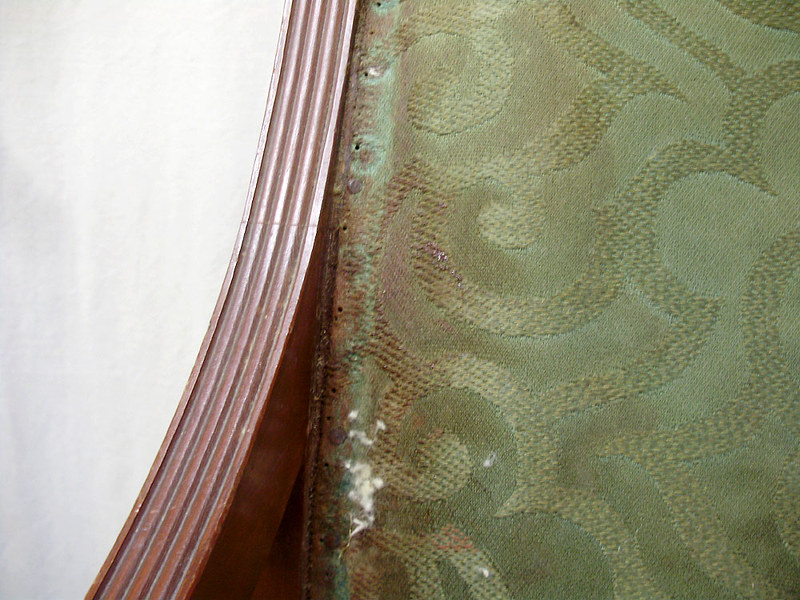
The colour used to be more of a teal shade, but it has faded or become dirty from use. You can also see the original tacks.
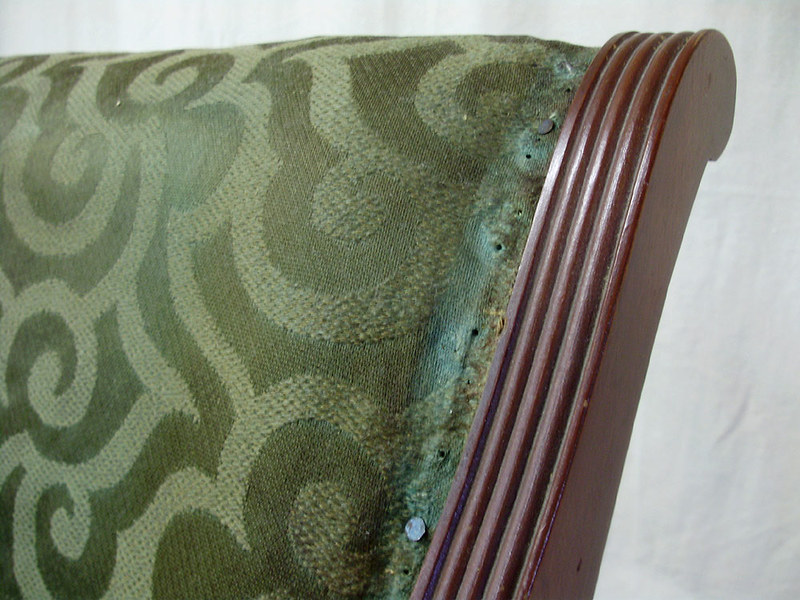
It also looks like someone might have done some stain touch-ups to the chair since there is some reddish staining here:
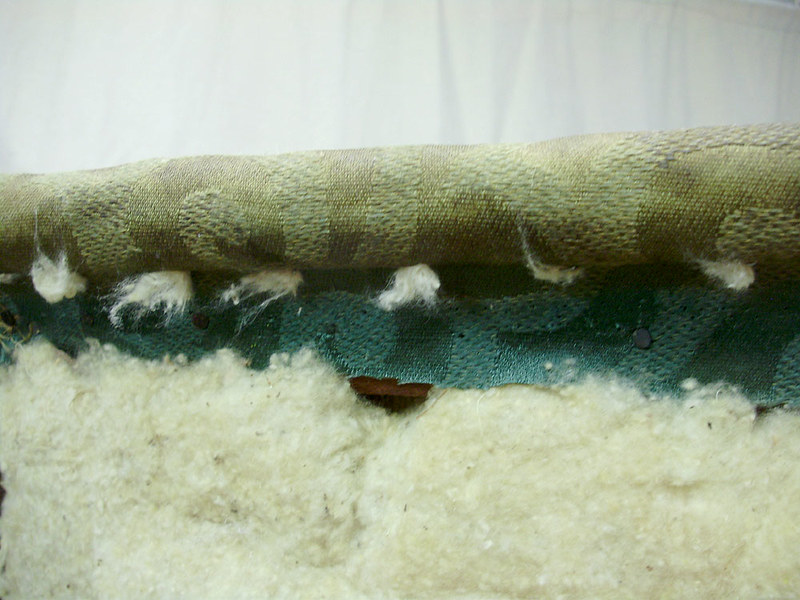
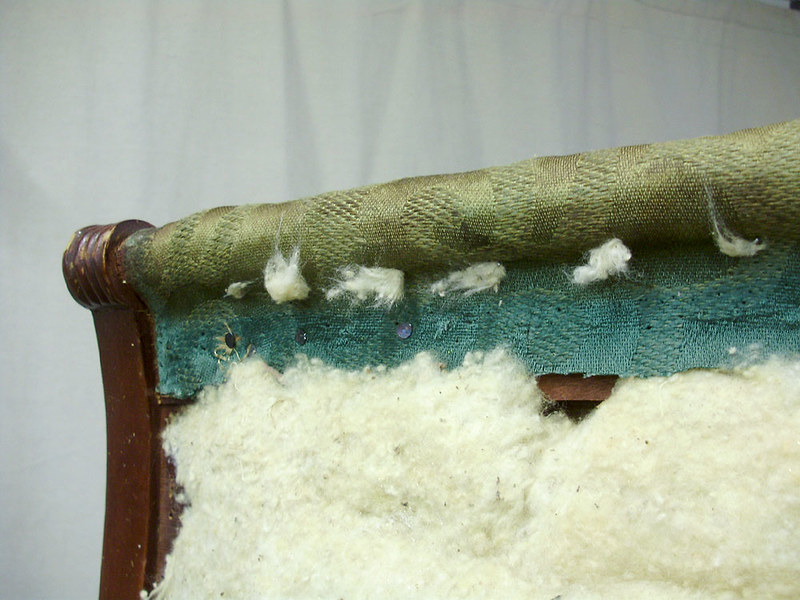
The original teal-green can be seen here where it was on the inside. Also note how lumpy the top edge has gotten.
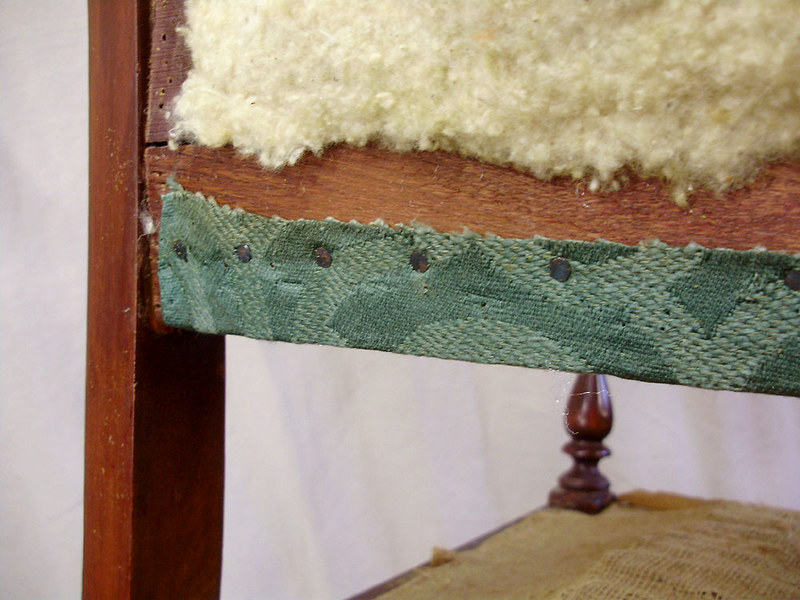
Green and mahogany have always been a pretty classic combo, even though this chair is actually not mahogany - just stained to look like it.
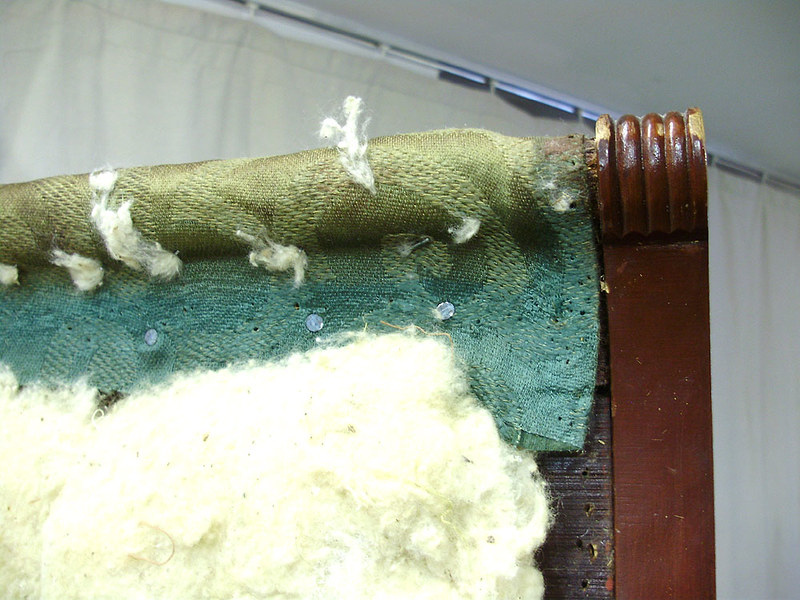
Here you can see the chair ready for upholstery. The original stuffing on the back has been readjusted, with new burlap, and new musin cloth. The seat base has been redone with new burlap, the straw stuffing was reinstalled and adjusted, and new burlap over this. Then the original cotton seat pad reinstalled/adjusted. Muslin was also added over the seat just after this.
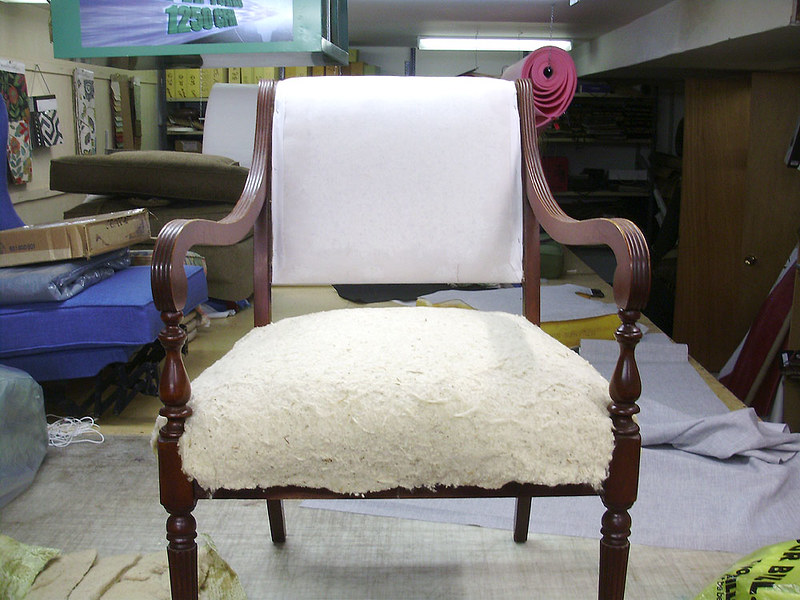
I had ALMOST forgotten to take a photo of the seat base. The original front roll on this chair is actually a round wooden dowel, which was nailed in place (under the burlap). This is why there's no special front stitching on this chair.
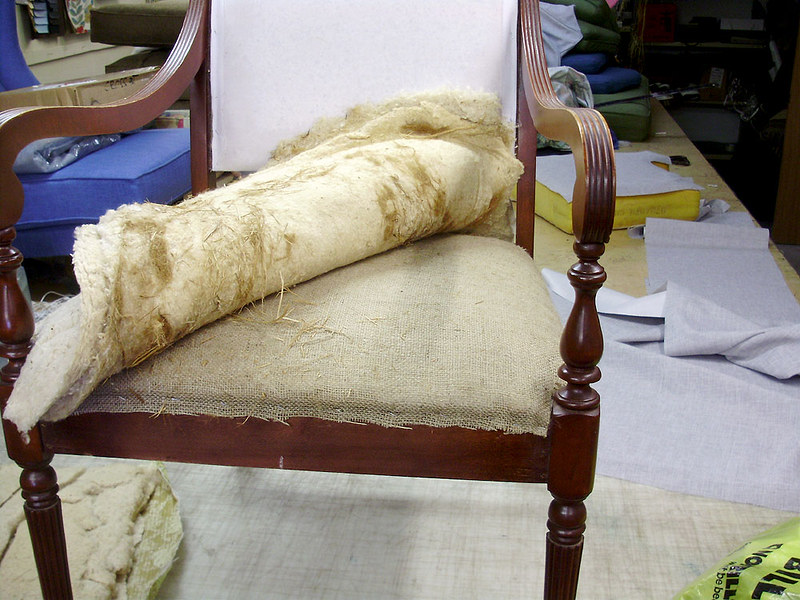
Seat done.
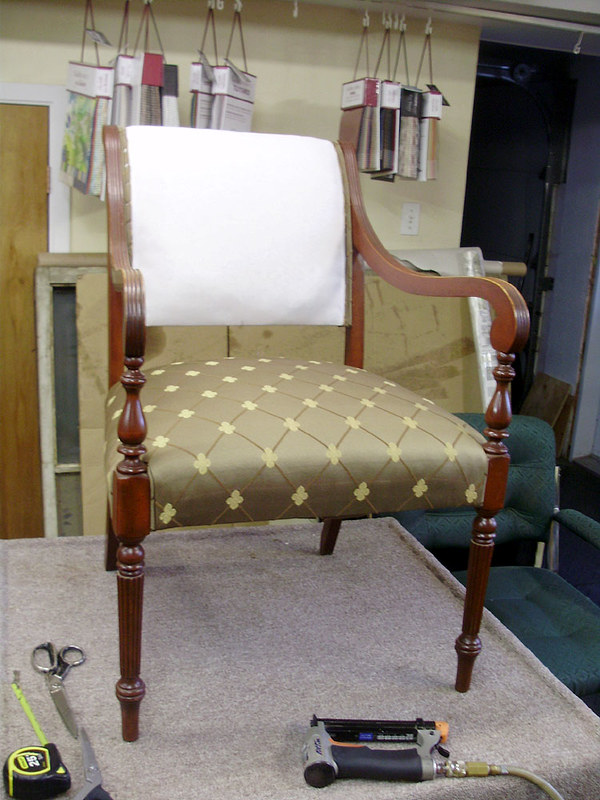
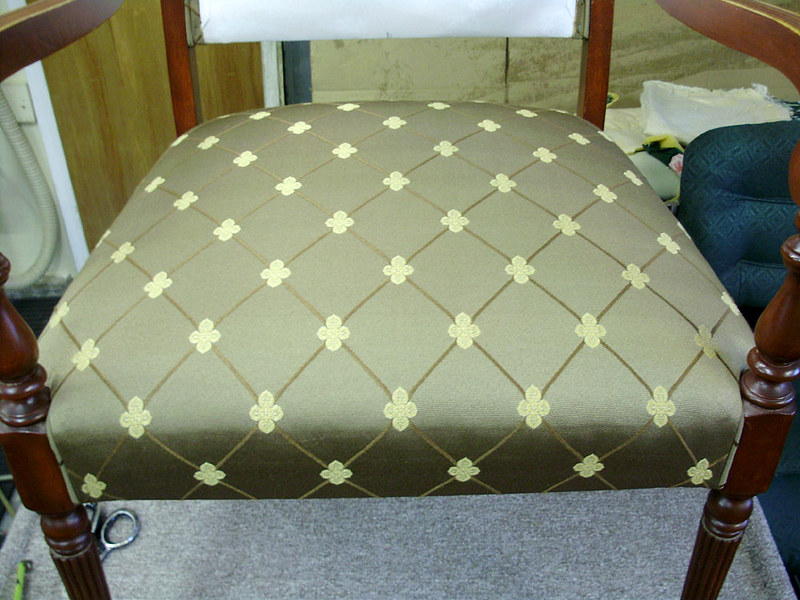
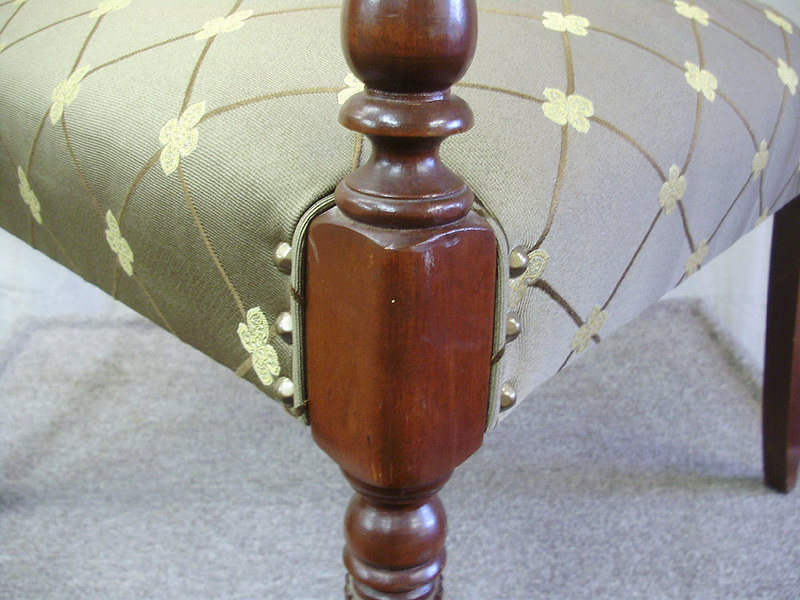
Finished chair, with piping on the edges, and copper-bronze tacks.
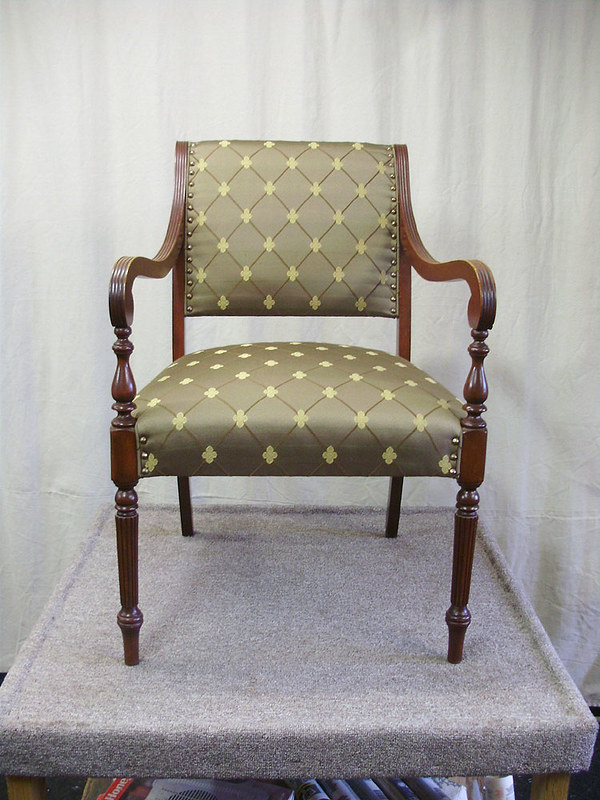
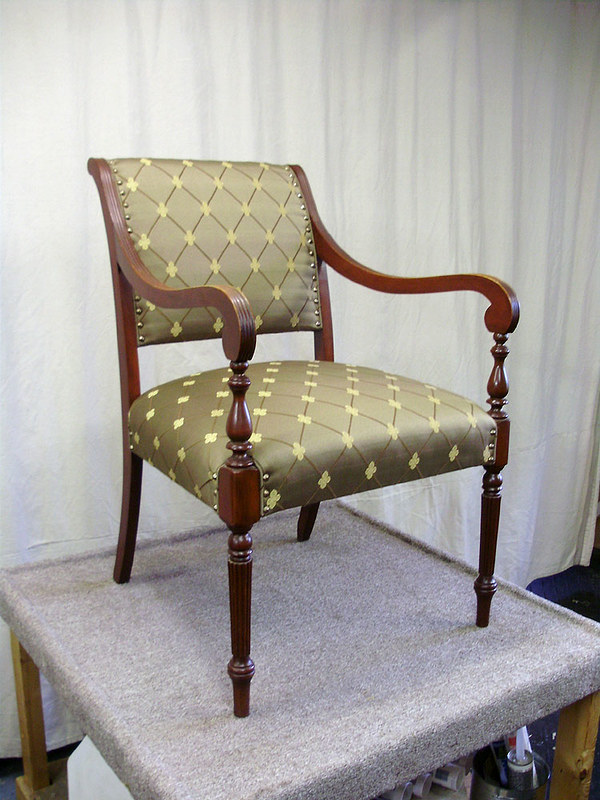
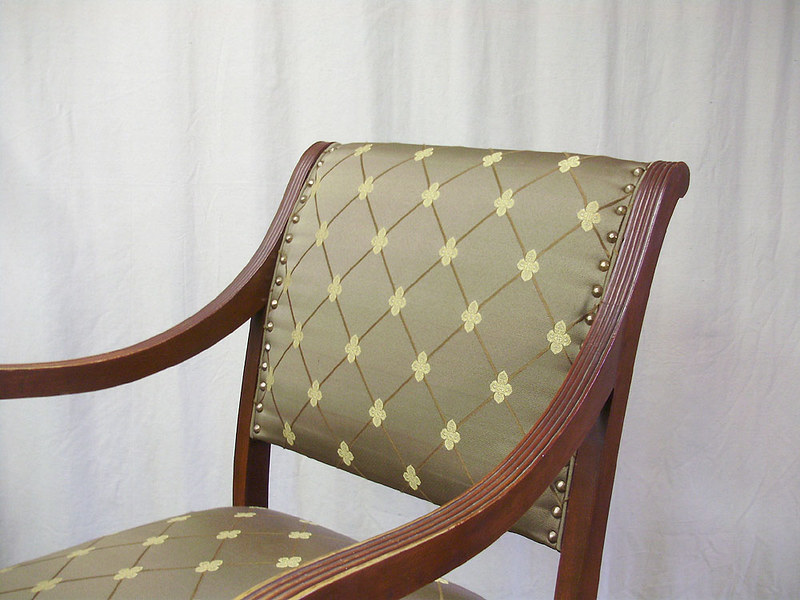
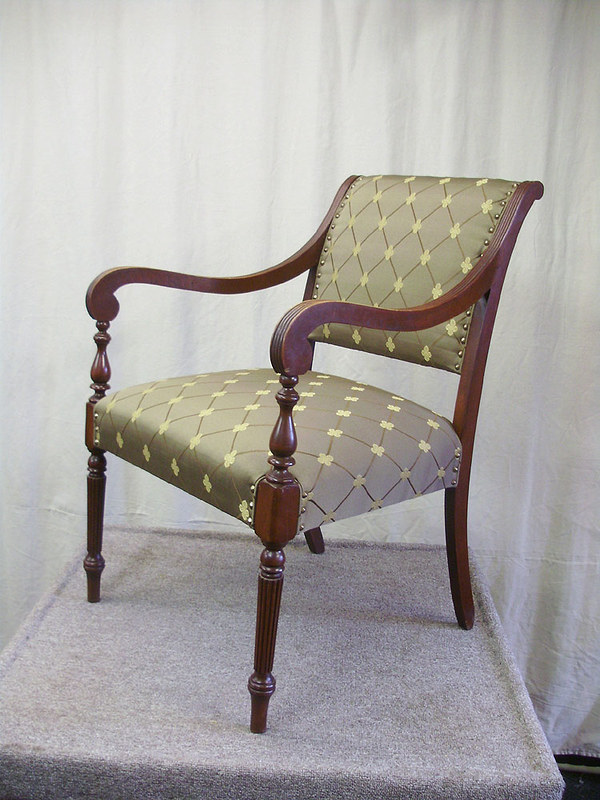
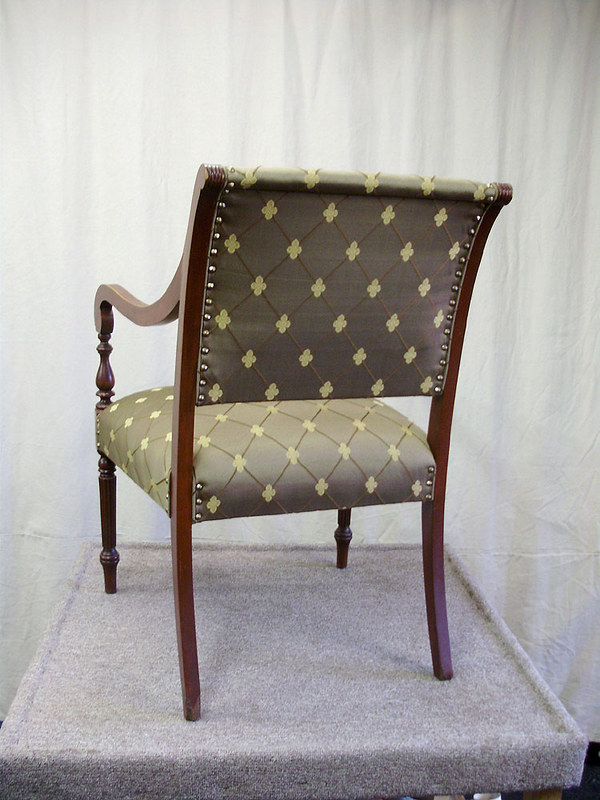
Note how the pattern from the top roll continues down seamlessly into the second panel of the main back.
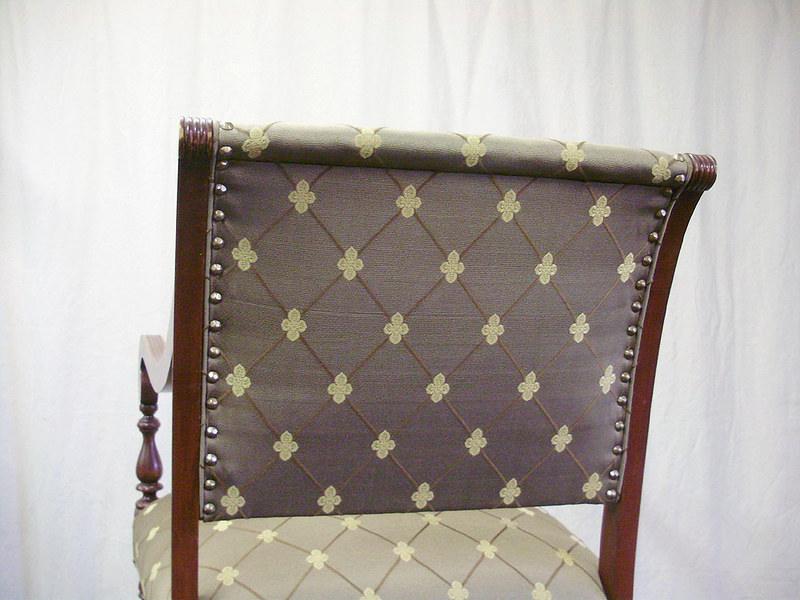
I'm thrilled with how this chair turned out. The colour matches my bedroom furniture perfectly, but it's also generic and neutral enough that it could go just about anywhere. The fresh upholstery adjustment and new burlap also made the chair much more comfortable to sit on.
Now this might be my last project from the upholstery shop, but it won't be my last upholstery project ever (as the blog title may seem to suggest). I still have at least 5 other chairs to work on. There's a wing chair that I got for free (I just need a fabric for it, and to refinish the legs), there's a pair of antique chair frames that need a complete restoration and all new historic stuffing, there's a lovely arm chair, and a few others as well. So don't fret. I'll eventually have a few more upholstery projects to share. I'm just not exactly sure when. I'l like to buy a half decent upholstery stapler, and an air compressor (which would be nice for air nailers and finishing spray guns as well). All in due time.
As most of you know, I've been working at an upholstery shop for the past 4-5 years. As of Jan 1st, however, I no longer work there. I don't want to go into too many details or in to too much of the drama that lead up to this, but ultimately it was not an amicable break-up on my employer's part, and I was left pretty sad about how everything boiled down. The primary reason I was dismissed was that the minimum wage was set increased to 14$/hour in Ontario, and my boss was not willing to pay me this new rate. I had been working for the past few years "by contract" (a fixed price on a "per project" basis) but the new minimum wage would have required him to still cover the new minimum wage based on hours worked, which he did not want to do. That was ultimately his choice, and I respect that, but some of what happened afterwards was completely uncalled for.
Anyhow, in late December, after I raised my concerns about the new minimum wage increase, he asked me to call him after the holidays to let him know what I wanted to do for 2018. I called him on Jan 2nd, and he expressed once more that he did not want to pay the extra hourly difference, which was what I had expected to hear. A few days later I received my unemployment papers in the mail from him. Up to this point, I thought everything was fine between us.
By chance, maybe 2 weeks after this, I heard that they were hiring where my dad works, so he put in a reference for me and after several interviews I got in! However, on the last week just before I would be starting, I still had to complete my 'back check' and there was a conflict with my last employer because I said on my application that I was dismissed, and he was saying that I quit. He refused to provide a release letter, and they had to call him directly. Apparently he was not very cooperative with the recruiter, and he made some derogatory remarks about me. Without mentioning what was said, I'll just say that I was shocked. Especially since it was coming from a man who was saying a few months earlier that he'd want to sell me the business when he retires. Lucky for me, because of the way my unemployment papers were filled out with an "A Code" (which means that there was either a shortage of work, an end of contract, or a termination), my recruiter believed my side of the story. I really don't know what I did to upset my former boss enough that he would try to sabotage a potential job offer. I would have been happy to keep sending him clients, and promote his business, but now I'm just left with an awful feeling about how I was treated and I just want to put it all behind me.
On with the good news! So what's this new job? Well, it's quite a departure for me, since it's in a completely different field and it's unlike anything I've ever done so far, but I think I will like it. It's customer service for a bank at a call centre. The call centre is just a few blocks away from my house, the pay is more than double what I made the past few years, and it comes with benefits, a pension, employee perks (free bank account, lower rates on products and other special perks), an annual bonus, and the people there are just wonderful. I'm currently on week 7 of 10 for the training (which is INCREDIBLY INTENSE), and it's going well. I've been on the phone for 2 weeks out of the 7 so far, and most of our clients are actually really nice and pleasant to talk to.
So yeah, a better job, paying a much better salary, will mean that I'll be able to afford more materials and supplies for home renovations! I might even be able to finally get a car. And maybe even a cell phone! (Yeah I'm one of those rare people who does NOT own a cell phone).
So all that said, I wanted to post one last project that I did at the shop, which was one of my chairs. This is an antique chair that I picked up shortly after I bought the house (so maybe 2010 or 2011). It was from a yard sale, and I liked the shape of it. The fabric wasn't great, but it wasn't too horrible either. I always knew that I wanted to redo it at some point, but it wasn't high on my to-do list. The old fabric was a sort of greenish yellow with roses, and there were a few light stains on it. I really liked the tacks on it, but not with this particular fabric.
About a year ago a fabric store went out of business and I was able to find a PERFECT fabric for this chair.
BEFORE:
I'm not sure why there were extra tacks off to the side here:
Note faint water stain:
This is the back, which had two circular stains near the top. I tried cleaning these, which left an additional large circular water mark on the fabric.
Yet another stain:
A small chip in the wood. I decided not to repair it.
Starting to remove the back already shows that this is not the original upholstery, as there's a green fabric visible.
When I took this chair apart, I was really surprised to see that it was a fair bit older than I thought it was. I had assumed that it wasn't that old, and that it was maybe from the 1960s or 1970s, but it is probably closer to 1930s or 1940s. The original stuffing in it is straw and cotton!
Current covers and stuffing removed, showing what might be the original green fabric on the back rest.
This is a rather interesting looking pattern. It's a solid green colour with a pattern in it that shows up depending on the angle. The pattern is almost on trend with modern geometric prints.
The colour used to be more of a teal shade, but it has faded or become dirty from use. You can also see the original tacks.
It also looks like someone might have done some stain touch-ups to the chair since there is some reddish staining here:
The original teal-green can be seen here where it was on the inside. Also note how lumpy the top edge has gotten.
Green and mahogany have always been a pretty classic combo, even though this chair is actually not mahogany - just stained to look like it.
Here you can see the chair ready for upholstery. The original stuffing on the back has been readjusted, with new burlap, and new musin cloth. The seat base has been redone with new burlap, the straw stuffing was reinstalled and adjusted, and new burlap over this. Then the original cotton seat pad reinstalled/adjusted. Muslin was also added over the seat just after this.
I had ALMOST forgotten to take a photo of the seat base. The original front roll on this chair is actually a round wooden dowel, which was nailed in place (under the burlap). This is why there's no special front stitching on this chair.
Seat done.
Finished chair, with piping on the edges, and copper-bronze tacks.
Note how the pattern from the top roll continues down seamlessly into the second panel of the main back.
I'm thrilled with how this chair turned out. The colour matches my bedroom furniture perfectly, but it's also generic and neutral enough that it could go just about anywhere. The fresh upholstery adjustment and new burlap also made the chair much more comfortable to sit on.
Now this might be my last project from the upholstery shop, but it won't be my last upholstery project ever (as the blog title may seem to suggest). I still have at least 5 other chairs to work on. There's a wing chair that I got for free (I just need a fabric for it, and to refinish the legs), there's a pair of antique chair frames that need a complete restoration and all new historic stuffing, there's a lovely arm chair, and a few others as well. So don't fret. I'll eventually have a few more upholstery projects to share. I'm just not exactly sure when. I'l like to buy a half decent upholstery stapler, and an air compressor (which would be nice for air nailers and finishing spray guns as well). All in due time.
Saturday, September 09, 2017
Summer Project No. 3 - Finally Built A Bed!
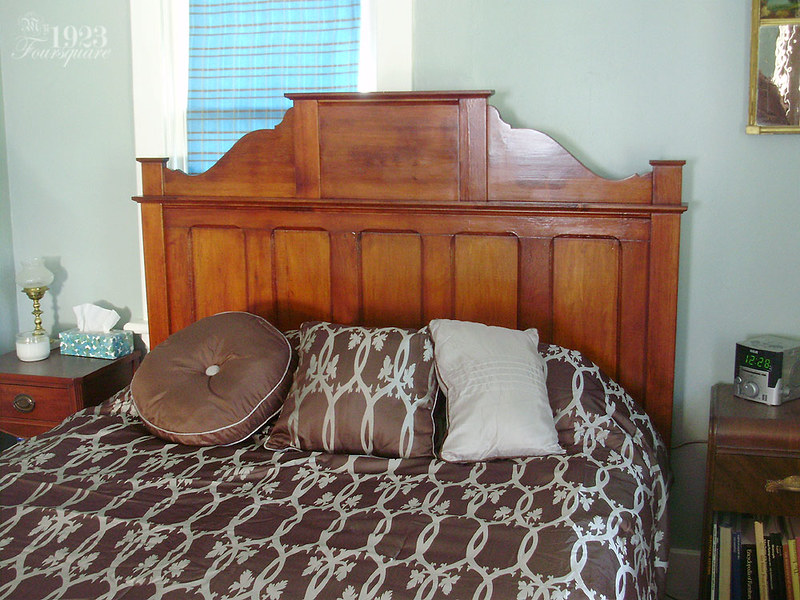
So I've been wanting to build a new Queen sized bed (or buy an old one) for a few years now. Pretty much since I bought the new mattress in 2012 (http://my1923foursquare.blogspot.ca/2012/05/new-mattress-last-weeks-work-on-porch.html). The bed I built (which you can see above) is not really what I originally wanted to build, but it's a pretty decent bed for now. My original plan was to build a 4 poster bed (and I still kind of want to... eventually). I was getting to the point where I was really sick and tired of sleeping on the floor, though. My second option was to build a panel bed (which are pretty simple to build). Panel beds are even easier to build if you're using recycled doors.
Here are some beds that are made using antique doors. There seems to be a pretty wide variety of looks and finishes when it comes to beds made from recycled doors. From really simple, to giant and clunky, to really rustic. There's pretty much a style for everyone.
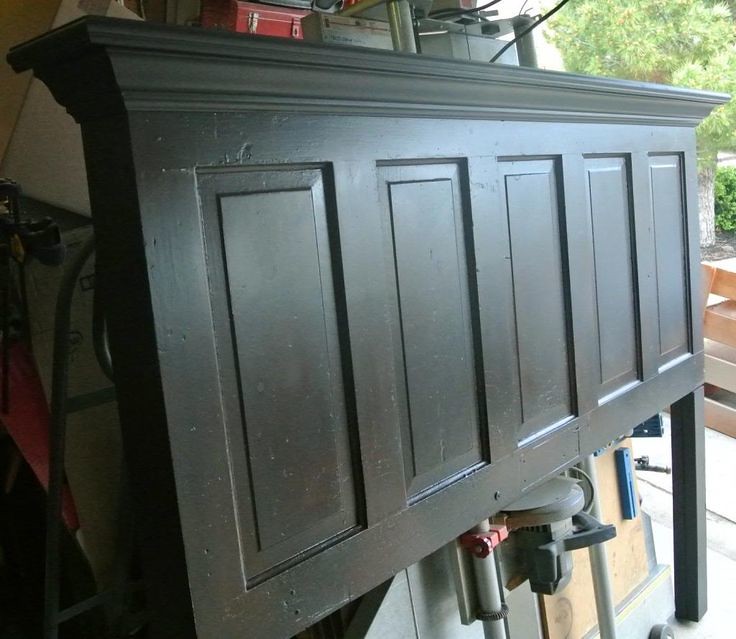
Here's a simple headboard with a large crown (painted):
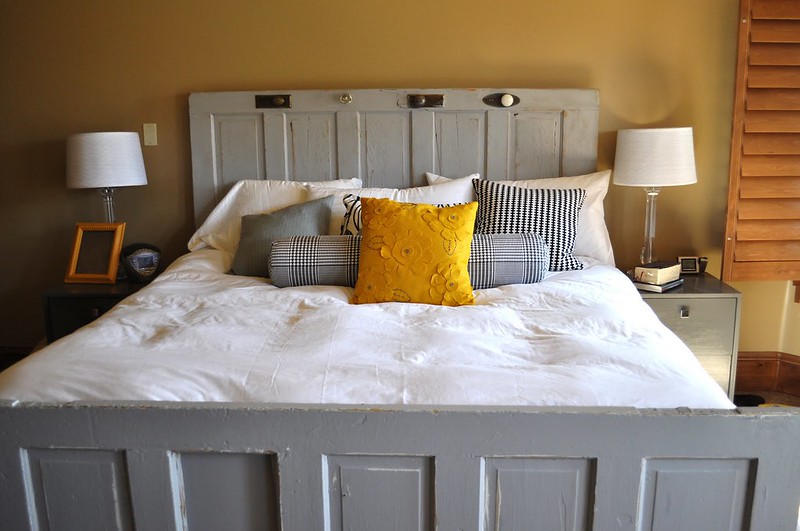
This one is a bit awkward and "lazy" with no added trim, no cutting, or any modifications. Just 2 old doors and bed hardware in between. Not my favourite look, but it could work well depending on your decor. I do like the light grey:
Another headboard with crown, this one with the door inset slightly within a frame:
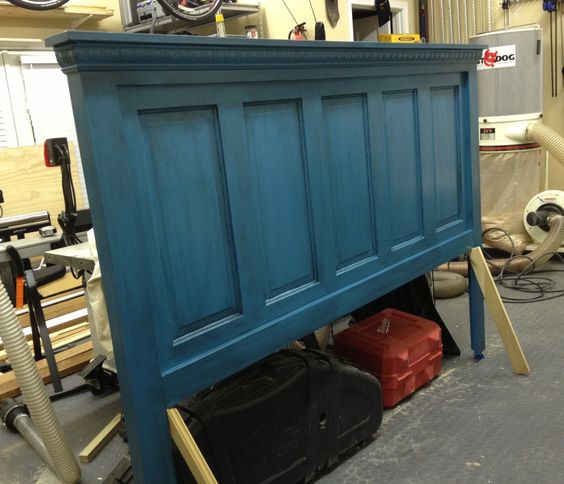
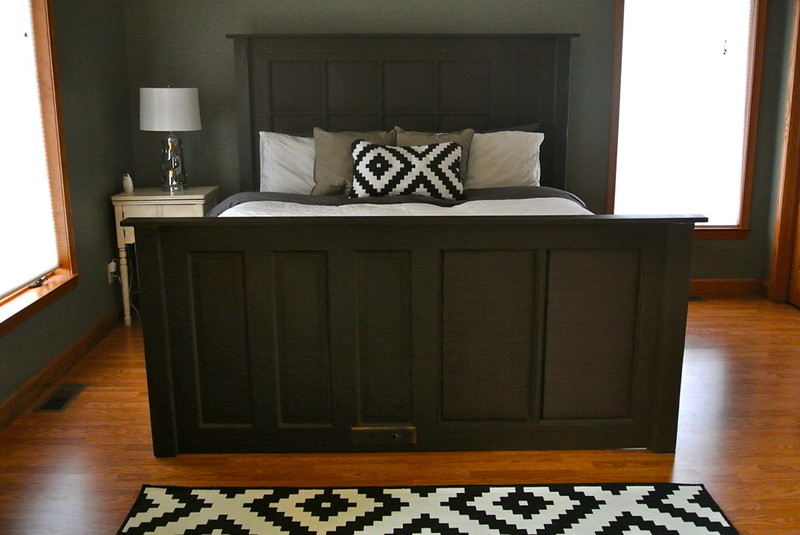
This one is neat, but it also kind of drives me crazy because it's completely asymmetrical and mismatched. It also seems like they used rather wide doors, which makes the foot board rather tall:
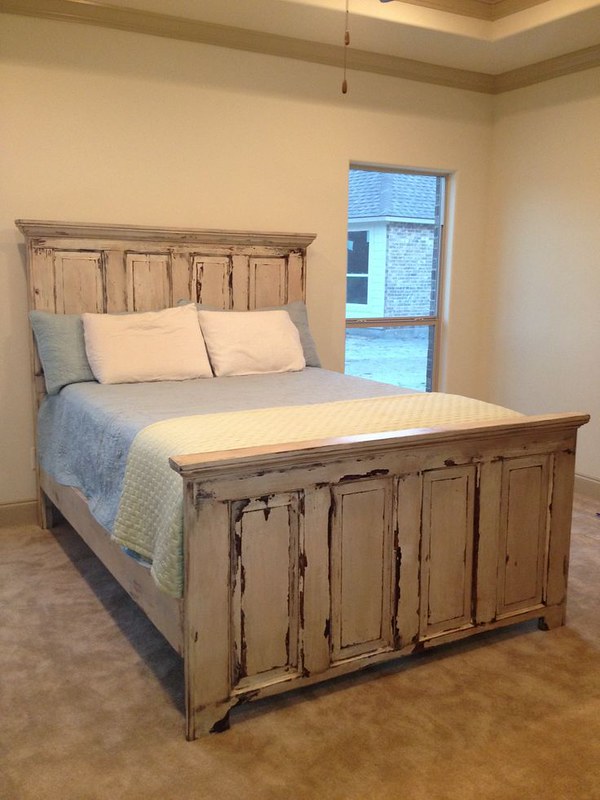
This one is quite nice, but I'm not a huge fan of the shabby chic look. It would look awesome in a "French" styled room:
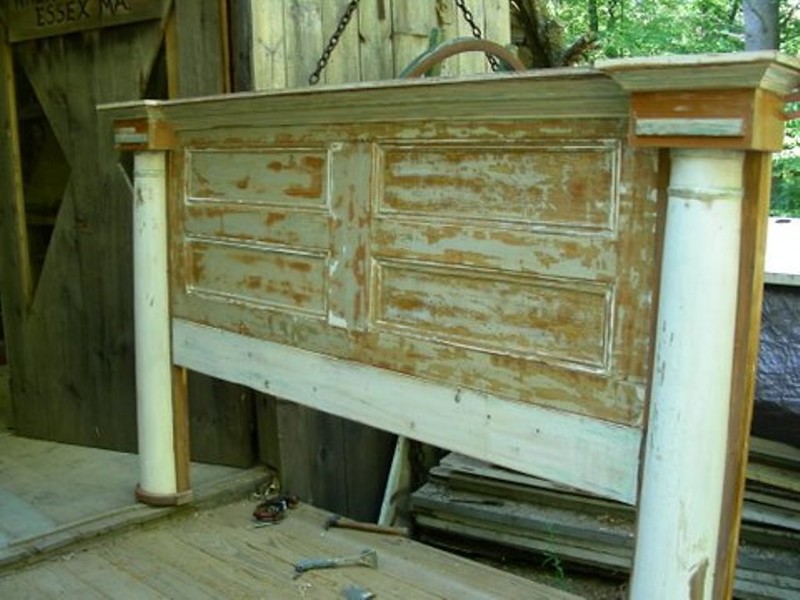
I kind of love this because of how it's styled, but it doesn't seem the most practical, since the doors look like they are just loose/leaned. Old doors could easily be mounted to the wall, though, so if you like this look, it's very easy to pull off:

This one is nice, but the columns seem a bit too big. I assume it was to be painted, but I didn't find another photo of it. It also looks like a King size:
This one is really nice and simple. Also just a headboard. It was made by friends over at Old Town Home:
Tutorial here:
https://oldtownhome.com/2011/5/18/Opportunity-Knocks-Transforming-an-Old-Door-into-a-Headboard/
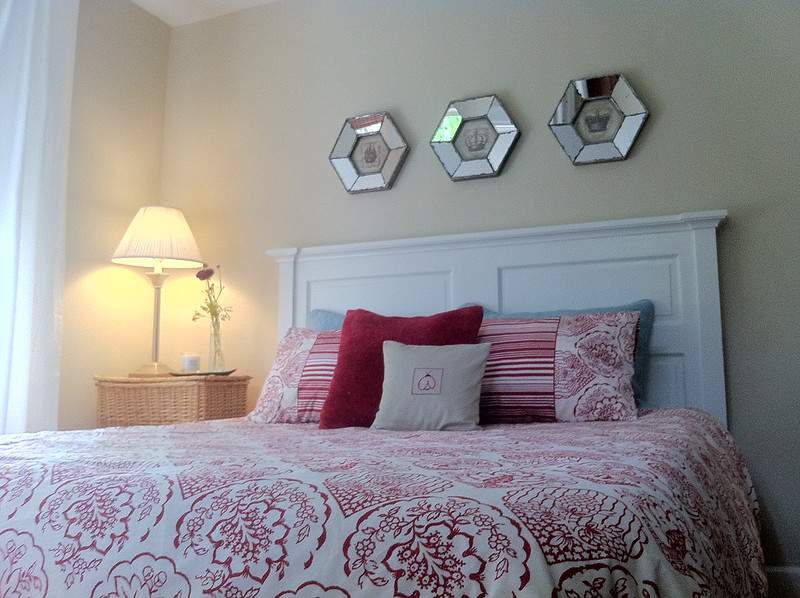
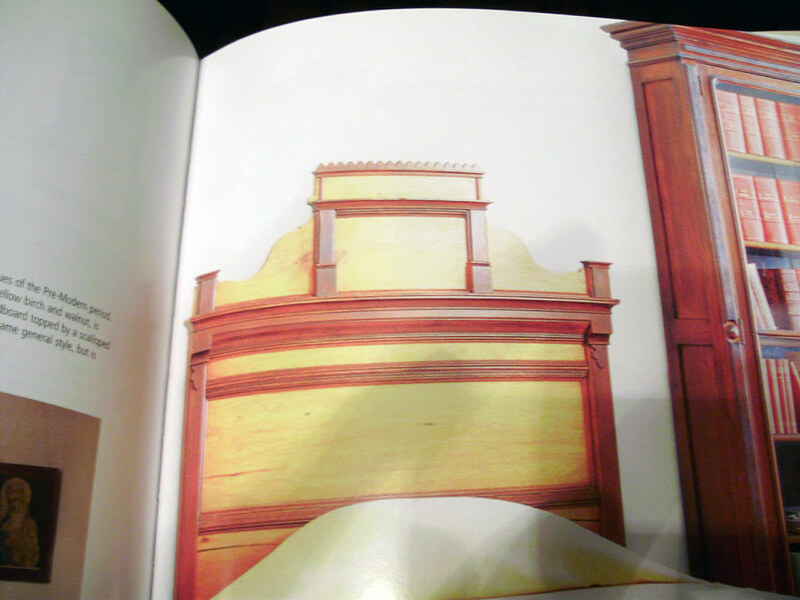
My primary inspiration for the bed I built was this particular one from one of my books:
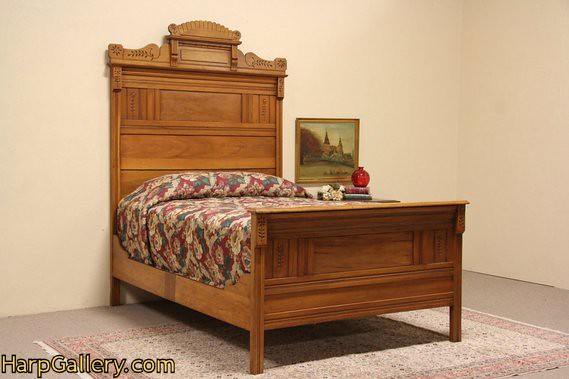
It also closely resembles this Eastlake one:
Obviously since I was using some salvaged doors, the bed couldn't be an exact copy. I also didn't make it quite as detailed with all the small mouldings, pillars, and plinths. I went for almost the same shape, but slightly simplified.
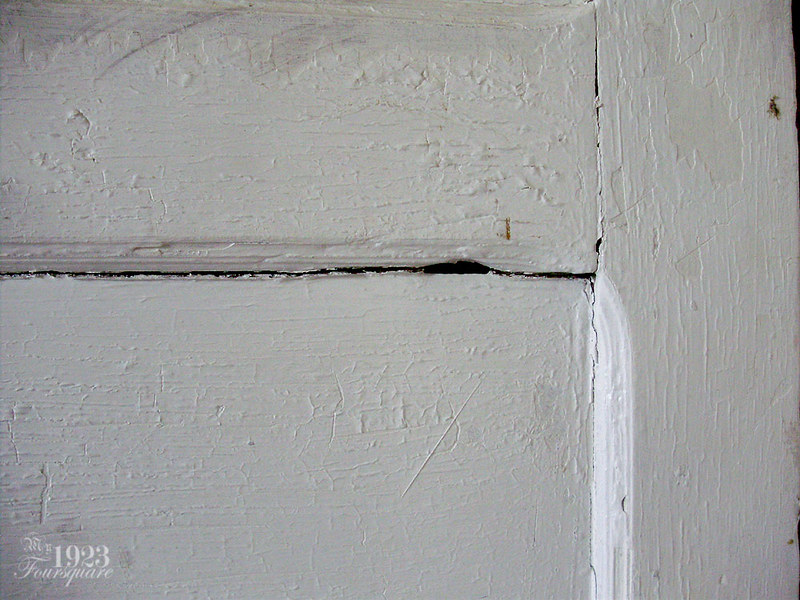
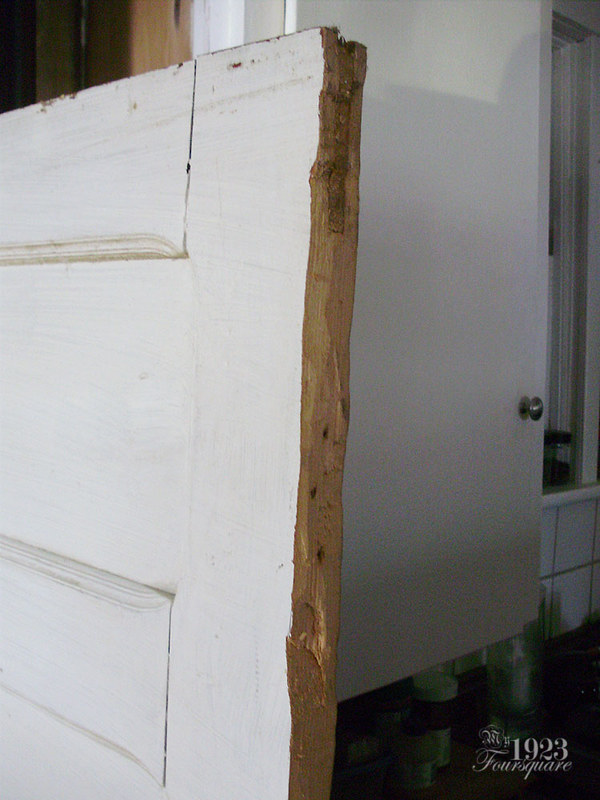
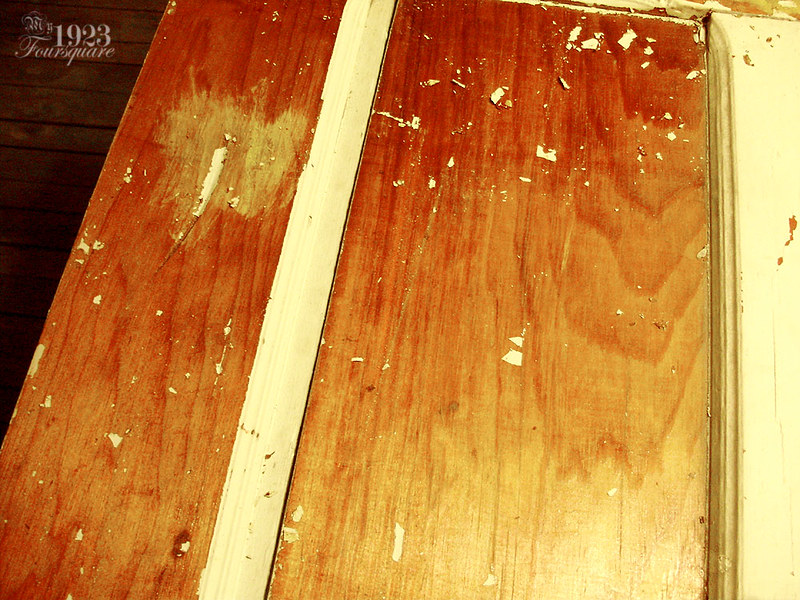
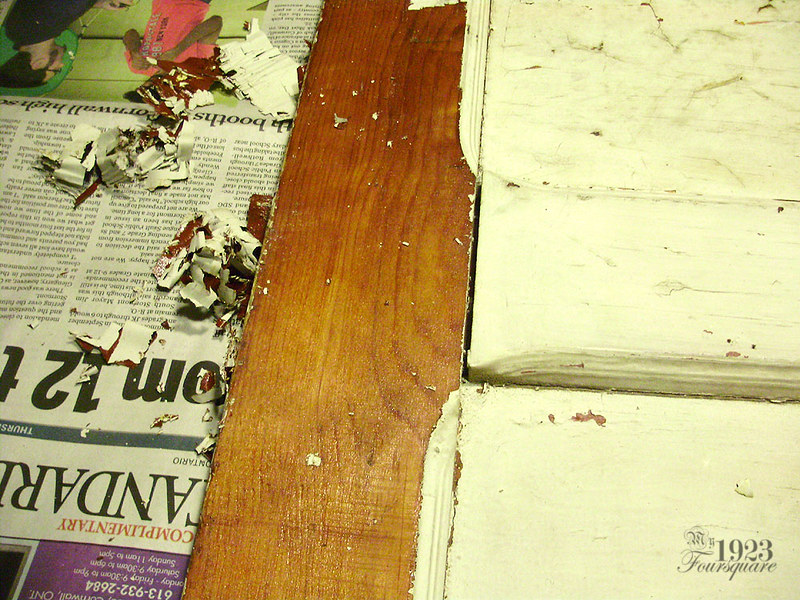
These were the two doors I decided to use for the bed. These are doors that had originally been closet doors in the house. I'm really not sure what kind of door handles they had, because they aren't drilled for normal mortise locks. The doors were in TERRIBLE shape, and they also didn't perfectly match the style of the other larger main doors (these have rounded panel corners, where the main doors had squared panel corners). These had also been chopped and hacked around the edges, and one of them was falling apart.
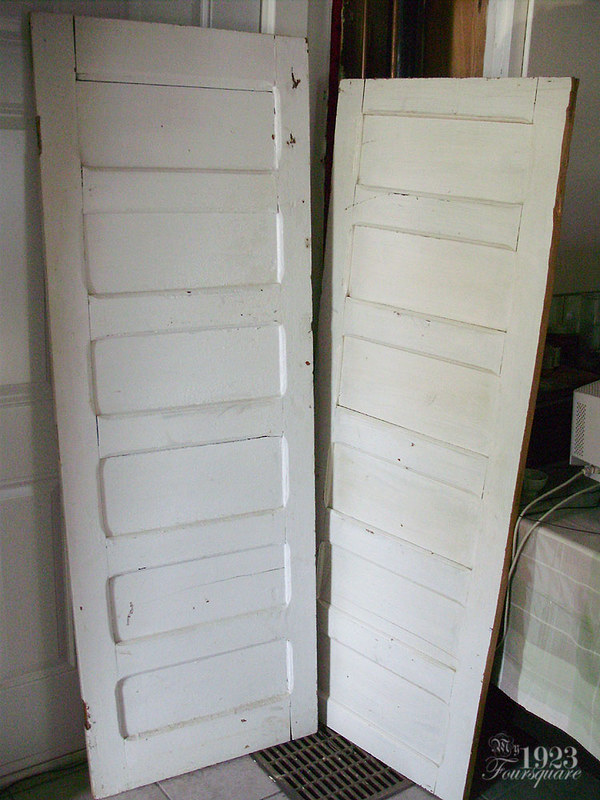
Lots of paint, damaged bits...
Butchered edges:
The other two sides:
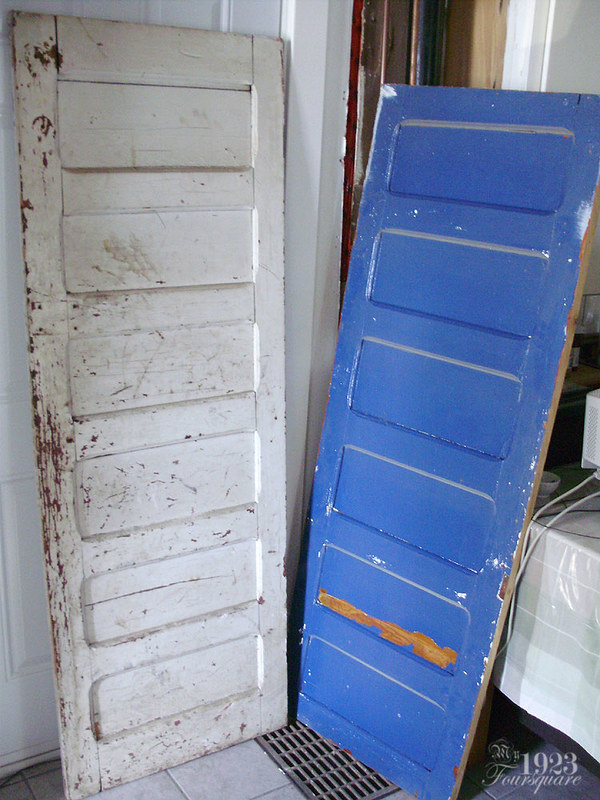
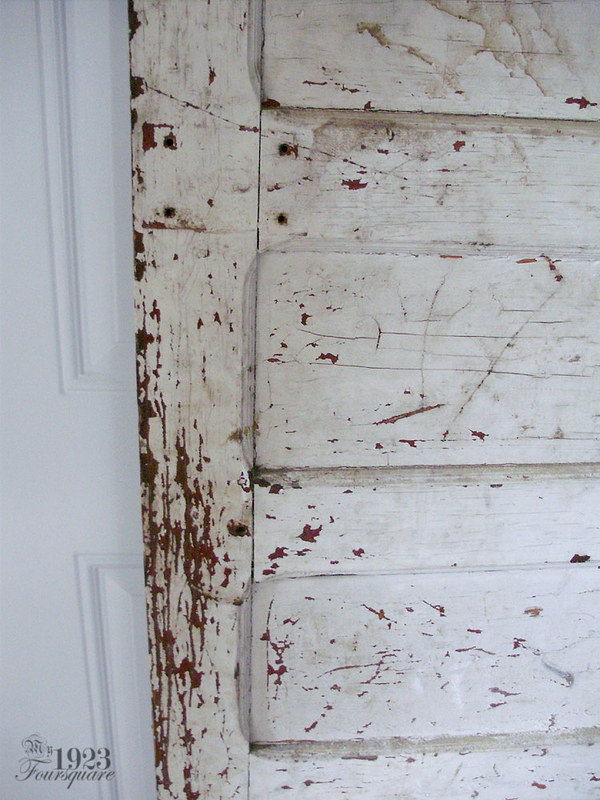
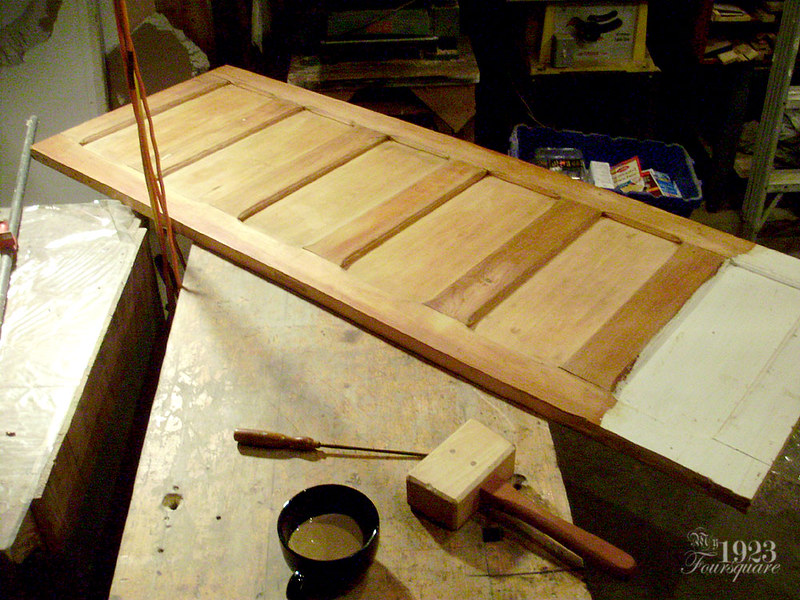
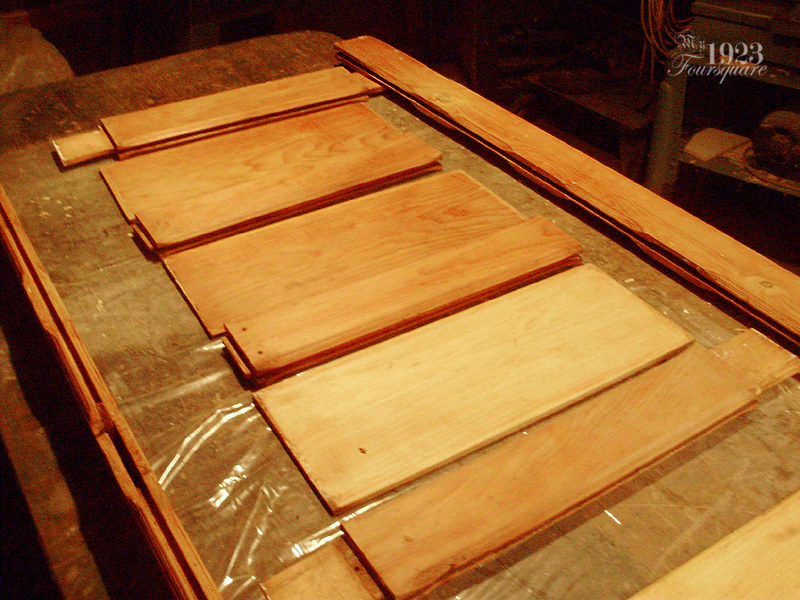
These had to be stripped (obviously), so I tried my normal method (using chemical stripper) but it was working terribly, and slowly. A heat gun turned out to work INFINITELY better, and I was able to take 99% of the paint off with the gun, then scrub and clean the rest off with the chemical stripper and a rinse.
One of the two doors had to be taken apart to reglue it, so I stripped that one in pieces. This second one I only stripped the portion I would be using. One panel would get sawn off.
I was able to find a few sections of nice clear old 2x4s and scrap wood for the posts (I think it was half thick pine, and half a nice 2x4).
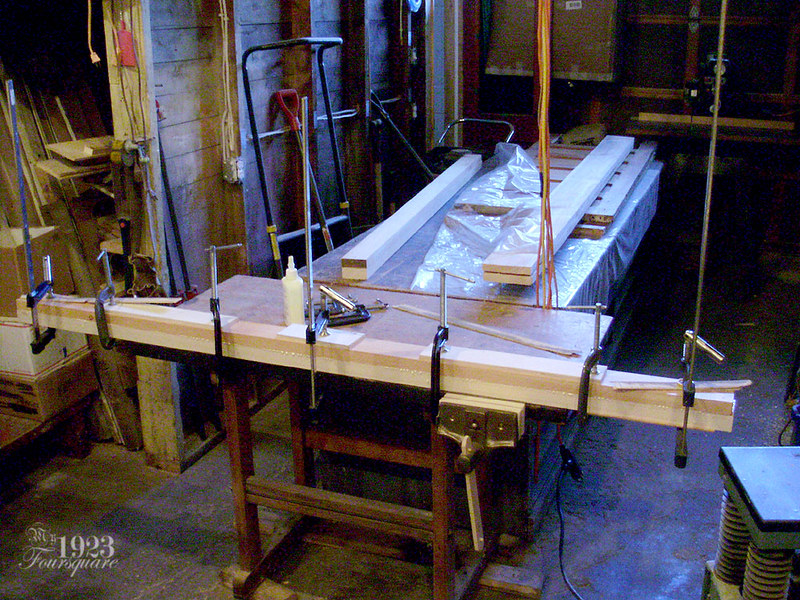
Two 6" boards of 1" thick rough pine for the bed rails (before planing and sanding).
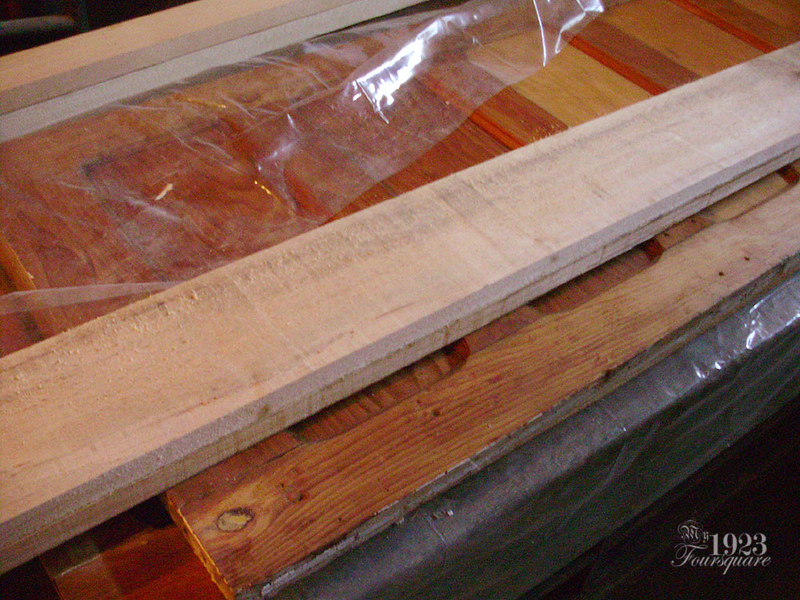
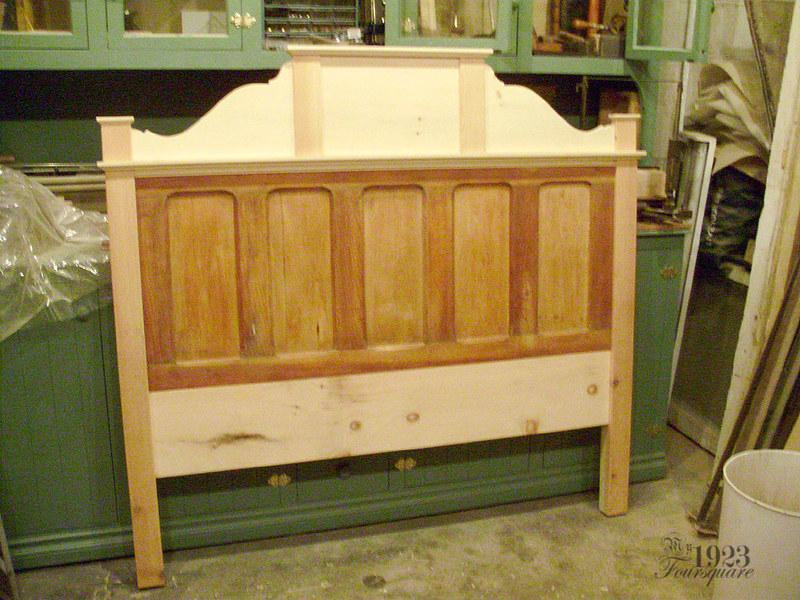
Here are the doors after trimming the 4 edges, and with the 4 posts installed. You can see how all the posts have nicer boards on the fronts, and lighter (spruce) boards on the backs. The panels were fixed to the posts with four 3 inch screws drilled into 3/8" holes, which then had wooden plugs glued in them and sanded flush.
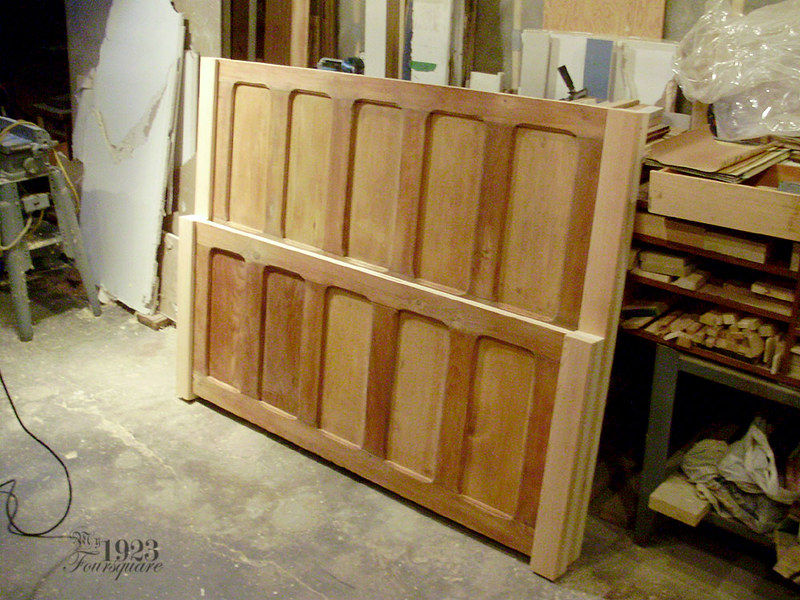
Top boards and mouldings applied. The tops were glued in place, and nailed down with old square nails (just because I have them, and they make the bed look old). You can also see how the doors are made of mis-matched woods. The foot board panels on the left are fir, but the others are all pine. I believe the door rails are fir as well.
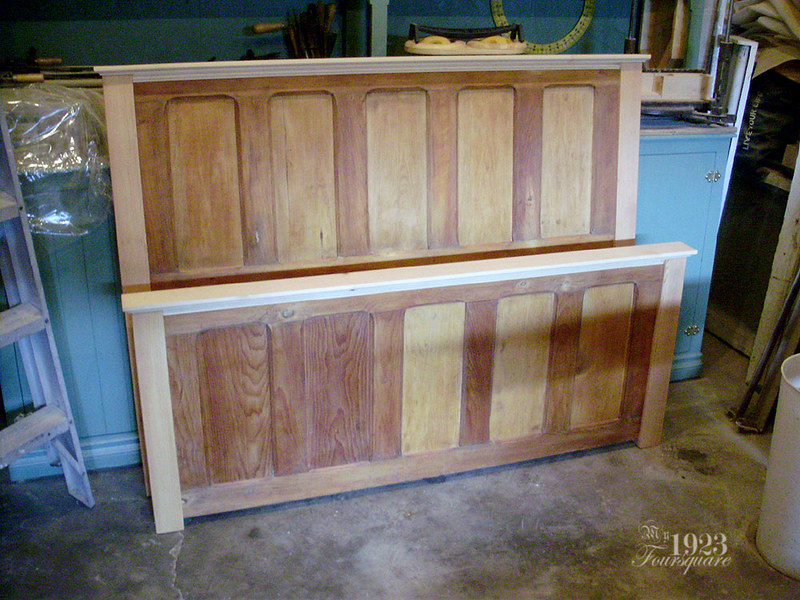
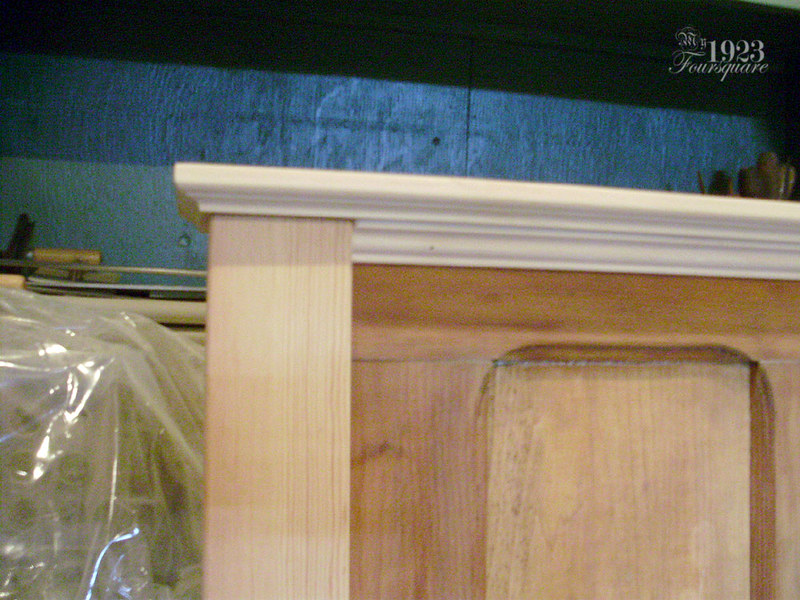
Blurry detail shot. These are fairly standard router bit profiles. A Roman ogee, and regular ogee.
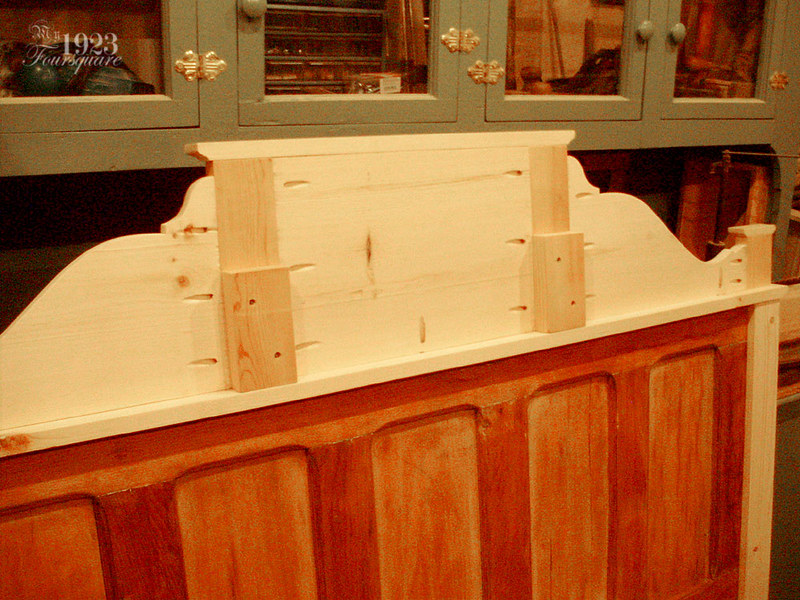
Top crest. The crest was all made from similar scrap pieces (new and old wood), and matching profiles. The majority of the crest was assembled with pocket screws. It is held to the bed top with 3 screws, so that it can easily be removed (because the headboard is both huge and heavy). The wide pine board at the base was also attached with pocket screws. This is only meant as a stopper for the mattress. I used a fairly crappy board with lots of knots and a crack (it won't be visible).
This shows the rear construction. The two blocks that stick out prevent the crest from rocking backwards.
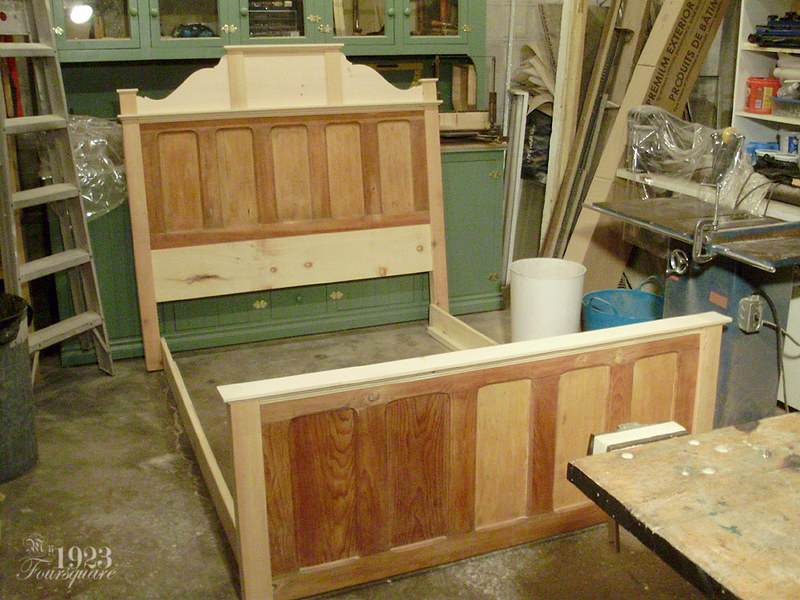
Preview of the bed before finishing. You can see the rails, which I didn't really photograph. They are about 6" x 80", and they have a beefy 1 1/4" square section of blocks glued and screwed along the base.
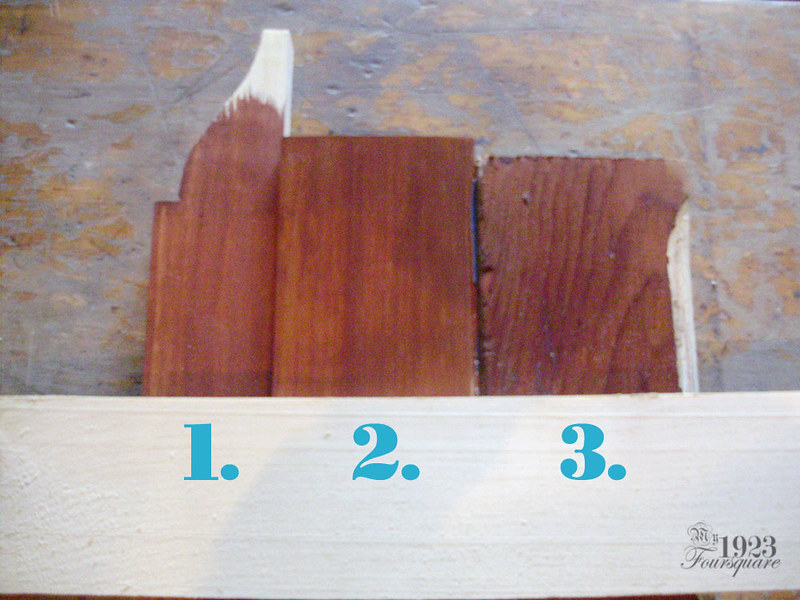
Because this bed has multiple different wood species, as well as old, really dry wood, alongside brand new pine, I wanted to make sure that the stain I was using would work well and match with everything. This is really obvious in the above photo. I decided to use a water based aniline dye on this. Aniline dye is pretty tricky to use (I would not recommend it to beginners) but one of the advantages is that if you apply a second layer you can darken sections and make everything blend/match.
This sample shows:
1 - Brand new pine
2 - Antique pine
3 - Old fir door rails
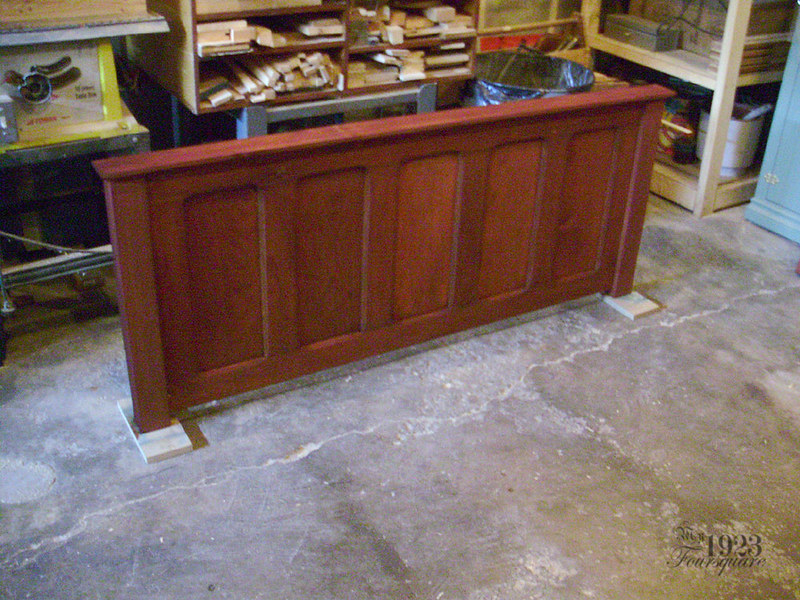
Blurry, but this shows the foot board after staining. You can see that the two left panels (the fir ones) don't quite match. I ended up giving the 3 lighter panels (but nothing else) a second coat of stain. Otherwise everything ended up matching pretty well!
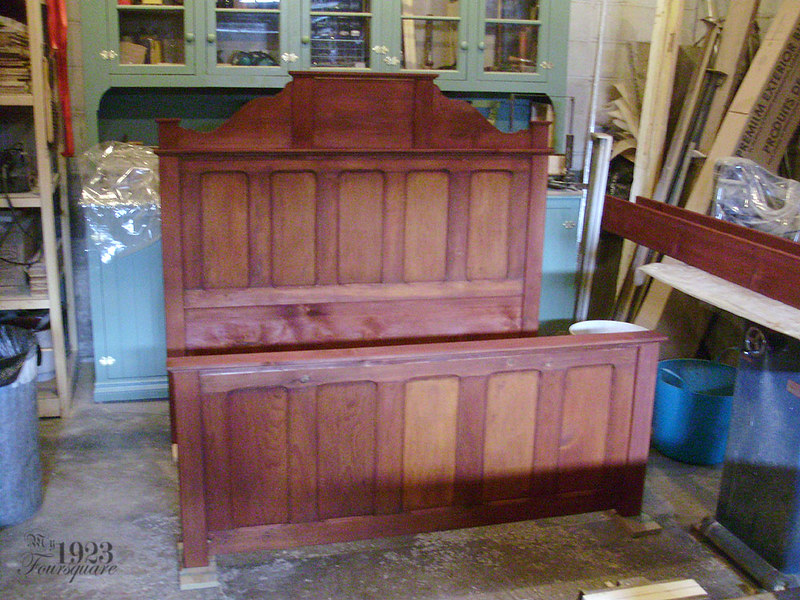
Another note on using aniline dye (should you ever try any). Once it dries, it WILL look awful. It will not look the right colour, and you might be disappointed and sad, but it's only an illusion. Once the varnish it applied, it will once again look like when it was freshly applied (wet).
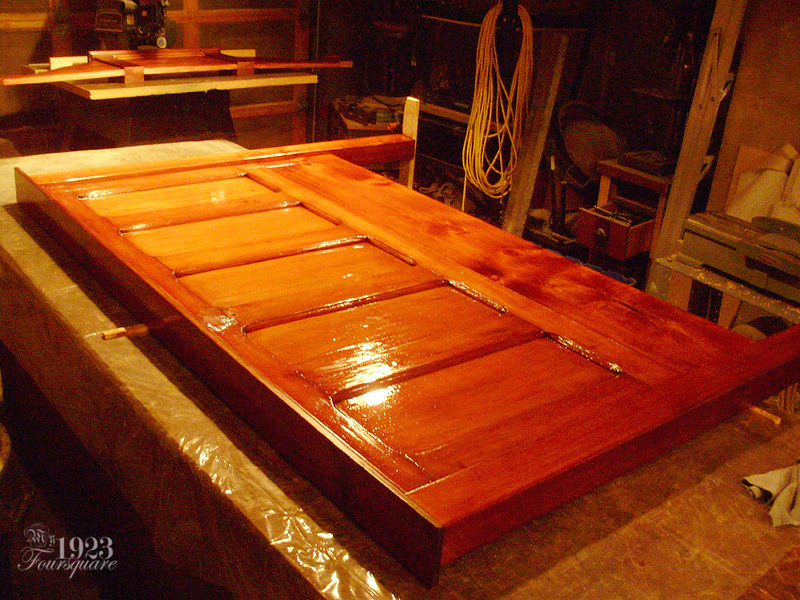
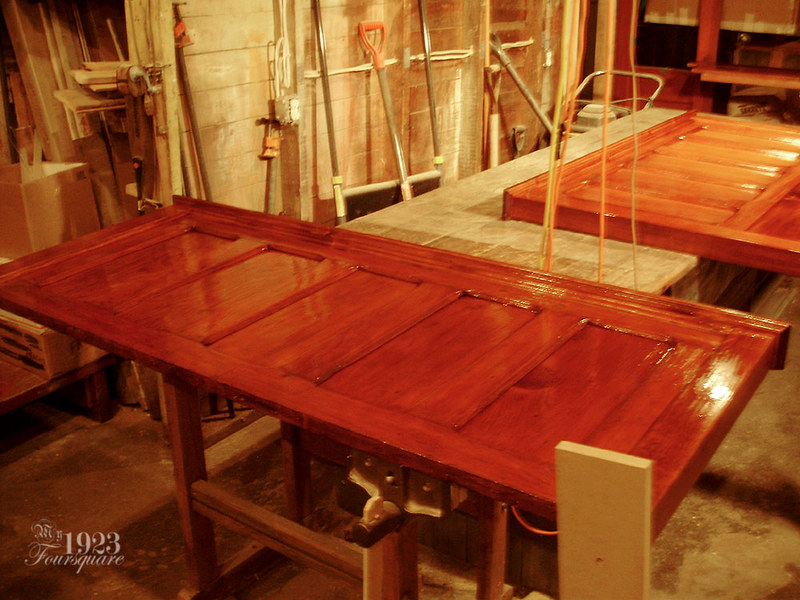
Finishing on this was a pain. The polyurethane I used was a bit thin and runny, and I could only do one thin coat at a time. It was also taking a very long time to dry (maybe the can was a bit old?) I also ended up with a few runs, so then I did one SIDE at a time, leaving the sections lying down. It took THREE coats (over a week). Usually 2 coats is plenty, but it was still looking rather blotchy with 2 coats.
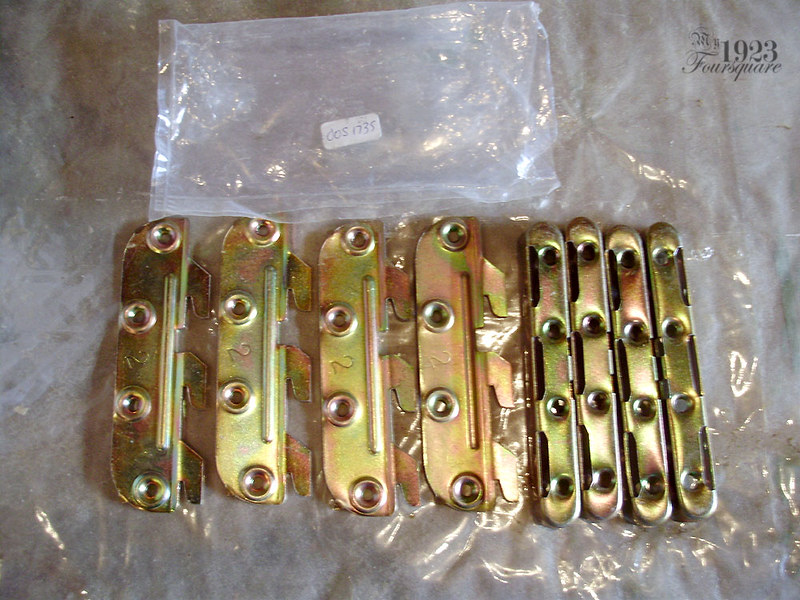
Another small hiccup that happened is that the hardware I had bought for the bed (over 5 years ago) was packaged incorrectly and it had all right side hooks! This system has the hooks screwed flush onto the rails, with the actual hooks offset (bent outwards slightly), so they aren't reversible. There are usually two #1 hooks (left) and two #2 hooks (right). I contacted the company and they sent me a new set, but I had to wait a few days for them to arrive.
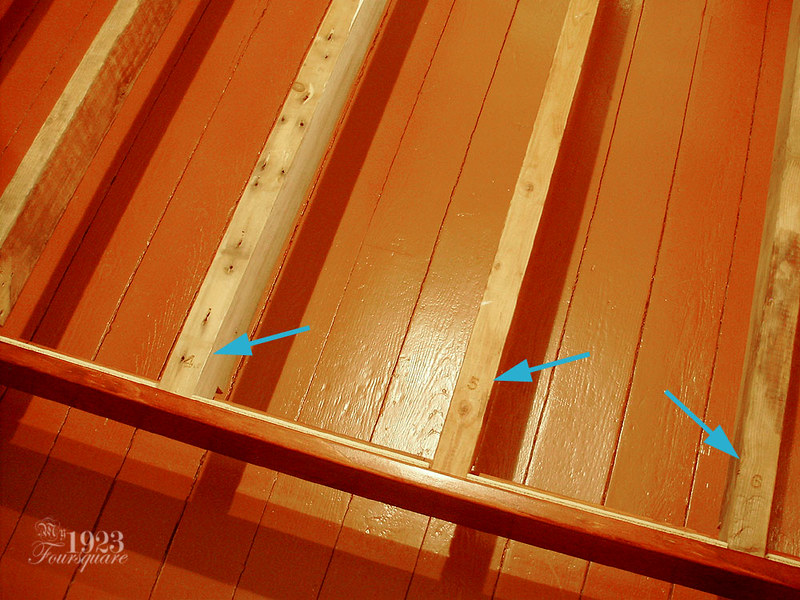
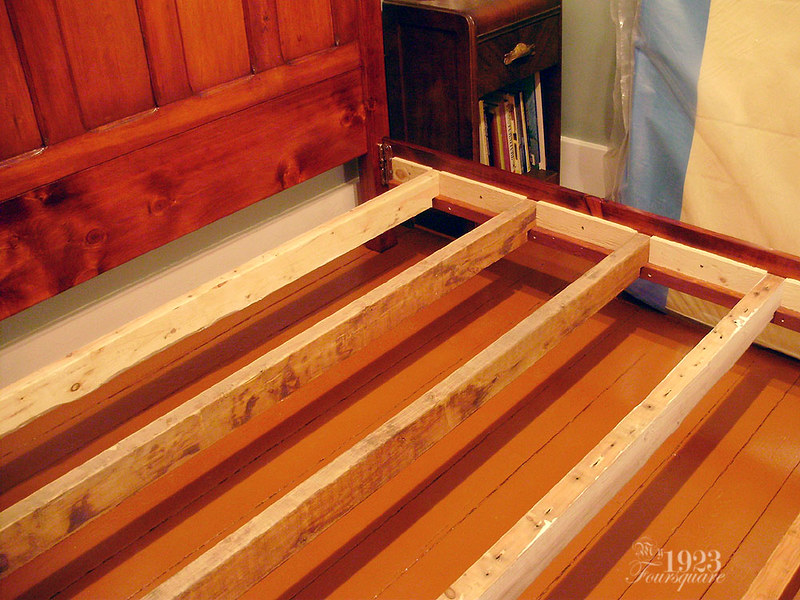
The rack system I ended up using were a number of scrap 2x4s that were notched to fit the height I wanted. These sit on the rails, and I added some plywood spacers between them (to make sure they stay vertical). This system can be changed to suit a box spring application instead (my setup is a mattress only - no box spring). Because the 2x4s are all different widths/sizes, I numbered them with a punch set. On top of the 2x4s are two sheets of thin plywood lined up so that the seams fall on one of the 2x4s.
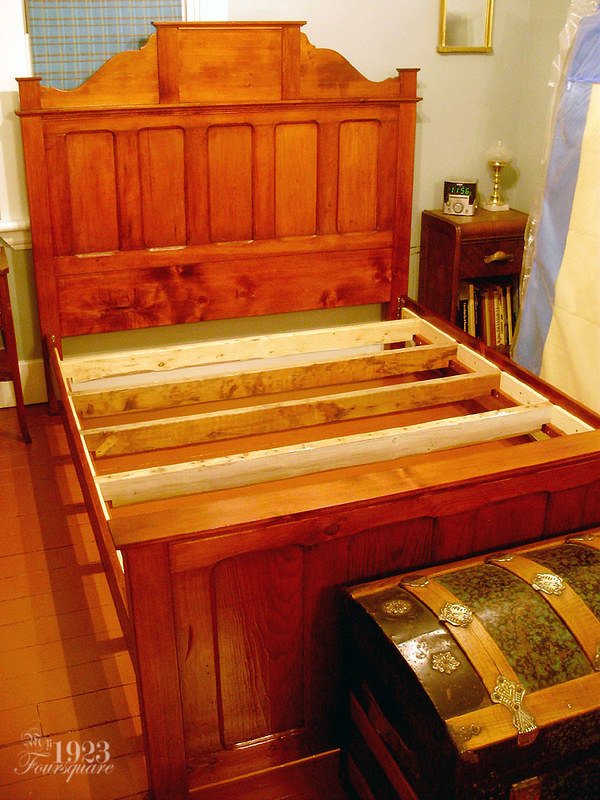
You can also see how the bed hooks work (kinda). They're designed as top-mount, so they could be raised or lowered if I ever end up with a different mattress in here. It would leave screw holes behind, but those could be hidden fairly easily.
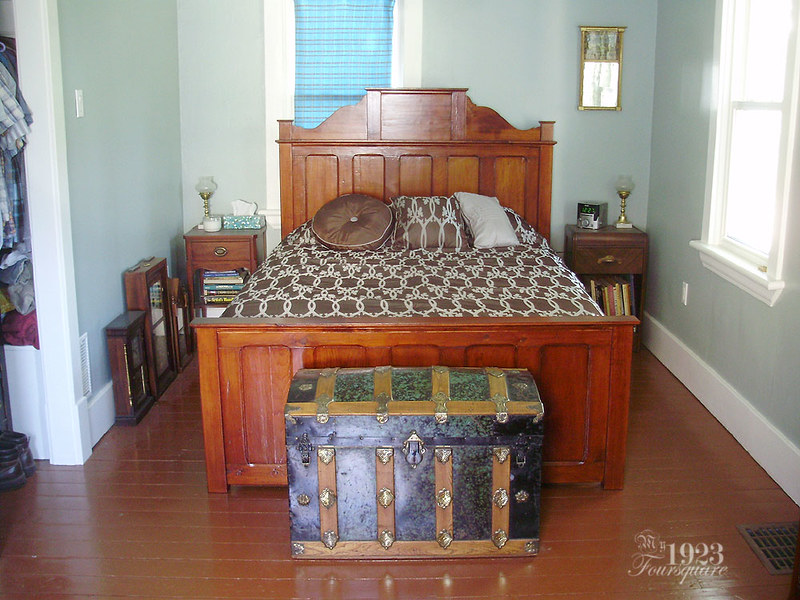
FINISHED BED! :D
I should also add that there were a few spots with leftover white paint from the stripping. These areas were touched-up with brownish-red paint after the staining was done (before varnishing).
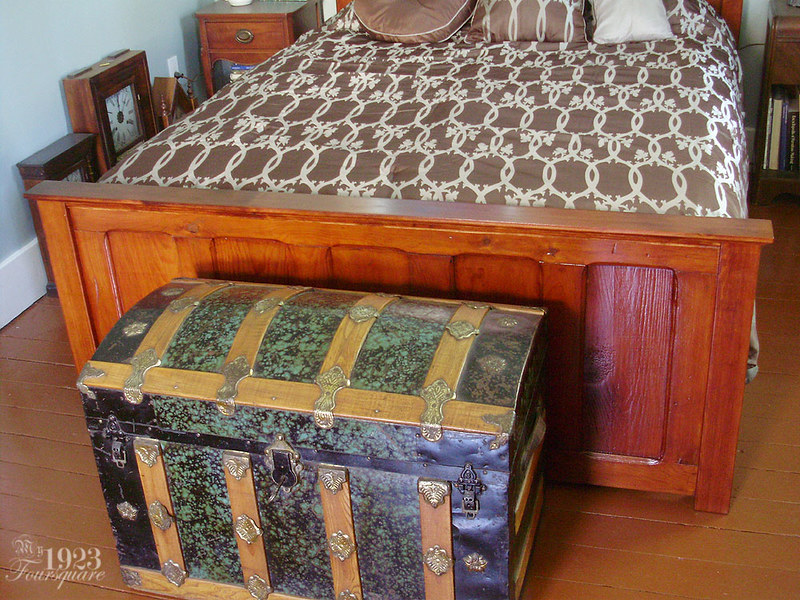
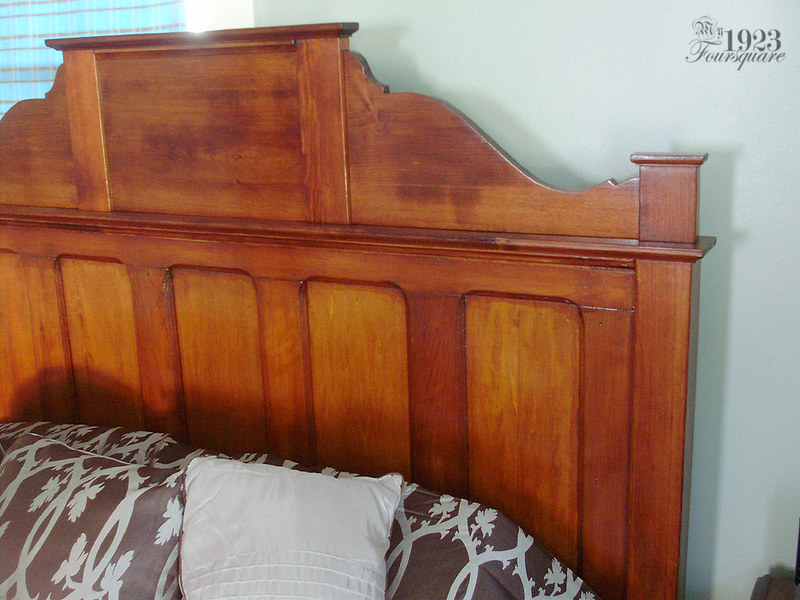
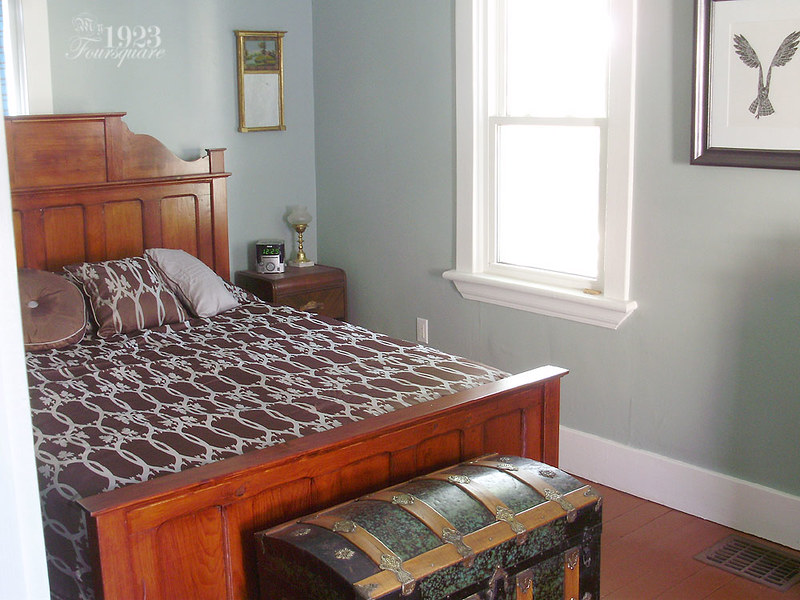
I'm really happy to finally be off the floor.
Subscribe to:
Posts (Atom)