
When we last left off, I had scavenged a bunch of old flooring from the hallway to fix the main floor in the living room. That done, we needed new pieces to replace what we took. I gave Devin a cut list of the wood I needed. Basically 4 boards 5" x 40" OR 2 boards 5" x 80" of birch. He went to basically the only place in town that sells hardwood lumber, and dropped off the boards late in the evening. I think he dropped off the wood on Tue night around 11:40pm.
It was too late to start working on it, so on Wed night, I started cutting the boards. Obviously there was WAAAAY too much wood. We needed 14 feet, and I had about 32. It was also very thick (about 1 1/4" and I needed only 3/4" final thickness). Well, as I started to plane the first board, I had to stop immediately because apparently they gave us silver maple (aka soft maple) instead of birch. I was pissed. I already have a fairly low opinion of this company, and this was just typical for them. This was NOT going to work. Maple vs birch have different grain, different colour, it was a no go. I messaged Devin, and he was also NOT happy about this (because he'd have to come back to get the wood and go back to return it. I had told him he'd have to exchange the wood since it was their screw up. He was worried they might not take it back since the wood was already cut, but the pieces were large enough that they could reuse them (40" is long enough for stair treads, which they make), and I told him it was not his problem to worry about. He was able to easily exchange the wood on Thu.
He has a spare key to my place (in case I get locked out), so he just dropped off the wood while I was at work (otherwise we'd have lost another full day since he works till 11pm). I was able to cut the boards on Thu night, and then install them on Fri so that we'd be able to sand on the weekend.
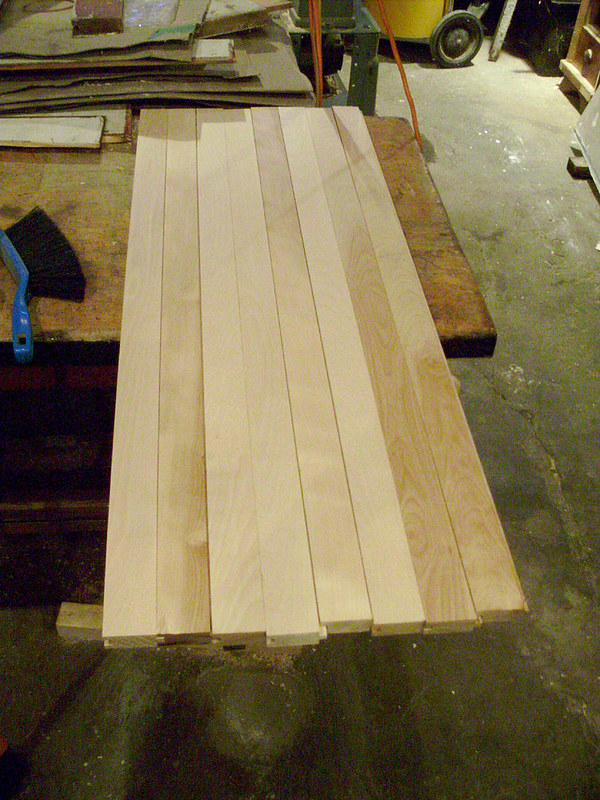
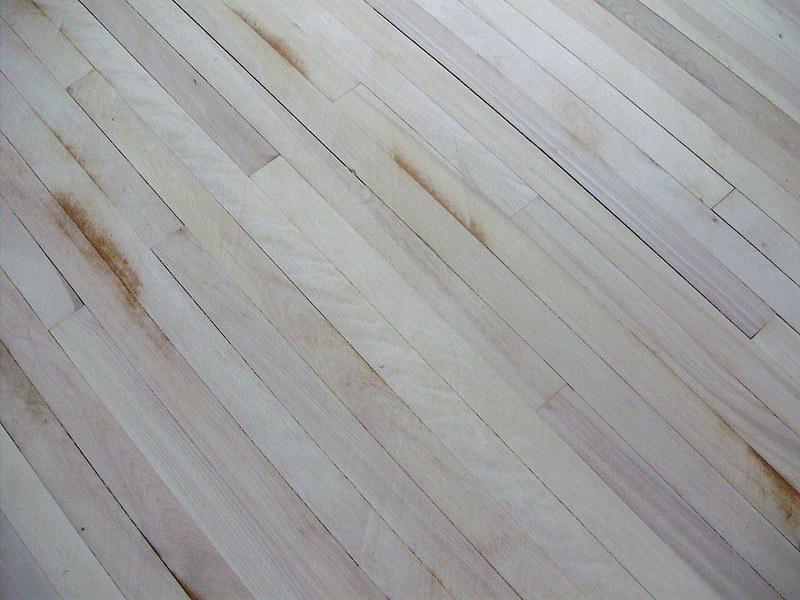
Custom milled tongue-and-groove floor boards:
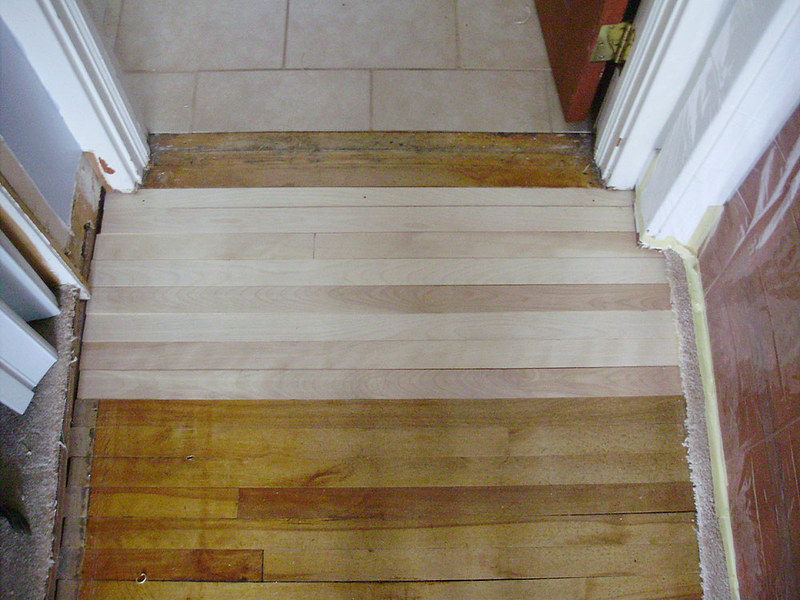
Installed. I had made the new boards JUST A HAIR wider than the old ones to make 100% sure that I wouldn't end up with a gap, but instead I ended up having to cut off about 1/2" from the last board.
So then came Saturday. Ughhh. So based on some internet research I had done (brief research, I should mention), and based on one post I had seen, a few people had suggested using the square/rectangular orbital sander to sand the floor. This seemed like a perfect option because the floor was pretty flat, HOWEVER, this was not the case. In my mind an orbital sander should have worked fine. Slower than a belt, but because of how it sands, you have little or no risk of gouging the floor.
We rented the rectangular orbital sander, with various grit papers, and started the rough sanding with 20 grit paper. If you're not familiar with sanding grits, the lower the number, the rougher it is. 150 to 180 is usually about the finish you want to sand down to when making furniture in hardwood or softwood, but for rough sanding, I generally use something like 80 grit or 100 grit (on tools like a belt sander). So with 20 grit, it's rough like an ASPHALT ROOF SHINGLE. With paper this rough, I thought it would sand pretty quickly. I expected the sander to carve deep scratchy swirls through the floor in no time.
Again, not the case. Learn from our mistakes here. We sanded with the 20 grit for about SIX HOURS (three of us - Dev, myself, and Devin's father) and it had barely taken down the varnish!
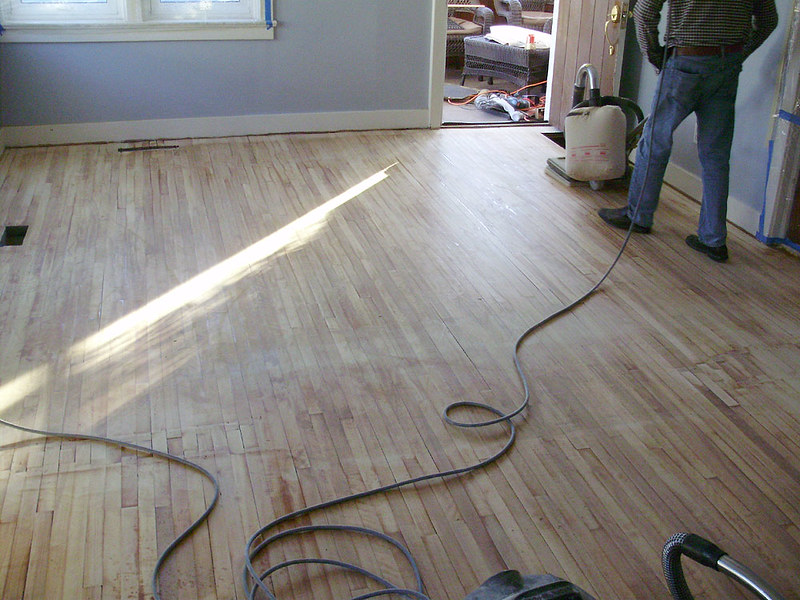

At this rate, we'd be sanding for DAYS. We gave up around 9pm. This was just NOT going to work. It sucked because we wasted the rental and the paper, and also an entire day. On Sunday we rented a belt sander (a smaller one than the 240Lb beast that they had used at the Victorian Farmhouse, see here: http://my1923foursquare.blogspot.ca/2017/01/victorian-farmhouse-part-21-refinished.html) and with the belt (and using 40 grit paper) we took down the wood to bare floor in just minutes. The belt sander is much harder to control, but it was so much faster, and we REALLY needed it to level-out the patched areas (which needed lots more sanding).
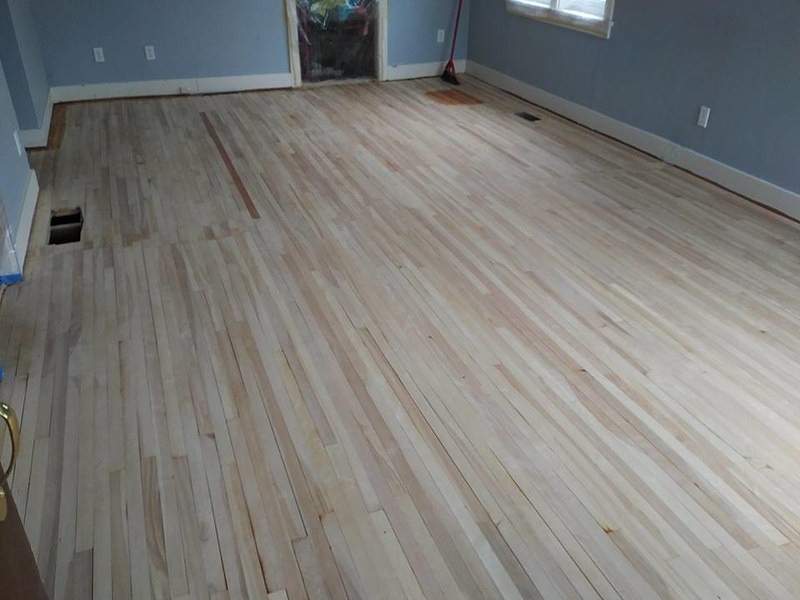
This was after maybe 40 minutes of work (Sunday May 28th around noon):
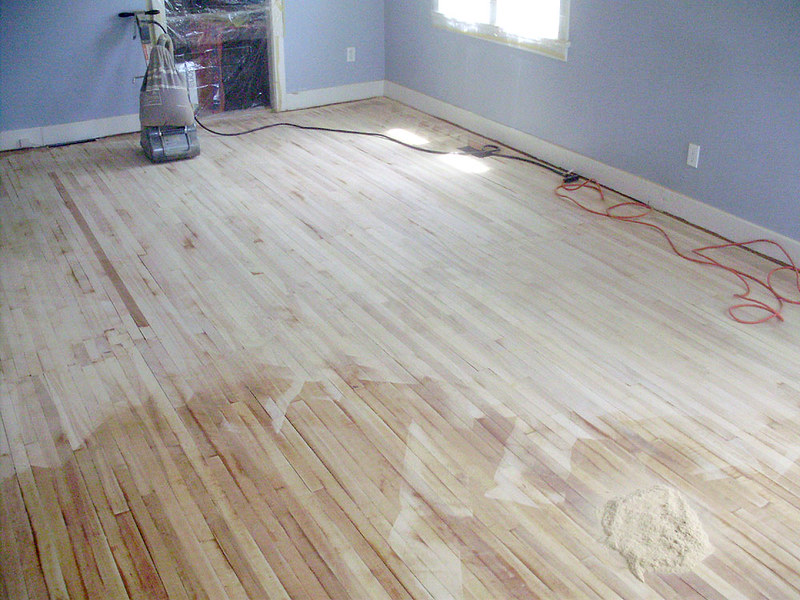
We took turns sanding, first at a 45, then with the grain. I think we did 40 grit, then 60, then 80? Or maybe only 40 and 80? They only had a few grits for this sander.
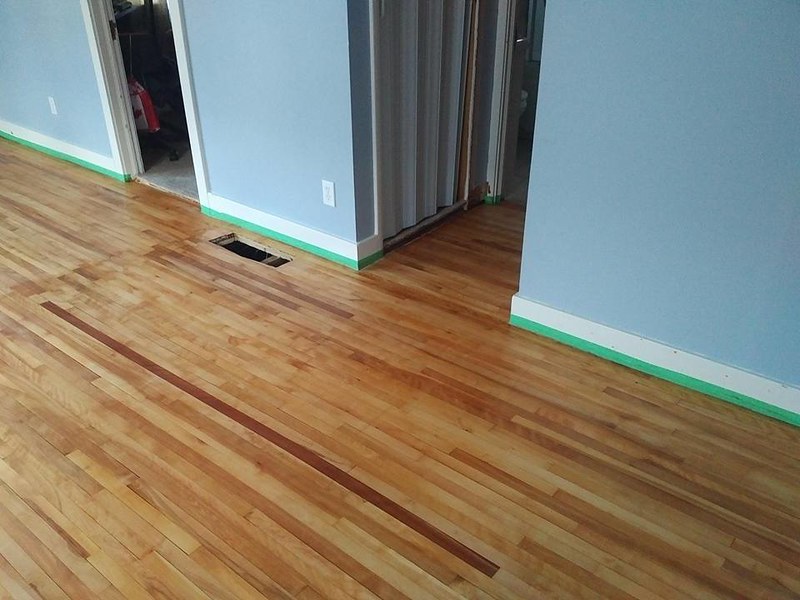
All the belt sanding done (edges left) and a sample of the stain in the top right corner. Devin and Gen wanted the floor to be close to the original colour it was (shellac) so we found a stain that was VERY close. Varathane Ultimate Wood Stain in the colour Golden Pecan.
Patched area:

The finished sanding with the belt was done with 80 grit (they didn't have a finer grit). I tried my best to smooth out as many bumps as possible, but there were still several of them. I used the hand held belt sander with 80 grit belts to fix most of the small divots and grooves near vents and corners. I used oblique lighting (with a lamp on the floor) for this. The edge sander was rented on Mon or Tue night and I did that alone (Dev was at work, and Gen is pregnant). It did not take very long, and the edge sander is fairly easy to use. They had lots of different grits for the edge sander, but I only used 40, 60, and 80 again.
The ideal would be to then use that first orbital (rectangular) sander and finish-sand the floor to remove any leftover bumps, but we left the floor at this stage (sanded up to 80 grit). Devin did all the staining and varnishing himself during the week (with Gen sleeping over at her in-laws' house away from the toxic fumes).
The floor turned out pretty good. I like the final colour. I haven't seen it in person yet, but I have photos from Devin & Gen.


That one darker board is actually cherry (not birch). It must have gotten mixed-in at the factory.
So yeah. This was a back-breaking and labour intensive job. Days of work. Sore for days afterwards. Yes it's much cheaper than hiring professionals, and you have a lot more control over finishing touches, like where we did patch/putty a bunch of gaps, nail holes, etc, and we sunk-in several nails that we missed while we sanded. A lot of floor refinishers won't bother to do these little extra things (like at the farmhouse).
HOWEVER, on the flip side, the roughly 1200$ to 2000$ that most flooring guys will charge is well worth the time and effort involved if you're not too physically fit, not too DIY savvy, or if you just don't want to deal with the overall stress and pressure of possibly messing-up and gouging the floor, then hiring people might be the better option for you.
For those who are curious, the breakdown was something like this:
- About 150$ for the useless rectangular sander rental + sand papers + pads (which would have been better for final sanding)
- About 150$ to rent the belt sander for the day (including sand paper)
- About 30$ for the edge sander for a few hours + papers (I think I used 4 discs total)
- 45$ in stain (two 20$ quart cans +tax)
- 180$ in varnish (two 80$ gallon cans for 3 coats +tax)
- 15$ for a package of 80 grit belts for the hand held belt sander
- Paint brushes or rollers, painter's tape and other supplies (about 20$ ish)
Total: About 400-600$ depending how many sanding sheets/pads you need, and whether or not you bother to rent the rectangular orbital sander. Prices are in Canadian dollars. The rental places will refund any unused sand paper sheets so just take a bunch and return what you don't use.
No comments:
Post a Comment