Sunday, December 27, 2015

A Small Tribute For A Great Client

I was saddened to hear not long ago that Dr. Traer Van Allan, my favourite client at Lefebvre's Upholstery, passed away in mid November at age 84. We've had steady business from him since I started, and I always loved working on his projects. One of the very first projects I ever saw in the shop was a blue striped chair that Pierre was working on (see blow).

He was a kind old fellow, and he loved antiques, history, and old homes. During our deliveries we briefly toured the better part of the three homes he owned in Morrisburg. The oldest, and nicest of which I talked about here: http://my1923foursquare.blogspot.ca/2013/07/amazing-house-tour.html. He had plans for this house to become a museum, but I have no idea if there were provisions or specific plans for this already in place.

Anyhow, since it doesn't appear that he had any children, and he is survived only by his sister and some cousins and friends, I thought it would be nice to compile a nice little list of the projects he helped save for future generations to enjoy. Some of these were a lot of work, and would have otherwise ended up in the landfill. Not all of his projects were documented. There are several dining chairs that we repaired (I couldn't find the photos), as well as a funky leopard print ottoman we did, and several other small repair jobs (painted exterior chairs, some rush seats, seat cushions, etc). There was also a large slipcover we did in white fabric for a daybed, along with about a dozen feather pillows in the red and white toile fabric.

The list of projects below show the majority of all the projects Pierre and I worked on for him between 2013 - 2015. I have no idea how many additional pieces Pierre worked on before I started working for him. All the links lead to the upholstery blog posts, and there are lots of additional photos there.

Blue Striped Victorian Chair:
http://lefebvreupholstery.blogspot.ca/2013/06/a-beautiful-early-victorian-chair-with.html


White Sofa:
http://lefebvreupholstery.blogspot.ca/2013/08/antique-loveseat-white-complete-overhaul.html

This was my first time taking apart such an old sofa. It still had all the original straw stuffing, and even the spring seat cushions (like a miniature mattress wrapped in cotton padding). As you will see from the other projects, Mr. Van Allan loved bright white cotton.


Coombe Wing Chair:
http://lefebvreupholstery.blogspot.ca/2013/08/coombe-wing-chair-white.html

This is one of the nicest chair frames we've worked on. When it comes to wing chairs, most of them all look very similar, but this one had really striking triangular wings, and beautiful carved legs. Several of the chairs we redid had gotten water damaged in a basement, and all the original upholstery was ripped off and thrown away.


Victorian Side Chair:
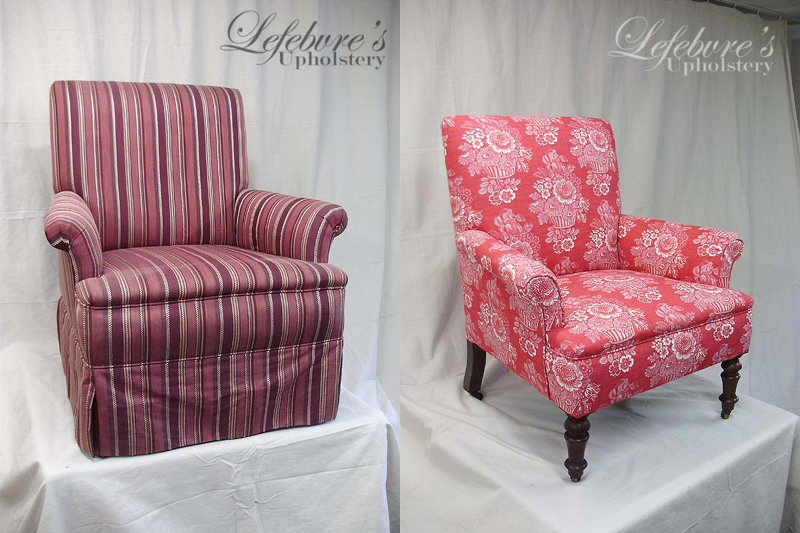
http://lefebvreupholstery.blogspot.ca/2013/08/victorian-side-chair-red-floral-toile.html

Out of all of his chairs, I think this one is my favourite. I absolutely love the red toile on it.

Blue Striped Fan Back Chair:
http://lefebvreupholstery.blogspot.ca/2013/09/fan-back-chair-blue-white-stripe.html


Hitchcock Chair (Repair):
http://lefebvreupholstery.blogspot.ca/2013/09/early-antique-stencilled-chair-repair.html


1962 Wing Chair:
http://lefebvreupholstery.blogspot.ca/2013/09/1962-wing-chair-white.html


Arm Chair / Sofa Chair:
http://lefebvreupholstery.blogspot.ca/2013/12/arm-chair-white.html


Ribbed Back Antique Chair:
http://lefebvreupholstery.blogspot.ca/2014/02/ribbed-back-antique-side-chair-white.html

Mr. Van Allan did not originally like this chair very much (he may have even called it an "ugly duckling" at one point), and he wasn't even sure what fabric he wanted for it. He told us to do the best we could with it, and just to use more of the white. We decided to get rid of the top-mounted piping, and fix the back stuffing back to how it was before. The final touch was a few tiny white buttons. He was very happy with how the chair turned out. We didn't change very much on it, but it made a big difference. It's a very elegant chair now.


Small Antique Wing Chair:
http://lefebvreupholstery.blogspot.ca/2014/02/small-antique-wing-chair-red-toile.html


Victorian Slipper Chair:
http://lefebvreupholstery.blogspot.ca/2014/02/antique-victorian-slipper-chair-red.html

This one looks like very little was done to it except new fabric, but it needed LOTS of frame restorations. It was completely taken apart and redone from scratch.


Antique Sofa:
http://lefebvreupholstery.blogspot.ca/2014/03/wonderful-antique-sofa-bold-orange-dark.html

I absolutely love this old sofa! It would have looked great in my living room against my light green walls.


Eastlake Settee:
http://lefebvreupholstery.blogspot.ca/2014/04/fully-restored-eastlake-settee-red-toile.html

By far the most dramatic transformation was this settee. Pierre spoke to Mr. Van Allan over the phone, and explained that it would need far more work than we had originally planned. He also mentioned that it would be unrecognizable when it was returned. I wasn't there for the delivery, but he was so happy that we were able to restore it that he dug out the matching chair (below).


Eastlake Chair:
http://lefebvreupholstery.blogspot.ca/2014/04/fully-restored-eastlake-chair-red-toile.html


This is a beautiful carved mahogany arm chair. We didn't reupholster it. I believe he just wanted a bit more padding on the arms. This is one of those other small side projects. I took a few photos since it was such a nice chair.


Cooper Sofa Chair:
http://lefebvreupholstery.blogspot.ca/2015/01/cooper-arm-chair-wing-chair-red-white.html


Headboard & Divider:
http://lefebvreupholstery.blogspot.ca/2015/01/headboard-room-divider-white.html


Vintage Sofa:
http://lefebvreupholstery.blogspot.ca/2015/02/vintage-sofa-simple-white.html


Hopefully these all find new homes, and good caretakers.

So long, Mr. Van Allan. You will be missed.

Wednesday, December 23, 2015

Best of the Web 2015!

I didn't do one of these last year, either because I wasn't sure who to feature, or I didn't have the spare time to put it all together. Although it won't show, this post is the result of multiple hours of work (I've been at it for at least 5 hours).

Here's a link to the Best of the Web 2013:
http://my1923foursquare.blogspot.ca/2013/01/best-of-web_11.html

I've found that a lot of the blogs that I follow have been much less active this year, or have become largely inactive. Some of these were favourites, like Brick City Love, who hasn't had a new post in over a year and a half. Others who had been previously featured are still active, but haven't updated very often (less than once a month). This is either because most of the renovations are done, or they simply don't have the time to post anymore. Others, like A Country Farmhouse (now under the name "In The Fields") are still active, but they have only been sharing a few occasional progress photos.

That said, you will see at least 3 returning favourites. In no particular order, the blogs featured here largely showcase the best and newest home renovation/restoration blogs that I've been following. I hope you will take the time to go have a look at them, and let them know I sent you!

Best of the Web 2015!

Manhattan Nest
http://manhattan-nest.com/


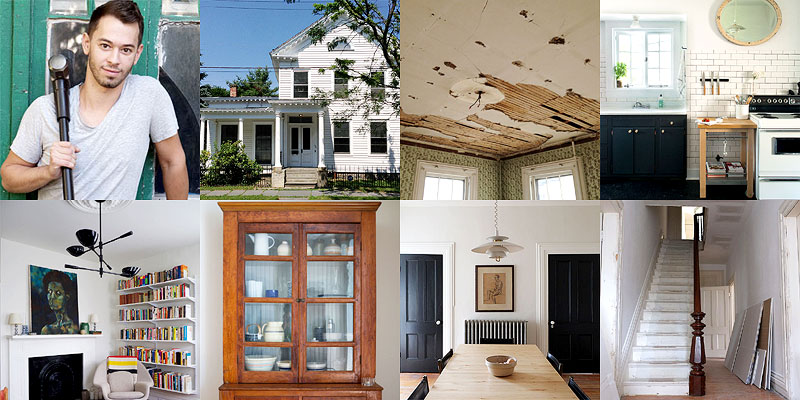
Manhattan Nest started off a few years back with Daniel and his partner Max. They purchased a large 1800s house in need of some serious renovations. In the past year or so, however, the couple parted ways, and the projects are now being tackled entirely by Daniel. I think it's fair to say that he has his work cut out for him, but that doesn't seem to have slowed his progress much. He's very passionate about proper restoration work, and he shares my love of beautiful old buildings, historic details, and he also has an eye for style. I may not share his love of midcentury modern, but all of his restorations so far have been done in a beautiful and sensitive manner, and for this he should be commended. Some of the projects tackled so far include the kitchen (restored/repainted cabinets, subway tile, vintage stove and light fixtures), the laundry room, upstairs office, the dining room, living room, the immense roof including rebuilding the built-in gutters, painting the shed, adding fencing, etc... If all this wasn't enough, Daniel also purchased a condemned house down the street, which he is restoring and either plans to sell or rent. He has also taken on a third large project, which is a cottage he is helping rebuild/renovate/redesign for clients/friends of his.


Old Town Home
http://www.oldtownhome.com/


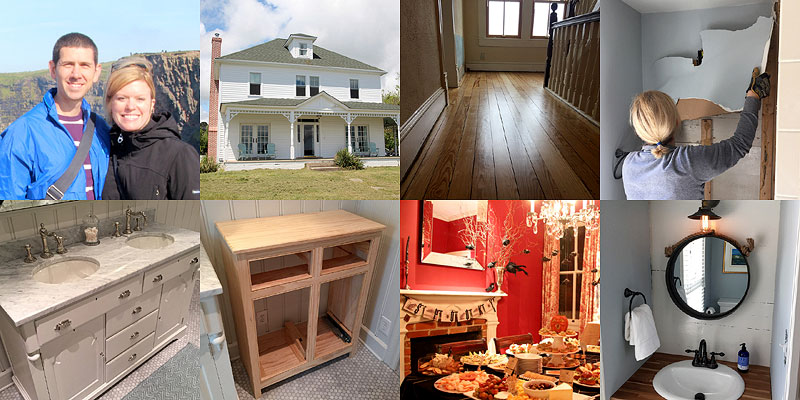
Old Town Home continues to be my favourite blog. Since I last gave them a shout-out, they have purchased a second home as a cottage get-away near the water. It is an early 1900s Foursquare similar to mine, but with a completely different layout. They have started many projects on this second home, while also continuing to work on their house in Alexandria. The new place hasn't entirely been without its problems, as last winter there was a problem with the heating and all the pipes in the house froze while Alex and Wendy were away. This setback meant replacing a lot of the pipes, and repairing water damage. The master bathroom in Alexandria is well on the way to being finished, and at the cottage, all the hardwood floors were just recently refinished, so I expect we will be seeing a lot of wonderful new projects this year!

Little Green Notebook
http://littlegreennotebook.blogspot.ca/


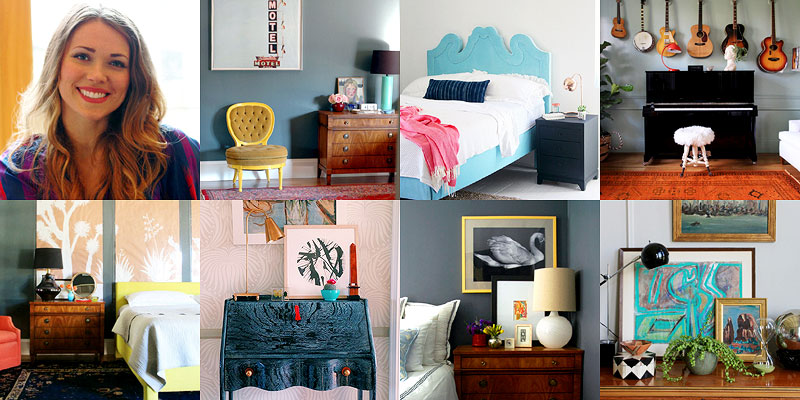
The Little Green Notebook is a blog that I've been following for a while. Jenny, who runs the blog is an interior designer, and she is also quite crafty. Several of her DIY projects are drool-worthy. One of the newest ones she posted that really drew my eye was her cérusé oak secretary desk. Another one of her simple DIY projects that I absolutely loved was her Roman Blinds with the ribbon edging. Aside from DIY projects, she also features great thrift store finds, painting and renovation tips, and gift ideas. This lady is not afraid of bold colours and accessories either.

Brooklyn Limestone
http://www.brooklynlimestone.com/


Brooklyn Limestone is another returning favourite. The photography is always fantastic, and Stefanie knows how to decorate for the holidays like no other! The Halloween and Christmas decor are always impressive. If you've never checked out her blog, she, her husband, and their daughter live in a wonderful New York Limestone townhouse with fabulous old mouldings, inlaid hardwood floors, and nice tall windows. Although their renovations are pretty much done, the blog is still regularly updated. Whether it's recipes, decorating ideas, or small DIY projects, there's always something new to see.

Big Old Houses
http://www.big-old-houses.com/


John Foreman is a wonderful old fellow who somehow manages to plan elaborate and thorough personal guided tours of some of the most grand and opulent homes you will ever see. No rooms are left unexplored, and the posts are almost always accompanied by historical information about the homes and their past owners. This is definitely the kind of blog you want to check out if you're the type of person (like me) who enjoys getting a peek into other people's homes, enjoy old/antique interiors, or are searching for historic ideas and inspiration for your own projects (such as original kitchens, bathrooms, and butler's pantries).

The Dusty Victorian
http://thedustyvictorian.blogspot.ca/


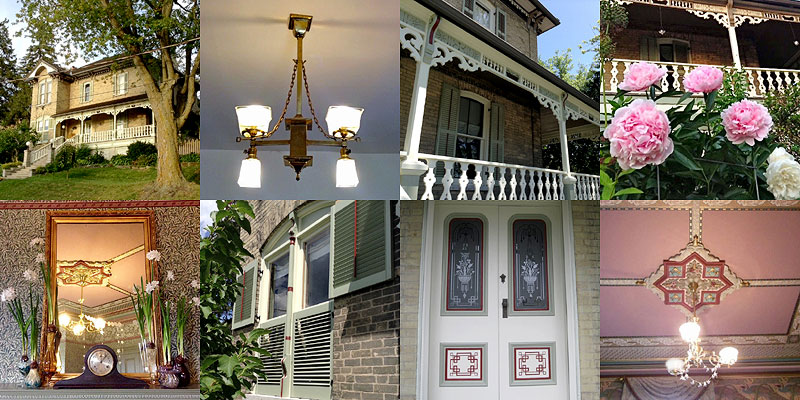
The Dusty Victorian had previously only received an honourable mention, but her blog has continued to be regularly updated, and work on the wonderful old house continues with vigour! Just recently the entire front porch went through an extensive restoration, which included replacing rotten boards, scraping paint, and painstakingly repainting all the gingerbread trim in multiple colours. Anyes also creates an annual Countess dress and head piece using flowers and foliage. Occasionally there are also versions made in paper or other materials, and they are always fascinating and beautiful!

Victoria Elizabeth Barnes
http://victoriaelizabethbarnes.com/


Lastly, we have Victoria's blog. Oh, how to describe her blog without simply calling her a delightful crazy person?! Seriously. With titles like: "Auctions– because you can never have too many giant, antique, fancy pieces of junk", how can you not love her? She has a knack for scoring enormous "giant fancy things" much to the dismay of her poor husband Paul, who is usually the one left to figure out how to get these unwieldy purchases home. I believe she has at least a dozen pieces of furniture (or 8 foot tall antique mirrors) that need at least 2-3 people to lift/move them. She is also hilarious! Despite her love of huge ornate furniture and gold, the house is beautifully decorated. It doesn't look like "grandma's house". You definitely need to go see her blog. Go. Go now!

Lastly, I have an honourable mention for Old House Dreams, which continues to be a wonderful source of inspiration.

I would love to hear about any new and interesting blogs that I may not have heard about.

Monday, December 14, 2015

DIY Scrap Leather Magnolia Wreath

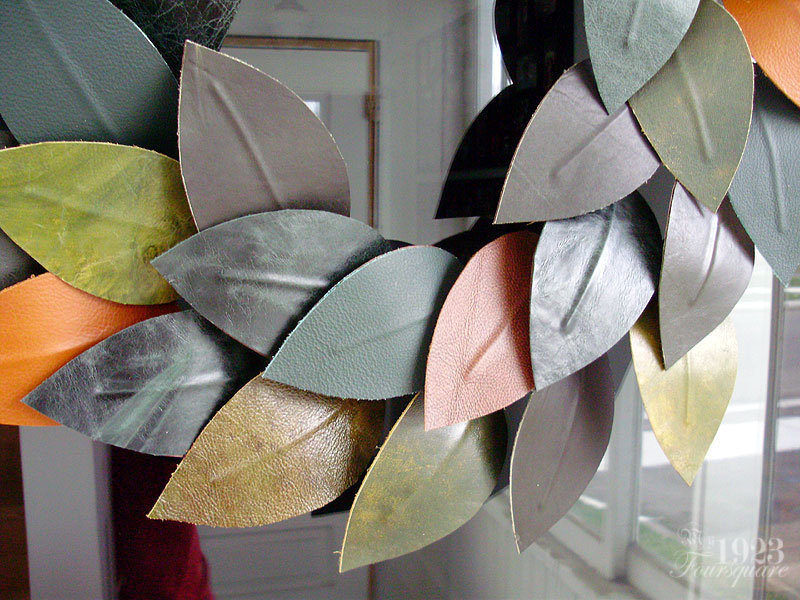
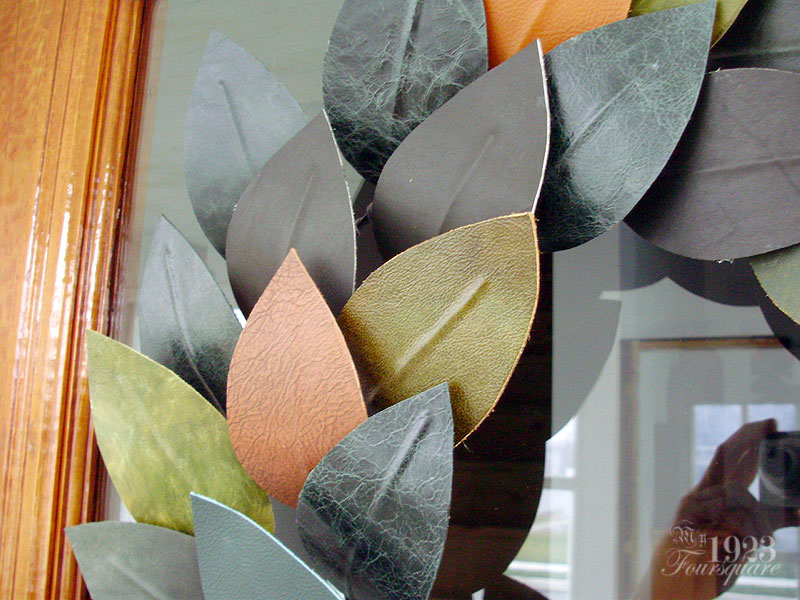
I've had this idea in my head for over a year now. I really love the look of fresh magnolia leaves in Christmas decorations. They just have a wonderful contrast of rust brown, and a fresh glossy green. I thought that this wreath idea would be a great way to use some of my large quantities of scrap leather (all off-cuts from upholstery projects given to me - literally a large black garbage bag full).


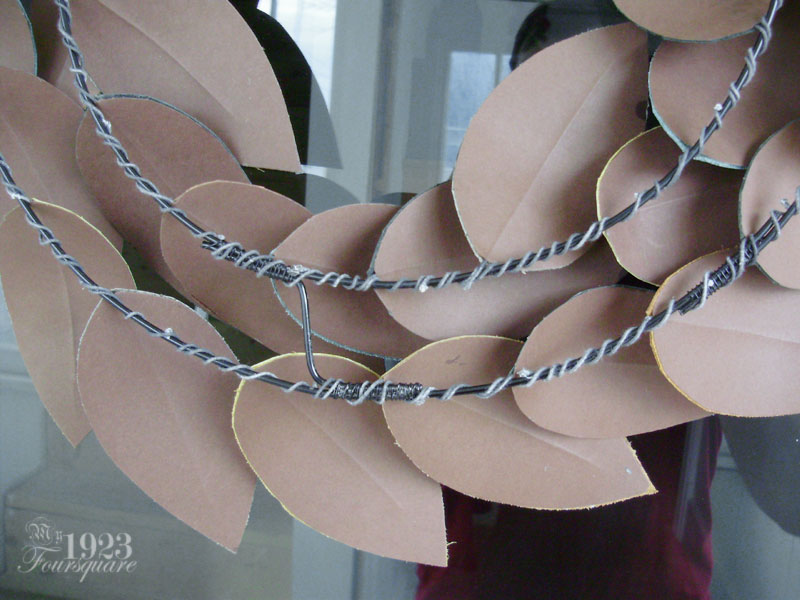
The wreath was quite easy to make, and there are a lot of ways you could customize the look. I chose to make all the leaves the same size (roughly) using a pattern. The leaves are made up of 3 pieces each. A leather front (shades of greens, browns, and a few flat black ones), a brown backing paper (cardstock), and a length of floral wire. They are glued together with contact cement, then trimmed into leaf shapes. I tried spray adhesive, but it wasn't strong enough of a glue bond.

I had a look at a number of real magnolia wreaths as inspiration. Here are two simple ones:


You can make the wreath with a lot more leaves, smaller leaves, or with a mix of different sizes. You can also keep them all the same colour, or use only green and brown. I've also seen wreaths with lots of different bows, with flowers (real or silk), and with a mix of other decorations (red berries for more of a Christmas look). Mine is pretty plain, so it can work as a Fall/Winter wreath as well.


The leather scraps that I used were in a pretty wide variety of shades, glosses, and textures.


I custom made the wreath frame (heavy wire, thin wire wrap on the joints, solder, and then black spray paint), but you can use a commercially available one, or even a foam one. The leaves are individually wrapped onto the frame, and then bent into gentle curves.

Saturday, November 07, 2015

A Comfy New Addition & Halloween

Wing Chair Project:

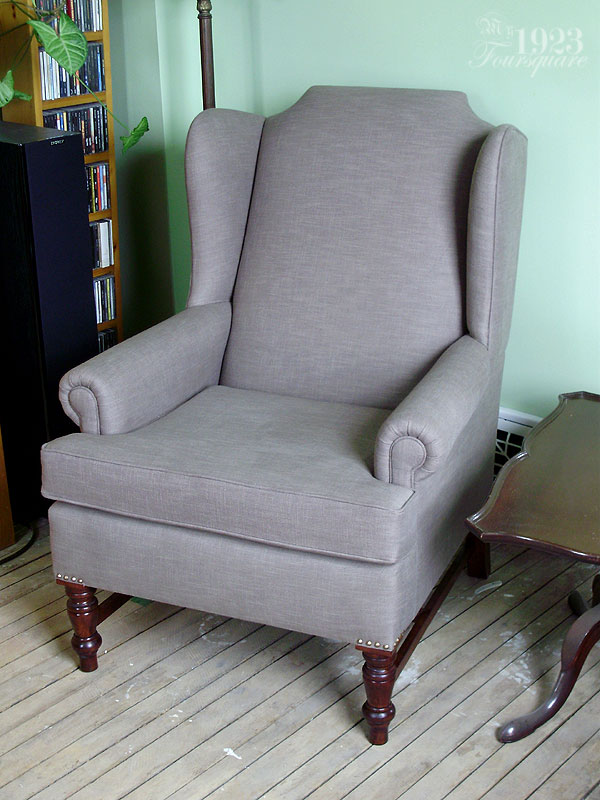
So the house has a new addition in the form of a piece of furniture. This is a wing chair I picked up at the curb down the road in May 2014. I have been on the lookout for a wing chair for a while, and I had spotted this one coming home from work. When I went to look at it, I noticed it had nice legs, so I brought it home.


Now, right off the bat, I knew I'd be changing the chair if I decided to keep it. I absolutely hate the back (La-Z-Boy style pillow back), and when I took a closer look at it, I discovered that the legs were just cheap plastic.


Ugh. At this point I wasn't sure if I should just put it back at the road, or try to save it. I decided to strip it down somewhat, and see if the frame on it was decent.

With just the back removed, the chair already looked a lot better. One other feature that I really liked on this chair was the lean on the back rest.


I decided that I'd make new legs, and make a few modifications to the frame. The frame on it was solid wood (mixed hardwoods) and it was fairly decent (far from the best, but it wasn't made with scrap wood or plywood).

The following 3 photos were some of my inspiration for the legs. I didn't want to do any complicated carvings or shaped Queen Anne style legs. Since I have a lathe, turned legs would be easiest option.


I decided very early on that if I was going to keep this chair, I wasn't going to spend much money on it. The new legs were made from scraps of cherry that I had on hand, and the chair was upholstered in a plain grey upholstery fabric that I had bought over 10 years ago for another project that never got done (the two previous sofa chairs I threw away when I redid the antique settee).

The new legs were done in a fairly simple, yet traditional style.


Since the legs on a chair are usually built right into the frame of the chair (for strength), these had to be tacked-on and held with large dowels and biscuits. Since the fastening method is a bit weaker, I decided to add stretcher bars in between. Normally, higher end and older chairs have these stretchers. I'm not really a fan of the stretchers, but they were needed for strength.

Also notice that the bottom curve was removed from the front rail, and a taller back centre board was added (I didn't like the flat back). I finished working on the frame and finishing the legs just about a month ago.


The chair was brought into the shop a few weeks ago, and I reupholstered it.


I changed all the foam on the chair. The arms had gotten too soft, the back was no longer the original pillow type, and the seat cushion was worn (and very cruddy).


The finished chair has nail-head detail around the legs. It's an extremely comfortable chair. Combined with the ottoman I did a while back (which matches the sofa cushions) it's just fantastic to sit in. I got the chair home just a few days ago.


I'm very happy with how it turned out. The fabric choice is a bit boring, but it works well in the room, and it was basically free. The chair does take up a fairly large amount of floor space in the small living room, so for now it's in this corner. It's hard to believe it's the same chair, and hopefully this gives you some ideas if you're thinking of having a piece of furniture redone. I often tell people that you're better off redoing an old sofa than buying a new one. Once it has new cushions, and fresh fabric, you're left with a beautiful piece that isn't shoddily thrown together like what you find today. Most of the newer frames I've worked on were garbage, and I'd say anything older than 1980s is good. This particular chair is probably 1990s, and just starting to drift into "modern junk" territory.


Halloween:

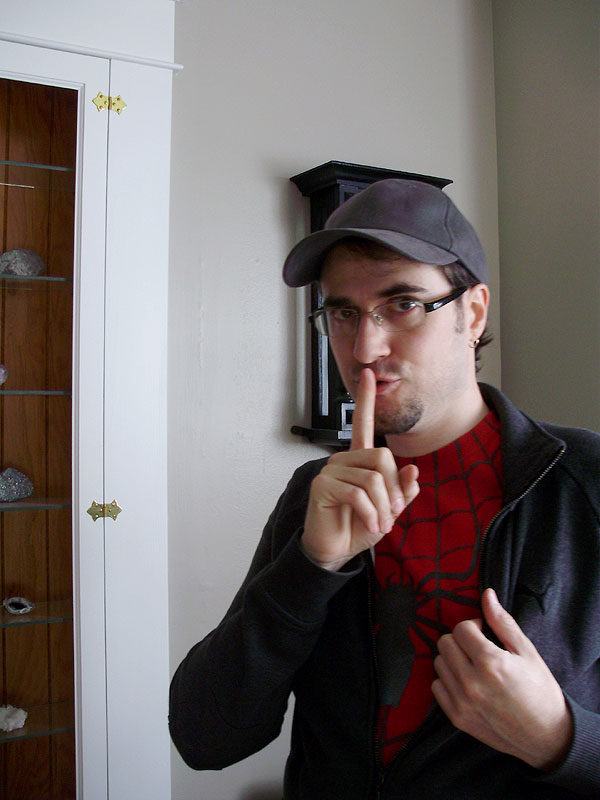
This year's costume was a cheapie. I'm pretty broke at the moment, so I only spent 5$ on this costume (the price of a plain red t-shirt from Wal-Mart). I went as Peter Parker, or "Spiderman in disguise".


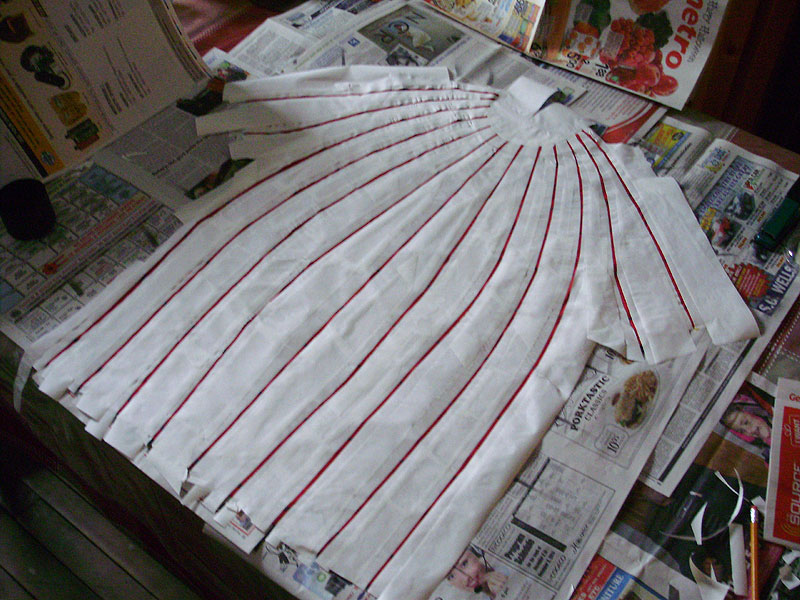
The shirt was done using some quick sketches, freezer paper, an iron, and spray paint. For those who don't know, freezer paper (the kind used by butchers and available at most grocery stores) is a fun way to make simple stencils. You simply cut out what you want, and iron it in place. The glossy side of the paper melts and sticks in place creating a perfect stencil for fabrics.

I started with the curved horizontal lines, which were an absolute pain in the ass to line up.


The verticals were much easier, but they were also made up of hundreds of pieces. Largely thin strips, followed by tons of little bits to fill-in all the gaps.


The spider was fun. It's a mirror image, so I just quickly sketched out one half, cut it, then stuck it down.


Despite several coats of black on the spider, it didn't completely hide the web lines. The shirt still turned out really well though. I mentioned to several people that I had made the shirt, but no one really took me seriously until they saw the "making of" photos on my Facebook page.


I'll conclude by saying that I had a record number of trick-or-treaters this year. I normally buy for roughly 40-50 kids, but this year I had enough for 50, and I ran out completely within an hour! I started to get kids at around 5:50pm, and by 6:30 I was completely out. I had to be gone for the party by 7pm, but normally if I'm home for the evening, I keep handing out candy until 7 or 8pm.