Showing posts with label Cabinets. Show all posts

Wednesday, January 11, 2017

Dining Room Ceiling Project Part 2 - Demolishing the Chimney Cabinet

I have several posts (8 of them) ready to share over the next few weeks, and I will try to space them out every few days so that you don't get everything all at once.

I will be going back and forth between posts relating to the dining room ceiling I'm restoring (in my house), and the Victorian farmhouse posts.

***

In order for me to be able to repair the dining room ceiling, I'm going to need to make a bunch of patches in the woodwork. Some of the damage was due to plumbing or heating vents, new electrical, and rot. I could make new boards to patch the missing ones, but the originals are alternating width tongue-and-groove boards in solid birch with beveled edges. I do have some router bits to make something nearly identical, but it would be very time consuming. Instead, I still have the existing chimney cupboard that is in the kitchen, which is made from the same boards. The plan is to eventually demolish and remove the entire cabinet and chimney, so for now, I just scavenged the exterior wood. This is how that went.

The first part to be removed was the wooden box covering the electrical wires that go up to the attic for all the upstairs electrical. This box had been made very sloppily from rough wooden boards.

PC200172

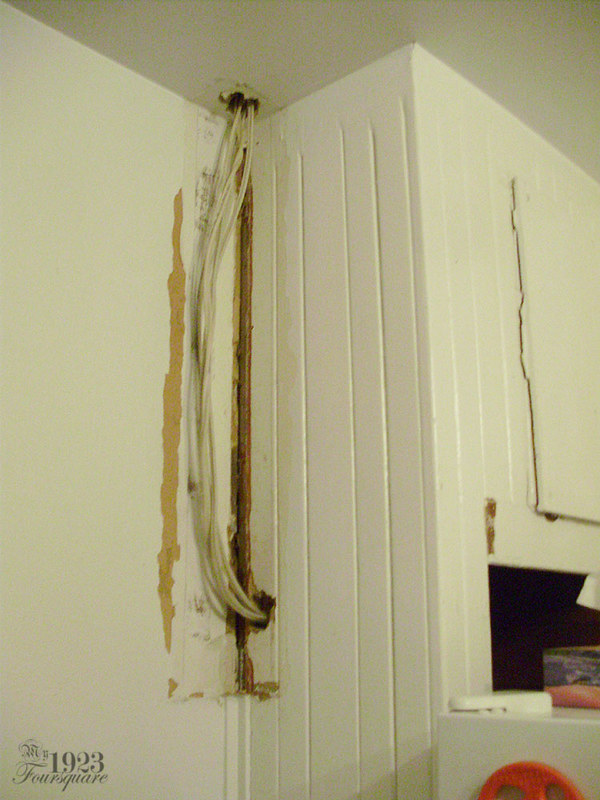
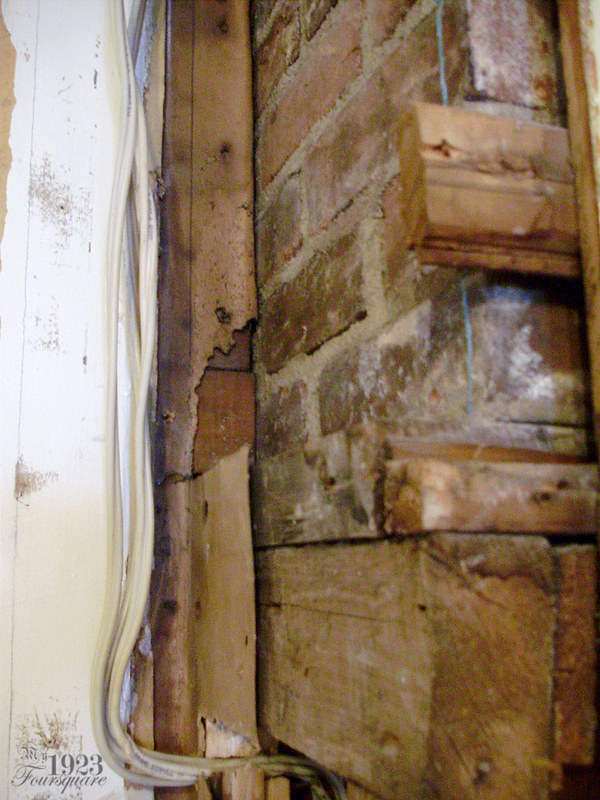
The next easiest board to remove was the long vertical corner board. It's at this point that I found out that this demo job was not going to be as easy as I thought. The cabinet appears to have been built BEFORE the ceiling tongue-and-groove boards were installed. This means that the boards go up into the ceiling about 6 inches, and they are nailed up at the top on a 2x6 or 2x8 beam that goes across the top of the chimney (where the floor is nailed around the chimney above). Because of this, there isn't a lot of room to wiggle the boards, or the lever the boards to free them from those upper nails.

PC200175

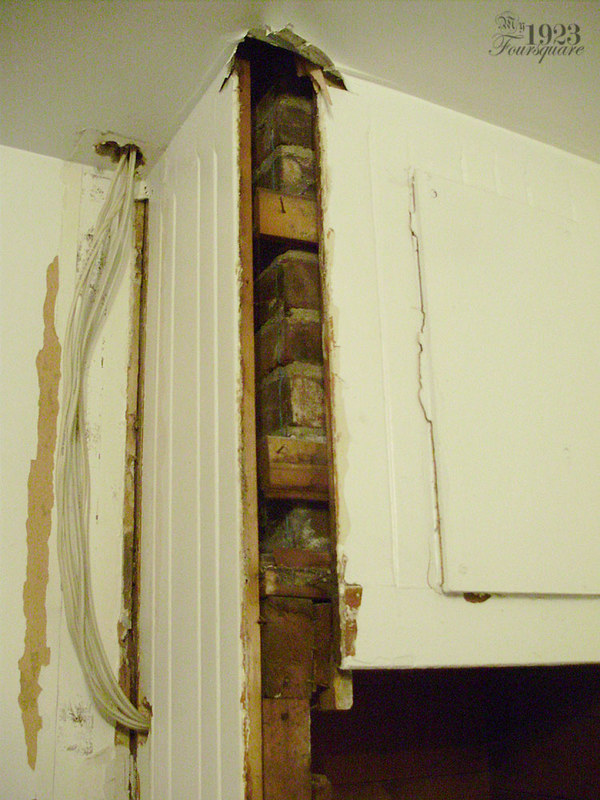
Eventually I was able to get the first few boards loose, and for the rest of them, I was able to slide a hacksaw into the gap and cut the upper nails.

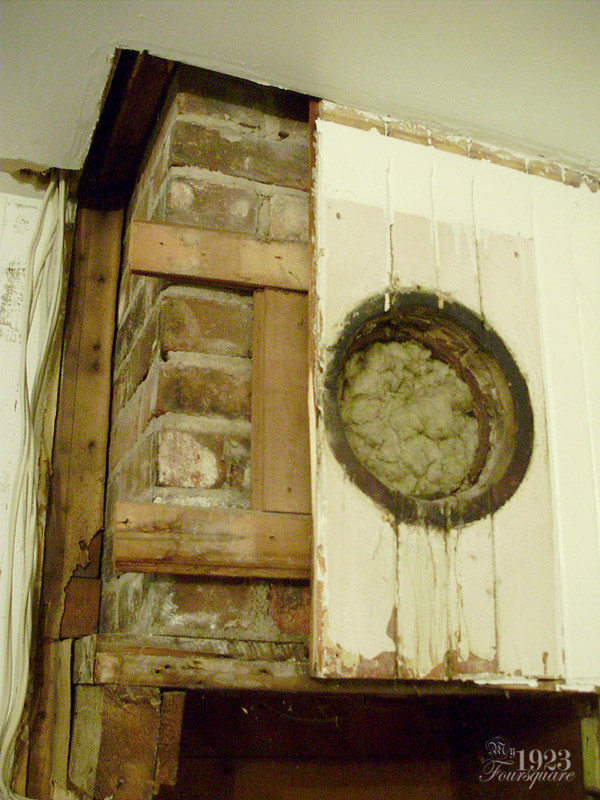
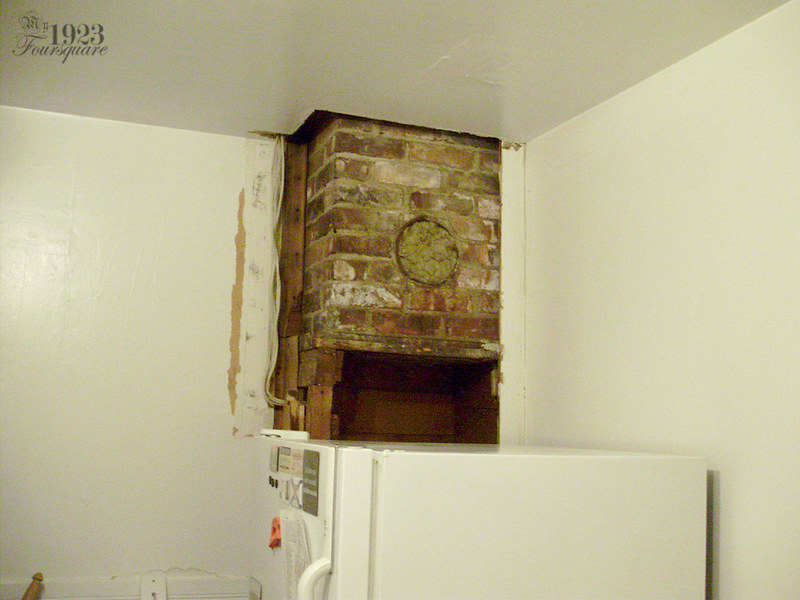
I didn't want to see the packed dead leaves and sooty debris in the chimney opening, so I stuffed the hole with insulation. You can start to see how the chimney cabinet was framed and assembled.

PC200179

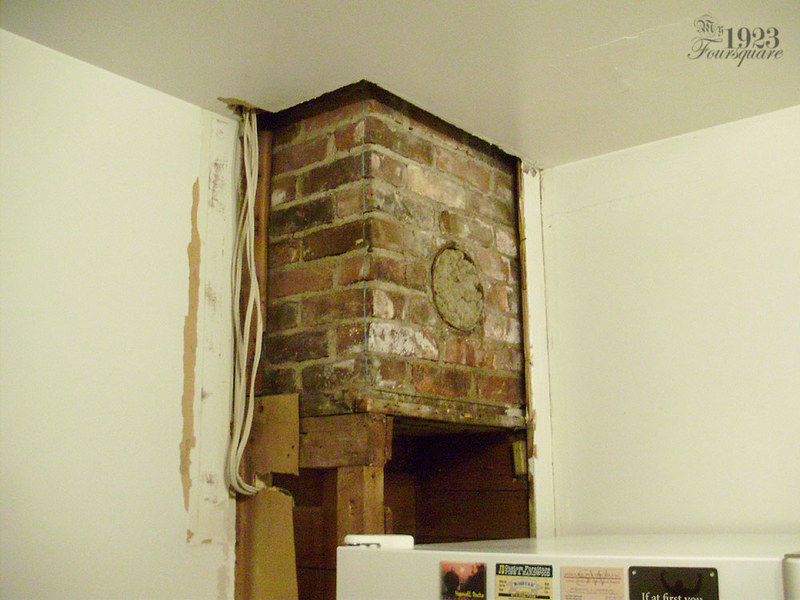
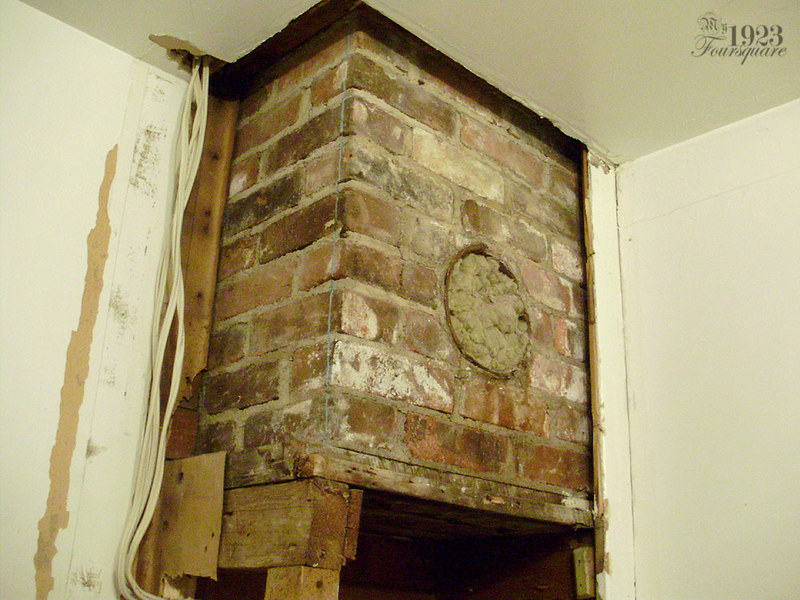
Long boards removed. You can also sort of see how the chimney is partially inset into the exterior wall. The chimney is 2 bricks deep (front to back), and 2 1/2 bricks wide on the front. In the photo you can see 1 1/2 bricks wide, with the other ~4" of brick within the outside wall. It's kind of an unusual setup. I assume that the chimney sits between two exterior studs, which have a 24" spacing between them. The framing for the cabinet is basically two rectangular frames that act as legs, plus a shelf on top.

PC210180

PC210182

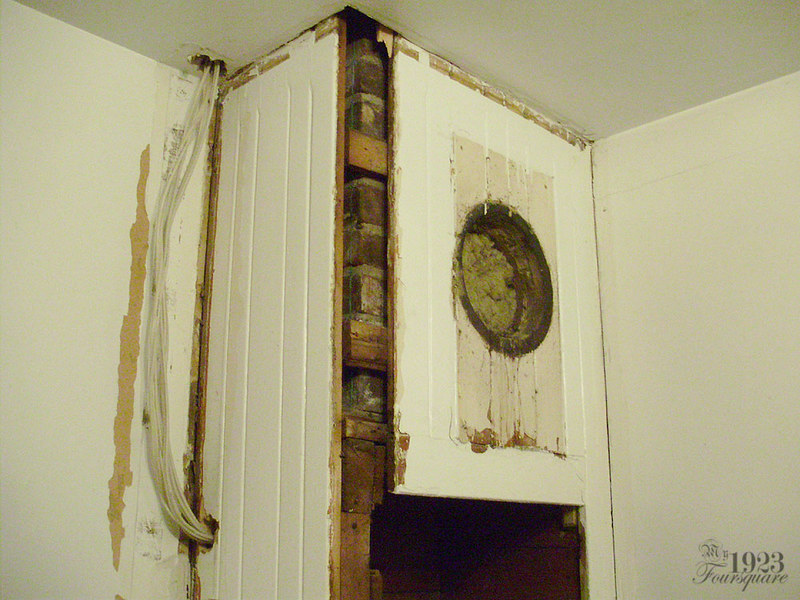
Front boards. There isn't a whole lot of wood to save on these pieces, but they will need to come out, and sometimes I only need a very small piece.

PC220185

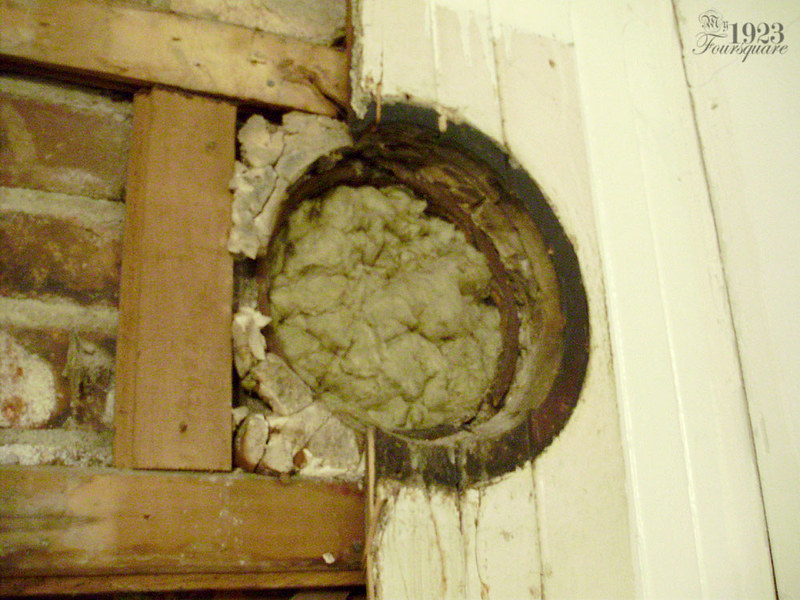
There was a 3/4" gap between the cabinet front and the metal ring in the chimney opening. It was filled with some kind of hard white putty. It almost looks like plaster of Paris, but plaster of Paris is usually pretty liquid when you mix it, and this looks like it was pushed in the gap in thick blobs.

PC220186

I ended up leaving that last board in place for now. Most of the edge on this side is no good because the groove was cut off to make a flat edge. It's also nailed all along the edge and the drywall is going to make it hard to remove for now.

PC220188

PC220190

The chimney lands flush with the interior centre wall (along the right side).

PC220192

Monday, June 15, 2015

Some Recent Woodworking Projects

About a month ago I did a set of cabinets for a client (a former boss) and I thought I would share a few of the photos here. This will give you a bit of an idea of the kind of quality pine furniture that I used to make at one of my old jobs (2002-2008). These are made of regular "common grade" pine, with the nicest boards used for the panels and doors, and the "less pretty" boards used for the shelves. The backs are store bought t-g. The cabinets were built in his shop, and I'll be able to eventually make my kitchen cabinets in pretty much the same way.

Laminating large panels (shelves in the corner unit):


The cabinets were 3 bookcases divided by 2 blanket boxes to span a wall with 2 windows. These are the three bookcase bodies:


Frame pieces for the blanket box fronts and doors:


A semi-complete blanket box:


This is how the units line up, with the large corner one off on the left.


Finished blanket box:


One of the bookcase cabinets with the door in place:


Corner units:


I don't have any good photos of the finished cabinets except for this one. As soon as I had them assembled, we brought them inside. The colour was matched to the original wood floors in the house.

Sunday, November 03, 2013

Amazing Firewood

Hmmm... how to start this post. I guess I should start at the beginning. My boss Pierre is good friends with a nearby antiques restorer, Enrique. Enrique has already given me an old shop vac, and he's been doing some major cleaning around his shop lately. In the midst of this cleanup, he's gotten rid of a lot of old scrap wood, and other "garbage".

I believe a lot of this old wood was burned at a get-together a few weeks ago, and it was Pierre who told Enrique to save a few pieces that I might be interested in, which were mainly a bunch of "old doors".

This was maybe a week ago, and I finally got to see them and take them home yesterday (Friday). In addition to the old doors was an old gilded frame, and just before coming, Enrique asked over the phone if I'd also want an old desk.

These were all going to be burned as fire wood. If this is what was thrown out, I can just imagine what he kept.

Most of the doors are quite large (nearly 4 feet tall), and most are over an inch thick. Most of them date to the 1800's, but a few may be old enough to be in the 1700's.

I quite liked this set. Enrique said they were nice, but too plain.


These look very, VERY old. Possibly early 1800's, definitely French Quebec, and likely from an old buffet/hutch.


These are probably the oldest ones, and possibly into the late 1700's. They have very rough carpentry (all hand planed, and hand carved). The back has a lot of rough tool marks. They are stained very dark, but I think they may be yellow pine?


Back panel detail:


This one is quite nice. It has sort of a Gothic or Arabesque arch, old blue paint, and the back is grain painted.


The back has the letters Y (or J) B.


This is the smallest, and roughest of the bunch. It has woodworm, rot, and some broken parts.


Here is the lovely gilded frame:


It needs work, but I should be able to cast/copy a good portion, and use it to duplicate the broken sections. What's nice about it is that there are 3 or 4 shades of gold used on the frame, and it's quite deep and elaborate.


The frame is quite large as well. Here you can see it propped up in the living room, and it's nearly the height of the love seat.


There was also this lovely inlay panel:


It seems to have been cut out from something, since all 4 edges are rough, and it's too thick to have been a door, so I'm not sure where it was taken from. It could potentially make a nice little table top.

It has some losses, and a rough surface, but I think it can be saved.


The show stopper, however, is the desk.

The desk will need a TON of work to restore, but it's a very interesting and lovely piece. It appears to be mostly walnut, so if you can use your imagination, it could be really gorgeous once it's done.

Here was just the empty base (which has completely fallen apart and is barely being held together by a few tiny wooden strips) right before I put it all back together:


And here's what I've got to work with. As-is, it's missing several major sections, such as the bottom skirt (toe-kick), the drop-down lid (writing surface), the left side lid support, and the right side slant (triangle piece).


The interior drawers have curly birch veneered fronts, and the original ring pulls.


I was glad to see that I have one of the two lid supports, because I have never seen any like these.


The left one is missing. Enrique said he might still have it somewhere, but I won't hold my breath.


The top is in very rough shape. There are several spills where the wood has swollen-up, and the finish is toast. I'm also wondering if it might have had a bookcase top, since there are shadows, and a track where there might have been a back board (it has been filled-in with a strip of pine).


Left side slant is cracked.


Both bottom sides are separated (the 2 boards that make-up the side came apart at the glue joint):


The right side also has a huge broken chunk at the front (bottom), which will need to be patched/repaired, and a broken chunk at the back, which won't show under the toe-kick (I may still patch it).


Missing right-side slant:


The 8 handles from the drawers are missing (matching ring pulls), and two of the 4 keyhole escutcheons are also missing. Luckily these are made of wood, and I should be able to copy them on my lathe.


All of the 10 drawers have hand-cut dovetails at the front AND backs.


Something interesting, and that I'll have to be very careful with, is the hand written calligraphy labels (on thin fragile paper) over some of the pigeon holes. They are in French, and have titles like:
Lettres privées (Private Letters)
Comptes (Accounts)
Lettres reçues (Received Letters)
Lettres envoyées (Sent Letters)
Reçus (Receipts)
Divers (Miscellaneous)
Certificats d'Arpentage (Survey Certificates)
Terres de la couronne (Crown Lands)
Rapports (Reports)
Bureau des Arpenteurs (Office of Surveyors)
etc.


I am not quite ready to work on this project, but I decided to at least clean it up a bit, so I removed all the worn-out and chewed-up felt, clean-off the dust, and you can also see in this photo that all the pigeon hole dividers are loose, and will need to be reglued.

I also removed the two later hinges, and you can see that the desk originally had 3 smaller hinges.


It should be a fun project, but I have other ones I want to finish first, like the grandfather clock.