Showing posts with label Cleaning. Show all posts

Monday, April 24, 2017

Spring Cleaning (and a bit of a rant)

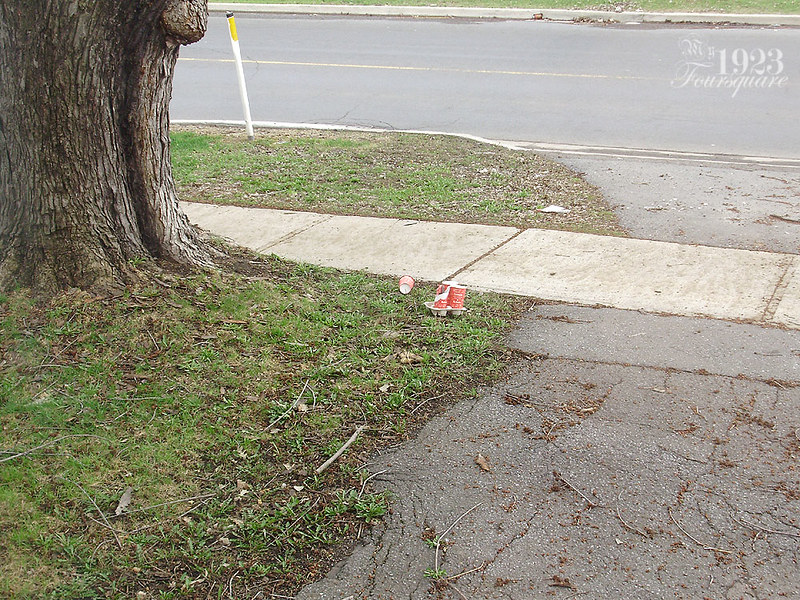
If you're the kind of person who dumps a bunch of trash on somebody's lawn...

P3120002

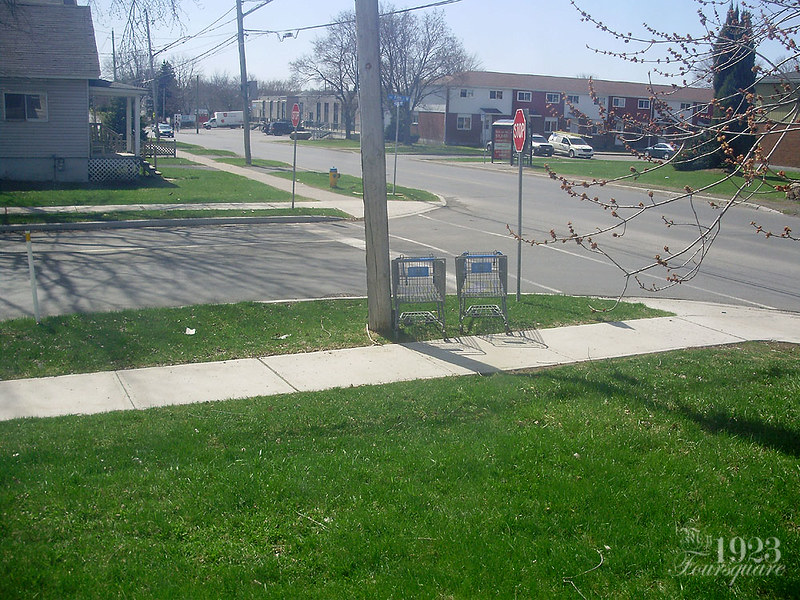
Or you're the kind of person who thinks it's totally fine to just take the shopping carts home with you and randomly ditch them somewhere...

P4120001

I have news for you: you are a GARBAGE human being! Seriously. What's wrong with people? Who does this?

As if I didn't have enough trash and dead branches to pick up in my yard. Anyhow, today I finally did a big post-winter yard cleanup. I picked up all the trash (cups, bits of plastic, water bottles, and various wrappers and papers), picked up 2 full trash cans full of dead branches (which I had been piling next to the house all through winter), and I also raked-up two full leaf bags of dead leaves, more bits of dead branches, dead grass, and bark chips.

By the time I was done, I was too exhausted to mow the lawn, but it will need to be done in the next few days. Half the lawn is barely an inch tall but the other side is already about 4 or 5 inches tall in some spots.

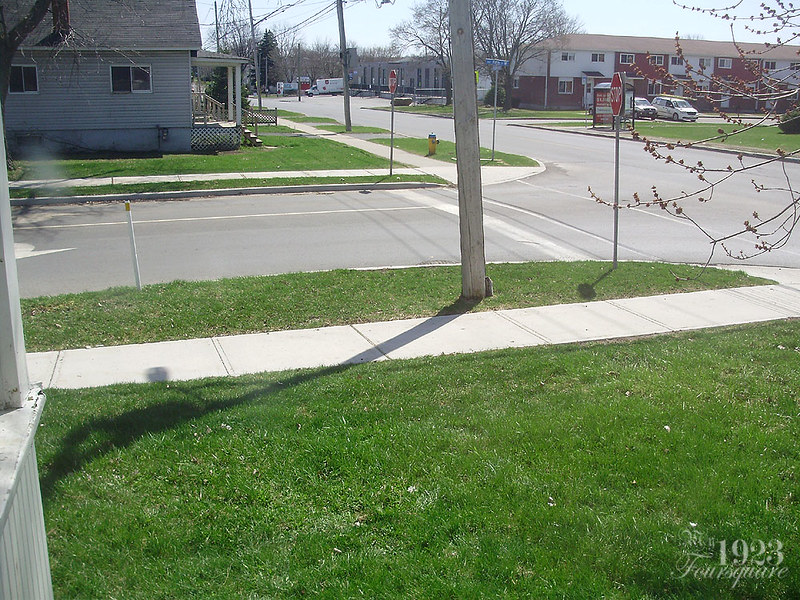
Luckily those 2 carts were picked up and I didn't even see them get scooped-up.

P4120002

P4120003

P4120004

Saturday, April 26, 2014

Garage & Upholstery

It's been quite a while since I've posted any upholstery "Projects of the Month", so I thought I would share these two pieces with you guys. These are both from the same set, and both were horribly butchered and just awful. They took a lot of work to restore, and the before vs the after is so shocking you'd swear they're not even the same pieces of furniture.

I won't be re-posting all the photos here, simply because there are over 120 photos and a lot of text, so I will just post a before and after of the chair to whet your appetites:

Chair Before:


Chair After!:


Here are the links to the chair, and the matching settee (the settee was done first, and you should see that piece first since there are details done on the settee that are not shown again for the chair).

http://lefebvreupholstery.blogspot.ca/2014/04/fully-restored-eastlake-settee-red-toile.html
http://lefebvreupholstery.blogspot.ca/2014/04/fully-restored-eastlake-chair-red-toile.html

I'm also not sure if I ever shared with you guys the beautiful antique sofa that we redid (also for the same client, who has a ton of antiques). I really loved how this one turned out, and there was a lot of work involved in that one (so many coils to string, plus some frame repairs):

http://lefebvreupholstery.blogspot.ca/2014/03/wonderful-antique-sofa-bold-orange-dark.html


In that post you get to see me and my boss, Pierre, covered in feathers after we had to redo the seat cushion. This is the finished sofa. I love the fabric, and it would have looked great in my living room.


***

As for house renovations, I'm currently working on repairing the 28 foot long exterior wall of the garage. For now, I'm just cleaning up, and making room to work. Some of you who have been reading for a while will remember that a good section of this wall (almost half of it) is completely rotted and almost ready to collapse. You can see how much of a sag there is in the roof in this photo from my bedroom window. Compare the roof line to the siding on the neighbour's house.


I actually measured the sag of the roof last night, and it's surprisingly not as bad as I had thought. The lowest dip (the part shown above) is about 2 inches low.

Just yesterday, I was able to finally get rid of the old washing machine that was in the basement washroom when I first bought the house in April 2010. I had wheeled-it up into the garage with a dolly, and it's been sitting there for the past 4 years. I wasn't sure if it worked, since I hadn't used it, but I knew the motor worked. I hated to just throw it away or have it scrapped, so I saw an ad for a local guy who picks up and sells used appliances. I contacted him and told him he could have it for free if he picked it up, so now it's finally gone!


I also bought a wonderful vintage Craftsman joiner on Thursday. I usually don't have much luck when it comes to nice old tools, because they are HEAVY, and difficult to move (remember that I don't own a vehicle). Since my Mom's latest car is now tiny (she went from a mini-van to a hatch-back to a small car) I'm pretty much on my own with these things now. Luckily for me, I took a chance and asked the seller if he'd be able to deliver it, and he was more than happy to drive it down (from just out of town) if I was interested in it. He even said I could plug it in and test it out, and that if I didn't want it, that it was okay as long as I'd help him load it back in his truck.

:D

So he came down and I was really happy with it (it's in excellent shape and works well - it just needs the blades to be sharpened), and the price was great.

I've wanted a joiner for a while now. I would have preferred something larger, but larger is just harder to move around, and I don't really need it to be much bigger.

It's a pretty small machine (maybe 3 feet long) but it's solid cast iron, and with the stand and motor, it probably weighs close to 100 lbs.


For those who aren't familiar with woodworking tools, this is a tool that is used to trim (and square-up) the rough edges of boards. It is extremely useful when you want nice flat square edges to glue several boards together. It can also be set to trim at an angle, and you can do fun stuff with it, like tapered legs.

More garage updates soon.

Monday, December 23, 2013

It's Christmas at the Foursquare!

It's that wonderful, yet sometimes stressful, time of year again at the Foursquare!

Lucky for me, I was relatively well prepared this year, and I didn't leave too many things up to the last minute. My annual dinner party with close friends was this past Saturday evening, and now most of the holiday stress for me is over.

To prepare for the party, I needed a few projects to get done: mainly the dining room chairs.

I had been pondering several fabric options over the past several months. I wanted something fun, but not too crazy. I wanted something that wasn't too light (because white or beige get dirty too quickly), and not too dark (since all the dining room furniture is dark mahogany), and I wasn't sure if I wanted a solid, a stripe, or a print.

At first, I was thinking of finding another fabric to closely match the current pink and lime green stripe, but this proved very difficult.

After that, I considered this fabric, which is a very nice quality, historic looking, and gives a rich look, but in the end, I thought it was just too busy.


As I was taking apart the chair seats, I also fell in love with the beautiful original damask fabric, which was a sort of indigo or periwinkle blue. Pierre and I flipped through several books, and we found 2 similar blue fabrics, but after taking them home, I found that both of them looked too dark, and with the dim and yellowish lighting of the dining room, the blue just looked like a drab grey.

In the end, I went with this lovely lime-ish green textured fabric. It was a remnant we had at the shop, and it was *JUST* large enough to do all my seat covers. Pierre was also nice enough to donate the fabric!

I got all the seats stripped, added a bit of new cotton (in addition to the original straw and old cotton historic padding) during my lunch breaks, and after work. I love how they turned out.


Before the seats were reattached, all the chairs were given a coat of the Howards Restore-A-Finish, which cleaned up a lot of the scratches and dings.


The next big project was setting up my Christmas tree. This is the fist time in many years that I actually have a full sized tree. Since 2003, I only once had a real tree, and all the other years I just went without one, or used my little mini tree that had been given to me by a coworker. This new tree is a nice pre-lit one that I had been eyeing for weeks last year, and after Christmas was over, it was drastically reduced and I think I bought it for only 60$.

The tree was still new in the box so it took about 1 1/2 hours just to set it up, and fluff all the 1200+ tips. I had thought I could have the tree in front of the larger window in the living room, but with the base of the tree at over 4 feet across, this just wasn't possible. I put it in the corner between the two windows, and moved the furniture around just a bit.

When it came to topping-off my tree, I had been wondering for a while what I should do. I'm not religious anymore (having grown up as a Roman Catholic), and I didn't want a star, or an angel, which leaves very few options. I had seen bows and ribbons before, but it wasn't until I saw this one on display at Sears, that I was confident it would look great.


I loved the ribbon on this display tree, and I asked the clerk if they sold these bows. After we looked around for quite a while, we turned up empty handed, but I spotted just the ribbon for sale, and I realized that someone had just thrown the bows together themselves! At only 6$ per spool (and 18 feet long each), I bought 2.

The bows were easy to make. All I did was I unravelled the entire 18ft roll, found the centre, and did a few looped rectangles. After that, it was just a matter of tying them in the centre with a stiff metal wire, and voila! The extra long tails were burned on the ends to keep them from fraying, and the tails were used to trail down the sides of the tree.

Here's my quick (crappy) sketch in Paint of the bow-making steps:


Super easy, and I couldn't be happier with the results! This design uses two bows, and leaves 4 long tails. I preferred the tails to gently trail vertically, but you can also place them in a spiral, though you may need longer ribbons, or additional lengths where you can tuck/hide the seams in the branches. I also liked that the display tree used two or three contrasting ribbons, but I chose to keep my tree a bit more simplistic.


I've also slowly fallen in love with the green living room paint colour. It suits Christmas decorating especially well.

I had thought that I might not have enough decorations to fill an entire tree, but as it turns out, my years of hoarding vintage and handmade ornaments has left me with enough ornaments to decorate at least 4 trees! For this tree, I just stuck with my favourite handmade ornaments, childhood favourites, and beautiful hand-painted glass ornaments (antiques). I also have a love of birds, and they remind me of my grandmother, who is no longer with us.

In this photo, you can see a lovely bird (one of three) with curled feathers, which I actually found at the dollar store several yeas ago. The cute little felt mouse in a Santa hat was handmade by my Mom.


In this one, you can see some of the apples and oranges, which are some of my favourite decorations (because they remind me of times gone by, where these simple fruits were difficult to obtain, and considered a real treat). You can also see two of the antique Christmas balls (next to the 3, and above the snow man).


The bear with the red bow was handmade by my Mom from "Plastic Canvas" which was incredibly popular back in the 1990s. The eyes are made with peppercorns. Above him is a hand blown glass bird ornament, hiding in the branches.


The bows, which each have 5 loops. They turned out even nicer than I had thought. I also love that the ribbon has a nice ribbed texture to it. It's not as easy to see in this photo, but you can see it clearly in the photo with the bears above.


And here is the tree in the evenings. I haven't bought a tree skirt yet, so the bottom looks a bit odd.


Also in the living room are two snow men carollers which were recently donated by my Mom, and my childhood Christmas stocking, which you can see farther below (in the photo of the pink roses).


While preparing the dining room, I also made an amazing, and exciting discovery (for me, at least!) I needed to swap-out the dining room table. As much as I love the Duncan Phyfe style mahogany table that goes with the set, it's 42" wide, and the dining room is quite narrow. It wouldn't be too bad if the sideboard wasn't as deep (it's around 21" deep), but with the existing table, it was difficult to push-out your chair without banging into the sideboard. My old table is only 36". It's not a huge difference, but every inch helps. What also didn't help the old table is that I still don't have the original leaves that go with it (that's a whole other long story, but basically they're still looking for them).

While I was wrapping-up and moving the old table top, I found this!


This is the ONLY label on the entire set, and I only spotted it by accident. If the table had been flipped the other way, I wouldn't have seen it. CFM is an amalgamation of several old furniture companies in the Toronto area. CFM started around 1901. Oddly enough, my 1880s grain-painted dresser is also made by one of the companies that eventually got grouped into CFM.

The dining room looked pretty festive this year. It will look even better once I paint the walls and refinish the floor, but that will get done eventually. Here you can see the current setup. I wanted to use the 8 matching mahogany chairs, but they were too wide to all fit under the table, so I used the two blonde ones.


I was also able to find a similar green table cloth to match the new chair seats. This table cloth is similar to my previous one, but the other one was much lighter.


I added yet another nutcracker to my collection: A snowboarder! I thought he looked neat (and different) plus he reminds me of a coworker from my previous job, who loved snowboarding.


In addition to oiling all the chairs, I also did all the furniture from the dining room set, which needed it. I also cleaned all the clocks with lemon oil, which smells wonderful.


This wreath was also donated by my Mom.


This is the first time I buy myself flowers for the house. I feel like the house is finally getting close to the point where I can bother to do this. These were inexpensive roses from the grocery store (5$ per bouquet of 5). I'm not crazy enough to spend 20$ for flowers.


A daytime shot (the day after). I'm not sure why the camera didn't focus quite clearly on the roses.


I bought a bouquet of red for the dining room, and a bouquet of pink for the living room.


The party itself went really well. I had 8 guests, with only one person who couldn't be here for the supper (he came after 9:30). The rest of us enjoyed a meal with the following:
- Caesar Salad
- French Onion Soup
- Boeuf Bourgignon with sides of mashed potatoes and green beans
- All served with French baguette, cheese, and red wine.

The beef turned out exquisite, and melt-in-your-mouth. The only issue was that the sauce/broth was much too liquidy since I didn't add enough flour. I was also very happy with how my French Onion Soup turned out. I had made it once before with ho-hum results, but this time it was just perfect.

Another pleasant surprise for me was the wine selection. I'm generally not a fan of wines. I've tried dozens so far, and for me, it's either love or hate. All the wines we had with the meal were awesome! The wine I used for the beef was Peller Estates Cabernet Sauvignon, which was good (90% of it got used in the cooking with just a bit left for drinking), then I had a friend who brought a large bottle of Tocornal Cabernet Sauvignon Shiraz from Chile, which was great! Then I also had a bottle of wine that my boss Pierre gave me, which is one of his home-bottled wines: La Réserve du Coq de Bruyère 2007, and that one was also very good. Potent, though. It needed to breathe, and my friend said it would have benefited from using an aerator (which I didn't have). The bottle still disappeared pretty quickly. On top of those, we also shared another blackberry wine cooler that I had on hand, and then we were out of wine, haha.

Overall, though, it was a great evening with friends.

Friday, December 21, 2012

Exhausted

As I mentioned earlier, I'm having a Christmas party for the very first time at the house. This isn't the first party I host here, but it's the first time I'll be having a more traditional sit-down meal type party.

That said, I've been cleaning the house from top to bottom for the past 2 days (mainly today). I'm nearly done, and some of the food for tomorrow is ready to go. I have a last minute shopping trip tomorrow morning, and cookies to bake, but everything should work out alright.

Here's the long list of what I did/cleaned so far:

- Dusting everything (yes, everything, piece by piece)
- WASHING all the painted floors (by hand, with a rag and pail, on my hands and knees)
- Washing/cleaning all the mouldings, baseboards, and windows sills (you wouldn't believe how much dust had settled over the doors and windows - no one would see this, but I wanted a THOROUGH cleaning)
- Washing the tub/shower
- Washing the bathroom tile floor
- Washing the sink in the "guest bedroom" upstairs (lots of scrubbing with Comet & Bar Keeper's Friend)
- Passing the vacuum in the guest bedroom and "L room" (unpainted floors)
- Washing the main staircase (OMG it was atrocious)
- Vacuuming the living room and dining room
- Washing everything in the kitchen (including the mouldings, cabinets, and the blue cupboard with everything on it), stove, fridge, etc.
- Washing the PC, keyboard, mouse, speakers, tower, monitor, and desk

I also re-potted and did "maintenance" on the bulk of my house plants yesterday. That was a huge job in itself (I have roughly 2 dozen), which took probably over 2 hours. This included replanting several of them, trimming-back roots, and planting a whole bunch of new cuttings that have been in water for months. I also took the time to WASH all the plants. The leaves on most of them were coated in dust.

This has been on my to-do list for probably around a year. Many of them were pot-bound, or getting straggly.

Left to do in the next hour (I'm on a break):

- Wash all the tile floors on the main floor (rag and pail)
- Wash the basement staircase (it's filthy)

So pretty much the entire house is now dust free (as much as it can be), and I'm 80% ready for my party. I still have the cookies to bake (as mentioned), and the serving dishes to wash (dinner plates, bowls, glasses, utensils).

That said, since the house will be so nice, and all the junk is put away, I'll probably be making a "walking house tour video". I've wanted to do one for a while. It's always much better to sense the scale and feel of a house through a video than through photos, and I won't be too ashamed of all the mess since it's all clean. You'll also be able to see the Christmas decorations since they're hard to photograph (because of the angles and where they are).

Friday, November 30, 2012

Spice Jars!

It seems like, for the first time in months, the house is not a total disaster. I mean, it's FAR from clean or organized, but since I finished the Gramophone cabinet, put it back together, and moved a few other things, I have so much extra space in the dining room and kitchen.

I badly need to sweep upstairs, since I did drywall a few weeks ago, the entire floor is coated in fine dust. The fact that I have glossy wood floors doesn't help. I ALSO need to clean the bath/shower. It's getting gross.

Otherwise, I have been a little bit productive around the house. I spent the last 2 days completely reorganizing my spices. Since I moved in, my spices have been disorganized and in 2-3 places. The main ones were literally all tossed in a cardboard box on the floor in the kitchen (I don't have any cabinet space to store them anywhere - YET), and most of the others were in my wooden spice cabinet. A few others were on a shelf next to the sink.

Yesterday I went to the Dollarama to see if they had any kind of decent spice jars (I wanted something fairly specific), and I came across the PERFECT ONES for my needs. They are a pretty decent size, and they can fit an entire "spice packet" of 150g (standard No Name and Wal-Mart type packets) and have easy to use screw-top lids in several colours, and the jar openings are large enough to fit a big soup spoon. I bought 20 of them, but I might want another 4 or 5. These would be a perfect fit in a cabinet drawer, and I will label the jar lids for easy and quick reference.

This is something that I've been wanting to do for YEARS after my aunt did something very similar (she always has such great ideas).

I went through ALL my stuff, and I combined several stray/forgotten duplicate bags, emptied dozens, and finally got rid of all the cheap, mismatched plastic spice jars. Now, the bulk of my most used spices are in the new glass jars, and all the others and refill packets are in the spice cabinet.

The only issue right now, is that I have no space for the new jars yet. I'll figure something out. I also need to make labels, but for now, the spices have loose tags inside, although I can tell what 99% of them are simply by looks or smell.