Showing posts with label Gramophone Cabinet. Show all posts

Tuesday, December 04, 2012

Office Ceiling Fixed!

I decided to finally go ahead and fix the original ceilings in the main parts of the house. I didn't want to completely demolish the kitchen cabinet just yet (since I'm reusing the wood from it to fix the ceiling), but I noticed that the door was quite long (at 6 feet), and I was able to remove it, save the hardware, and do most of the repairs with it.

Last night I completed the ceiling repair in the office. I was able to keep the boards from the door (for the patch) "together" just with the thick layers of paint. This is pretty amazing, considering that I also had to use a pry bar on the back to remove the wooden cleats.

The door and cabinet I'm talking about are seen here from this old photo. The cabinet is actually a support "stand" to hold the weight of the entire chimney. Above the door is the flue opening for a wood stove (I'm assuming that the original kitchen stove was an old wood or gas stove). The chimney seems to have served no other purpose, since there is only one original opening in it.


You can see the opening (jammed with decades of dead leaves) and the back cleats from the door in this photo:


To jog everyone's memory, this is how the ceiling looked when I got the house. Basically they had ripped out a few boards to run the new wire, and then slapped-on some new wood and painted it. It looked pretty bad.


For the past year, I've been living with this big hole. I removed the damaged boards, and redid the electrical box area, and I added the metal plates. This was done when I installed the antique lights.


The huge advantage of reusing this old wood is that it's a perfect match to the old ceiling, including dozens of coats of paint.

Here is the new patch, fitted, and installed. You can see the screw holes. I decided touse thin #6 screws on the ends, and 2 nails in the centre, to hold this patch. I didn't want to mess around with nails, in case they cracked the paint, or in case I would hit the electrical wire (which I was very careful to avoid, even though I also had metal plates over it).


Holes patches, and a bit of silicone added in the larger cracks:


Then this morning I sanded all the putty/filler, and slapped-on a coat of high-end primer. Looks pretty good except the end near the electrical box. I will probably try to sand this a bit, and add a bit of putty to get a better transition, but for now, it looks great. Can you tell which 3 boards are "new" (old replacements)?


Today I hope to do the living room ones the same.

***

Lastly, two random photos. One shows the refinished/repaired gramophone cabinet in it's new spot (dining room) PLEASE IGNORE ALL THE JUNK AND CRAP, and the second is an artsy shot of my longcase clock test stand, and a miniature ebonized Vienna clock.


The clocks (on the test stand) are all "works in progress" from a few years ago (before buying the house). The beautiful longcase clock movement on the left is eventually going to be cased in a handmade case in the style of a 1690s-1750 English longcase clock. The dial (rings) need to be silvered, the small seconds dial also needs to have the numbers etched, and the hands on it are cardboard templates, but will be hand-cut from steel (eventually). I actually made the entire dial from scratch except for the large chapter ring, which is a hand-engraved antique. The one next to it in the middle also needs work (and a similar dial/hands), but it is a great old movement that I picked up very inexpensively. I remade several parts for it, with a few left to go. Lastly, the one on the right is for a reproduction I'll be making, of a rare American clock. This movement is one that I made from a kit. It was literally in 100s of pieces, and each wheel had to be assembled (very accurately and carefully), and each piece had to be hand polished. I added the bell-strike feature, and made the parts for it (like the hammer and bell stand).

Tuesday, November 27, 2012

Gramophone Cabinet - Complete!

I'm very happy to report that this project is finally finished. I'll be leaving the doors open on it for a few days so that it can keep curing/drying out, but it's finished.

I think this is a wonderful piece of furniture. It was free, and I only spent about 25$ to refinish it, and replace the knobs. The knobs that were on it were mismatched and one (possibly both) was not original. I settled for two antique brass knobs from my stock of old hardware.

The cabinet will live in the corner of the dining room, since this seems like the best place in the house for it, but I might change my mind later on, depending what kind of dining room furniture I end up with. I kind of want an antique table, chairs, and either a sideboard or hutch. These can sometimes be had for very cheap at auctions.


You can BARELY even see my two repairs on the drop-down door. They're practically invisible, which makes me very happy.


Compare with the before photos:


BTW: Can you believe my father was just going to put this at the road? It wasn't in great shape, but it's such a wonderful cabinet! I'm so glad he asked me first. I would have been extremely upset with him.

Friday, November 23, 2012

2:00 AM

I realize it's very late, and I *am* headed to bed in a few minutes, but I thought I'd share my next project.

Earlier this afternoon, I worked some more on the office curtains, and I'm not at all happy with the results, so I am sorta abandoning that for now (until I decide how I want to fix it).

Instead, since I have the kitchen table all laid out for painting (ie: clean, with nothing on it), I've chosen to finally cross another long-awaited project that's been sitting around since summer 2011 off my to-do list.

CAN YOU GUESS WHICH ONE?

Yes? No? Maybe?

Here's a hint: It's a cabinet that's currently in pieces in the dining room.

Still not sure? It's the gramophone/radio cabinet that my Dad gave me. Remember this thing? Last time you guys saw it, it was literally "ready to varnish" and it's been that way since summer 2011. The only reason it never got done is because I hate this part of any cabinetmaking project - the finishing. Especially since I have to do it all entirely by hand. Like... with a paint brush. Yeah...


Well, since it's been sitting around SO FREAKIN' LONG, I've moved it around, it's COVERED in dust, and I set down a dirty paint brush on it while I was working on the crown. OOPS!

To remove the white paint out of the wood, I used my knowledge of chemistry (as far as household chemicals go - since I have a ton of them) to remove the latex paint. Generally, getting paint off of wood is not easy. The strongest chemical would be lacquer thinner (which will actually strip paint and varnish if you're not careful), but I didn't want to remove the layer of stain on the cabinet either. The second strongest choice would be acetone, but it, too, might screw up the stain. What I ended up choosing is simple alcohol. Here in Canada it's Methyl Hydrate (methyl alcohol - or ethanol extracted from wood), and in the USA, you would find it as "Denatured Alcohol".

Alcohol will easily melt latex paint (even fully cured paint that's been on your walls and fully dry for over 5 years - ASK ME HOW I KNOW). But it's gentle enough, and not quite compatible with the oil based stain, so it was the best choice.

Well that was overly lengthy for nothing. Now it's already 2:16...

Here's the paint splatter half removed (you can just barely see the dull outline of the "wet spot".


With the stain fully removed - even from deep in the wood grain, using a wire brush, I then put a very light coat of the same stain to blend it.

While I was at it (staining), I also had to stain the new back board for the cabinet. The old one was ok, but my Dad had made huge holes in it for wires when he was using it for stereo stuff, so I opted to replace it altogether.

Here are the parts being cleaned and readied for varnishing (new back under the fancy door):


And the new back stained (so that it can dry overnight). It's a hair lighter, but it won't be noticeable:


More soon!

Monday, July 25, 2011

Mouldings, and Cabinet Update

As promised, here are some photos of the most recent work on the house (the custom matched mouldings over the doors) and the gramophone cabinet.

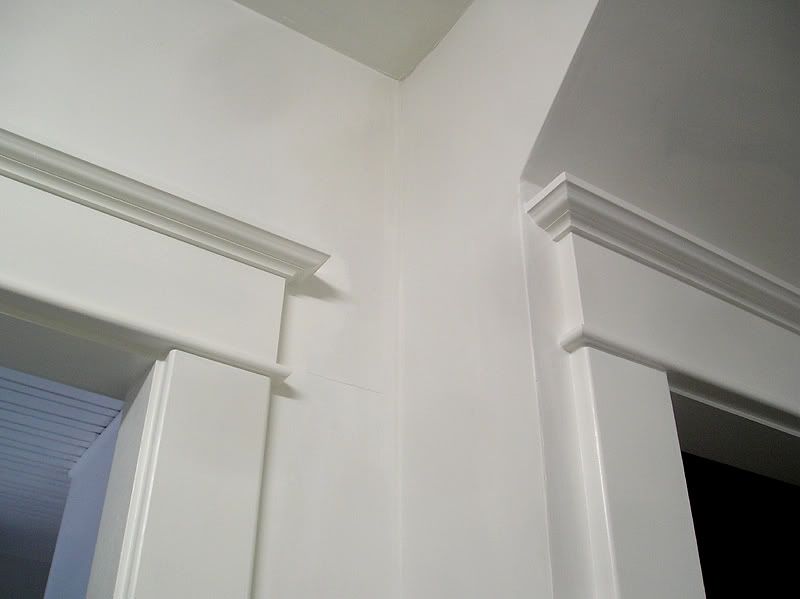
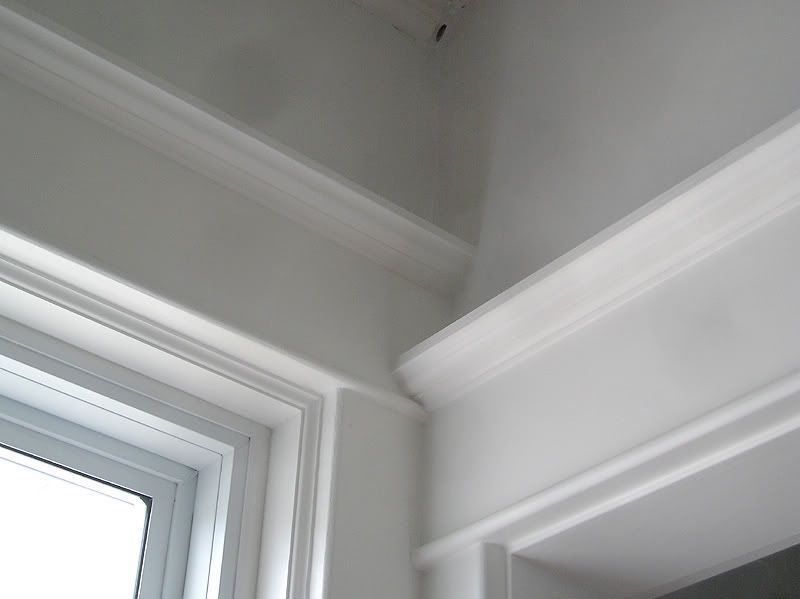
I'll start with the mouldings. As you may know, about 80% of the original mouldings were scrapped when this house was renovated over the years. I reused absolutely everything I could, but for the most part, a lot of the mouldings will simply be copies of the originals. Lucky for me, the bulk of the mouldings are all extremely simple, and the only tool I needed was a 1/4" round over bit on my router (and I already had the router and the bit). The side pieces of the door casings (originally done in Ash) are just simple 4 1/4" x 3/4 MDF with a round over on each side. The plinth blocks are 4 5/8" x 1 1/8" thick, and about 10" tall. These also have just a simple round over on most (but not all) the edges. The parting bead at the top is a simple 7/16" (I mis-measured this at 1/2" on many of them but it looks the same) piece of stock, 1 1/8" wide, with the same round over on both edges to make a full bead.

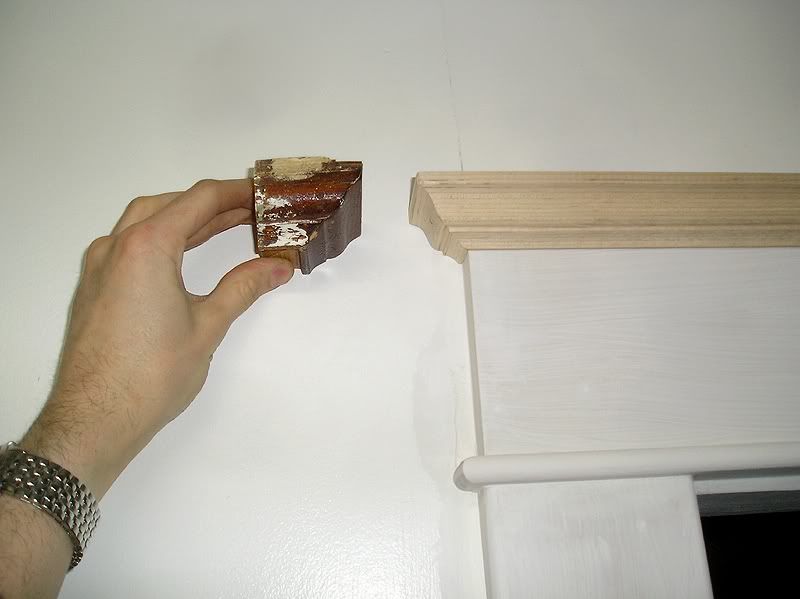
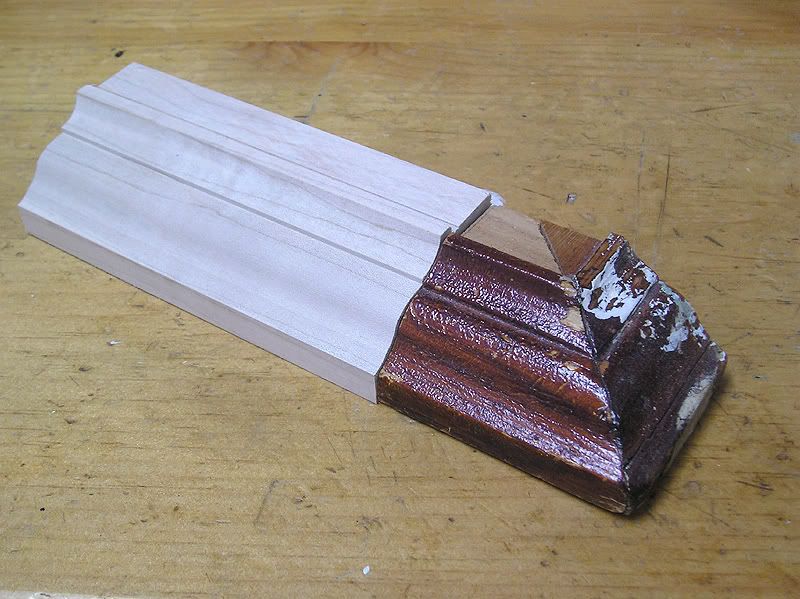
The only part that gave me trouble was the top door/window crowns. At work, we have literally hundreds of cutters, router bits, and various shaper blades that I was able to sift through, and we didn't have anything close enough to replicate the top cyma curve (http://www.pushpullbar.com/forums/attachment.php?attachmentid=59870&stc=1&d=1268044693). I puttered around with samples and I wasn't able to get the right curve. This was an early attempt:


But as you can see, it's too squashed.

It was only about 2-3 weeks ago that I ran across a smaple moulding in our rack of smples that I found a curved moulding with nearly the EXACT shape I wanted. I couldn't believe I had missed it. So I went through the cutters again, and I couldn't find it. It turned out to be just a large 1/2" shank router bit (which I could use on the shaper with the auto-feed (this makes cleaner, nicer cuts). In the end, I used that cyma curve along with one other round cutter (to make the bottom coved portion, and nibble-off the rounded tip), and I ended up with this:


PERFECT!

The mouldings needed to be 1 1/4" thick to work, so I was limited to only 3 wood choices at work: 6/4 soft maple, 8/4 poplar, and 6/4 knotty pine. I did not want pine because it's such a bloody pain to paint over, and it nicks easily. Not to mention the knots and sap. So I wanted Poplar, but since it's 2" thick, I'd be wasting a lot of material. I asked my boss's son (the one mainly in charge of pricing, etc) to get me a price for both to know which would be cheaper. I'm a bit cheesed off that he never got back to me (he knew I wanted to make the mouldings before my holidays) so I ended up just making them out of the maple. I know it will probably be more expensive, but from my own quick calculations, I figured that it couldn't be much more than 2$/foot, so I didn't care.

Long story short, I got the bulk of the mouldings made. I made 113 feet, and I think I needed 100 feet minimum, but I wanted spare, so I may need to make more later. I have a bunch of lengths that did not pass well through the cutter, and they're full of chips/splinters, so I may/may not be able to salvage them.

The mouldings took a lot longer to make than I had originally thought. In total, it took around 4 hours.

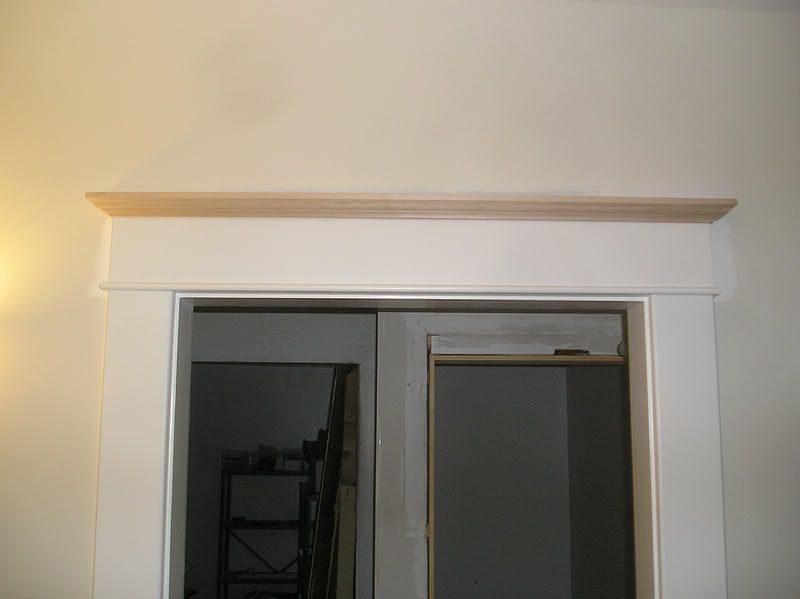
Here are some of the mouldings installed:

Doorway to the first floor office:


Bathroom door (interior):


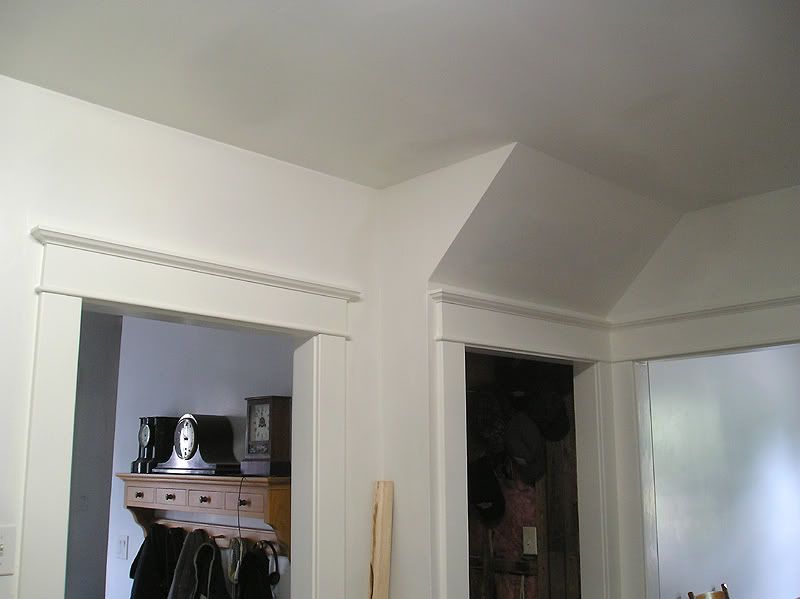
And here are a few more photos once they were all painted. I have a bunch done, but I still have quite a few left to do. These are just the first bunch.

Here are the ones in the kitchen:


Detail (I love how they catch the light):


This is in the office. This is the only place in the house where an original moulding (the one on the window) is nearly next to a copy (the one over the door on the right). Luckily, even *I* can hardly tell the difference, other than the fact that the original has double the amount of paint over it.


***

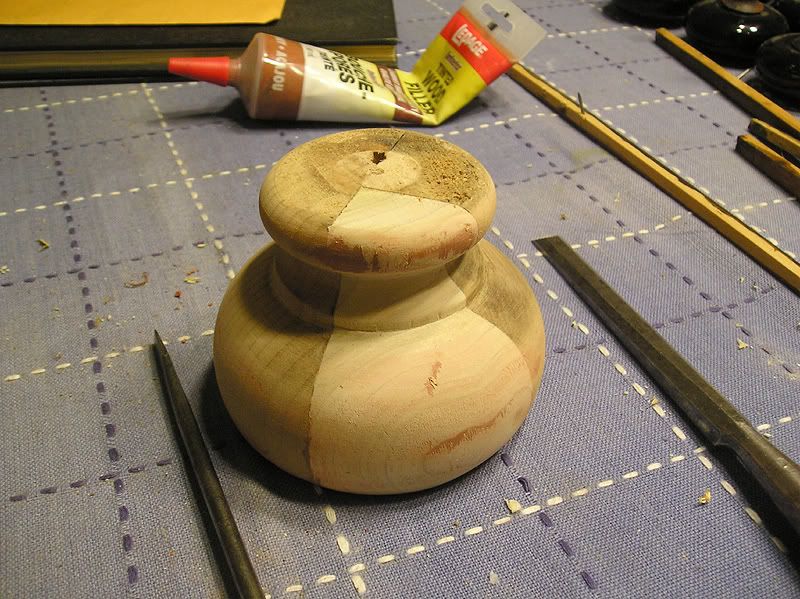
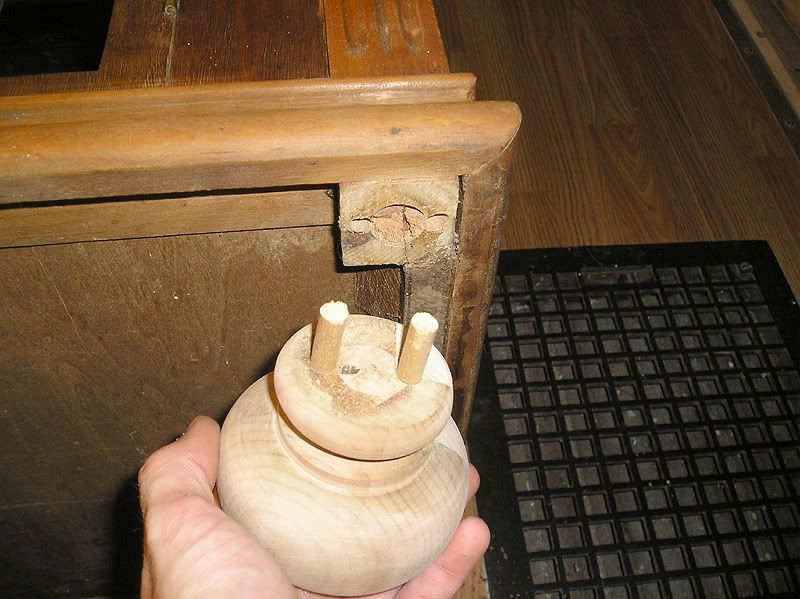
Here's the work done on the cabinet. The foot was a very tricky repair. I had to pretty much break it off, since the tenon holding the foot had a nail going through it. Add to this the fact that the foot is broken in half, AND missing a large chunk.

Step 1 was to clean up the surfaces to be glued, and cut a new blank to fill the missing area. Before gluing the 3 pieces together, I cut the bulk of the waste off the new blank. Once that was done, and glued, I mounted the foot onto the lathe, and carefully cut away the new portion, then re-sanded the whole foot, and did additional touch-up sanding and shaping by hand.

Finished foot:


Once that was done, I had to re-attach the foot. Since I no longer had a tenon, I had a few options. I could just use a large dowel and make a new tenon (this would have been the normal repair), but I still had a nail through the tenon hole, so that wasn't a good option. The second best method (since I had the room) was to use 2 smaller dowels. This worked out perfectly.


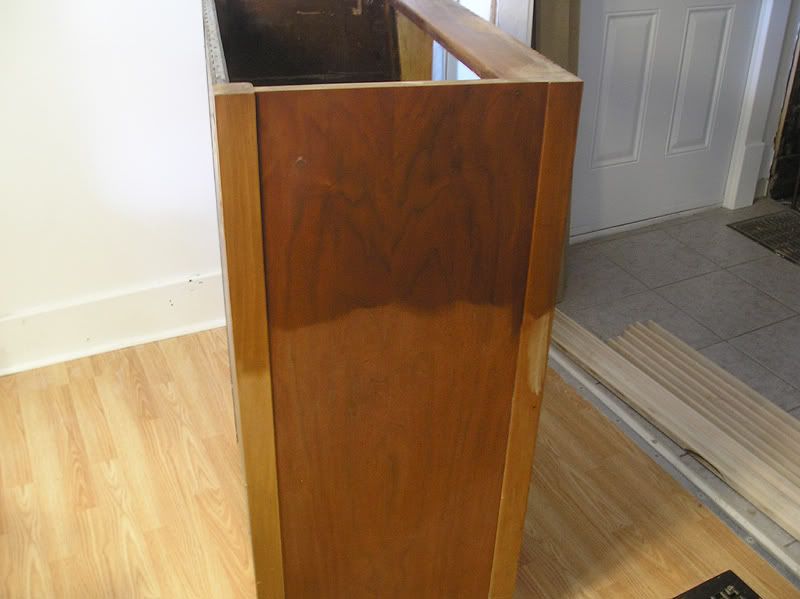
Once the rest of the repairs were done, I applied the first "base coat" of a light walnut stain. This helps to clean-up and blend-together any wood blemishes or light stains/fading. It also brings out the true beauty of the walnut veneer.


It looks pretty dramatic there, but the colour change was fairly subtle overall. I used Verathane gel stain in "Special Walnut".

Since the cabinet is made-up of several types of wood (Poplar, plywood, maple, and walnut veneers) some pieces are much lighter. This was commonly done (and is still done today) when using expensive woods. The main (large) sections are done in the "good" wood, and the other smaller parts are made of a cheaper (or stronger) wood, and then simply made to look like the "good" wood with either stains, tints, dyes, or even paints. In my case, I went over these secondary pieces with a "Dark Walnut" gel stain, and I applied it fairly thick. I tried several other dark stains that I had, but they were not deep enough. Generally, you don't want to apply too much stain, since it eventually gets too thick, gooey, or sticky, and you end up with a mess. You could also end up with adhesion issues with your varnish, but I should be ok.

Here's the fully stained cabinet. The only thing I might need to adjust, still, is that really light centre bar. For that, I'll apply more stain between my two layers of varnish.

Wednesday, July 20, 2011

Awesome Freebie!

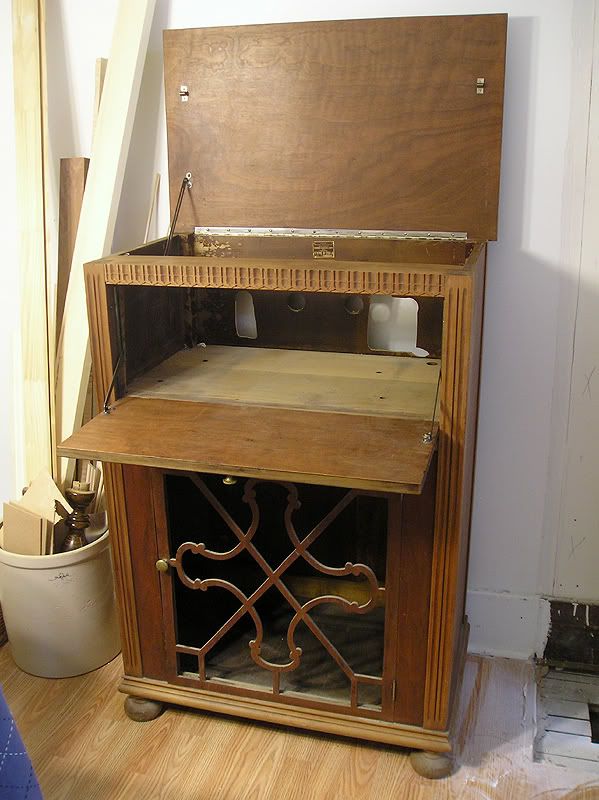
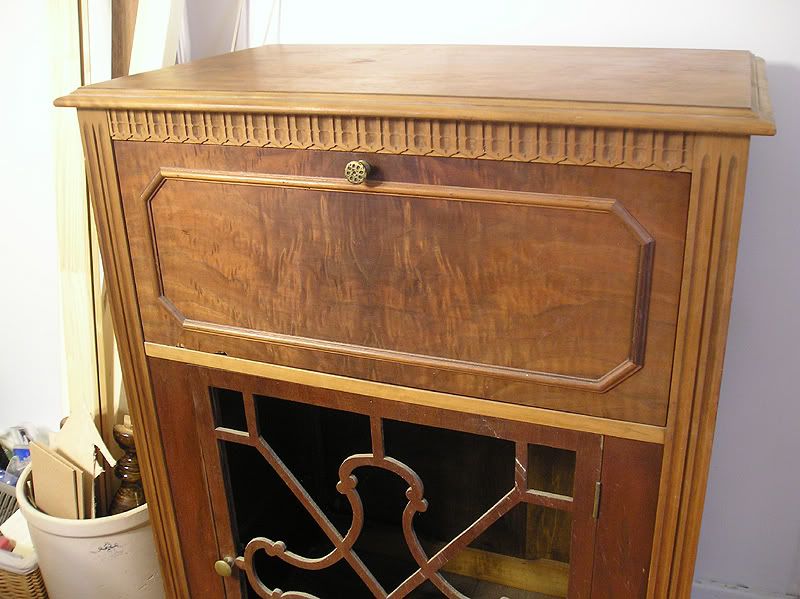
My dad has recently been doing a major clean-up in the basement at the house (where I grew up), and he's thrown out all kinds of old junk, donated some items, and among some of the stuff he was getting rid of was this wonderful old gramophone cabinet. He was going to just put it at the road! But at least he thought of asking me before, or I would have been pissed.


This poor cabinet has been sitting in the basement in a corner (buried in piles of junk) for as long as I can remember. Dad says it used to be a gramophone cabinet, but the label inside says "Standard Radio Mfg. Co. (Toronto Canada) Type R-200-A" with patent dates from 1916-24, so I'm not sure. I searched Google, but I can't find ANY pictures or info on any other cabinets, radio cabinets, gramophone cabinets, or record players by this company. The only thing I DID find was that it was indeed a company in Toronto, but that's about it. The "Type R-200-A" doesn't turn up any results either, and there's no patent number (it only says 'patented', and has dates listed).

Either way, I love it, and it was FREE. Another perk is that it fits in PERFECTLY with the time period that my house was built. It does, however, have several small problems (most of which are not visible in the 3 photos). One is that the fretwork door is completely delaminated (that's cabinetmaker-speak for unglued) everywhere, and it's all cupped and warped. The second issue is that the bottom right bun foot is missing 1/4 of it (there's a large chunk broken off and now missing). The last problem, and this one is kind of a blessing, is that the cabinet is completely stripped. So I'll need to stain it (lightly on the main body, and more heavily on the lighter woods to blend everything nicely).

The top portion opens two ways, but more than likely I'll have stuff on top (like a clock, lamp, photos, etc) so it's nice that the front drops down. The bottom space with the fretwork door has spots for 2 removable shelves (which of course are missing). I love the burled walnut panel, and the Gothic inspired moulding.


As of this evening, the door has been repaired. I scraped off all the old glue (and re-repair glue) and reglued the frame to the front panel. I also puttied some holes and chips in the case, and glued a new chunk of wood onto the bun foot to fix it (I'll need to either try to turn it on the lathe or hand carve it to shape).