Tuesday, July 26, 2011

Bathroom Reno (Part 1)

Alright, since the bathroom renovation spanned over a year (and is still not done yet) I'll just summarize what went on, and post as many photos to go with it as possible.

The first messy job was to gut the room. There was nothing at all in the room that I wanted to save. In the end, the only things that survived were the window, and the shower head.

The tile installation was so shoddily done, that a few whacks with a hammer made the tiles shatter and bounce off the subfloor.

Photobucket

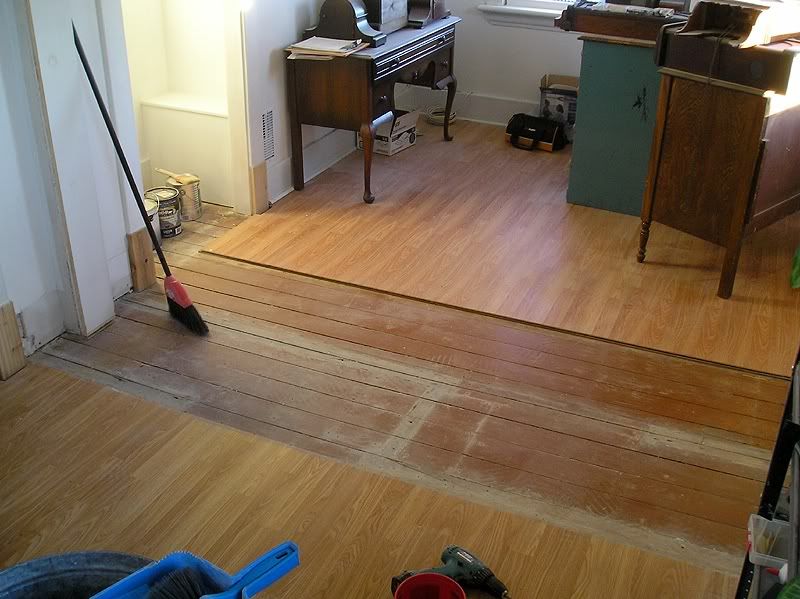
The sub floor turned out to be a layer of 1/4" plywood screwed (randomly everywhere) over another layer of 1/4" which was nailed in place with spiral nails (like the rest of the upstairs). Many sections were just awful patch jobs, and there were many weak areas in the floor, which had caused tiles to crack (see before photos).

The toilet valve was in the most retarded spot you can imagine, which was pretty much directly against the floor. I had a very hard time turning off the water to get he toilet out. The toilet was so gross and dirty that I just went and put it at the road.

Photobucket

The cheap wall-board tile was also hiding a very poor patch job on the wall under the window. Because the room originally had an old (large) window, when they fitted a smaller one, they didn't flatten out the existing ledge (where the window frame met up with the drywall originally. Instead, they just cut drywall to fit around it, and plastered over the wood frame. I'm not sure if I got a good photo of this, but if I did, I'll post it.

Photobucket

The tub was interesting. I had never removed one before, and I wasn't sure how they went in. I had to look it up. I was going to buy one of those special drain tools, but in the end, I just used a large pair of pliers (held in the open position against the tabs inside the drain) and unscrewed it with the help of a hammer, acting as a lever.

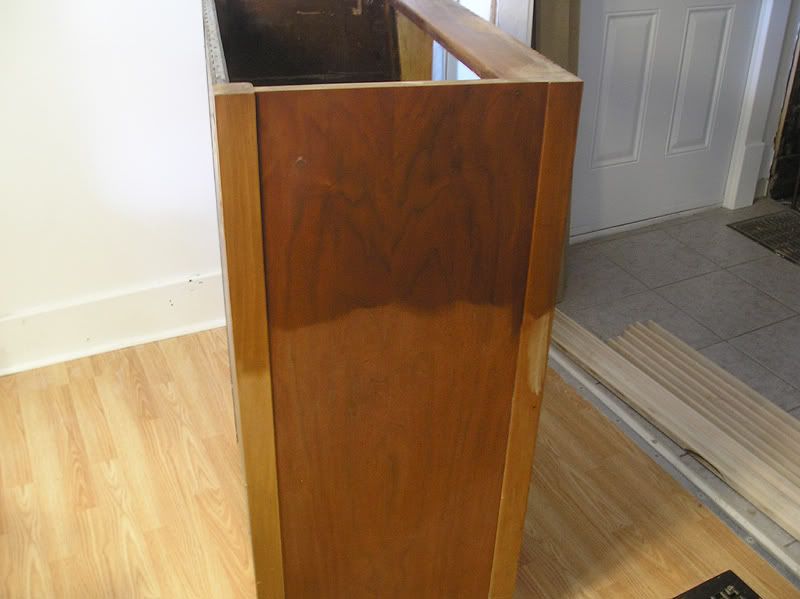
When I took the tub to the road with my dad, we didn't even have time to go get back down the stairs with the vanity, when someone was already loading it into their van. They were going to bring it to the scrap yard (to get cash for the steel).

During the wall demo, I found out a few interesting things. the first was one of the labels from the original drywall in the house, which had patent dates up to 1921. The drywall is by the "Beaver Products Company" and is marketed as "Beaver Bestwall". This original drywall is 3/8" thick, so remember this for later.

Photobucket

Here's a more detailed photo of one of these labels:

Photobucket

After I got all of the floor patches out, I was left with a large open hole in the floor, with easy access to most of the plumbing. A few problems were easy to spot. The first, was that in their floor-screwing frenzy, they had drilled a hole into the bath tub drain line, the second was that the toilet seal had been leaking slightly, and the third was that there was still some old galvanized steel piping in use (cold water).

I thought I had more photos posted with the floor patches, etc (I did take many photos of everything), but it's not that important. Anyways, long story short, I ran all new copper piping. Sounds expensive, but it really wasn't (since I did it all myself). I needed something like 4 lengths of pipe, maybe 5 (at 18$ each) as well as a bunch of elbows/corners.

Photobucket

You can also see the rubber flex-type joint for the sink drain (near the toilet flange), which I ended up replacing with an ABS joint/glue instead.

Now, something that was interesting is that half the outer (hallway) wall was old (the part with the label above), and the other, which had the door, was newer. The newer section of wall was installed crooked, and I chose not to fix this since I would have had to re-drywall half the wall in the hallway. In hind sight, I probably should have fixed this, but it's WAAAAAY too late now.

Not only was the wall off, the studs were not the same size. The original wall studs are 2" x 2 11/16" (really odd size, but that's what they were). So the new ones were only 2 1/2". I had to add some 1/4" flat shims over the studs to make this work.

Photobucket

They had also made the doorway taller than all the other ones in order to use a store bought door (80" tall). I shrunk down the opening to the same size as the other original doors (~78").

Photobucket

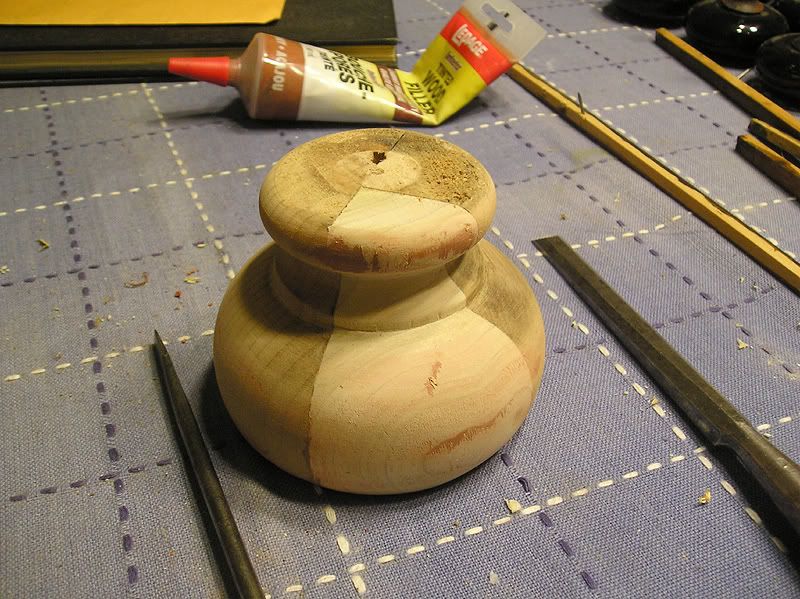
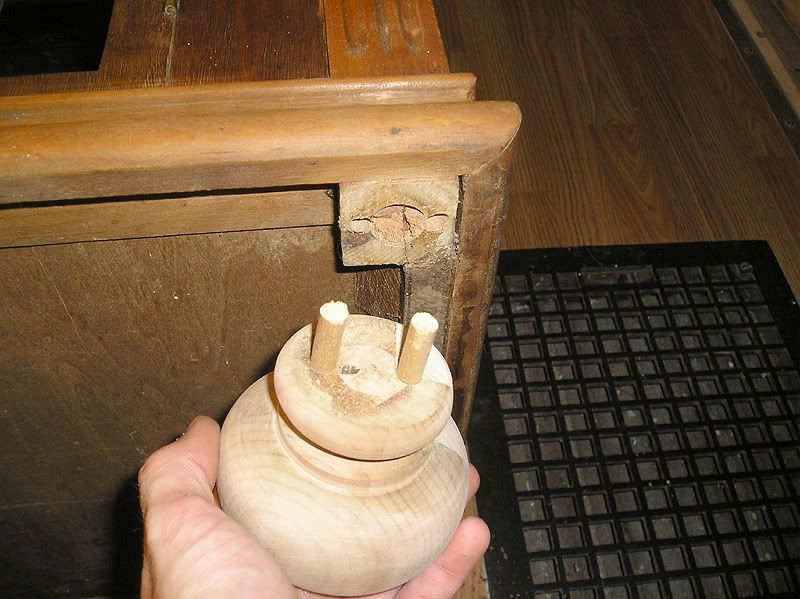
I drastically shrunk-down the plumbing stack, and decided that I would make the base kind of like a shoe (with an angle), but I couldn't make the base until I had the new plywood (sub)floor down.

Photobucket

Then came the electrical.

As-is, the room had one overhead light switch, which was on the same grid as the laundry room (just a light switch and overhead bulb). Apart from this was a GCFI plug over the sink on it's own circuit.

I decided that I wanted wiring for an overhead fixture (I originally wanted pot lights) some wall sconces on each side of a mirror, and a bath fan. I disconnected the existing switch and bulb, and I ran a new wire up from the basement. This fed into the light switch box, and then to the three items listed.

I had never done house wiring except for very simple circuits, so this was a bit scary (but only because I wasn't sure if I could have these 3 things on the same breaker or not - my dad confirmed that it was perfectly fine, and that I could have up to 6 plugs and 2? light switches on a single breaker, so this was still pretty "light" duty). I had to figure out how to wire this circuit "in parallel". This means that all the items on the circuit have power independently, and that each one could be turned on/off without affecting anything else on the circuit. Once I figured out how to do it, it was pretty simple, but I had to do a lot of trial and error using spare sockets and light bulbs:

Photobucket

I was actually REALLY proud of myself after I had everything wired properly. Don't worry, the house will NOT burn down.

Photobucket

Photobucket

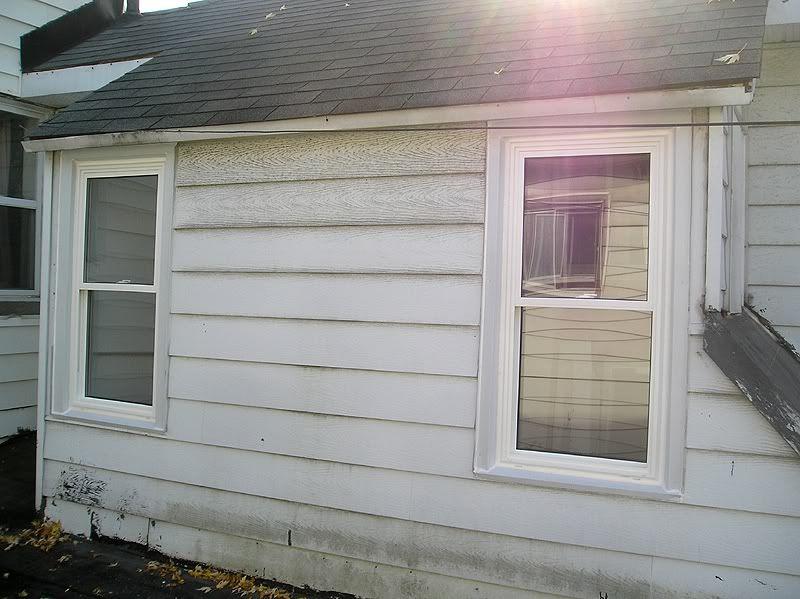
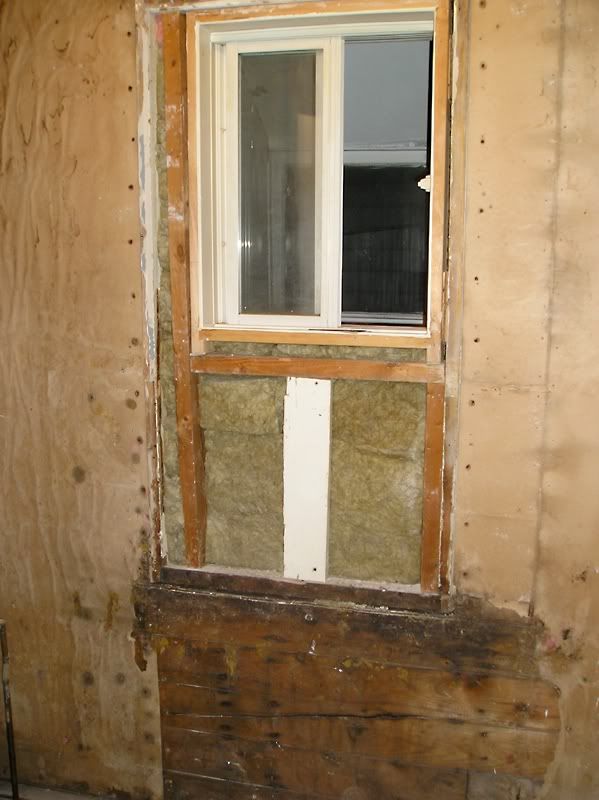
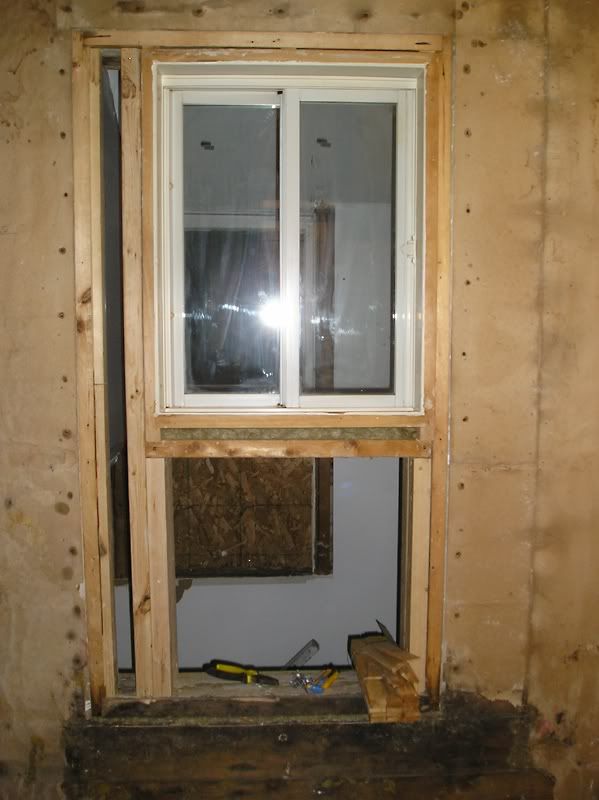
I then addressed the window issue. I took a while to decide weather or not I should re-install a large window, but in the end I decided that the small one was much more useful, since I could have either a towel bar or a small cabinet underneath it (there is no other wall space available in the room).

So I redid the crappy hack-job that they had in there, and cut some proper studs, with sloped bases to match the angled board at the base of the window opening (which they had not done).
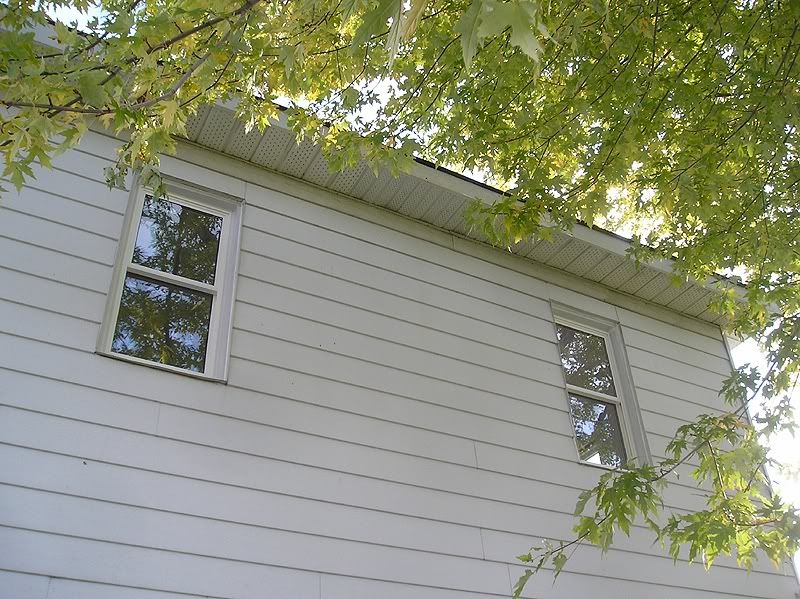
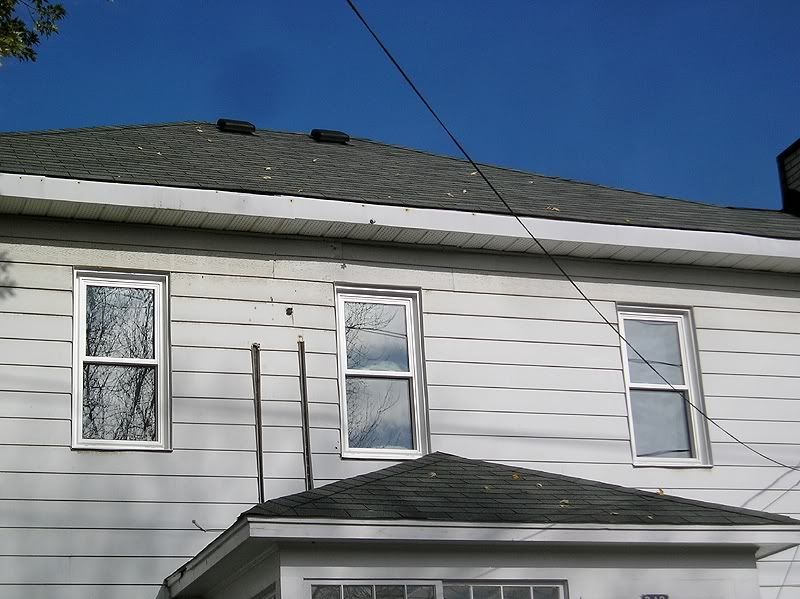
BEFORE:

Photobucket

Photobucket

This is viewed from the back staircase just outside the bathroom:

Photobucket

Photobucket

Photobucket

I also chiseled-off the wood frame flush with the exterior tongue and groove wall (so that it could be covered with drywall properly).

Once I finished with the plumbing, bath drain, and plumbing wall for the shower, I laid down my new subfloor, which was a 3/4" plywood, screwed all over the place (avoiding areas with pipes/drains) and I even used 3" screws into the joists. I wanted a solid base for the tiles. Some people say that I should have used the Schluter-System, and others say that I needed thinset cement as a base over the plywood, but I didn't want to walk up a step when I got into the bathroom, so I didn't use anything else.

Photobucket

Here's the plumbing stack "foot" with very trickily-installed toilet pipe going through it.

Photobucket

TUB! I bought the cheapest tub I could find, but I wanted an enameled steel one, not acrylic or any of that other junk. I was hoping to find a decent second hand one for 60$ at the Re-Store, but they only had 2 white ones, and one had a rusty drain opening, the other had a huge chip. So... this one cost 200$. :(

Photobucket

Photobucket

Continue in Part 2...

Monday, July 25, 2011

Mouldings, and Cabinet Update

As promised, here are some photos of the most recent work on the house (the custom matched mouldings over the doors) and the gramophone cabinet.

I'll start with the mouldings. As you may know, about 80% of the original mouldings were scrapped when this house was renovated over the years. I reused absolutely everything I could, but for the most part, a lot of the mouldings will simply be copies of the originals. Lucky for me, the bulk of the mouldings are all extremely simple, and the only tool I needed was a 1/4" round over bit on my router (and I already had the router and the bit). The side pieces of the door casings (originally done in Ash) are just simple 4 1/4" x 3/4 MDF with a round over on each side. The plinth blocks are 4 5/8" x 1 1/8" thick, and about 10" tall. These also have just a simple round over on most (but not all) the edges. The parting bead at the top is a simple 7/16" (I mis-measured this at 1/2" on many of them but it looks the same) piece of stock, 1 1/8" wide, with the same round over on both edges to make a full bead.

The only part that gave me trouble was the top door/window crowns. At work, we have literally hundreds of cutters, router bits, and various shaper blades that I was able to sift through, and we didn't have anything close enough to replicate the top cyma curve (http://www.pushpullbar.com/forums/attachment.php?attachmentid=59870&stc=1&d=1268044693). I puttered around with samples and I wasn't able to get the right curve. This was an early attempt:


But as you can see, it's too squashed.

It was only about 2-3 weeks ago that I ran across a smaple moulding in our rack of smples that I found a curved moulding with nearly the EXACT shape I wanted. I couldn't believe I had missed it. So I went through the cutters again, and I couldn't find it. It turned out to be just a large 1/2" shank router bit (which I could use on the shaper with the auto-feed (this makes cleaner, nicer cuts). In the end, I used that cyma curve along with one other round cutter (to make the bottom coved portion, and nibble-off the rounded tip), and I ended up with this:


PERFECT!

The mouldings needed to be 1 1/4" thick to work, so I was limited to only 3 wood choices at work: 6/4 soft maple, 8/4 poplar, and 6/4 knotty pine. I did not want pine because it's such a bloody pain to paint over, and it nicks easily. Not to mention the knots and sap. So I wanted Poplar, but since it's 2" thick, I'd be wasting a lot of material. I asked my boss's son (the one mainly in charge of pricing, etc) to get me a price for both to know which would be cheaper. I'm a bit cheesed off that he never got back to me (he knew I wanted to make the mouldings before my holidays) so I ended up just making them out of the maple. I know it will probably be more expensive, but from my own quick calculations, I figured that it couldn't be much more than 2$/foot, so I didn't care.

Long story short, I got the bulk of the mouldings made. I made 113 feet, and I think I needed 100 feet minimum, but I wanted spare, so I may need to make more later. I have a bunch of lengths that did not pass well through the cutter, and they're full of chips/splinters, so I may/may not be able to salvage them.

The mouldings took a lot longer to make than I had originally thought. In total, it took around 4 hours.

Here are some of the mouldings installed:

Doorway to the first floor office:


Bathroom door (interior):


And here are a few more photos once they were all painted. I have a bunch done, but I still have quite a few left to do. These are just the first bunch.

Here are the ones in the kitchen:


Detail (I love how they catch the light):


This is in the office. This is the only place in the house where an original moulding (the one on the window) is nearly next to a copy (the one over the door on the right). Luckily, even *I* can hardly tell the difference, other than the fact that the original has double the amount of paint over it.


***

Here's the work done on the cabinet. The foot was a very tricky repair. I had to pretty much break it off, since the tenon holding the foot had a nail going through it. Add to this the fact that the foot is broken in half, AND missing a large chunk.

Step 1 was to clean up the surfaces to be glued, and cut a new blank to fill the missing area. Before gluing the 3 pieces together, I cut the bulk of the waste off the new blank. Once that was done, and glued, I mounted the foot onto the lathe, and carefully cut away the new portion, then re-sanded the whole foot, and did additional touch-up sanding and shaping by hand.

Finished foot:


Once that was done, I had to re-attach the foot. Since I no longer had a tenon, I had a few options. I could just use a large dowel and make a new tenon (this would have been the normal repair), but I still had a nail through the tenon hole, so that wasn't a good option. The second best method (since I had the room) was to use 2 smaller dowels. This worked out perfectly.


Once the rest of the repairs were done, I applied the first "base coat" of a light walnut stain. This helps to clean-up and blend-together any wood blemishes or light stains/fading. It also brings out the true beauty of the walnut veneer.


It looks pretty dramatic there, but the colour change was fairly subtle overall. I used Verathane gel stain in "Special Walnut".

Since the cabinet is made-up of several types of wood (Poplar, plywood, maple, and walnut veneers) some pieces are much lighter. This was commonly done (and is still done today) when using expensive woods. The main (large) sections are done in the "good" wood, and the other smaller parts are made of a cheaper (or stronger) wood, and then simply made to look like the "good" wood with either stains, tints, dyes, or even paints. In my case, I went over these secondary pieces with a "Dark Walnut" gel stain, and I applied it fairly thick. I tried several other dark stains that I had, but they were not deep enough. Generally, you don't want to apply too much stain, since it eventually gets too thick, gooey, or sticky, and you end up with a mess. You could also end up with adhesion issues with your varnish, but I should be ok.

Here's the fully stained cabinet. The only thing I might need to adjust, still, is that really light centre bar. For that, I'll apply more stain between my two layers of varnish.

Sunday, July 24, 2011

Slow Progress Is Still Progress

Alright, I've taken a short break from reposting back entries with the post about the gramophone/radio cabinet (see below), and I'm posting now with more recent news.

As of last night, I now have the door crowns installed, primed, and painted (one of 2 coats), on the door to the office (both sides), kitchen (both sides), main bath, and the dining room/basement door.

I'm extremely pleased with how my copies of the historic mouldings turned out. Photos soon.

I am also working on the doorway leading down the stairs from the second floor. I had thought of making this just a plain drywall opening, but I didn't like how it would have looked, and I also thought of removing the wall(s), but it would have messed up the ceiling(s) and the lighting arrangement, so I left it as-is, and decided that I would install trim like a regular door opening on both sides.

Before I can do this, I had to rebuild a new door jamb (I recycled some scrap wood for this), and I have to redo the two outer drywall corners, since the POs did a horrible shit job of this. I think they actually installed the metal corners upside down, because a light sanding reveals bare metal, and there's supposed the be a paper covering. So I added a new paper corner joint over this, and LOTS of mud. It's still drying, actually.

Work on the gramophone cabinet is nearing completion. I have done all the repairs to the door, patched and fixed the foot, patched and fixed the chipped veneer on the drop-down door, and I've applied the first coat of stain on everything (and I mean everything). That alone took over 2 hours.

Next I'll need to add more stain to darken some of the lighter (non matching wood) pieces, then varnish it.

Wednesday, July 20, 2011

Awesome Freebie!

My dad has recently been doing a major clean-up in the basement at the house (where I grew up), and he's thrown out all kinds of old junk, donated some items, and among some of the stuff he was getting rid of was this wonderful old gramophone cabinet. He was going to just put it at the road! But at least he thought of asking me before, or I would have been pissed.


This poor cabinet has been sitting in the basement in a corner (buried in piles of junk) for as long as I can remember. Dad says it used to be a gramophone cabinet, but the label inside says "Standard Radio Mfg. Co. (Toronto Canada) Type R-200-A" with patent dates from 1916-24, so I'm not sure. I searched Google, but I can't find ANY pictures or info on any other cabinets, radio cabinets, gramophone cabinets, or record players by this company. The only thing I DID find was that it was indeed a company in Toronto, but that's about it. The "Type R-200-A" doesn't turn up any results either, and there's no patent number (it only says 'patented', and has dates listed).

Either way, I love it, and it was FREE. Another perk is that it fits in PERFECTLY with the time period that my house was built. It does, however, have several small problems (most of which are not visible in the 3 photos). One is that the fretwork door is completely delaminated (that's cabinetmaker-speak for unglued) everywhere, and it's all cupped and warped. The second issue is that the bottom right bun foot is missing 1/4 of it (there's a large chunk broken off and now missing). The last problem, and this one is kind of a blessing, is that the cabinet is completely stripped. So I'll need to stain it (lightly on the main body, and more heavily on the lighter woods to blend everything nicely).

The top portion opens two ways, but more than likely I'll have stuff on top (like a clock, lamp, photos, etc) so it's nice that the front drops down. The bottom space with the fretwork door has spots for 2 removable shelves (which of course are missing). I love the burled walnut panel, and the Gothic inspired moulding.


As of this evening, the door has been repaired. I scraped off all the old glue (and re-repair glue) and reglued the frame to the front panel. I also puttied some holes and chips in the case, and glued a new chunk of wood onto the bun foot to fix it (I'll need to either try to turn it on the lathe or hand carve it to shape).

Monday, July 18, 2011

Windows

One thing that needed to be addressed before the winter turned out to be my largest purchase to date: new windows.

The dilemma: I didn't mind the old original windows, but they were in really terrible shape. They were not entirely beyond help, but they would have required countless hours of work. The old aluminum storm windows were also really bad. Several had broken levers, and would barely open properly. I also had an exceptionally hard time removing the screens. I actually had to practically destroy one of them to get it out (the one in the bedroom that led onto the flat roof of the garage).

Another issue regarding the windows was the fact that all the main floor windows had already been changed just under a year before I bought the house.

I decided that I wanted all the windows to match, and that I'd prefer to have the double hung windows for easy cleaning. The fact that they also don't need painting, and won't rot was nice.

I do realize that they are still "crappy modern vinyl" windows, but I don't regret my decision. I know that the old house purists will curse me, but I did keep the original sashes, and the windows were all plain 1 over 1 (nothing fancy).

These were the new windows after they were delivered. They were surprisingly heavy.


One of the 8 new windows in it's new home:


The two windows in the back porch were the worst of the two. The windows that were there were very thinly framed windows that look like they were recycled from another spot. They almost looked like storm windows.


At this point, the windows were in, but they were not capped on the exterior. I had a friend of my mom's come and do this for me. Here are the finished windows:


The only other window that needed work was the one in the bathroom. The current window was installed in 1992 I believe, and it was from a local lumber supply (actually the same place where I bought the new windows). The window was non-matching to all the other ones, but it was still in good shape so I reused it. I did, however, need to rebuild the entire framing for the window since it had been really poorly done.

Before:


After:


For those who are wondering, the room you see beyond the window is the back staircase with the two windows pictured above.

The last detail I did on the interior windows (all the main ones on both floors) was to install a custom-milled detail moulding to hide the seam where the vinyl insert window (and shims) fit into the window opening. On the main floor, they simply covered this with a large bead of caulking. I added the new moulding over top of this.


Here is one of the fully finished, puttied, caulked and repainted windows.


Closets / Layout

Ever since the beginning, I've been making numerous interesting discoveries about the original layout of the house. The house has been changed several times, but the basic layout is about the same. The first, obvious change is that the master bedroom is made up of 2 former bedrooms. These were originally separated by two VERY NARROW closets. These were about 16" deep (as evidenced by the shadow lines on the floors and in the drywall). The current closet used to be the hallway with the door leading into the second bedroom.

On the opposite side of the house, the laundry room and "L shaped room" in front used to be two mirror-image bedrooms. The door in the laundry room that leads down to the garage, and outside actually used to be a window.

When the upstairs was turned into an apartment, the laundry room was made into a combination kitchen/laundry room. The closets that divided the room were also modified into an archway. A hole was very roughly knocked-into the chimney to vent the stove or heater.

Here is the archway turned into an arch with two cubby cabinets on each side:


The poorly done hole in the chimney:


And the shadow of the two closets in the master bedroom:


On the main floor, I've concluded that the wall against the stairs (hallway side) is a later addition, and the wall that makes up the front room (computer room/office) is also a later addition. The rest of the main floor appears to be original.

The only part of the house I can't really be 100% sure about is the exact location of the stairs. The stairs currently pass partially into the door to the living room. I'm sure it was NOT like this originally. The door, though, has definitely not been moved. To add to this puzzle, the ceiling above this shows signs that the crown moulding originally went around the top of the door, across the stair opening, and back down the length of the hallway to the kitchen, which seems to indicate that the stair wall is original (but the studs in it don't match the old studs in the rest of the house....)