Showing posts with label Addition. Show all posts

Tuesday, February 14, 2017

Victorian Farmhouse Part 27 - Kitchen Demolition

So the kitchen from the Farmhouse is a disaster. I've put off posting this last part because I'm just not too sure what to write.

Pierre continued to demo the kitchen so that we could see the condition of the floor beams, the foundation and add insulation. We would also need access under the floor to redo the plumbing and fix some of the heating ducts. Pierre removed all the tongue-and-groove from the walls (carefully and he set them aside for reuse), and he removed all the solid hardwood flooring. He numbered everything so that it could be reinstalled the same. Those were also set aside.

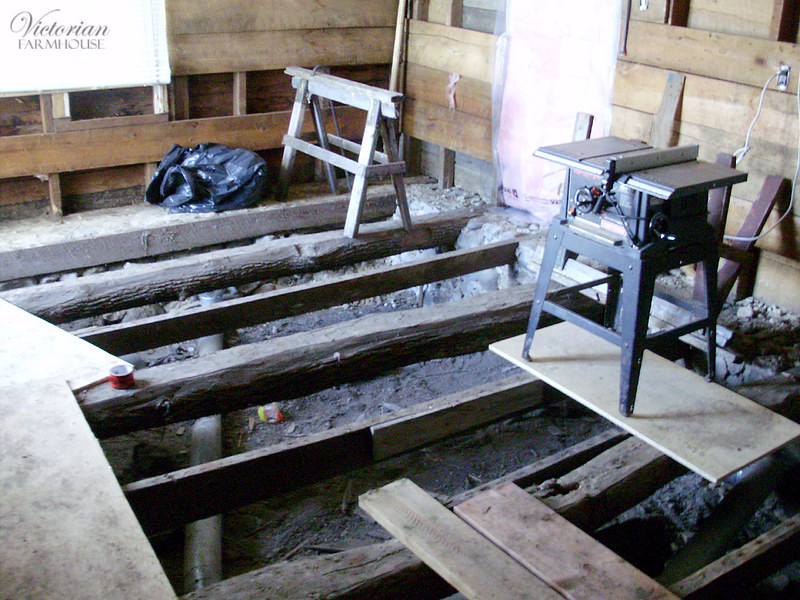
Here's what the aftermath looked like.
PB260006

Most of the beams are in good shape, and it looks like some intermediate beams (the 2x4s) were added later. The foundation isn't very deep (as far as we can tell), and it may not have been dug deep enough to keep it stable. This might be the reason why one corner has dropped down about 6 inches.

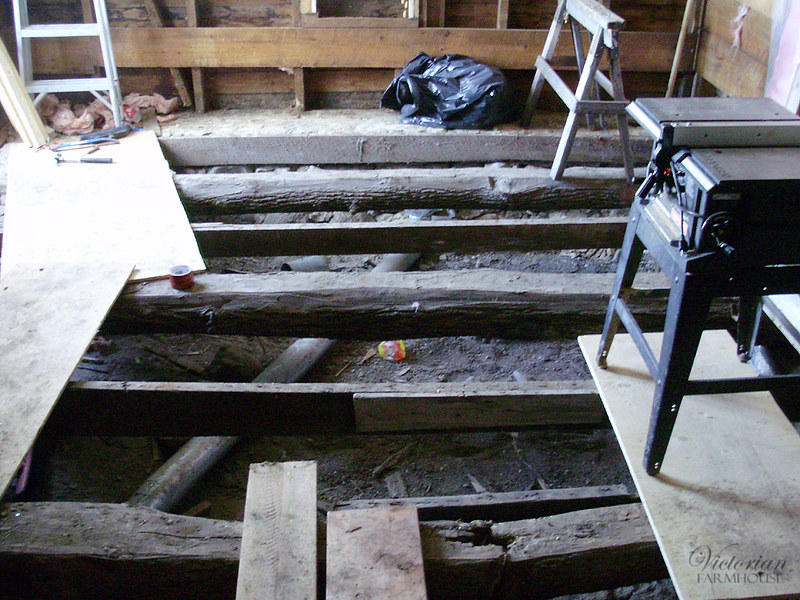
One of the beams is rotted right in the centre (lower part of this photo). I have no idea how the beam could have rotted in the centre of the room, but this was then propped-up with random boards and log pieces.
PB260008

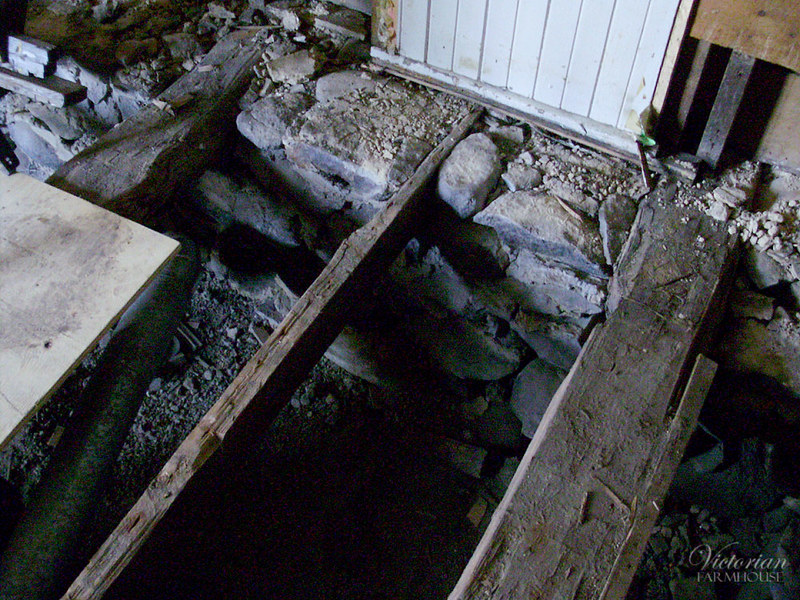
The entire construction of this addition is a complete puzzle. It looks as though the foundation supports part of the barn addition (built later ???) but it's not clear what was built first, and what was added onto.
PB260009

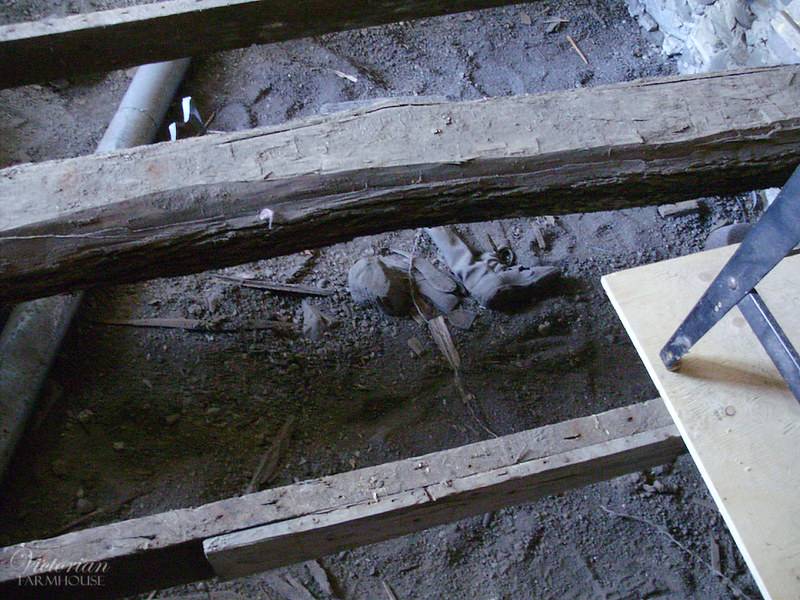
There were a few old items tossed under the floor. Old shoes and a rusty old pan.
PB260011

This seems to be the same type of construction as the main house, but built on a slightly crappier foundation.
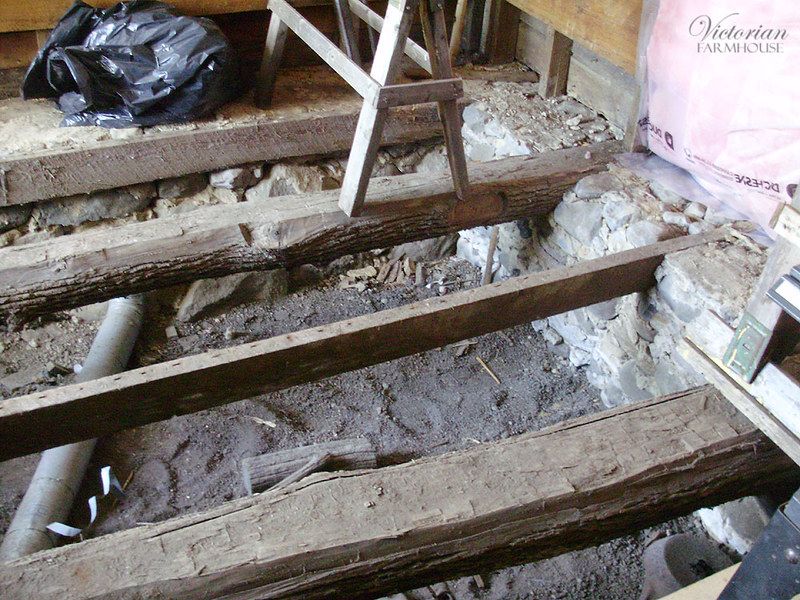
PB260012

Here's the propped-up beam in the centre.
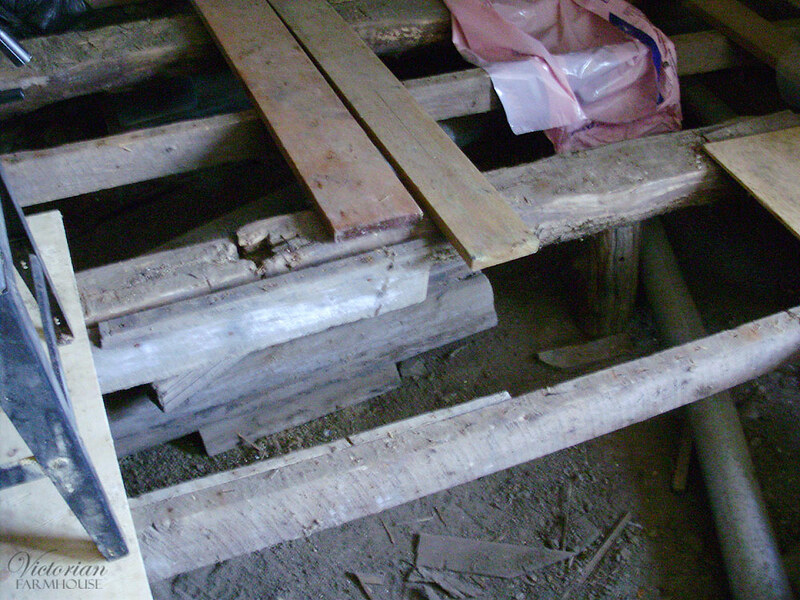
PB260014

You can see the outer squared log, which is "hugged" on two sides by the stone (same as the main farmhouse).
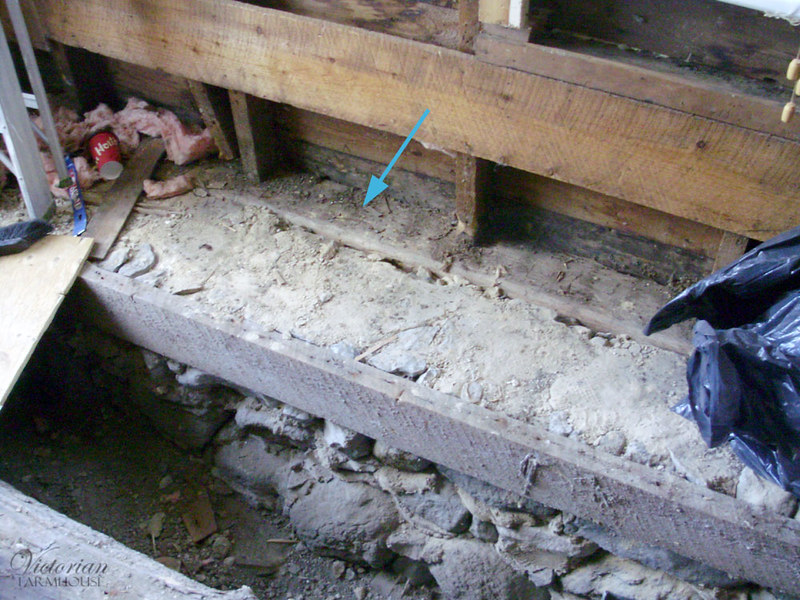
PB260015

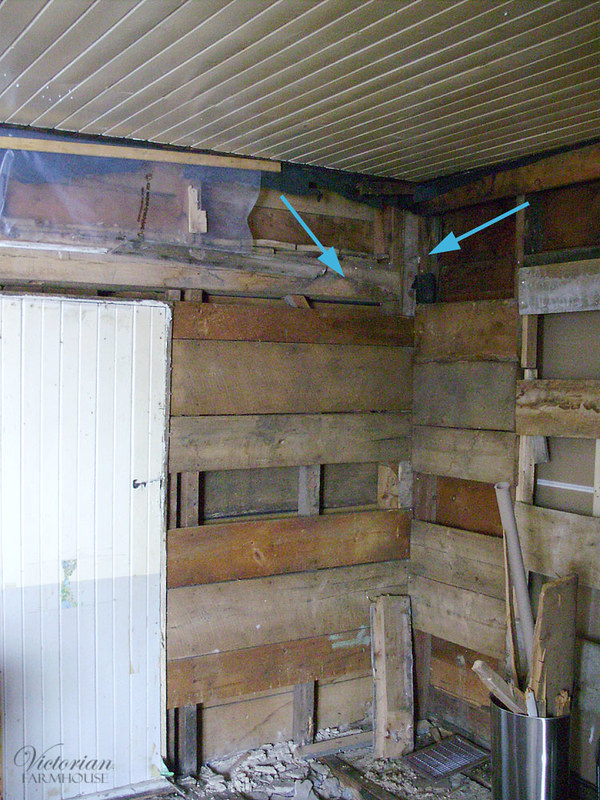
This is the back wall, which has the barn construction (completely different as the side/driveway wall above). The barn construction has the diagonal braces, and a low-ish horizontal beam that spans the building. This beam (arrow above) is pegged to the outer walls, and it keeps the roof from collapsing downwards. It can't be removed, but it could potentially be relocated higher. As it is now, it's the reason why the two doors on this wall (both had been closed-up) are so low. All the other wood on this wall isn't load bearing or structural. It's basically a giant H with the roof beams siting on top.
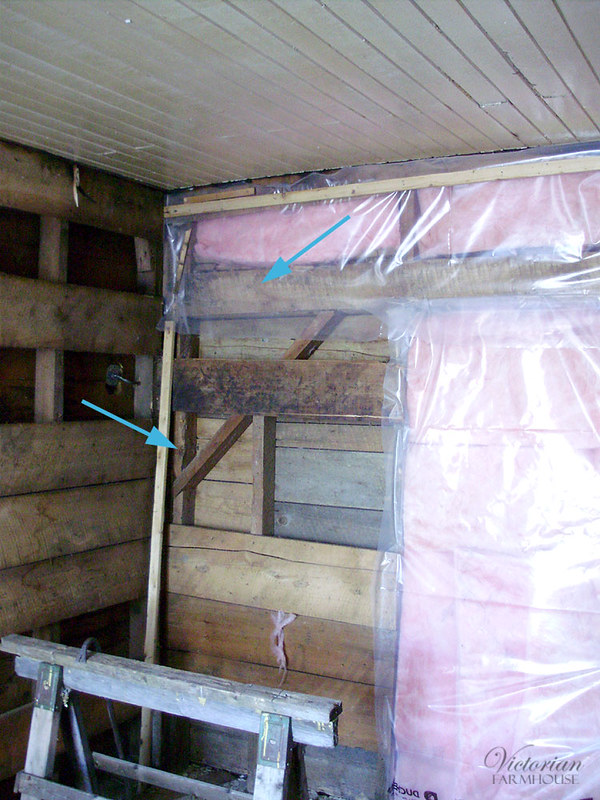
PB260019

Here's the other corner against the laundry room. You can see the corner beam of the barn and the diagonal brace, as well as the horizontal beam. It's almost as if the barn was about a dozen feet away from the house, and they just filled-in the space between the two buildings for this addition.
PB260020

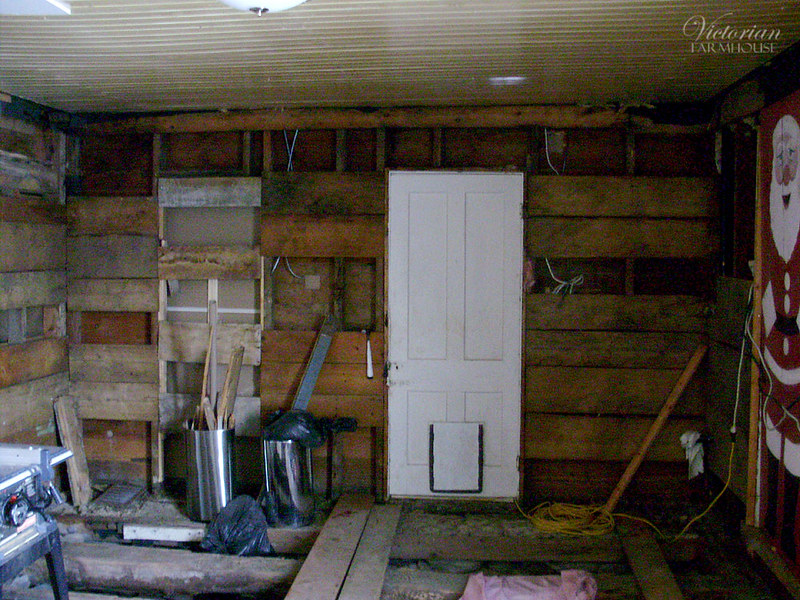
Laundry room wall, and doors. Santa door leads into the living room.
PB260021

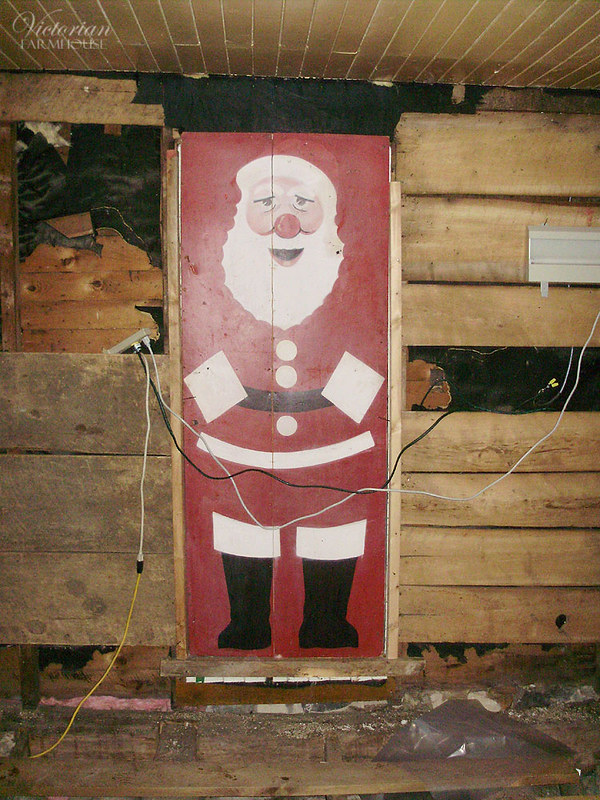
This hand painted Santa decoration on plywood was made into a temporary door for the living room.
PB260023

So yeah. Now we were looking for fixes and solutions. Right now we have one low corner and wall (a good 6 inches or so), a possibly unstable stone foundation (we don't know if it's just the two feet sitting on the ground, or if it was dug deeper below the frost line), and then the barn. Angie has mentioned that she would like to eventually (or potentially) demo the barn later, so if we rebuild this room, the back wall would need to be detached from the barn.

If we just level the floor, the ceiling will then slope by 6" towards one side, and the kitchen cabinets will look awful.

Angie and Pierre are strongly considering demolishing the entire thing (the whole addition, barn, and newly renovated laundry room/bath and starting over completely. New foundation, new framing, plumbing, wiring, etc. This was kind of my suggestion from the very start, because I could see some of these problems ahead of time. One of the biggest issues for Angie is that she wants easy access to the loft above for another bedroom (without having to go all the way around, or from the exterior stairs at the back. With the current layout, it's not really possible. The easiest way to get what she wants would be to have the addition not be offset from the farmhouse, and turn the window upstairs in the spare bedroom into a door to the upstairs of the addition. The spare room could then be a sitting room or hallway room between the old and new parts of the house. They'd also be able to have their laundry room upstairs with this new addition , as well as extra bedrooms, etc.

But there's also a budget issue. For now all of the renovations dealing with the addition are at a standstill. I helped install a laundry room sink and some cabinets into the laundry room so that they could have a temporary kitchen in there. Angie and Pierre are currently living in the house.

I just recently finished the new reproduction (simple) mouldings for the bathroom door, so that will probably be the next post.

Thursday, July 21, 2016

Oops! Victorian Farmhouse - Part 12.5?

Actually, we're not all caught up on the Victorian Farmhouse project. I just found another batch of photos I forgot. All of these should have been posted between parts 12 and 13.

Alright, here's the roof on the kitchen addition being redone. I'm really not sure why the roof was redone right away. It wasn't my decision, and all the tin was bought (Angie's parents?) so everything got done now. I would have waited until the back structure was raised and leveled. I don't really think anyone realizes just how much the barn addition has sunk. I estimate (by what I've seen of the structure) that it's sank in places between 2-3" in the better spots and as much as 12" in the worst spots.


The entire roof wasn't done, either. Just the part with the kitchen.

On top of that, the decision to redo the whole section of roof over the really terrible old cobbled together roof of the side additions (basement stairs and old laundry room) was good, but a huuuuuuge pain in the ass at the same time. Now we're going to have the trouble of removing the old roof while the new one is sitting on top of it. Most of this was done while I wasn't there, but I was under the impression that the old (small) roofs of the side additions would be taken off first.

Pierre had also said he wanted to completely knock down the last little corner section that is just sitting in the ground (and falling apart). I don't know why they put a new roof on that part. I think there was also something about just making a small little corner porch, which could look cute.

It's not my house, so for a bunch of stuff I just have to nod and smile, and worry about it later.


While I had this photo out, Angie and Pierre had mentioned several times (at least half a dozen) that they'd like to see if they could put a door in the bathroom leading into the room over the kitchen. Not going to work. The buildings are too far off-centre for this to work. A standard door would be about the height of the window, and the back (short) wall of the bathroom lines up with the plumbing pipe that passes through the roof. That gives you this:


The property seems to have an abundance of really pretty wild flowers. I think these might be a type of phlox that's run rampant around the edge of the grass. You can also see buttercups, and there were lots and lots of daisies as well.


The peony bushes at the front were also gorgeous, and you could smell their perfume on the breeze all the way to the barn (a good 75 feet away).


The electrical upstairs is all done. Nothing too exciting. There are now plugs and switches were previously there were none.


On the closet wall, there was only one tiny section of wall where a plug could be installed, because the rest of the wall (staircase wall) is only an inch thick.


The main part I forgot about was the kitchen demo! It's fairly clear what's going on in the photos. Everything in the room was shimmed to appear square again (because of severe warping and settling - because this addition was fitted into the frame of a sinking barn). Thin plywood, wallpaper, and other junk was added over the years. The original room is all tongue and groove.


The ceiling has a good amount of curve to it, but with all the braces removed, it's much less noticeable.


This wasn't a big surprise. This stovepipe hole fed into the chimney above. See one of the last photos in this post: http://my1923foursquare.blogspot.ca/2016/03/victorian-farmhouse-introduction.html.


Pierre was having a great time tearing off all this junk! Notice the original narrow window outline.


This was the only section of Mactac with a brick pattern. No idea why.


The layers of Mactac came off pretty easily.


This other short door leads into the barn to that side staircase.


Evidence of old built-in shelves over the sink.


Outline of a small wall shelf next to the door. Note the shadow of the long door casing next to the side-light.


Across the other side of the door, it had a window. The shadow of the window casing is still there. It would have been a door with a window stuck right on the edge of it (something I tend to see most often on old Dutch log houses from the mid 1800s). See next photo.


I picture something like this. This is an 1851 log home restored in 2009 by Paul Cutting. You should definitely check out his stuff if you haven't: Trout River Log House. Paul has restored about a half dozen or more log homes in the Iowa region, but let's not get too side tracked. Just go have a look.


In this photo, you can see 90% of the original baseboard under the door jamb.


In the opposite corner, however, the entire baseboard is about 3" below the floor.


The drop is at least 6-7" in height. It goes from nearly no drop against the old part of the house and near the basement stairs, to about 6-7" down near the side of the driveway. With all this framing removed, the ceiling is actually about 8 feet high. With all the additions and layers it was barely 7 feet, and not the same height across the whole room.

The foundation along that side needs repairs, so the plan is to jack-up this side of the barn addition. I'm not too sure how that's going to go.


The addition has a nice grey painted solid wood floor under all the braces and plywood. The issue is that we would need to get under this to insulate and to run plumbing. We might also like to check for any rot, rodents, or any other surprises. It might be possible to save 90% of the floor and re-lay it. We'll see.


The original heating ducts (and no, I have no idea how they got those installed because it's practically a rubble crawl space under the addition) are still in place, and they just added extensions on them to reach the new floor height.


Okay, NOW we're caught-up.