Showing posts with label Roof. Show all posts

Sunday, June 11, 2017

House Exterior Summer 2017

This is a post to just mention some of the exterior work that I will need to tackle soon.

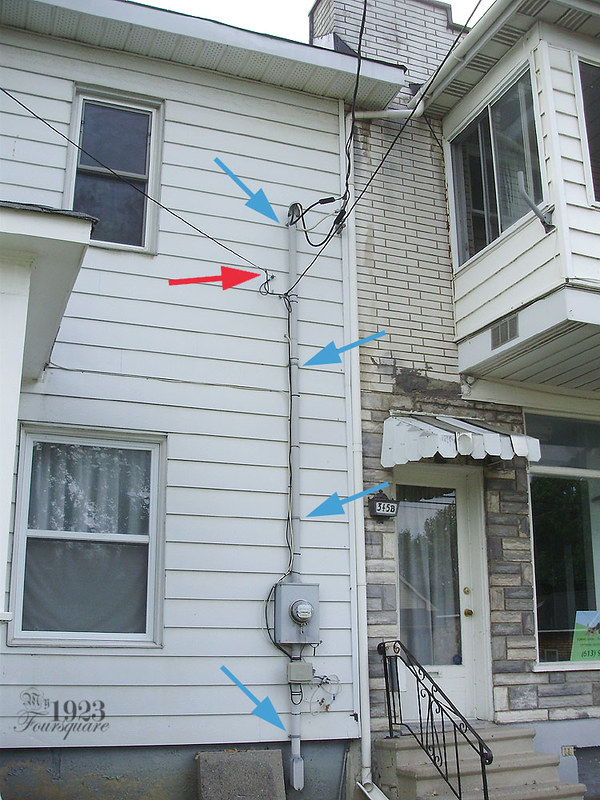
Over the winter or spring, I noticed that my electrical pole had come loose from the top, where it's anchored to the house. The reason: the two top plastic brackets had broken. Easy fix, but it took me about a month to pick up the supplies and actually get it done. I replaced all 4 brackets with new ones, and I did that yesterday.

In the photo below, the blue arrows show the brackets I replaced. The red arrow is another clip that had been torn out. The clip was still attached to the wire, so I only had to change the screw.
P5310084

I should note that even though this was only about a 20-30min job, this was TERRIFYING for me to do, because it involved being up about 15 feet on a crappy and rickety ladder. I don't deal well with heights.

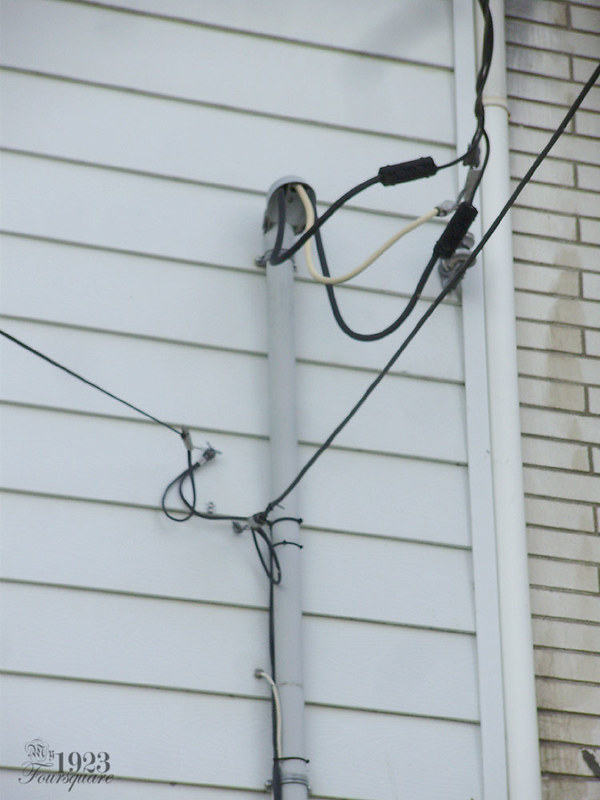
The entire top of the pole was curved away from the house. I thought I had taken a "before" photo. I looked everywhere for it, and apparently I didn't take one.
P5310085

There are still a whole bunch of other small issues on the outside of the house that will eventually need attention.

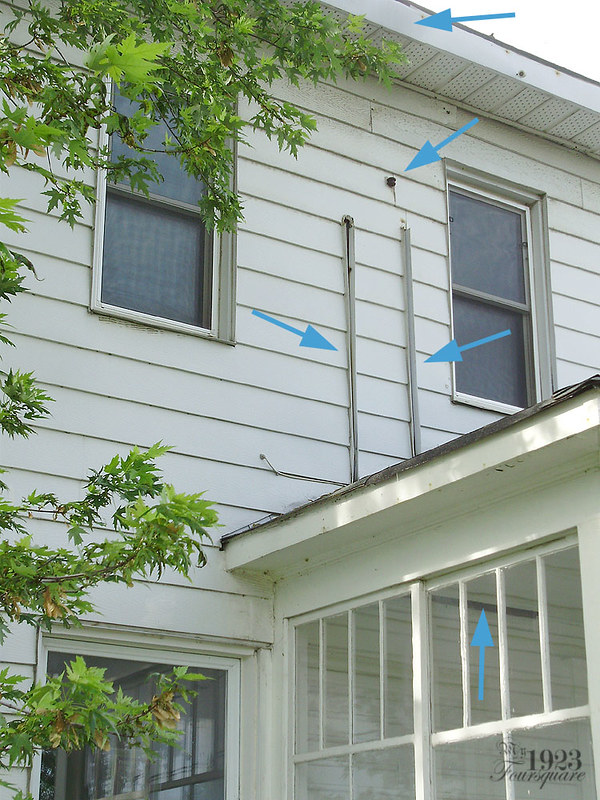
There's still the hole in the fascia from the squirrels (which is blocked-up with metal mesh wire). Then there are the old grooves/tracks/brackets from previous electrical hookups. I'd love to remove all this and patch the siding. I have all the siding that was on the porch that I could use here. Currently these tracks are letting in some water into the porch. I still have the hole in the ceiling tongue and groove inside the porch. All the porch windows are also badly in need of restoration. Lots of the putty is flaking out and they need paint.
P5310002-(2)

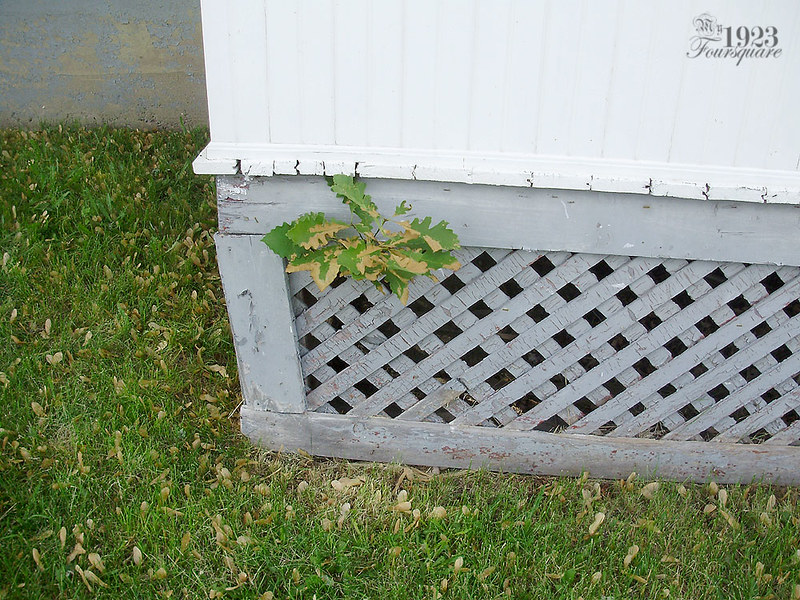
I have an oak sapling growing under the porch as well. Probably due to a squirrel, since the large oak tree is about a block away. I've sprayed it with Round-Up (poison) but it will need another application. I also still badly need to redo the porch bottom. I'm getting rid of the lattice and installing panels.
P5310002-(3)

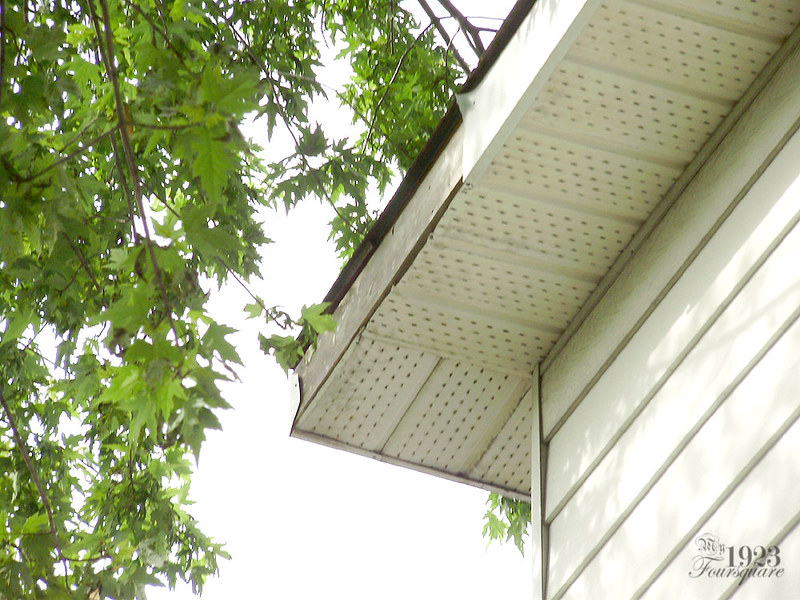
A while back I had a piece of metal fascia flashing that tore off this corner of the house. I also have a few torn-off roof shingles.
P5310003

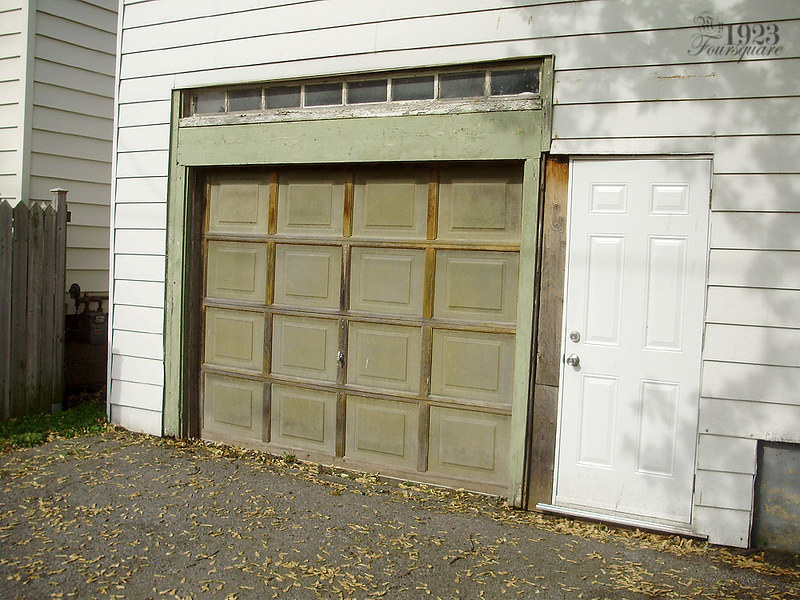
Then there are the garage/shop doors. I've hated the olive garage door since BEFORE I owned the house. It's hideous. I had planned to install folding doors, but I may just keep this door. Either way I want to paint this either white or light grey like the porch base. I also need to fix the trim around the 2 doors.
P5310004

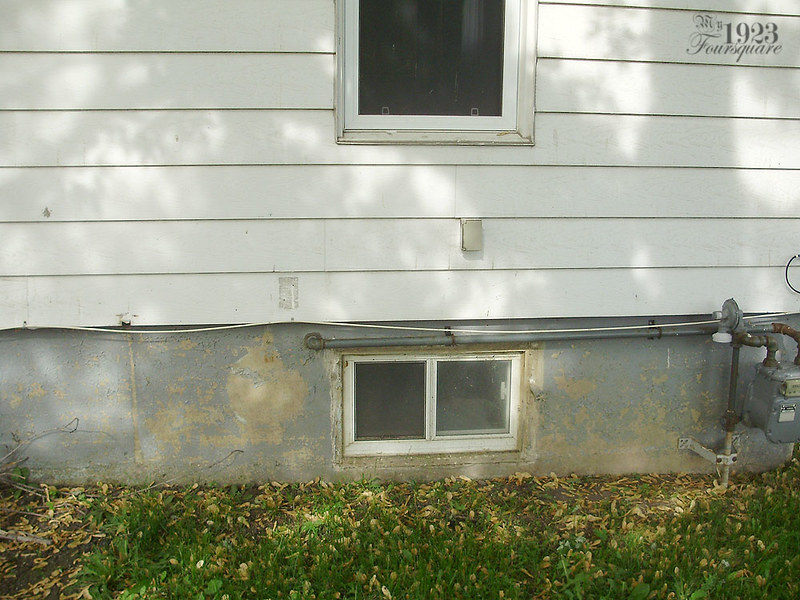
Two problems here. For some unknown reason, my exterior plug isn't working anymore. I have no idea why, but it will need to be fixed. Then there is the window. This is not high on my list, but the wood frame around the cement (that holds in the window) is pretty badly rotted. There is always water splashing on this window (it's always dirty).
P5310005

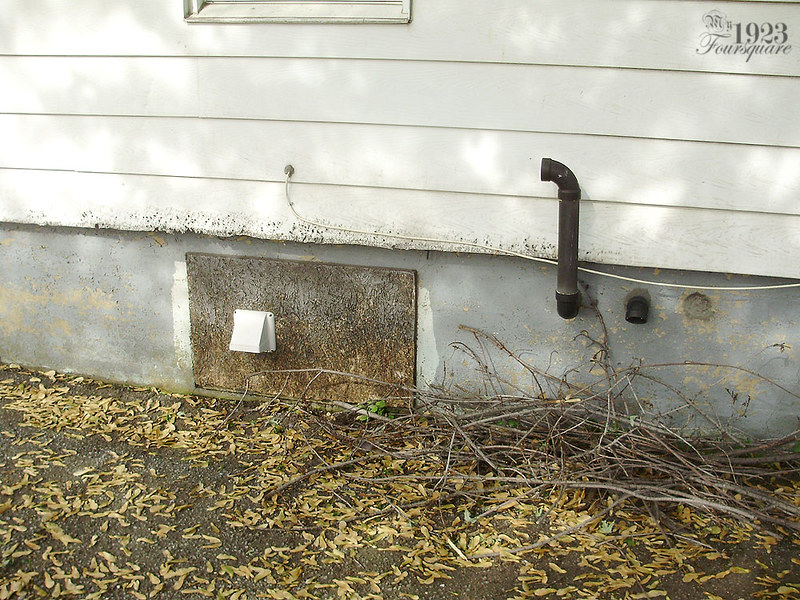
On the other window, I noticed that the chip-board (installed by a previous owner) is starting to rot and flake apart. It might be nice to close this off with brick or cement, or even metal flashing rather than wood. I was also told a few years ago that the black PVC pipes for the furnace are no longer up to code. They now need to be the white PVC, since apparently there's a chemical in the off-gassing that causes the black pipes to deteriorate.
P5310006

Thursday, July 21, 2016

Oops! Victorian Farmhouse - Part 12.5?

Actually, we're not all caught up on the Victorian Farmhouse project. I just found another batch of photos I forgot. All of these should have been posted between parts 12 and 13.

Alright, here's the roof on the kitchen addition being redone. I'm really not sure why the roof was redone right away. It wasn't my decision, and all the tin was bought (Angie's parents?) so everything got done now. I would have waited until the back structure was raised and leveled. I don't really think anyone realizes just how much the barn addition has sunk. I estimate (by what I've seen of the structure) that it's sank in places between 2-3" in the better spots and as much as 12" in the worst spots.


The entire roof wasn't done, either. Just the part with the kitchen.

On top of that, the decision to redo the whole section of roof over the really terrible old cobbled together roof of the side additions (basement stairs and old laundry room) was good, but a huuuuuuge pain in the ass at the same time. Now we're going to have the trouble of removing the old roof while the new one is sitting on top of it. Most of this was done while I wasn't there, but I was under the impression that the old (small) roofs of the side additions would be taken off first.

Pierre had also said he wanted to completely knock down the last little corner section that is just sitting in the ground (and falling apart). I don't know why they put a new roof on that part. I think there was also something about just making a small little corner porch, which could look cute.

It's not my house, so for a bunch of stuff I just have to nod and smile, and worry about it later.


While I had this photo out, Angie and Pierre had mentioned several times (at least half a dozen) that they'd like to see if they could put a door in the bathroom leading into the room over the kitchen. Not going to work. The buildings are too far off-centre for this to work. A standard door would be about the height of the window, and the back (short) wall of the bathroom lines up with the plumbing pipe that passes through the roof. That gives you this:


The property seems to have an abundance of really pretty wild flowers. I think these might be a type of phlox that's run rampant around the edge of the grass. You can also see buttercups, and there were lots and lots of daisies as well.


The peony bushes at the front were also gorgeous, and you could smell their perfume on the breeze all the way to the barn (a good 75 feet away).


The electrical upstairs is all done. Nothing too exciting. There are now plugs and switches were previously there were none.


On the closet wall, there was only one tiny section of wall where a plug could be installed, because the rest of the wall (staircase wall) is only an inch thick.


The main part I forgot about was the kitchen demo! It's fairly clear what's going on in the photos. Everything in the room was shimmed to appear square again (because of severe warping and settling - because this addition was fitted into the frame of a sinking barn). Thin plywood, wallpaper, and other junk was added over the years. The original room is all tongue and groove.


The ceiling has a good amount of curve to it, but with all the braces removed, it's much less noticeable.


This wasn't a big surprise. This stovepipe hole fed into the chimney above. See one of the last photos in this post: http://my1923foursquare.blogspot.ca/2016/03/victorian-farmhouse-introduction.html.


Pierre was having a great time tearing off all this junk! Notice the original narrow window outline.


This was the only section of Mactac with a brick pattern. No idea why.


The layers of Mactac came off pretty easily.


This other short door leads into the barn to that side staircase.


Evidence of old built-in shelves over the sink.


Outline of a small wall shelf next to the door. Note the shadow of the long door casing next to the side-light.


Across the other side of the door, it had a window. The shadow of the window casing is still there. It would have been a door with a window stuck right on the edge of it (something I tend to see most often on old Dutch log houses from the mid 1800s). See next photo.


I picture something like this. This is an 1851 log home restored in 2009 by Paul Cutting. You should definitely check out his stuff if you haven't: Trout River Log House. Paul has restored about a half dozen or more log homes in the Iowa region, but let's not get too side tracked. Just go have a look.


In this photo, you can see 90% of the original baseboard under the door jamb.


In the opposite corner, however, the entire baseboard is about 3" below the floor.


The drop is at least 6-7" in height. It goes from nearly no drop against the old part of the house and near the basement stairs, to about 6-7" down near the side of the driveway. With all this framing removed, the ceiling is actually about 8 feet high. With all the additions and layers it was barely 7 feet, and not the same height across the whole room.

The foundation along that side needs repairs, so the plan is to jack-up this side of the barn addition. I'm not too sure how that's going to go.


The addition has a nice grey painted solid wood floor under all the braces and plywood. The issue is that we would need to get under this to insulate and to run plumbing. We might also like to check for any rot, rodents, or any other surprises. It might be possible to save 90% of the floor and re-lay it. We'll see.


The original heating ducts (and no, I have no idea how they got those installed because it's practically a rubble crawl space under the addition) are still in place, and they just added extensions on them to reach the new floor height.


Okay, NOW we're caught-up.

Victorian Farmhouse - Part 11

Rather than keep track of days, or finding specific titles for all the farmhouse posts, I'm just going to switch to "parts". This is the 11th post about it, so it will be part 11, and will continue from there.

I've been pretty lazy about updates on the farmhouse for the past 2 months. This doesn't mean that things aren't still being worked on, or that I didn't take photos. It just takes a LOT of time to edit all the photos, and white down everything in an orderly, cohesive fashion. I don't make any money off this blog, so it's really only updated because I WANT to.

The last post was from days 12-13, I think, which was back in May. Quite a bit has been done since then, but not nearly as much as I would have hoped. The bathroom is still untouched, the electrical still isn't finished, and nothing is ready for paint yet.

Angie & Pierre, I think were hoping to move in by August (early or late, I really dunno). I don't remember if I mentioned this before, but their apartment building where they currently live is in the middle of some serious (and very disruptive) renovations where the entire exterior walls are being removed and replaced. I'm not entirely sure how that works (without the building collapsing) but there are basically just plastic tarps everywhere, lots of dust, noise, and they can't wait to get out of there. Then again, the farmhouse still isn't ready to be lived in (no electrical except for in the kitchen, and no bath/shower).

Since I'm SO FAR BEHIND on posts, I'm really going to skim through a lot of what was done. Either with just brief explanations, or with fewer photos (there are still over 100 - not all of which will be in this post). A lot of the work was floors, more demolition, electrical, and some trim.

Alright with that out of the way, here's the completed soffit/fascia trim. I'm a bit sad that the beautiful and original crown mouldings were unceremoniously ripped out and thrown away, though they were so badly deteriorated that they would have needed replacing anyway. You can also see in this photo that the peak's siding is a very faded mint green. The front of the house is the same.


This is the sill plate (beam) repair, which will need to be patched with siding. Angie's father repaired this.


More soffit.


This shows some of the foundation repairs to the stone (mortar). It's obviously much rougher because it will be buried.


The antenna was taken down. Also note the giant pile of branches and shrubs that were removed.


They hadn't finished the last two sections of soffit for another 2 weeks.


Does anyone know what these pretty indigo flowers are? EDIT: they're periwinkle. They're about an inch wide, and the leaves are glossy and in pairs (see stem just on the right). These were in the flowerbed by the kitchen addition.


One of the problems we ran into with the re-laying of the floor in the office was the AMOUNT of space we actually took up by eliminating all the gaps. I'd say we ate up at least 3 inches. This meant that we landed part of the way into the supporting cross-beam I had installed. At this point the beam can't be moved, and re-cutting the hole isn't an easy option. The only other "easy" option would have been to cut the board in half and replace the half with the partial hole. BUT, if you know me, I'm not about making things easy. I'm all about making it look good AT ANY COST.

The solution was to carefully carve a diagonal into the cross-beam to accept a custom duct fitting.


The beam was only overlapping by about half, so a small slope isn't going to weaken it very much. The new beams are also only to add rigidity to the floor. They aren't even technically needed.


Angie filling nail holes and imperfections in the trim.


This was as much as we could install of the floor. The remaining lengths of wood aren't wide enough to fill the rest of the hole.


I'm not entirely sure what the next two photos were meant to show, but they are already resized and saved (over a month ago).


Here's the new floor transition. Clean, crisp and beautiful! All the broken and cracked sections were copiously glued in place.


Yesss... Note the crooked vent hole (which will be fixed and straightened in later photos). Also note the knot holes.


Here's the last 2 rows of original floor (not installed). Even loose (not tightened-up) there's about 4" of missing floor to replace.


This was on another day (and took a good part of the day to do). Angelina was REALLY bothered by the location of the vent in the living room. I agreed, but I wasn't sure if we could fix it. I had my suspicions that it was there because there was a ceiling joist in the way. The basement (stone foundation) also had this vent completely sealed and cemented in place (all around it).


Well, as I said, it really REALLY was bugging her, so we took a look at it. Turns out it would be possible to fix it. We removed the vent/grille/boot in the upstairs spare bedroom, and found that there was space to the right. Likewise, all the loose stone, sand, and rubble of the stone foundation could pretty easily be moved to accommodate the pipe to the right (into the corner). The small bits of loose floor were rotted from moisture.


I had to make SEVERE modifications to the top (sloped/angled) boot to get this to work. I essentially had to completely remove the joint fitting (the coupler part).


A couple of elbow joints, and then more filling with crushed stone.


You can kind of see what I did here. The joint is missing, and the elbow goes directly into the sloped cone. It actually worked out really well. The boot isn't at a perfect angle with the floor, but it's only about 1/4" off.


Angie was VERY happy.

While I had to cut the tongue and groove ceiling to do the repairs/modifications, I also cut the patch for the ceiling where the round stovepipe vent was. The key is to have a staggered joint. If we had plenty of old salvaged tongue and groove to work with, I'd have made it even more random, but we are limited, so I cut off as little as possible.