Showing posts with label Grate. Show all posts

Monday, July 06, 2015

Master Bedroom Grates

Here's something small that FINALLY got done just the other day. I had started to strip and clean-up the grates (these are the ones that go in the master bedroom) probably about a year ago, and it had not gone very well, so I set them aside for later.

I have been working on a few French comtoise clocks lately (see below), and as part of their refurbishing, the movement cages needed to be stripped and repainted. I decided that it would be a good time to finally finish the grates while I had the stripping chemicals out. Since there were mostly just a few stubborn paint spots and drips on the grates, I decided to slather them in stripper, cover them with cling wrap, and leave them to "stew" while I worked on the comtoise parts. This ended up working nicely, and the paint and grime came off nicely with a bit of scrubbing.

Here's the comtoise clock I'm currently restoring (more info on the clock blog):


Here is how the grates turned out. I am pretty sure they are cast iron, but they seem to have a copper plating on them. These were originally quite dirty, grimy, coated in paint, and I thought they were originally just rusty iron. They turned out looking quite beautiful, and the colour blends in nicely with the painted floor. I didn't photograph the second grate, but they look pretty much the same.


Here's an older "before" photo of how the grates looked before cleaning/stripping:


And here's an OLD original photo from when I first bought the house:


Sunday, July 06, 2014

Insert Whitty Title Here

I don't know how people on other blogs manage to come up with all sorts of witty and interesting titles for their posts. I suck at it, and usually don't even try, but I didn't want to call this "Another Boring Update".

As promised, here are the two completed antique grates. One is original to the house (the one in the green living room), and the other identical one was installed to replace the large and poorly located floor grate next to the front door.

If you missed it, and wanted to see how I did that, go see these posts (in this order):
http://my1923foursquare.blogspot.ca/2013/01/secret-project-revealed.html
http://my1923foursquare.blogspot.ca/2013/01/office-floor-new-look-for-2013.html

As I mentioned a few posts ago, I had one missing thumb latch from my original grate, so I had a new copy cast in brass. I had paid 50$ for the second (and complete) grate, and unfortunately, it cost 45$ just for the casting. I could have just bought an entire new grate for an extra 5$, but I would have needed to travel out of town to go get it, and I hadn't gotten a quote for the casting, so I didn't think it was going to be that much.


Here's the final product. Grate closed:


Grate open:


Office grate:


In other news, I decided to spend last night with some lovely antique lighting. I used my two whale oil lamps, paired with old mirrors to double the light.


This prompted me to look for my other whale oil lamp AGAIN. I had another nice clear lamp that I've had packed away, and I couldn't find it. I looked for it on 3 or 4 occasions over the past month or so, and I finally found it this afternoon.

I wasn't happy with how I found it though...


Broken in half.


I actually discovered that the lamp was already broken here, and previously repaired. There was a thin layer of clear adhesive, and I spent about 30 minutes scraping it off and cleaning the joint. I plan to re-repair the lamp with Hxtal, which is a specialty glass adhesive used by museums. It's very expensive, but it's supposed to make an incredibly strong repair, and be crystal clear. I've been meaning to buy some to repair a broken clock glass (hand painted) from the 1840s, so this is another excuse for me to buy some.

This fine lamp also has a completely ruined original pewter collar, which I will need to replace, along with a burner. Unfortunately it's not a standard size, which will make my restoration job incredibly difficult. The lamp is from the 1830s or 40s.

Friday, June 27, 2014

Antique Heating Grates (Update)

I just finished-up the two antique heating grates last night (for the Office and Living Room). The new casting for the missing latch was brought back to me this week, and I painted it over the past few days (primer, followed by black on the back end, then white on the front). And they are now installed and functional again.

The casting ended up being quite expensive (nearly the price of buying an entire salvaged grate), but I had never gotten an actual quote for the casting, and it's over and done now.

I wanted to share photos, but I forgot my camera at work, so I will post those next week.

Monday, April 21, 2014

Small Project Updates

So as I mentioned the other day, I did some stripping for a few small projects, and here they are!

First off, it's nothing too exciting, but it was a *LOT* of work, and I want to show it off: the living room heating grate. It still needs the thumb latch, and I'm getting a copy cast for it:


Next is the inlay maple desk/table. I can't tell you how thrilled I am to finally have some semblance of a proper desk after 4 years of dealing with a rickety card table. I also took the opportunity to thoroughly vacuum the floor, clean out the computer (inside) case, and clean all the wires.

The desk turned out pretty well. The finish isn't perfect (since it's hand-brushed), but it should be quite durable. I like the edge a lot better without the brown paint, and I also fixed the drawer and replaced the runner boards.

The only problem now, is that my office chair (which I reupholstered last week) is now too low (the lift on it is broken). So I need to fix it, since the desk is now about 2" taller than before. Two inches doesn't sound like much, but it's a big difference.


You can see the office's matching heating grate in these next two photos.


Additional notes: There was a bit of a burn mark in the wood which is still a bit noticeable in the photo above, but it's not enough to bother me. I also decided not to do any modifications to the top (I had thought of routing another profile on the edges, or sanding it flush to eliminate the double bead, etc. I also didn't bother to do any veneer repairs (there was one large-ish chip). Instead, I just used wood filler in a light golden yellow, and it was a close enough match to do all the little chip and nick repairs.

Saturday, April 19, 2014

Stripping

Most of yesterday was spent stripping. Not the sexy kind of stripping, though, the messy kind.

I have several projects that need stripping, and I've been putting them off for a while (mainly due to the weather, since I need SOME ventilation).

Some of the projects include:
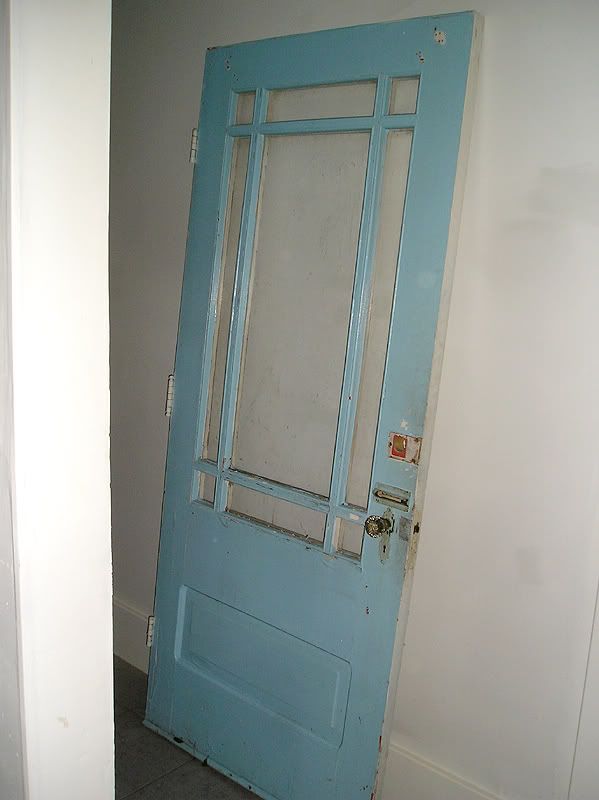
- Antique front door
- Two antique chairs (needing new upholstery)
- The living room heat grate
- An antique (1920s or 30s) cedar chest
- The maple table/desk
- The antique Eastlake walnut desk
- Several clocks
- Etc., etc., etc...

There's no way I could handle all these in just one day (it takes hours), so I worked on a few items that have been driving me nuts, namely the maple inlay table/desk, and the living room heating grate (which you might remember had a TON of old paint sloppily applied).

No photos on the table yet, but that was a fairly simple stripping job, since everything comes apart into many small flat pieces (4 legs, 4 aprons, the drawer, and the top). The grate, however, was another story.

The grate was a huge pain in the rear to strip because of all the nooks and crannies. I had to mostly slather it in stripper, and cover it with cellophane to sit for a while. Considering how strong the chemical stripper is, I'm surprised that the cellophane doesn't melt into goop, but I've seen this trick elsewhere, and it worked well.

Grate before (as purchased from an antiques salvage store):


And after stripping, and new paint. I should have taken a photo of the grate stripped (it was a beautiful flashed copper look and in decent shape), but I was tired and looking forward to getting it DONE.


Note: The interior is flat black, with the front parts in gloss white. These are just standard oil based spray paints, applied in several coats.

Not shown are the 2 interior flaps (lever operated shutter), which also had to be stripped, buffed clean of rust, and repainted (also in flat black). Next, I will need to have a new latch cast for the one that's missing. I hope this won't be too expensive, but at work we know a guy who knows a guy who does casting, and he had done a few copies of antique dresser pulls for us, and they were gorgeous. The set of 2 pulls (with back rosettes) was something like 60$ for the 4pcs. I only need one piece, so I'm hoping it will be under 50$, since I can buy a whole other grate for 50$.

Wednesday, November 13, 2013

Firewood Part Deux

After the freebies from last time, I also got a trunk-full of old lumber that my boss had set aside from the burn pile. The stock has a lot of useful pieces, such as thin pine backboards and drawer bottoms (which are useful for clock repairs), as well as several large pieces of lumber (armoire pieces?)

Initially I had no room for it anywhere, so it was piled in the front hallway (I didn't want it left in the cold porch).


The top board on this pile is actually a broken headboard from an old pine bed.


This second batch of firewood wasn't just boring wood planks. There were also a few fun pieces. Among them was this gorgeous gesso-decorated mirror frame. I was amazed that it was still in good shape, because I literally dug it out of the back of a pickup truck full of scrap wood. It was half buried, but it has almost no breaks. it will just need a few touch-ups. The frame has already been repaired with wooden dowels drilled diagonally and glued into the corners.

You can see it here in front of the previous mirror (which needs a lot more work), and 2 of my other old frames behind it. You can also make out the love seat on the right. The frame is pretty large at ~16" x 57". I'd date the frame to around 1900, but it has a similar style to earlier 1800's over-mantle mirrors. I plan to just touch up the frame, and install repro wavy mirrors.

Also note that large Victorian carved table leg on the floor. I have no idea what I'll do with it, but it's solid walnut, so sadly I may just use the lumber. Otherwise it's just a giant (and very random) decoration.


I also salvaged some interesting fretwork pieces. The large one is likely from a gramophone or radio cabinet, while the smaller one is from some sort of decorative wall shelf. The piece at the front is the top of an old mirror. It's ruined, but the pressed/carving can be removed and reused.


The desk has been brought upstairs into the "L Room" for storage until I can work on it.


The rest of this post is just a few random bits.

Here are two shots of the restored finish on the mahogany serving piece. I think it turned out awesome for so little work.


The colours are wonky in this one, but you can see the top better. It's not 100% perfect (since the top had a LOT of stains and blotches), but it's pretty good, and I prefer imperfections on antiques.


Lastly, here's a half finished project. I've started working on some of the grates. This one has been cleaned, scrubbed free of excess rust, and painted. The interior (and back sides) are flat black, and the front is gloss white. I used spray paint for a beautiful smooth finish. The screw was also cleaned-up with a metal file (to remove burrs and marks), and painted.


The reason it's only half finished is because the latch hasn't been stripped and painted, and neither has the interior flap. These will be worked on at the same time as I do the second one for the living room.

I also took advantage of this past week's sale on paint at the Home Depot. I spent over 200$ on 3 1/2 cans of paint. I bought green for the upstairs "L Room", and blue and light grey for the main hallway (it will be blue on the main floor, and grey going up the stairs).

Thursday, January 10, 2013

"Secret" Project Revealed!

Not a huge secret, but I finally decided that I've had enough of stepping on that awful grate across the Office door's threshold, so I've decided to do the necessary work to finish the duct work.

As many of you might know, a few months ago I was in Ottawa, and I found an antiques salvage store that carried some heating grates identical to the one in my living room. As far as I can tell, the house only ever had ONE of these wall grates, which I find odd, and I thought it would be fun to add a second one.

I had originally bought the grate in hopes of using it, or possibly just to replace the existing one, which is missing the lever handle for the internal batten. Since I bought it, I've had it sitting at the foot of my computer "desk" (a temporary card table, which I'm sure made an appearance in the Office floor demo post a while back), and I thought it would work well there.

I started the work by cutting and installing some structural braces and floor supports that will carry the weight of the floor patch for the old vent hole (no photos yet). The floor patching/repair isn't done yet, but it will be soon.

The next day, I started to work on the actual vent location and construction. I think I cut the hole in the wall and the floor on "day 2" and did the rest yesterday (day 3), but regardless, let's jump into it.

Note: I don't really understand the logic with how the house was built, with regard to how they did the ventilation. The first floor's floor is made up of old barn wood boards laid diagonally across large "tree trunk" beams spaced every 3 feet. The barn wood is not all the same thickness, but most is around 1" to 1 1/8" thick, and the spacing is also uneven (many boards have raw edges). Over this, there's a layer of thin cardboard, and then the hardwood. That's it. But the odd part is when it comes to the ventilation. They just cut large holes anywhere they needed. What's odd about this, is that since the "sub floor" barn boards lay diagonally, once they're cut, they aren't supported by anything. The only thing that holds them in place are the nails from the hardwood over it. But they did this everywhere, and it was like this originally. All the original main-floor vents are 12x15 (with the exception of one 14x18 - which is the one I'm covering over in the office door), and they're all the same. In a few places, I added some supports, but for the most part (and a bit surprisingly), it's all very solid.

Step one was to find the best spot for the vent. I knew where I wanted it, but I didn't know exactly where the electrical wiring passed, since there's a light switch on this wall just above the vent location.

I drilled a bunch of 1" holes in the drywall, and felt around for the wire. I didn't see it. I then drilled a hole at the top of the vent hole, and also couldn't find the wire. I was pretty sure I wouldn't run into the wire, so I just went and cut the hole. The hole needed to start at a 2x4, and end up with solid on all 3 sides.


Those of you who visit frequently might recognize this as the "hallway wall" in the Office. For my vent, I was basing my measurements partially from my original vent/duct opening in the living room, and partially off the vent itself. I needed a hole about 11" high, and 12 1/2" wide. After the hole was cut, I could see that the electrical wire was about 4-5" higher than my hole, which was just perfect.

Next was cutting the bottom stud, and the floor. Kinda scary, but also kind of fun. If you're doing this in your home, make sure you have clearance below (you don't want to end up cutting your hole over a joist, though a pipe, or into a wire). In my case, my finished hole was going to land about 8-10" away from one of the log beams, and in a spot clear from wires and pipes.

In this next photo, you can see the old duct that was still in use, feeding the old floor grate to the left. It was going to be gone/moved to feed this new duct.


I'll also point out that you need the right tool to do this kind of work. This was done almost entirely with my Rockwell Multi-Tool (They call it the "SoniCrafter"). Best 130$ I've spent so far. I'm not getting paid to promote them, but it's a damned good product. The first experience with this type of tool I had, was through work (but we use a 600$ Fein version). I find the Rockwell to be as good as the Fein, which is surprising considering the price difference. We use it all the time on installations, to cut wood trim in odd places, for outlet holes in cabinets, drywall, etc. The blades can also be resharpened rather than simply replaced. New blades are about 15-20$, but a local company can sharpen them for around 8$, and then they are as good as new. I've cut through plywoods, hardwood (this birch floor is very hard), MDF, drywall, PVC, and all kinds of stuff, and they last quite a long time, but I'm getting side tracked.

Once I had my hole ready, I made a pattern for the duct work box. I am pretty sure that new ducts for these super OLD vents aren't available, and since I can make one for free, I went that route. I'm sure that there are many tinsmiths who make custom duct work, that can easily throw one of these together for you ($$$), but here's how I did mine.

For the most part it's just a simple box with a small slanted front. You need to make sure to make the box a tiny bit smaller than your opening (or it will NOT fit), and you also need to make sure it will stick-out low enough under the floor (to hook-up your duct work). Another consideration you need to take into account, is how you'll be hooking it into your HVAC system. Will the duct connect from the front, back, side, or bottom. What angle is best? Etc.

For mine, I wanted to try to have the final duct running near the log beam, in a straight line, so I wanted my duct hooked into the back. I have about 4 huge boxes full of scraps and duct fittings, and I found one that worked perfectly.

I decided to make a full sized paper template for this duct, because it was a complex shape.


The paper template proved to be very useful, since I had already goofed a piece on it. I actually had measured the bottom wrong. I made it 4 1/2" wide (the same size as the top), and it should have been 5 1/2" (this was easily fixed on the tin copy).


Since I was making this for free, I used only the available scraps of tin that I had laying around. The main sheet (a flattened-out 5" round duct) could only accommodate the central part of my duct box, so the two side pieces had to be made and attached separately.


Tools needed for this:

- Ruler
- Sharpie
- Framing Square (large)
- Awl, screw driver, or another tool to score the tin
- Tin snips or shears (basically these are metal-cutting scissors)
- GLOVES (strongly recommended but not required, though there's a very good chance you'll cut yourself)
- Wooden blocks with good square corners/edges (to use for bending the tin)
- Pop-rivets & rivet tool
- Drill (for rivet holes you need 1/8" bit)
- Hammer
- Foil duct tape

Optional: First Aid Kit (seriously, if you're not careful you can wind up with deep cuts) I didn't use gloves this time, and only ended up with two tiny scratches, but be careful. The edges will be razor sharp.

Start with drawing and measuring out your main shape. Be sure to leave tabs along the edges (1 inch is a good size), and also leave allowances to have a folded-over seam on the exposed finished edges (since these will be sticking out of the wall).

Cut out the shape, being careful not to crinkle or buckle the tin as you cut. Cut tapers on all the tab corners. Here you can see the front, bottom, back, and top of the box, with a fold-over seam at the front and top of the box (both ends of the sheet), and tabs along all the edges.


At this point, you can start by scoring, and folding-over the good edges, and then starting to bend your edge tabs (at 90 degrees). If you have an opening to do in the tin, cut it before you get too far.

Openings are always a total bitch to cut. Unless you have a special tool, you'll just have to be patient, and do your best. I started the opening, by poking a row of holes through the tin with the awl, and then sneaking-in my shears.


Pretty soon, your box will be starting to take shape.


To attach the sides, I used a combination of 6 rivets (hammered-down flat after installing them with the tool), and foil tape. If you prefer, you can use sheet metal screws, but since this is a vent box that I might want to reach-in and clean occasionally (or if something falls into it), I didn't want sharp metal screw tips in there.

I did use two screws, however, to attach the "factory" duct boot to my opening flaps, but I only used 2 screws.


The finished duct is held in place with flat roofing nails. I used 4 (one per side, one on top, and one into the floor at the front edge). I didn't take any photos of it, but a stud was added to the right side, and to the top around the inside of the opening. The drywall around the hole was secured with extra drywall screws.


From the basement, it looks pretty awesome now.


You'll note that I didn't add any floor supports (in reference to the "note" earlier), but I did nail the sub floor up into the wall studs on each side, and I added some screws from the bottom up into the hardwood, so it should be just fine.

You can see a lot of the repaired/improved ducts here. The large box over the stairs is the hallway's cold air vent, next to it, a vent to the "L Room", then the new duct for the new wall grate (you can see the new box in the top left), and the last duct is the other "L Room" vent.


Side note, this was the Office duct work "before":


And here's a "before" of the photo above. What a mess. I've actually gained a lot of head room with my repairs.