Thursday, August 13, 2015

Salvaged Front Door - Update No.3

Here are a few photos of the finished door with all the antique hardware fitted and installed (except the hinges and the glass).

The knobs and plates needed stripping and cleaning. You can tell that they used to have more copper on them, but I like the weathered look that they have currently. I coated these with clear spray lacquer to try and keep them protected for as long as possible.

The Yale lock was stripped, and I believe the original paint might have been beige (which is a very unusual colour) but it was completely shot. I repainted it with a metallic bronze spray paint (masked-off the knobs). I have the matching strike plate as well.

Here's the interior side:


The key is not original, and it's not an EXACT fit, however it does work fine with the lock. Ideally it would need to be the same shape, but just a hair longer since it has trouble "throwing the bolt" all the way, and you need to rotate the key again no nudge it through to the end. I probably won't use this lock unless I want to make the door excessively secure (if I leave the house for a trip or something).

Note the original pencil lines in the wood. These were very deeply pressed into the wood, and I couldn't scrub them out. I would have needed to sand down the wood too much to remove them (the sanded area would have shown) so I left them there.


Yale lock, with original slot screws (also painted to match), and newly fitted with 3 keys.


Exterior Side:


The lock and ring around it are brass, and I love the existing patina on them.


The backplate on this side is matching, but it's a lot larger.


Monday, August 10, 2015

Salvaged Front Door - Update No.2

The door is now finished*, with almost all the hardware installed on it. I have just one small problem now, which is hinges. The original hinges were 4" flashed copper hinges. When I salvaged the door, most of the hinges were gone. There was only the half left without the ball tips or pins.

In addition to this, I also discovered that the door stile (the vertical door member) that carries the hinges is fairly warped. There is about a 1/2" to 3/4" warp along the length of the door. The strike side of the door (opposite stile) is fine. The only way I can correct this a bit is by adding a third hinge in the centre of the door. The original door only had 2 (very heavy duty) hinges, but I don't mind adding a third.

The hinges I need would look just like these (flashed copper aka Japanned copper etc., 4 inches, 4 holes, ball tip):


If I can find hinges (I have 2 incomplete hinges missing only the ball-tip pins, and I'd need a third complete hinge) then I can build the jamb and install the door. I have the bronze weatherstripping, nails, and an antique strike plate already.


* The varnished dried much faster than anticipated, and I was able to do a full coat (both sides) in one day.

Friday, August 07, 2015

Salvaged Front Door Project Part 3 - Repairs, Stain, and Varnish

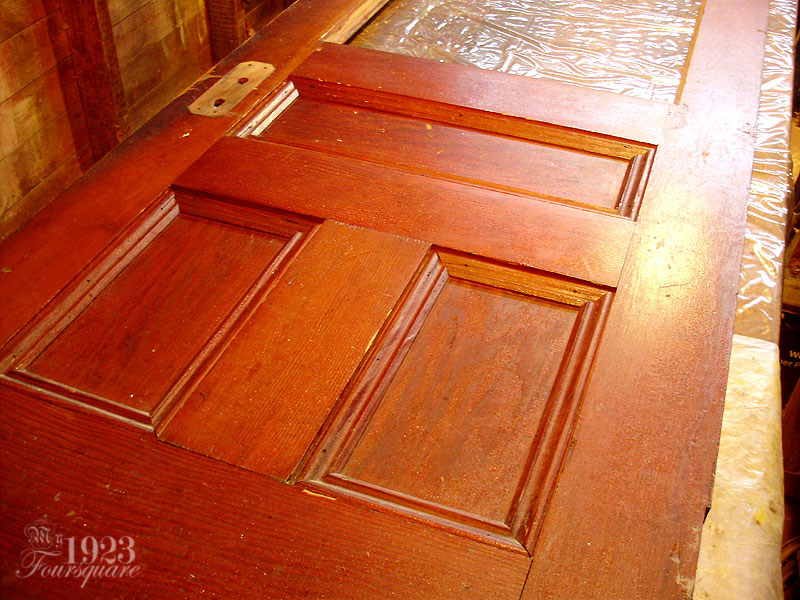
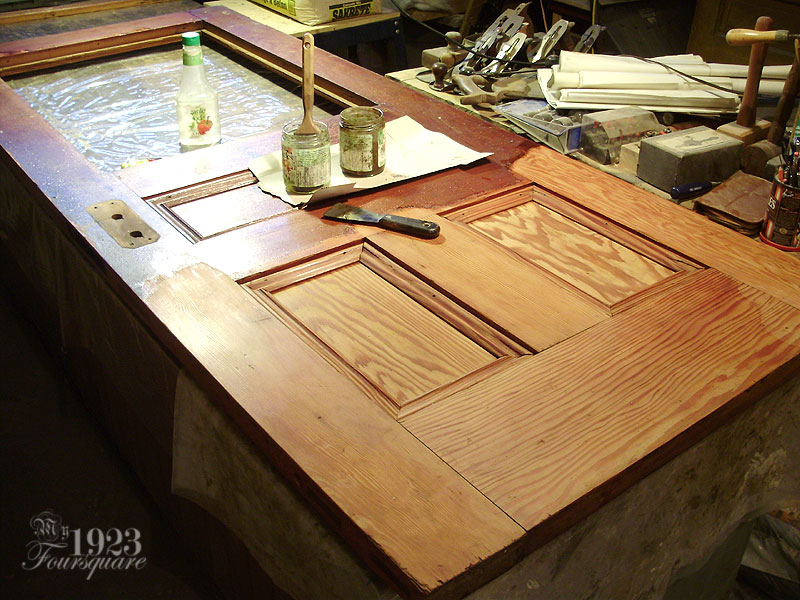
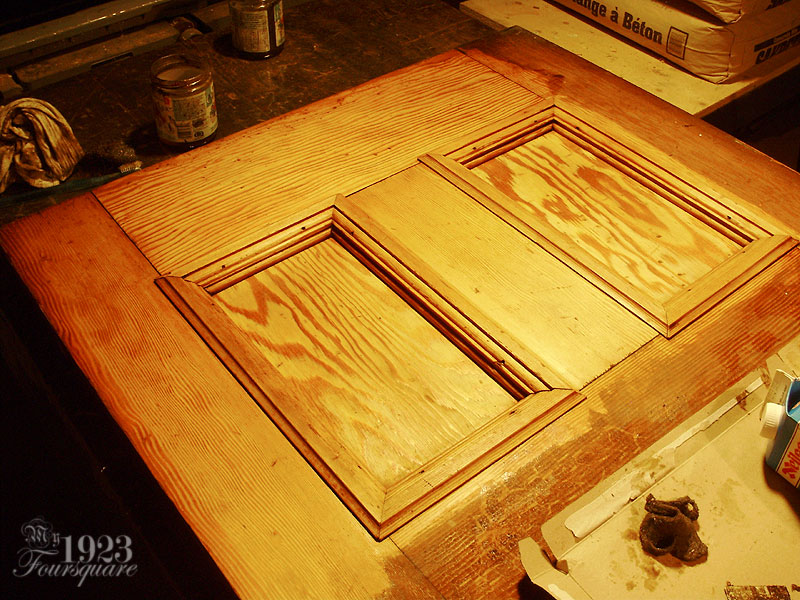
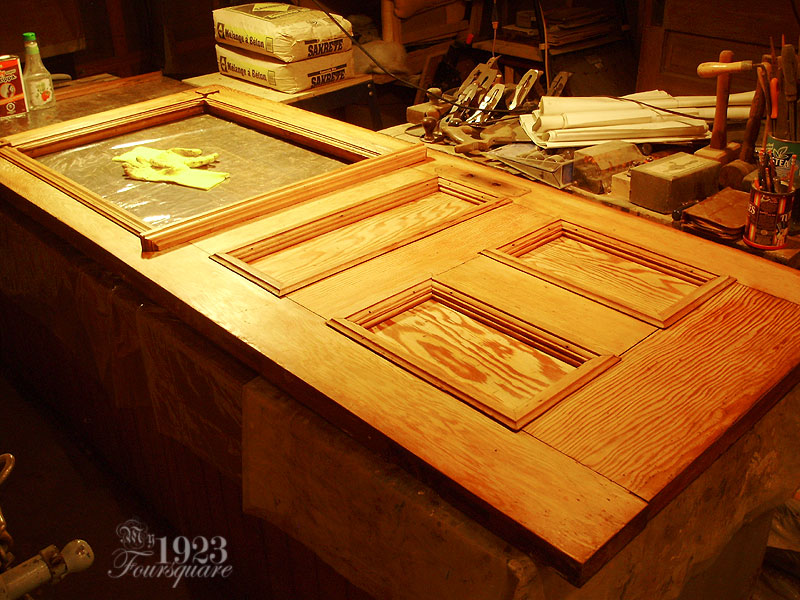
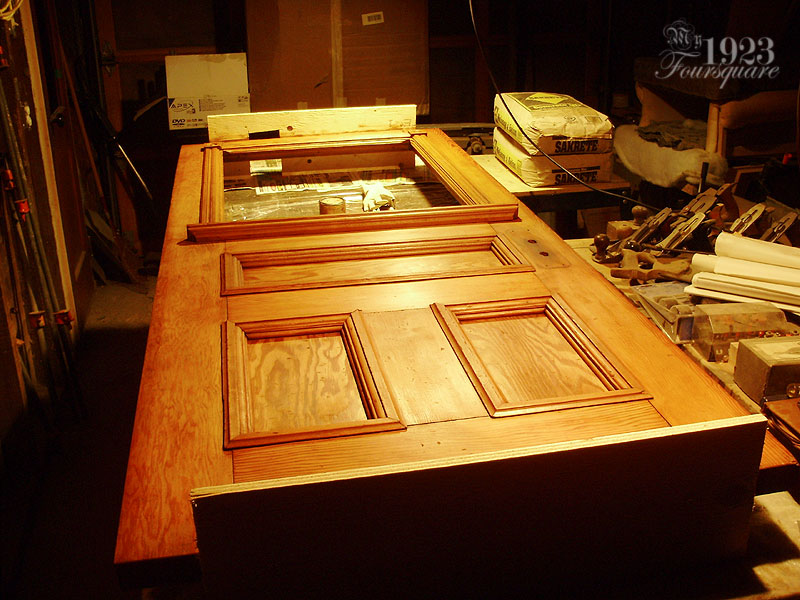
With the door fully stripped clean of the old finish, now I can turn my attention to all the woodworking aspects of the repairs. This includes a wedge shaped wood patch, filling nail holes, a plug patch (not shown), trimming the top and bottom of the door, and drilling a hole for the deadbolt.

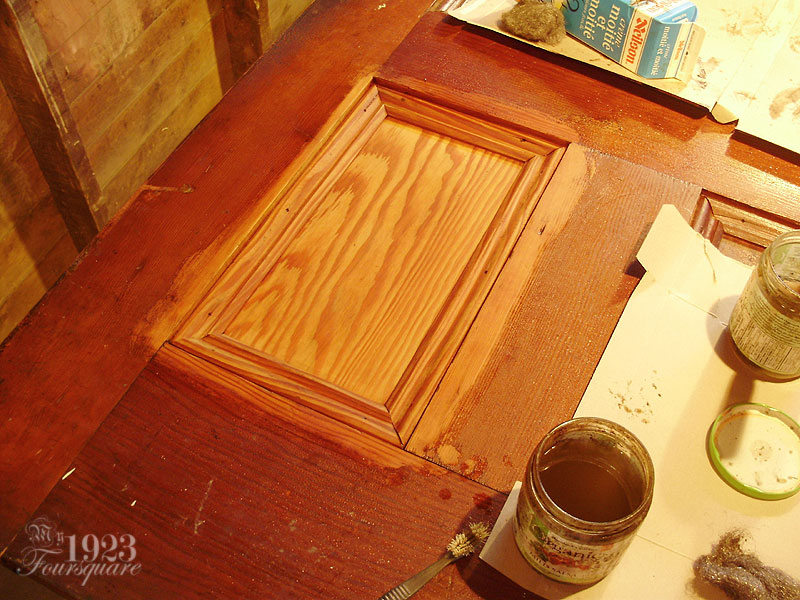
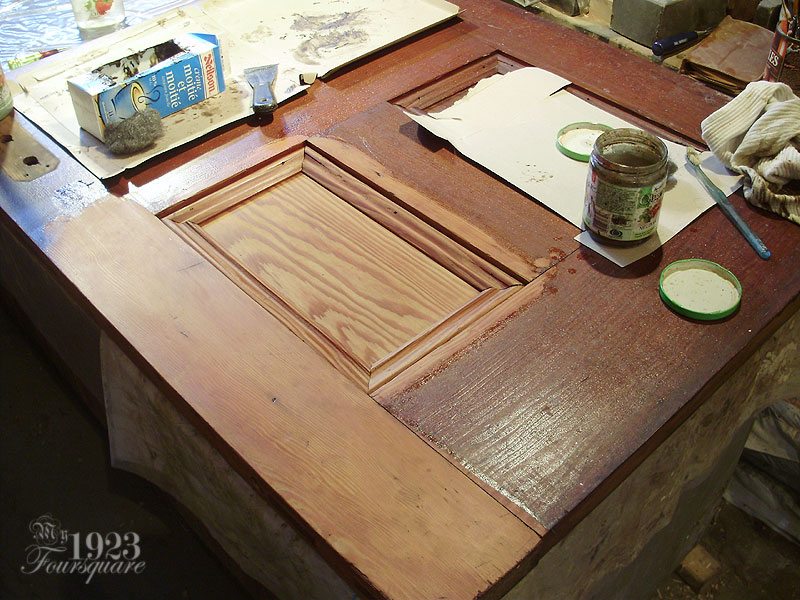
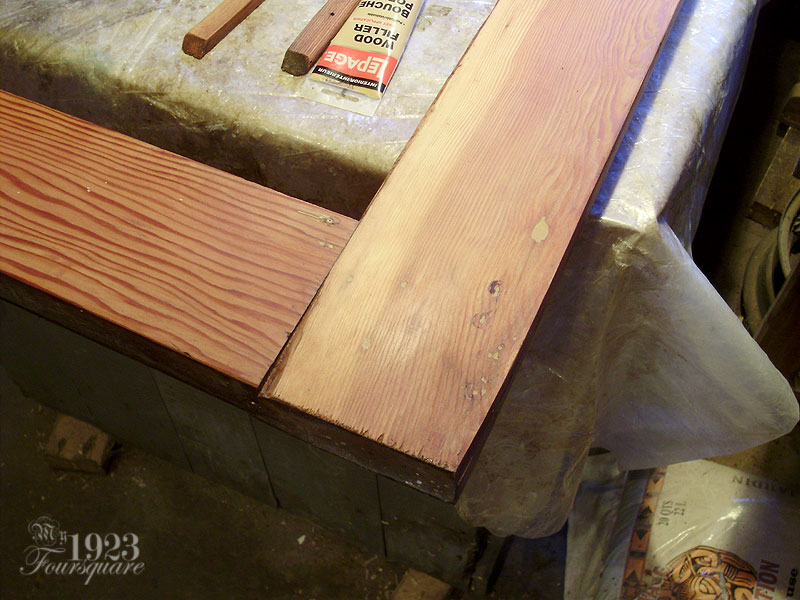
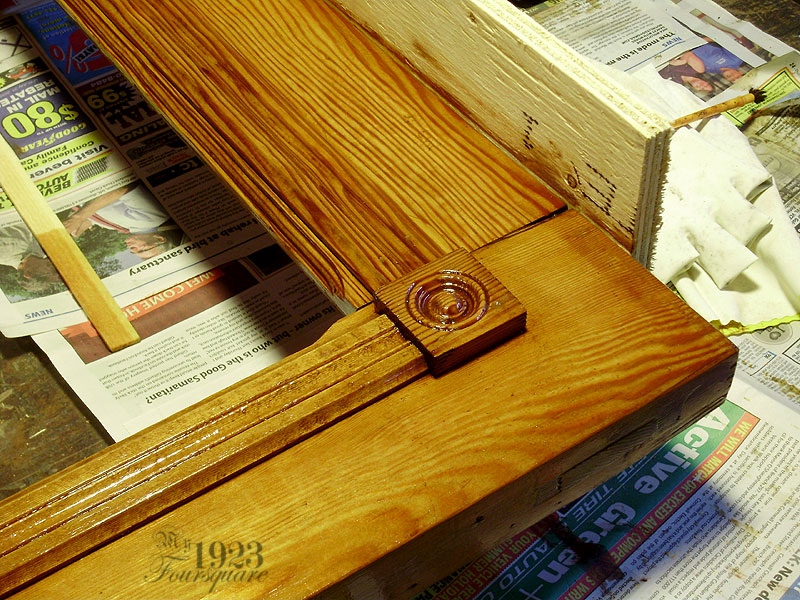
Here you can see where a sliver of wood (a fairly large one) has been broken away from the door frame (at the top on the interior side). If this were smaller, it could be left as "character", or putty-filled, but since it was so large, it was a better candidate for a wood patch.


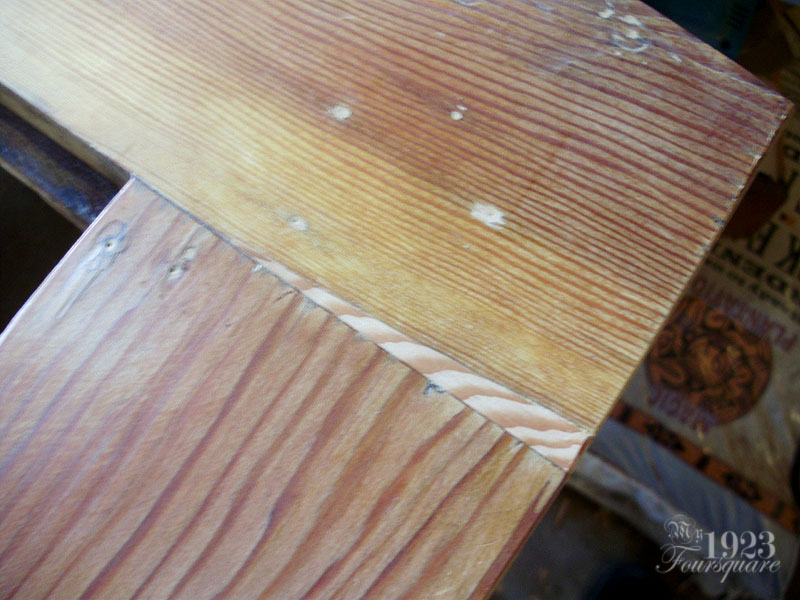
The hole was enlarged slightly and cleaned-up to have clean lines, then a scrap piece of antique BC Fir was cut and sanded to fit the hole. This was glued and clamped with waterproof exterior PVA glue.


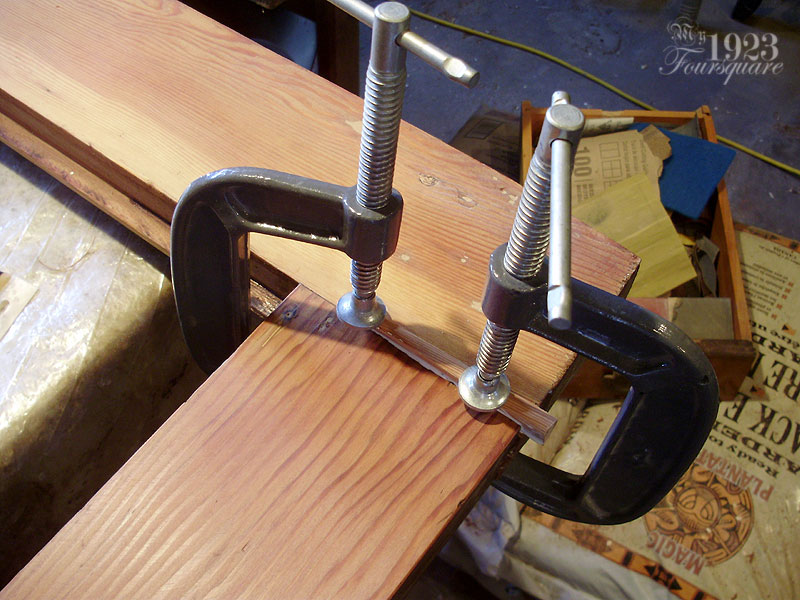
I had made sure to match the wood grain, but since the piece was oversized, and at a slight angle, once it was trimmed and sanded flat, the grain no longer matched. The important part is that it's a nice tight fit, and that it's the same species. I will try to blend the finish to hide the repair as much as possible.


Not shown is another similar repair where I had to patch a shallow 3/4" round hole on the bottom edge of the door. I have no idea if this was for a bolt or for a security system, but the hole was only about 5/8" deep, clean/unfinished, and with no other screw holes near it. I simply cut a plug, hammered it in place, trimmed it, sanded it, and stained it.

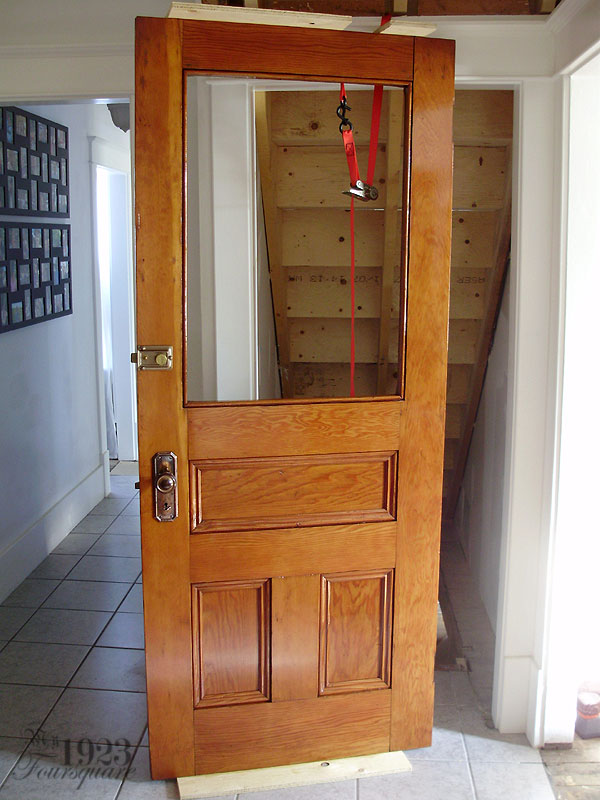
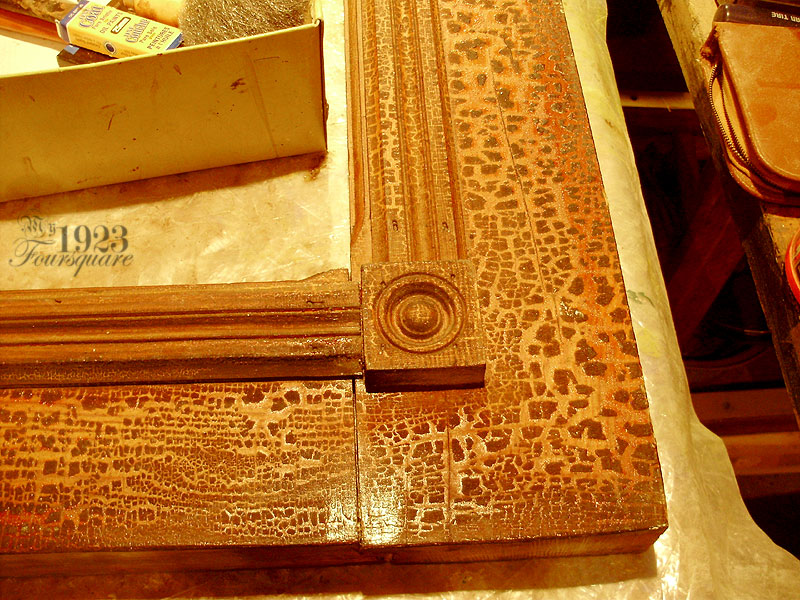
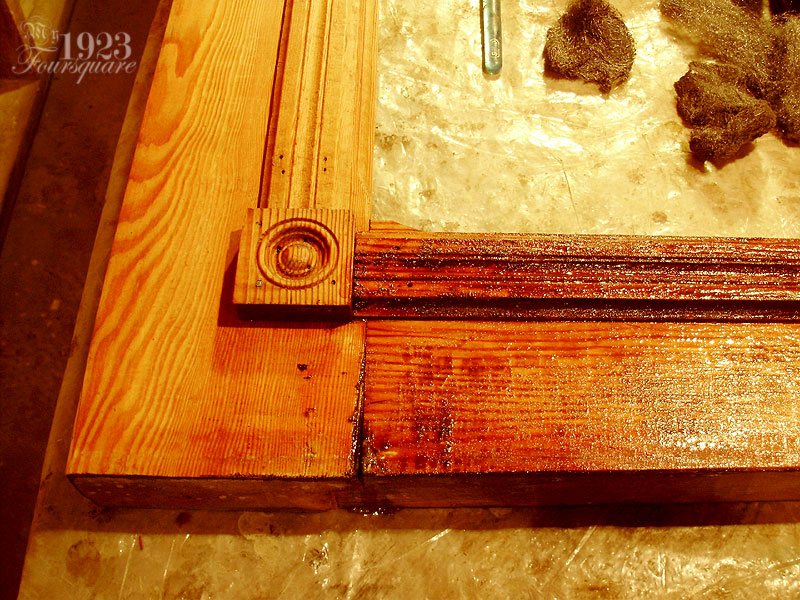
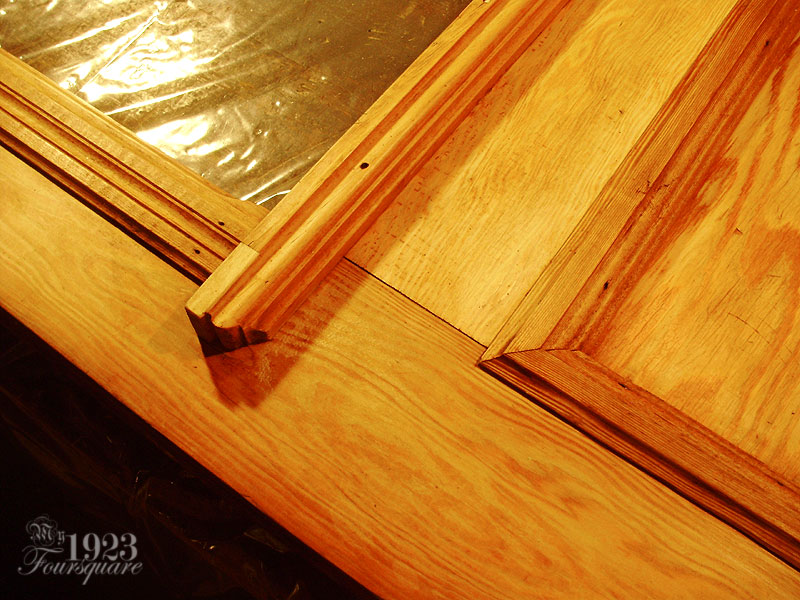
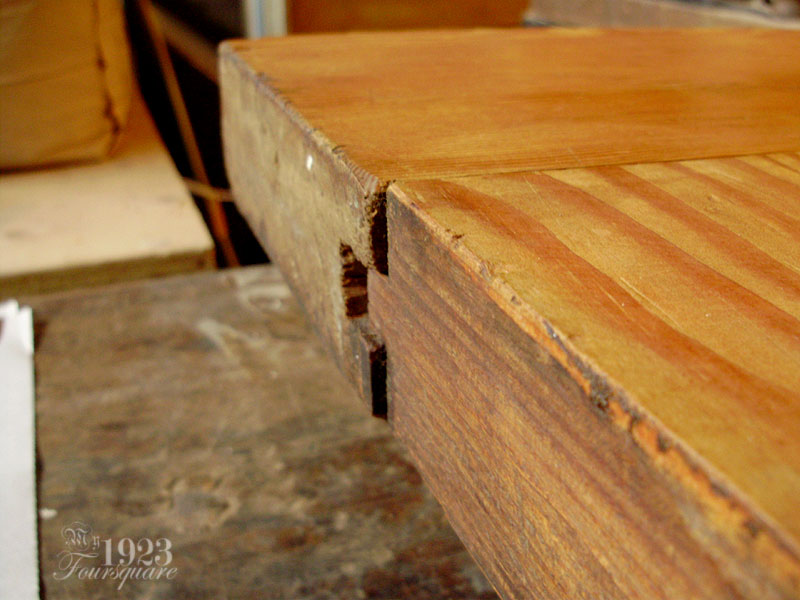
One other problem with the door was that all 4 corners (the door upright side pieces) had about a 1/8 overhanging past the centre boards. This may or may not be a big deal (depending on the installation), but because I plan to use bronze weatherstripping, I need a straight/flat surface for the weatherstripping to work well. All 4 corners were trimmed flush with the centre boards (see photo above). I used a guide and a router for this, since there's no way to lift this door onto my dinky table saw, and a hand held circular saw would have made a very rough cut.


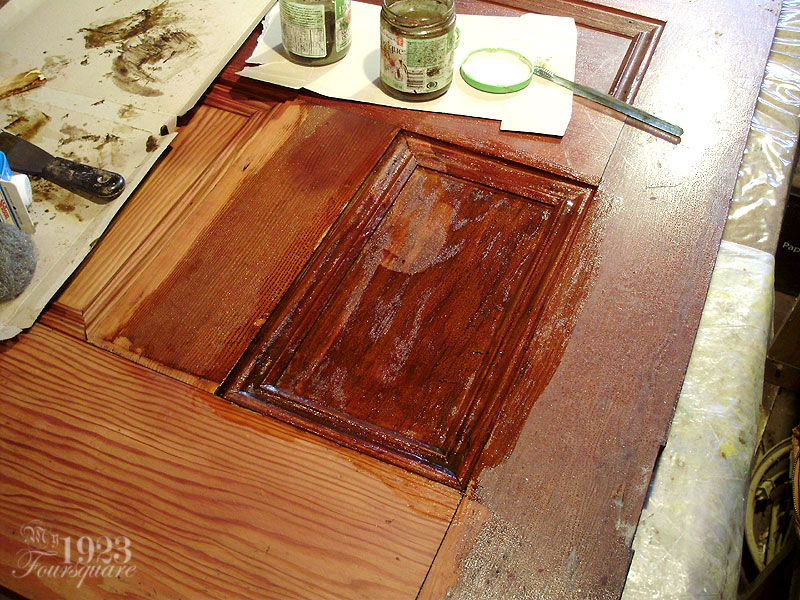
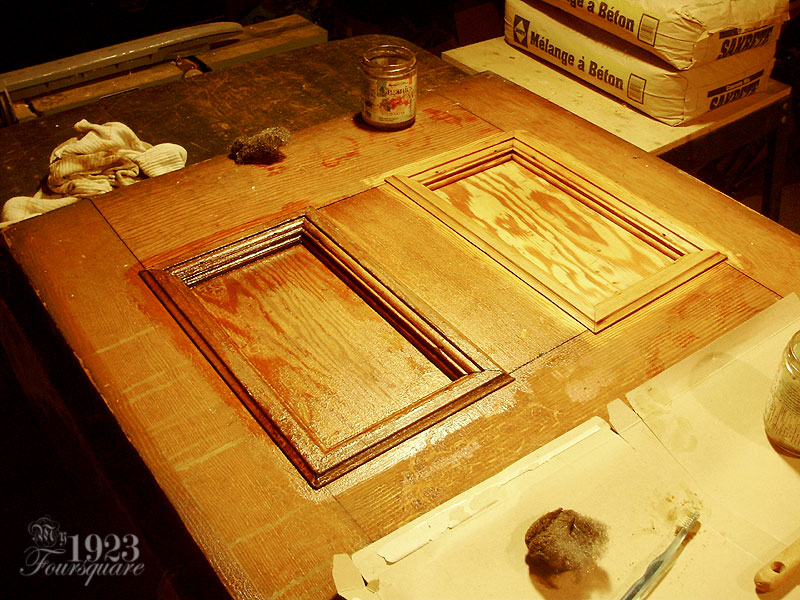
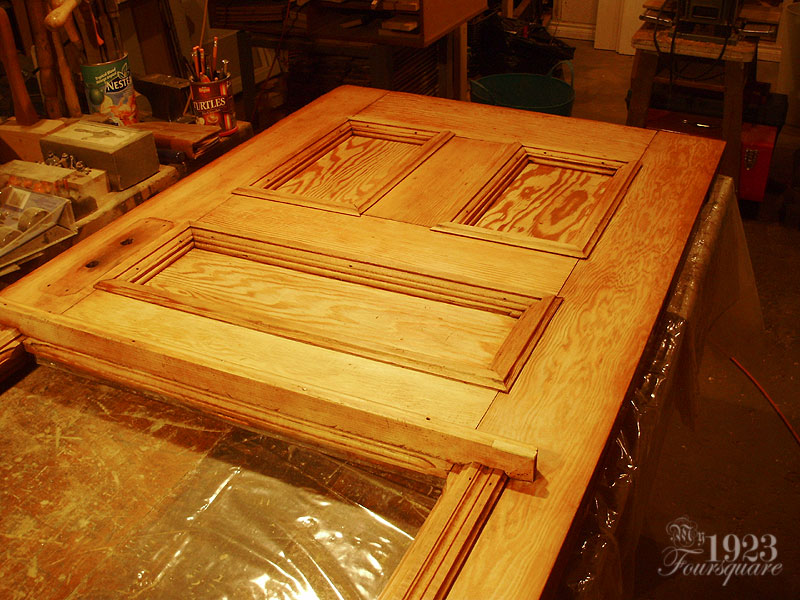
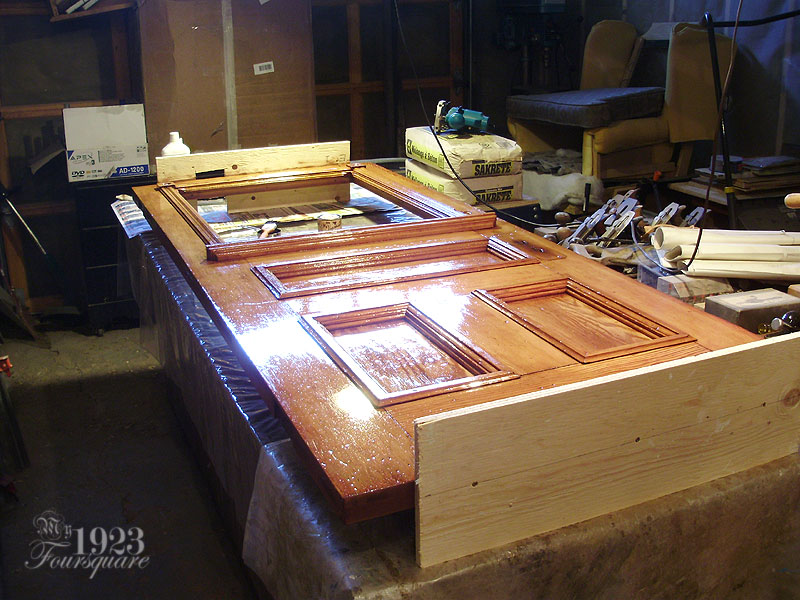
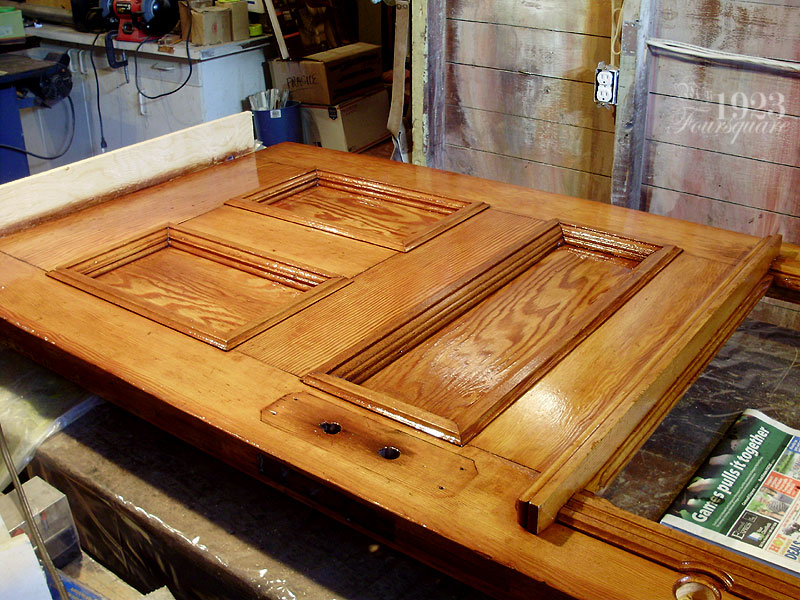
Once all the repairs were done, the entire door was given a coat of light stain. This is just enough to liven-up the colour, as well as blend together any light spots. It also helps to highlight the details in the mouldings, and it hides all the puttied nail holes.


VARNISH!

Most people tend to gravitate towards standard "Poly" (Polyurethane) varnish, or to these new water based acrylic finishes (which I absolutely hate) but for this door, I SPECIFICALLY wanted Yacht varnish (also known as spar varnish). I plan to use spar varnish for all the doors and floors (eventually) in the house. My father refinished his maple floors in the late 1970s using spar varnish (with a yellow-gold tint added to it) and the floors STILL LOOK GREAT over 30 years later. They have very light scuffing and scratches, but the colour, and the gloss are still excellent, and this sold me on the idea of using this varnish. When I was a teen, we finally got the floors upstairs installed (parquet), sanded, and finished, and they used some kind of Poly, and I hated the look and feel of it. It looked bland, and it felt very thin.

A comment also reminded me of another short "spar varnish story". My father had also done a refinishing job on some garage doors for a client/friend. He used spar varnish on them, and I believe it's been over 20 years (these are exposed to weather constantly) and they still look amazing. The client was amazed at how long the finish lasted, and how well it performed.

Some of the pros of spar varnish are that it contains UV blockers, it is also resistant to: salt water (it's designed for wooden boats), heat, abrasions, gasoline, diluted acids, and diluted alkalis. Another pro is that since it is oil based, it flows and becomes much smoother than a water based finish. It's also harder and more durable. It's also fairly easy to find, and very affordable (14$/quart, 40$/gal).

Cons: It is slow drying (6 hours touch-dry, 24 hours to recoat), it's messy for brush cleaning (oil based/paint thinner clean-up), it's very smelly, and 3 thin coats are recommended.

I should also add that as far as application, smell, and cleanup, spar varnish is about the same as Poly.

Because of the drying time needed, and the difficulty in flipping/rotating the door, it will take 6 days to varnish (3 coats per side at one day each).


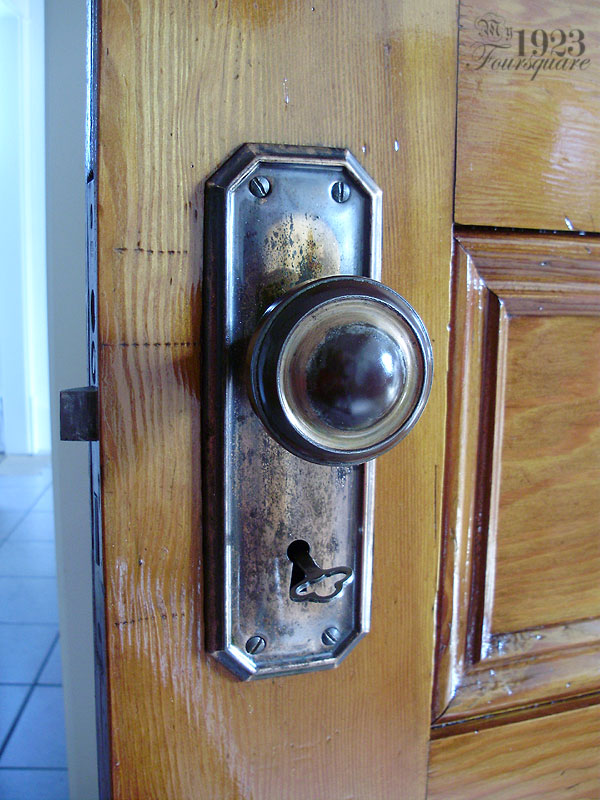
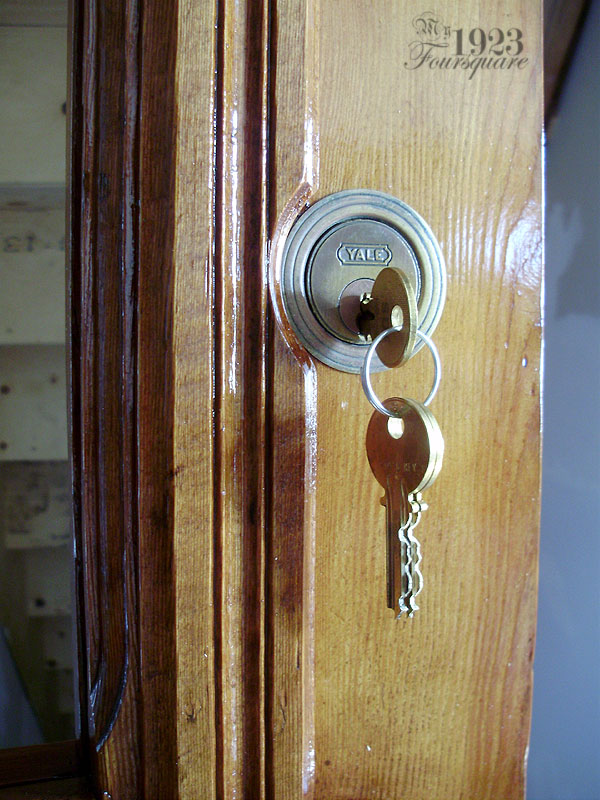
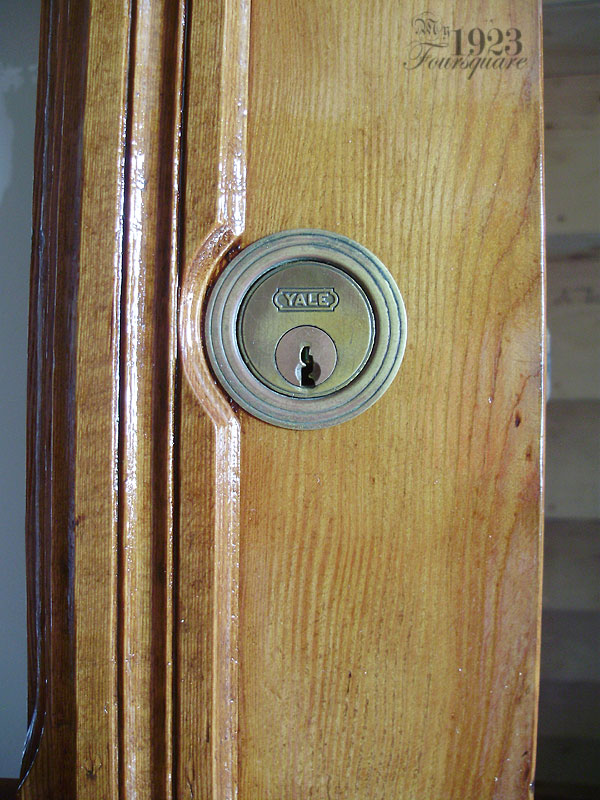
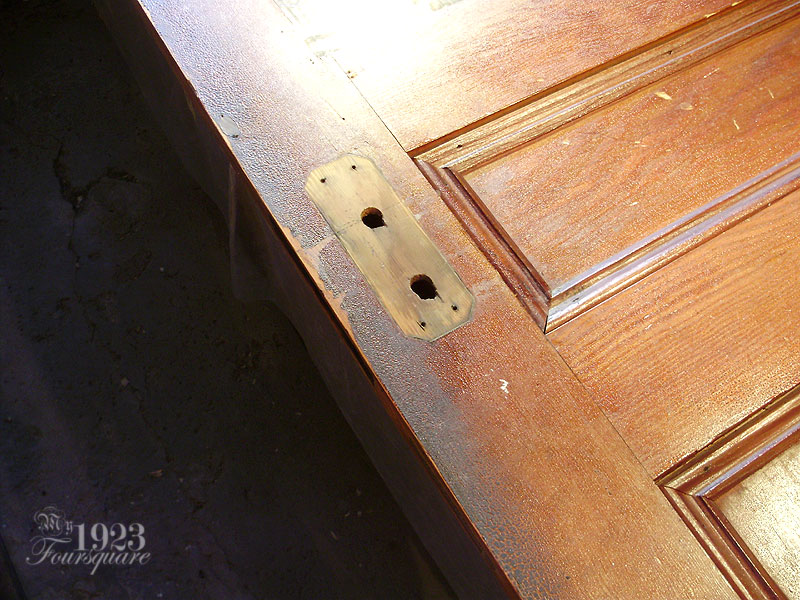
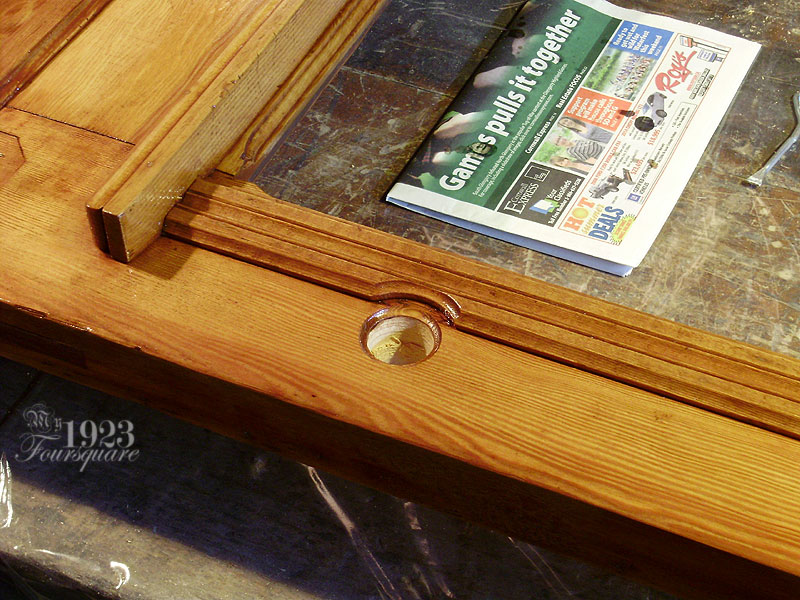
This shows the modifications I had to make in order to fit the deadbolt. The moulding was in the way, so I had to remove it, trim it, and route it to match. I think it will look very good. I would have preferred not to need to do this at all, but the door only had the original skeleton key mortise lock, and that's not at all secure for a front door. The deadbolt I'm using is a salvaged antique YALE lock, and it uses a modern 5-pin tumbler lock (I've already had keys made for it).


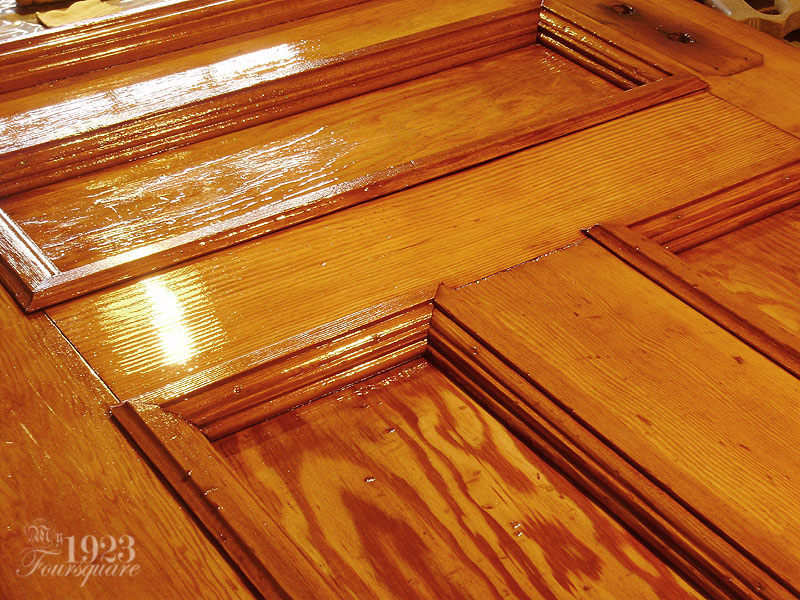
The actual colour is not nearly this dark/bright (more like the photo above), but isn't that wood grain just simply gorgeous? To think this door was headed for the landfill! I even love the little nicks and scratches. The varnish is gloss, but it's photographed while it's still wet. It won't look exactly like this once it's done.

Salvaged Front Door Part 2 - Stripping (Part 2)

Since this particular door is so time consuming and incredibly heavy, I stripped one side at a time. This second part shows the stripping of the interior side of the door. This side went faster because it has simpler panel mouldings as well as no trim around the upper glass opening. There are mouldings that hold the glass, but they are plain, and they were stripped separately.

This side of the door seemed to be a matching old shellac and varnish finish, but it was about twice as dark as the reverse side.

Again, photo disclaimer: due to poor lighting, a lot of these photos have a very reddish or yellowish cast to them.


I have no idea why they did the finishing AFTER installing the hardware. In normal woodworking this is something we'd NEVER do.


Fist panel stripped. You can already see a huge colour difference.


Better lighting:

Also note: the blue cream carton is cut with a window opening on one side. The goopy old varnish is scraped into this for easy disposal.


Gelled finish nearly ready to remove.


Bottom half done. Please note the "water mark" in the lower right corner. This happens a lot when rinsing/wiping the door down. To fix this, you just go over it with the rinse solution and steel wool, and wipe it until the mark is gone. If you leave any of these blotchy areas, they will show later.


Door stripping DONE! Note the 4 mouldings for the glass.

Wednesday, August 05, 2015

Salvaged Front Door - Update

I did get the other side of the door stripped, and now I'm currently making small repairs, filling nail holes, and making slight modifications to the door for the hardware. More photos soon.

Monday, August 03, 2015

Salvaged Front Door Part 1 - Stripping

I'm FINALLY getting started on this project that I've been putting off for quite some time (a few months now). The beautiful old solid BC fir front door (which weighs an absolute ton, btw) has been patiently waiting to get some attention, and just recently I started working on it.

The first thing I did was to reglue the loose upper mortise using old fashioned hide glue (the same kind of glue as the original). This is not the kind of glue you find at your hardware store. Hide glue is an adhesive that has been around since at least the ancient Egyptians (thousands of years) and when it's used properly, it can last a very long time. It can also stick to itself (new glue will reactivate old glue), and it can be taken apart/removed with heat and moisture (as many times as you want without losing strength). I use hide glue when doing most of the repairs on my antiques and clocks.

I also took a few minutes to repair the broken corner on the centre moulding (a very easy fix).

I have had the door ready for stripping for a few weeks, and I finally decided to start doing that tonight. I was able to do one entire side. This went well, but it still took 2 1/2 hours.

Here's my process. I strip furniture, clocks, and hardware using chemical stripper. I find that it gives the best results. It doesn't scrape or damage the wood, and you don't need to do any sanding which tends to completely ruin the age and patina on any item. Chemical stripping is very messy, but not very difficult. That said, it's not for everybody. It takes a certain amount of practice, and I've found from trying to teach a few people (at least 3 people) that most just don't have the patience to do a good job. You can't rush, and you have to keep working in the same area until the wood is clean. If it's still shiny, or there's still finish in the crevices, it's not done. If you move to another area, the softened varnish will only dry and harden again, and you're just doubling your work.

Tools needed: Stripper, rinse solution (I use a special recipe which is a mix of common chemicals - which I will not share) you may use alcohol, or water, steel wool (medium or fine), newspaper, tarps, rags, and optimally a dedicated set of 2 bristle hair paint brushes, as well as jars (one for your stripper, one for the rinse, and another for "waste goop"). You will also find it useful to have a small 2" drywall taping knife as a scraper for flat surfaces (dull the corners to avoid scratching the wood).

Start with the most messy and irritating areas. On a door, you will want to start with the panels, mouldings, and finish with the flat areas (this is the same order that you'd paint or varnish in as well).

Panel 1 stripped, panel 2 coated in remover:
Note: due to the lighting situation in the garage, all the photos have a fairly severe yellow cast. I tried to fix this a bit in Photoshop, but with limited success.


2 panels and a few flat areas done:


Upper left corner before:


Upper right corner during:


Beautiful tight grain of the solid BC fir. I will go back and fill all the nail holes later. Side note: Old toothbrushes also work well in tight corners and crevices.


Side one completed!


You can see the moulding repair here. This moulding is the only piece on the door that was made in pine rather than fir.


Top Left:


If the weather is nice, and if I'm in the mood, side 2 will be done tomorrow.