Alright, I forgot to mention this, but I like it in a different post anyways (Read previous post first or this won't make sense).
I can't decide what to do with the interior/back of the built-in (which is why it's not installed yet). I was originally just going to put some thinner Fir plywood back there, but then I thought it would be really cool to put tongue and groove instead. But the t-g would be pine, so the woods won't match. This isn't an issue if I paint the interior, though. I thought of maybe using a light blue in a gloss? Otherwise I had thought to have the interior lightly stained and varnished.
Thoughts?
- Stain/varnish interior (Fir back)
- Stain/varnish interior (even though the woods will be mis-matched a bit)
- T-G back with painted interior (colour ideas too?)

Tuesday, November 29, 2011
Lazy Blogger
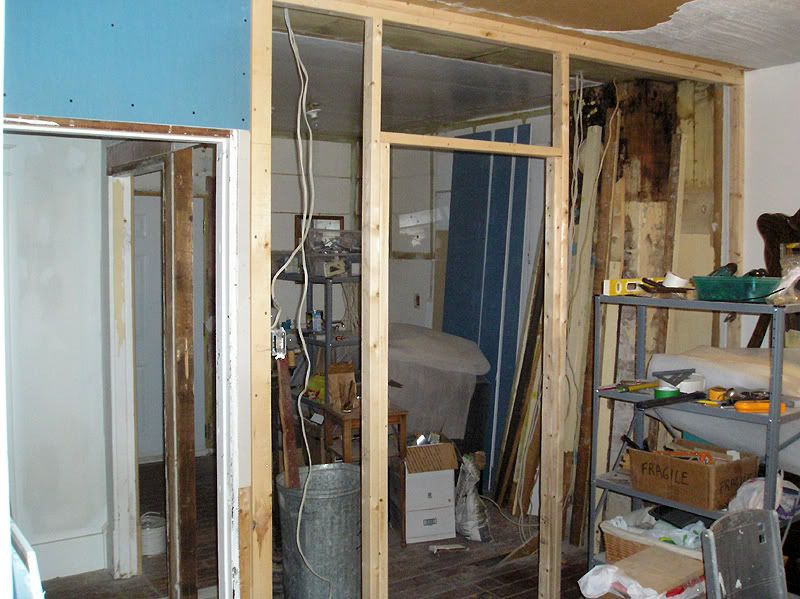
Well apparently I'm a huge lazy dork, and I never even showed you guys the photos of the main built-in case (which I thought I had uploaded already). So now you get to see the building of said case, the adding of the face frame, and some drywall work around it.
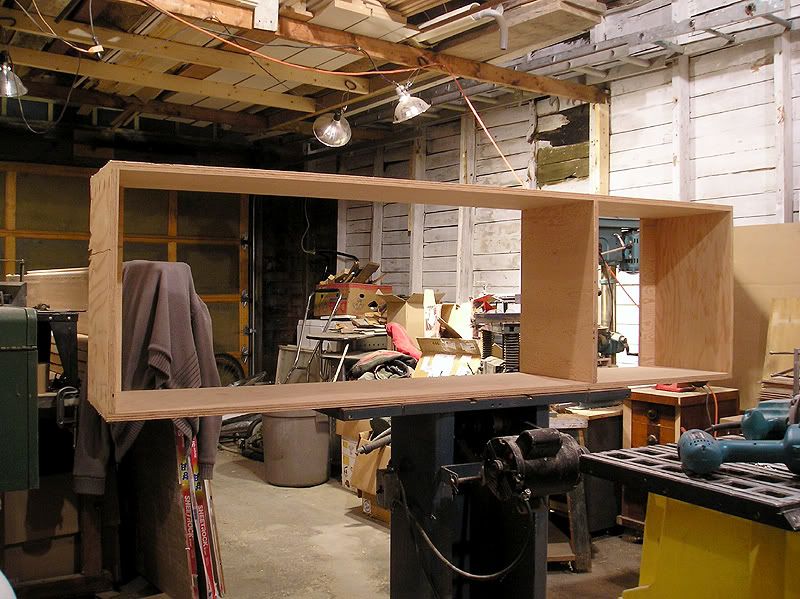
Alright, first of all, the built-in itself. I made this built-in "box" in the most basic and easy to assemble way possible. ANYONE with even the most basic woodworking skills can do this. Even though I'm an exceptional carpenter, I don't really have any great tools to work with. My table saw(s) are both crappy yard sale finds, and neither can cut anything wider than maybe 10" or so. I needed sides, a top, bottom, and shelf that were 14" wide. To solve this issue, I used some tricks of the trade, which I'll share with you.
Out of all my current readers, I think that Alex will be the only one with any serious interest, but I'm posting it anyways.
I started by marking out my pieces on the 4x8 sheet of plywood with a sharpie. My pieces were all marked slightly larger than needed (at least 1/4 inch or slightly more). To cut them out, I propped-up the sheet over both table saws (as saw horses, basically) and cut them with a circular saw. I did not try to be overly accurate at this point, and I cut them freehand.
Next, to make my accurate cuts (to size) I used a trick that we use every so often at work, which is to use a router with a straight-edge. You can use any kind of straight-cut bit for this, and if you planned out correctly, you should only be taking off about 1/8" cut (depends how much you oversized your pieces). The only measurements you need, in order to make this work accurately, is the distance between the cutting edge of the bit, and the edge of the router's face plate (for the sake of this example, let's say it's 1 3/4") and your final dimensions (14" in this case).
Draw one line off your good edge (in this case, the good edge was the factory edge of the 4x8 sheet), and mark your good measurment (14"). Your second line should be 1 3/4" less than this (depending on your router's base plate), so for this example, a line at 12 1/4". This is where your straight-edge needs to be clamped in place. Do a test cut on a scrap to make sure your sizing matches (sometimes you need to move your straight-edge in or out 1/16" or so to make it work well, so once it's good, save that measurement for all your other pieces.
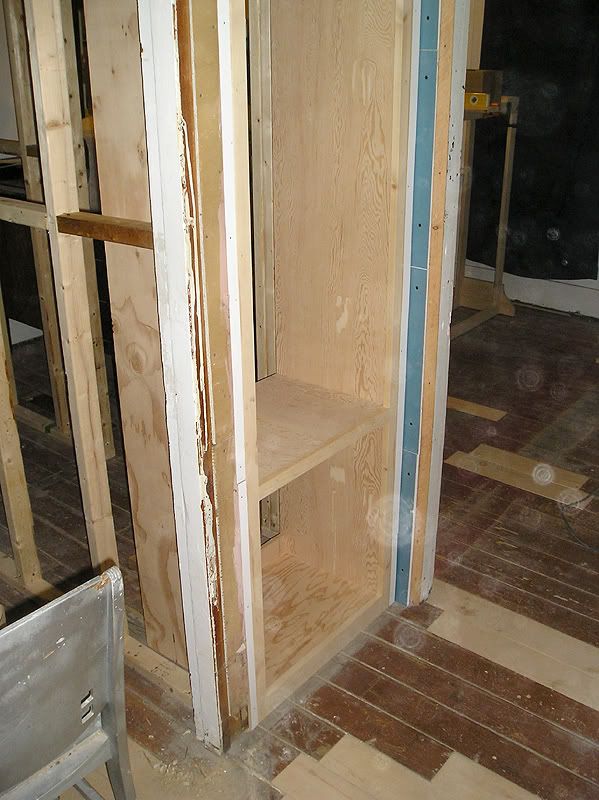
For this built-in, I needed 3 shelves (one top, one bottom, and one centre shelf), and 2 sides. My sides were something around 78" x 14", and my shelves were cut to end up with a cabinet width of 22 3/4" (so they are 22 3/4" minus the thickness of the two sides = 21 5/16" since the sheets aren't exactly 3/4").
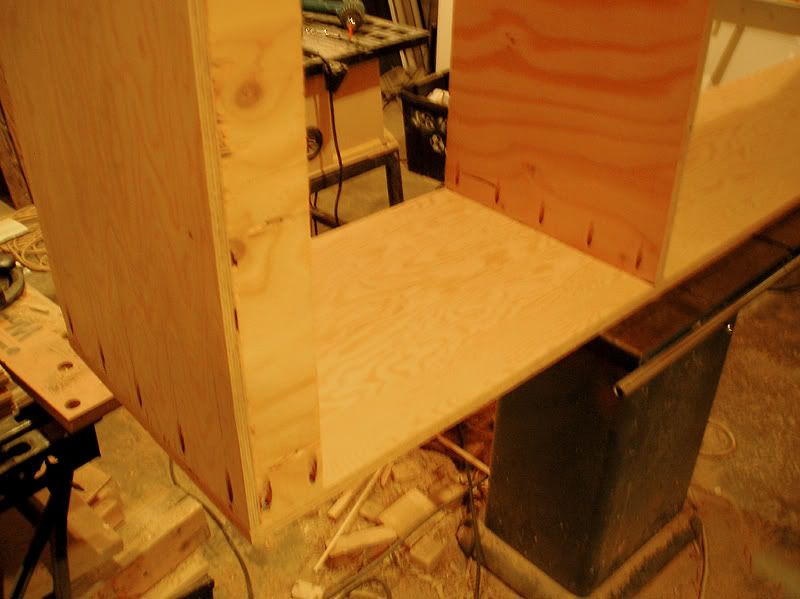
To assemble the box, I also added two braces that were made from scraps (any convenient size will work). All three shelves and braces were drilled for pocket screws (a very nifty, inexpensive, and sturdy cabinet making option). This is a fast, easy, and very simple way to put together this kind of furniture. In my case, all the pocket holes will be hidden (they will be on the outside of the cabinet, which will be covered with walls, or underside the centre shelf, which will have drawers.
The whole thing took maybe 2 hours tops, and that included all the measuring, sanding, drilling, and assembling.
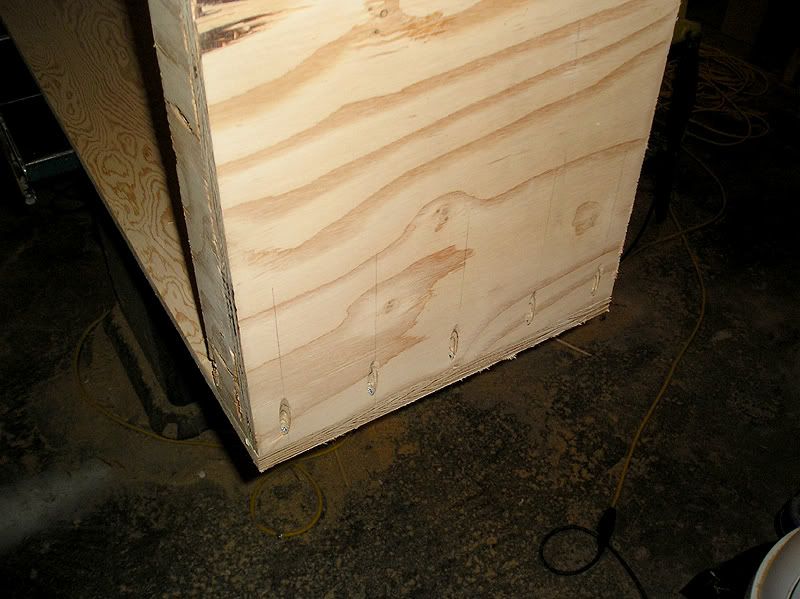
This photo has really poor lighting, and it's blurry, but it shows off the pocket screw layout really well. I only used screws (no glue), and it's very sturdy. Glue is a good option, but it's messy and hard to clean up any smears, runs, or drips.
Installed:
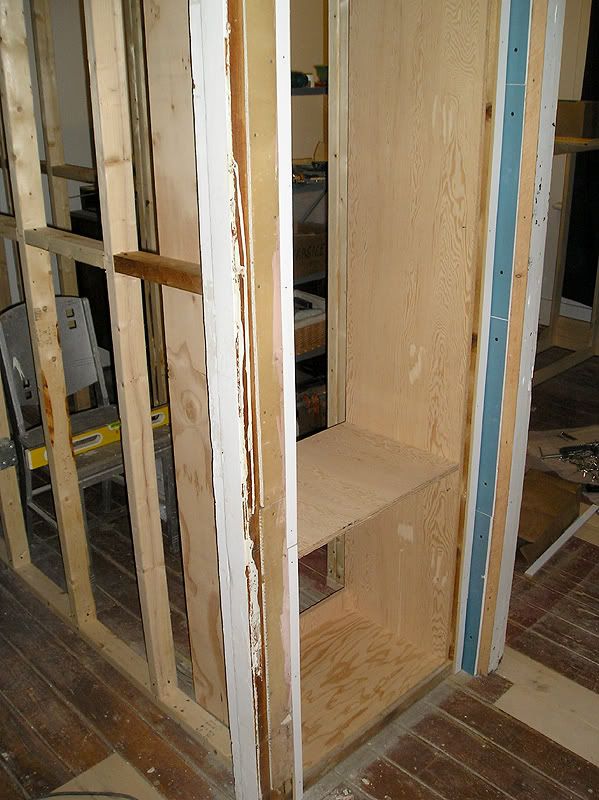
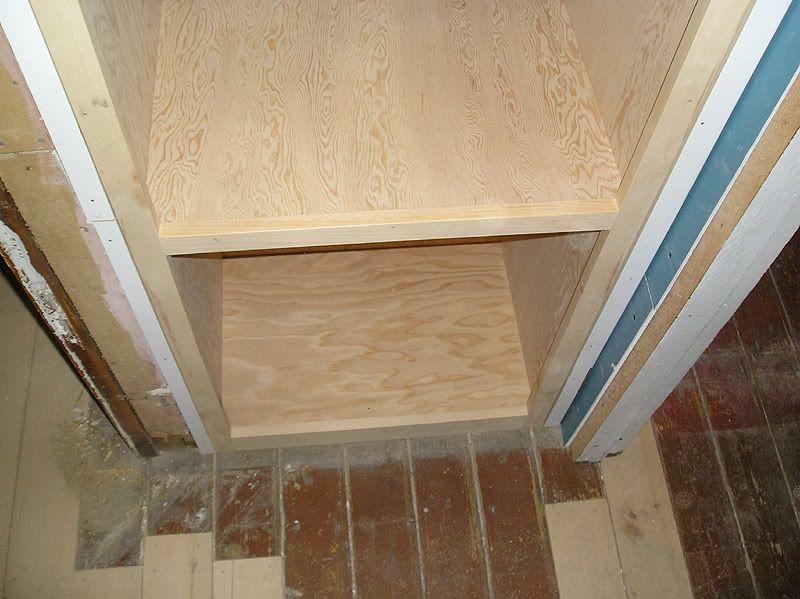
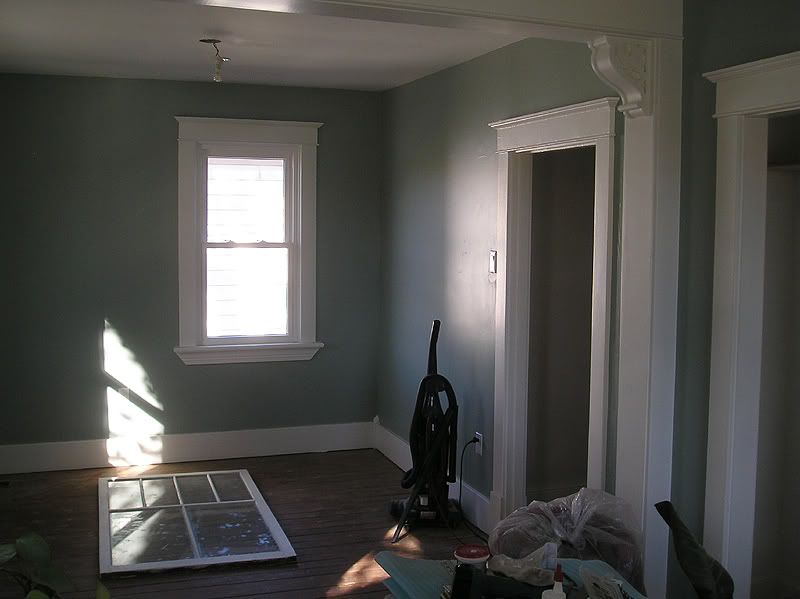
It's an awkward area, so I took several angles.
The face frame was likewise made in an "easy peasy" fashion. I just cut several strips of pine to 1 1/2" or 2 1/2" (larger pieces on top/bottom), and glued/screwed them together from the sides. Here, glue in the joints is important to avoid shrinkage/splitting in the joints, which would create seams later. The face frame was palm-sanded on the front, but not on the back (no point since it will be nailed on). The edges were also smoothed out.
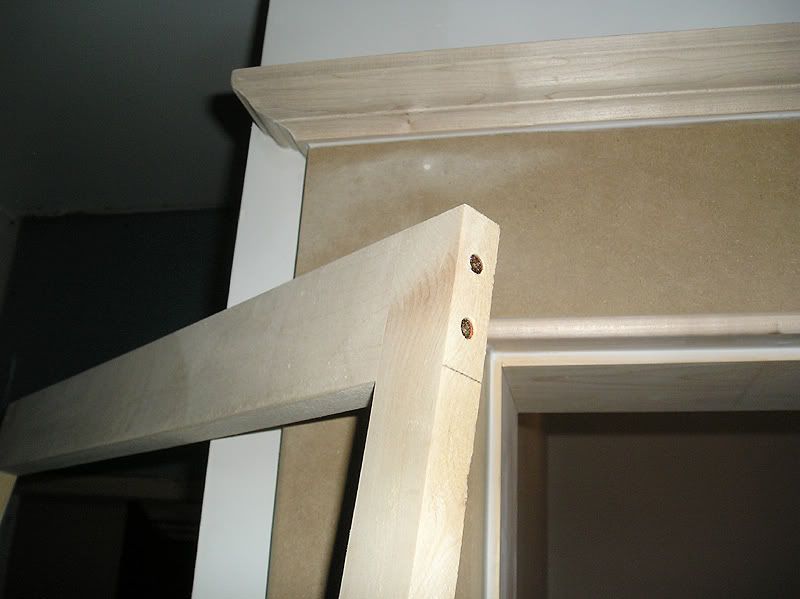
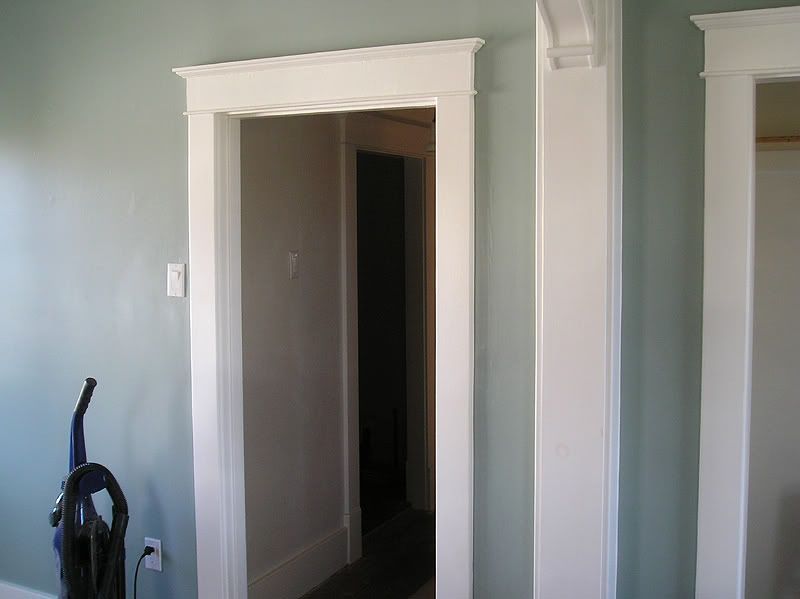
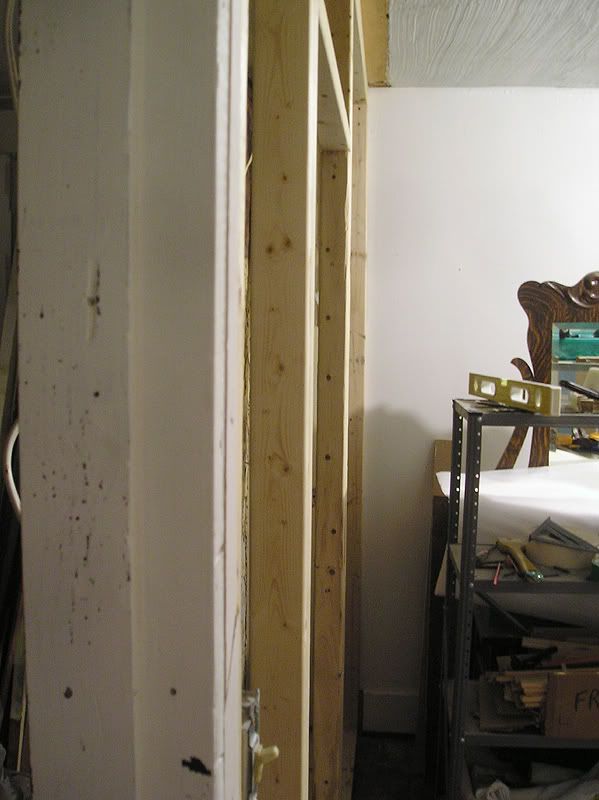
Face frame installed. Note that I installed the cabinet recessed-back 3/4" from the drywall, so that once the face frame was installed, it would end up flush to the drywall and ready for casings.
I've decided that I want to add a dividing bar between the two drawers. I should have done it before, but it's too late now. The new bar will go in with pocket screws instead of glue/side screws.
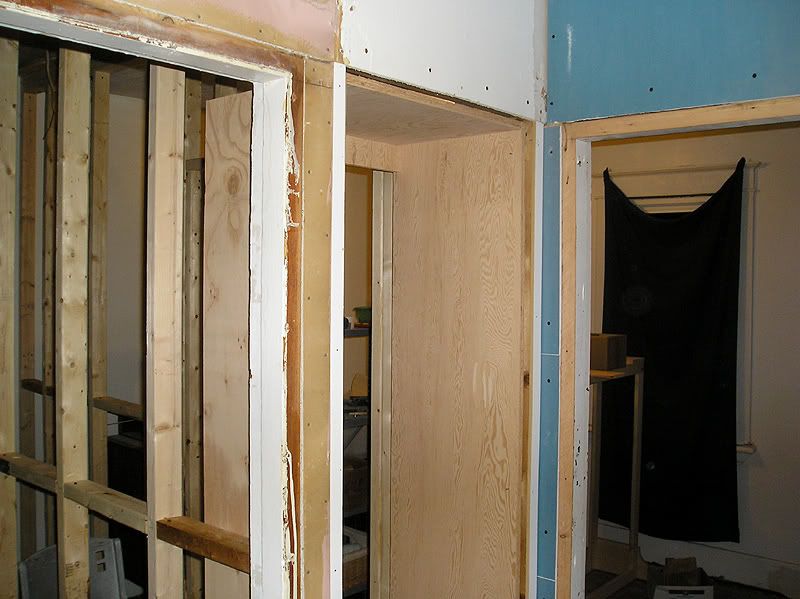
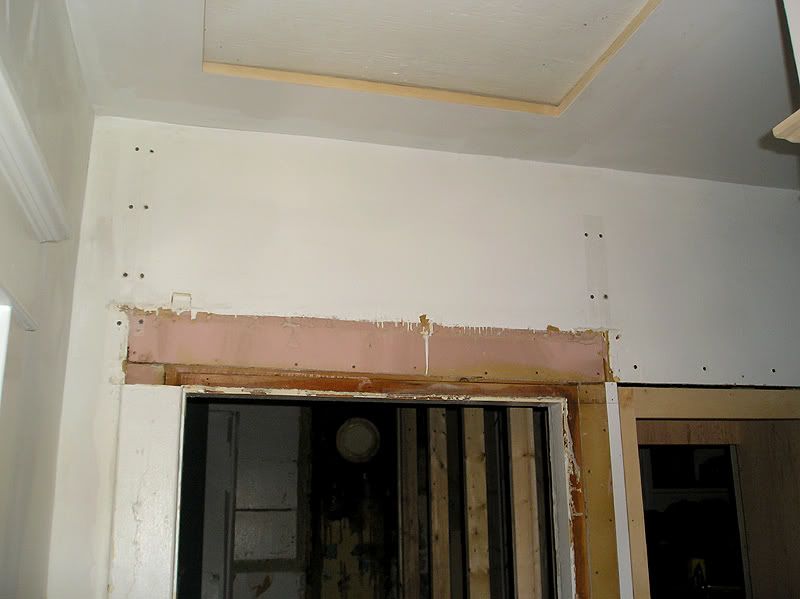
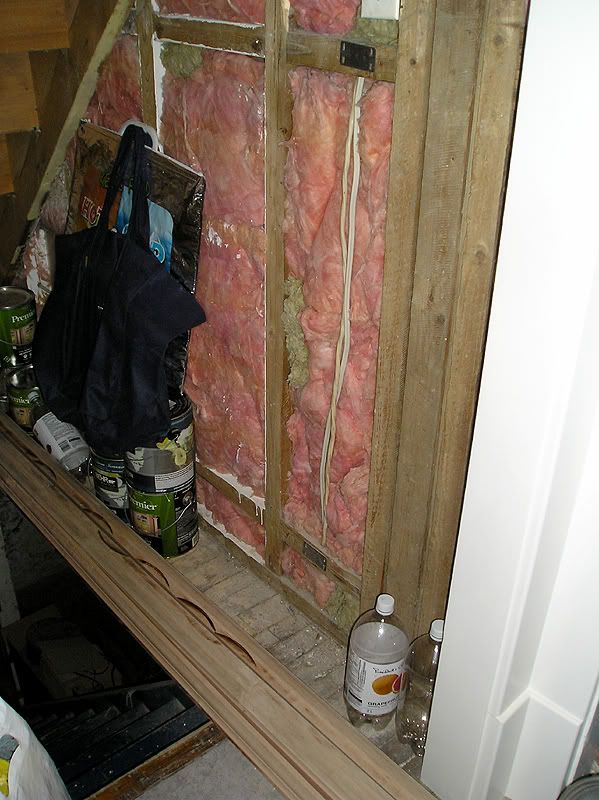
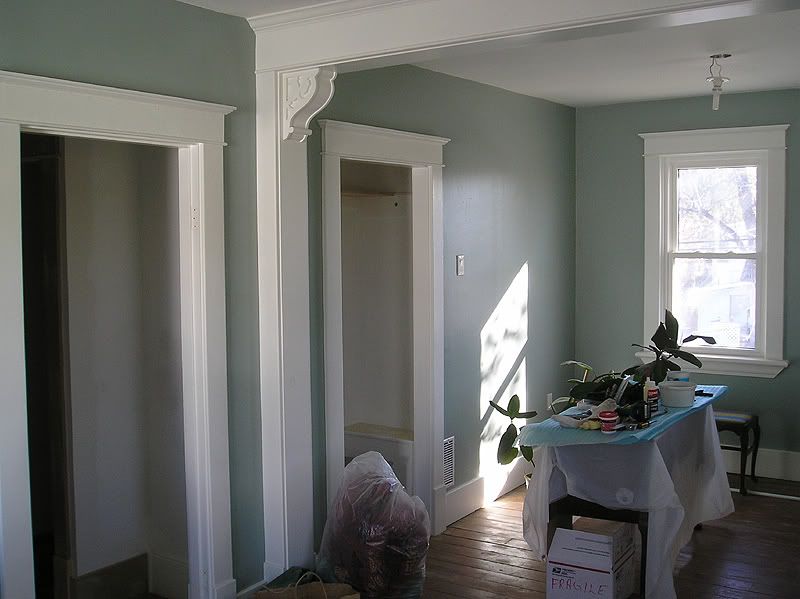
So now that everything in the hallway is "ready" I've been looking forward to adding the casings and painting the rest of the trim. But before I can do that, I need to finish patching all the drywall, so I did most of that the past 2 days.
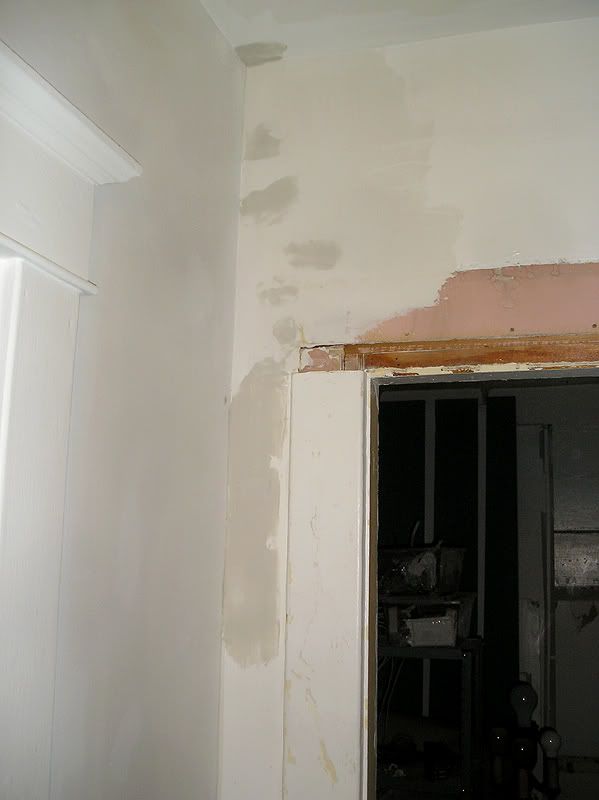
Note: I'm not sure if that pink is the original hallway paint colour. The "paint"(?) is rather flat and dull (no gloss to it).
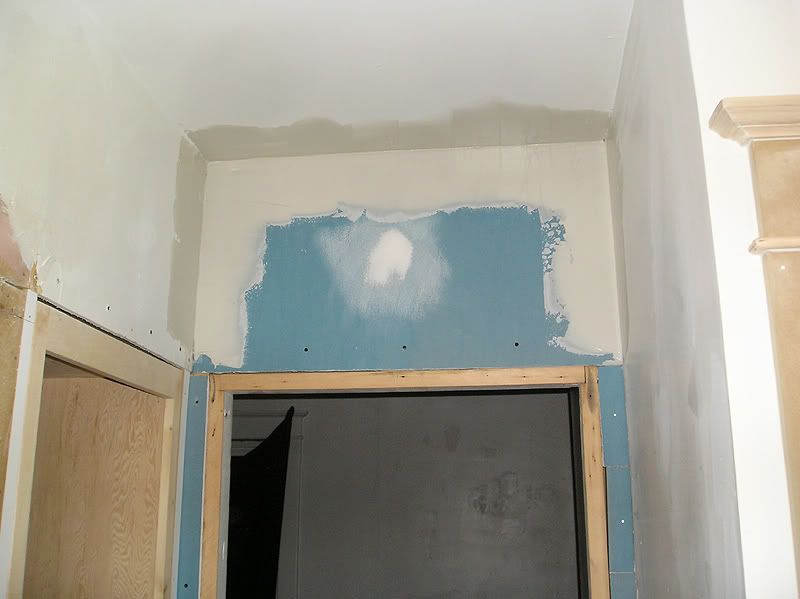
So what do you guys think so far. Can you get an idea of how it will look, or does it just look like a big mess right now?
Alright, first of all, the built-in itself. I made this built-in "box" in the most basic and easy to assemble way possible. ANYONE with even the most basic woodworking skills can do this. Even though I'm an exceptional carpenter, I don't really have any great tools to work with. My table saw(s) are both crappy yard sale finds, and neither can cut anything wider than maybe 10" or so. I needed sides, a top, bottom, and shelf that were 14" wide. To solve this issue, I used some tricks of the trade, which I'll share with you.
Out of all my current readers, I think that Alex will be the only one with any serious interest, but I'm posting it anyways.
I started by marking out my pieces on the 4x8 sheet of plywood with a sharpie. My pieces were all marked slightly larger than needed (at least 1/4 inch or slightly more). To cut them out, I propped-up the sheet over both table saws (as saw horses, basically) and cut them with a circular saw. I did not try to be overly accurate at this point, and I cut them freehand.
Next, to make my accurate cuts (to size) I used a trick that we use every so often at work, which is to use a router with a straight-edge. You can use any kind of straight-cut bit for this, and if you planned out correctly, you should only be taking off about 1/8" cut (depends how much you oversized your pieces). The only measurements you need, in order to make this work accurately, is the distance between the cutting edge of the bit, and the edge of the router's face plate (for the sake of this example, let's say it's 1 3/4") and your final dimensions (14" in this case).
Draw one line off your good edge (in this case, the good edge was the factory edge of the 4x8 sheet), and mark your good measurment (14"). Your second line should be 1 3/4" less than this (depending on your router's base plate), so for this example, a line at 12 1/4". This is where your straight-edge needs to be clamped in place. Do a test cut on a scrap to make sure your sizing matches (sometimes you need to move your straight-edge in or out 1/16" or so to make it work well, so once it's good, save that measurement for all your other pieces.
For this built-in, I needed 3 shelves (one top, one bottom, and one centre shelf), and 2 sides. My sides were something around 78" x 14", and my shelves were cut to end up with a cabinet width of 22 3/4" (so they are 22 3/4" minus the thickness of the two sides = 21 5/16" since the sheets aren't exactly 3/4").
To assemble the box, I also added two braces that were made from scraps (any convenient size will work). All three shelves and braces were drilled for pocket screws (a very nifty, inexpensive, and sturdy cabinet making option). This is a fast, easy, and very simple way to put together this kind of furniture. In my case, all the pocket holes will be hidden (they will be on the outside of the cabinet, which will be covered with walls, or underside the centre shelf, which will have drawers.
The whole thing took maybe 2 hours tops, and that included all the measuring, sanding, drilling, and assembling.


This photo has really poor lighting, and it's blurry, but it shows off the pocket screw layout really well. I only used screws (no glue), and it's very sturdy. Glue is a good option, but it's messy and hard to clean up any smears, runs, or drips.

Installed:


It's an awkward area, so I took several angles.

The face frame was likewise made in an "easy peasy" fashion. I just cut several strips of pine to 1 1/2" or 2 1/2" (larger pieces on top/bottom), and glued/screwed them together from the sides. Here, glue in the joints is important to avoid shrinkage/splitting in the joints, which would create seams later. The face frame was palm-sanded on the front, but not on the back (no point since it will be nailed on). The edges were also smoothed out.

Face frame installed. Note that I installed the cabinet recessed-back 3/4" from the drywall, so that once the face frame was installed, it would end up flush to the drywall and ready for casings.

I've decided that I want to add a dividing bar between the two drawers. I should have done it before, but it's too late now. The new bar will go in with pocket screws instead of glue/side screws.

So now that everything in the hallway is "ready" I've been looking forward to adding the casings and painting the rest of the trim. But before I can do that, I need to finish patching all the drywall, so I did most of that the past 2 days.

Note: I'm not sure if that pink is the original hallway paint colour. The "paint"(?) is rather flat and dull (no gloss to it).


So what do you guys think so far. Can you get an idea of how it will look, or does it just look like a big mess right now?
Saturday, November 26, 2011
Meh.
It doesn't really feel as though I got much accomplished today, but I did do the following:
- Clean/sweep garage/shop and main floor.
- Pass the rest of the wires and finish the electrical hookups in the Guest Room and L Room closet(s) as well as the L Room overhead light fixture.
- Caulk a few areas around 3 windows (small gaps/shrinkage).
- Remove unnecessary extra wires hanging off the side of the house.*
* These wires used to be connected to the cable, but at some point they installed another cable and left the old ones in place (they were not connected at either end). You can actually see some of the wires in the main header photo above the "F" of "Foursquare". So I just disconnected them and took all the screws/clips off and the area where they were looks much neater and cleaner now that there's only the ONE single cable line coming down (instead of 4 - one was some kind of ground wire).
Thursday, November 24, 2011
Face Frame
Nothing too exciting, but I'll be making a post shortly about the built-in. Basically just a bit of a description of the "making of" the face frame, with one or two pics to go along with it. But now that the face frame for it is done, I can go ahead and work on the mouldings to finish-up the hallway!
Thursday, November 17, 2011
Toilet Paper Holder
Alright, hopefully some of you are as excited as I am about this vintage toilet paper holder. I put it up in the bathroom just 5 minutes ago. Of COURSE I used old round head slot screws, since nothing bothers me more than having nice old hardware with ugly modern (inappropriate) screws on it. And if you've been reading for a while, you KNOW how picky I am when it comes to details.
Side note: The holder is actually made from a sheet of rather thick stamped brass, which is then chrome plated. There are NO maker's marks anywhere on it, which I find very unusual for such a nice piece.

This is how it will be for now, with a temporary rod, until I can figure out how to make/buy/modify parts to make the new missing bits (mainly the decorative brass thumb screw ends) for the new one.
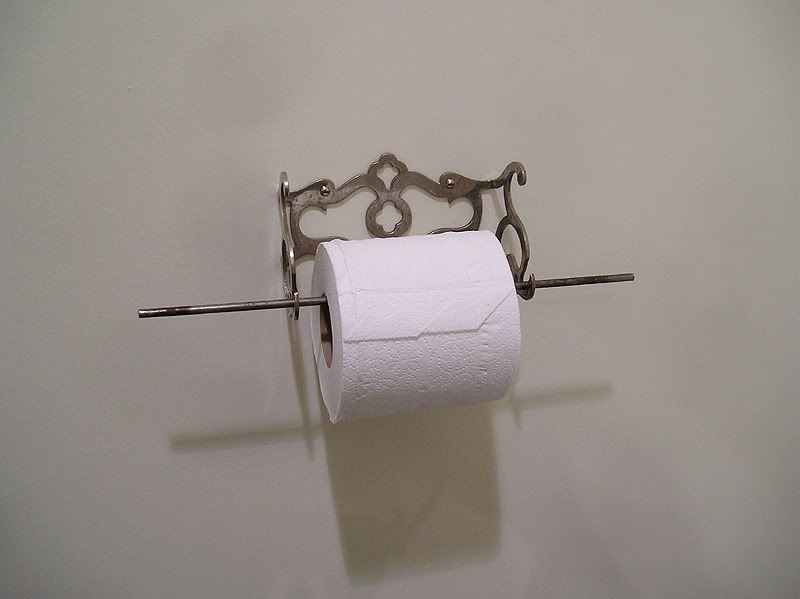
And in case you don't recall, this post has a photo of a nearly identical holder with the original parts: http://my1923foursquare.blogspot.com/2011/09/omg-steal-of-deal.html
Wednesday, November 16, 2011
Woohoo!!!
Alight! Just when I was starting to lose hope that it might never arrive, I now have the antique toilet paper holder! It got dropped off today and was waiting for me at the door.
It's in great shape, and even though the original photo(s) of it looked pretty grubby, it actually looks like it's chrome plated/shiny under all the grime. I plan to give it a polish. I've already taken out a few small bends and kinks in the frame. Now the hard part will be to decide if the roll holder should be Maple, Mahogany, Oak, Ash, Walnut, Cherry, Hickory, etc.
I'll also have to source some brass end knobs. I think the ones I have are too small.
Stay tuned!
Sunday, November 13, 2011
More Walls!
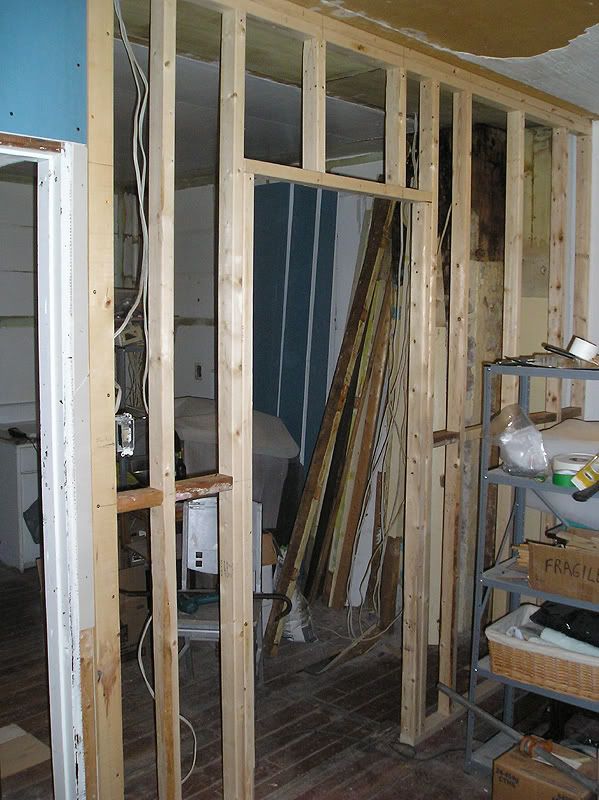
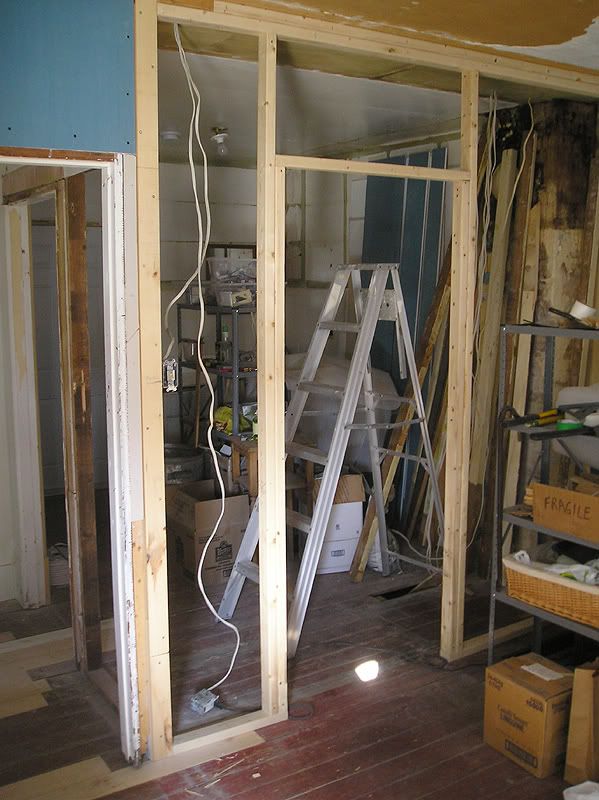
I built part of the Guest Bedroom side closet wall. I can't build the whole wall until the chimney is removed (not entirely sure when that will be).
This wall was pretty simple to lay-out and install. I'll be doing the wiring for it probably tomorrow, and that's when I'll go into the attic (so I can do two wires at the same time. Unfortunately, I think this will mean that I'll have no light up there, since I think the circuit for the attic light is the same as the guest bedroom (which will need to be OFF). No worries, I can still run a spot light up there with an extension cord.
Here's the progress so far:
New wall viewed from hallway, looking into guest bedroom:

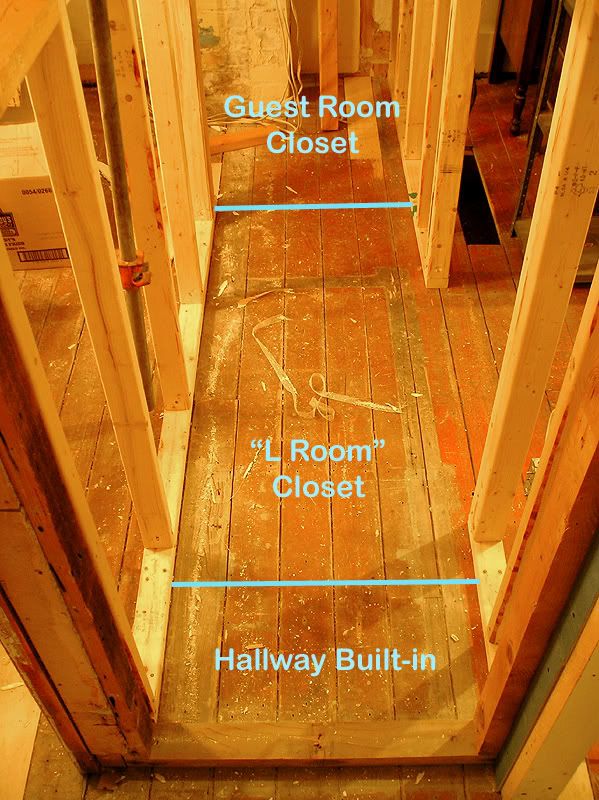
Footprint view from "L Room" side.
And this is probably the best view I can show for now. The blue lines show where the thin dividing walls will be (these will only be 1 1/2" thick to maximize closet space). The guest room closet will only be about 3 feet wide (39"), but the large "L Room" closet will be a more spacious 54" (I think). Originally I wasn't even going to include a closet for the guest bed, but I figured it would be better to have one, especially if I want to sell the house later on.
The photo is pretty self-explanatory, and it's viewed from the hallway where you'll eventually be facing the built-in.
This wall was pretty simple to lay-out and install. I'll be doing the wiring for it probably tomorrow, and that's when I'll go into the attic (so I can do two wires at the same time. Unfortunately, I think this will mean that I'll have no light up there, since I think the circuit for the attic light is the same as the guest bedroom (which will need to be OFF). No worries, I can still run a spot light up there with an extension cord.
Here's the progress so far:
New wall viewed from hallway, looking into guest bedroom:

Footprint view from "L Room" side.

And this is probably the best view I can show for now. The blue lines show where the thin dividing walls will be (these will only be 1 1/2" thick to maximize closet space). The guest room closet will only be about 3 feet wide (39"), but the large "L Room" closet will be a more spacious 54" (I think). Originally I wasn't even going to include a closet for the guest bed, but I figured it would be better to have one, especially if I want to sell the house later on.
The photo is pretty self-explanatory, and it's viewed from the hallway where you'll eventually be facing the built-in.

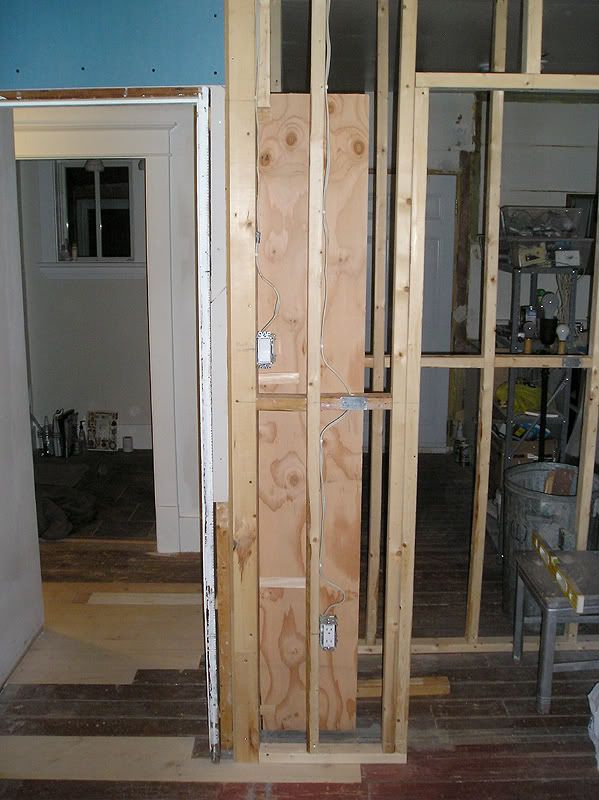
Electrical
I started to work on installing (re-routing) the electrical on the new wall. This would be 2 outlets and the light switch. So far I've done the two that are in between the doors (one outlet and the main light switch) but to get to the last outlet wire, I need to get up in the attic. For the other two I was able to reach at arm's length on the step ladder, but I'm actually going to have to get the long ladder from the garage to get up in the attic.
I didn't do much else today because I actually had to work today. I never usually work on a Saturday, but we had to install some display cases at my optometrist's office so it had to be preferably done off regular hours.
I wasn't too happy about this since I wasn't actually told about it until the last minute, so I managed to take Monday off instead, so I might be able to do a bunch more stuff on the house if I plan things properly.
Friday, November 11, 2011
Toilet Repair
Today's small and unexciting job was to fix the upstairs (main) toilet. Since I bought it (second hand) I had planned to change the interior workings, but never bothered since it seemed to work ok. But lately I had noticed it had a near constant (but small) leak in the bowl. So I picked up a new kit for it. At first I was just going to get the regular style, but they had a much nicer looking "Fluidmaster" kit with the newer style floating cup around the stem for just about 1$ more than the cheapie one. The general quality of the parts looked better so I spent the extra dollar on it. It's this one:

It was very easy to install, and works perfectly.
It was very easy to install, and works perfectly.
Thursday, November 10, 2011
Misc.
Alright, last night I got my ass in gear and finished framing the main closet wall. I was quite happy with myself!
I decided to add the fire wall (same as the other original walls in the house), but I'm not sure if I should bother with the bottom row. In the other original walls, there's a second row of studs that follow along the height of the baseboards (I'm assuming since this makes it much easier to install solid wood mouldings, which sometimes need to be bent slightly to fit nicely). But I don't really need it here. I have additional studs because of where I put the door, and I have plenty of solid.
This is one of the original walls on the main floor for comparison:
Next I'll need to build the "box" for the built-in, frame that in place, and re-run my electrical (into the new wall).
I decided to add the fire wall (same as the other original walls in the house), but I'm not sure if I should bother with the bottom row. In the other original walls, there's a second row of studs that follow along the height of the baseboards (I'm assuming since this makes it much easier to install solid wood mouldings, which sometimes need to be bent slightly to fit nicely). But I don't really need it here. I have additional studs because of where I put the door, and I have plenty of solid.

This is one of the original walls on the main floor for comparison:

Next I'll need to build the "box" for the built-in, frame that in place, and re-run my electrical (into the new wall).
Monday, November 07, 2011
Recent Photos
I took some photos over the weekend of stuff that's "in progress" around the house. Some are not exciting, like the photos of patched floor boards, but everyone likes photos, so I'm posting them anyways.
First up is this stupid thing that's been drying for 2 1/2 weeks and shows no signs of being dry enough any time soon *grumble*.
The putty on it is still soft and icy cold to the touch (meaning it's still pretty moist inside). I've kept it in the upstairs bedroom since I thought it would dry nicely, but I guess not. By the feel/look of it I'm gonna assume it will be ok to paint in 4 weeks (1 1/2 weeks from now)-ish.
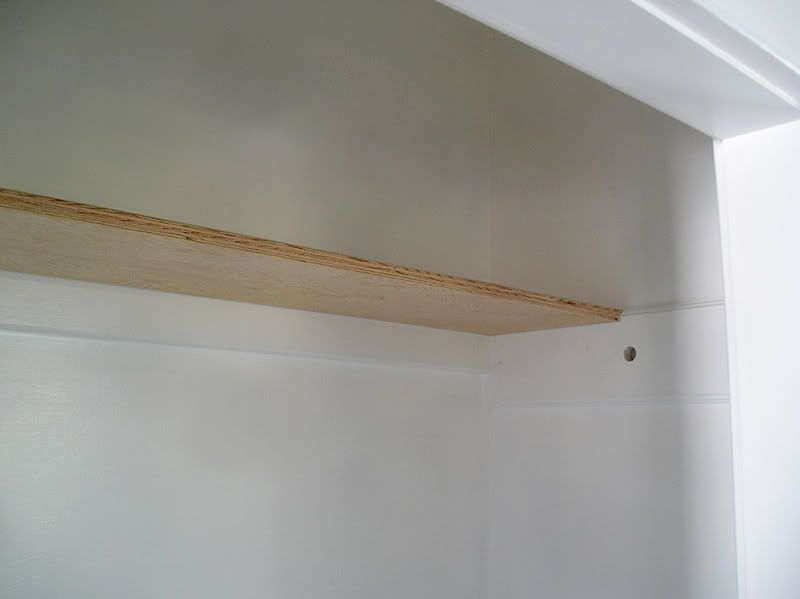
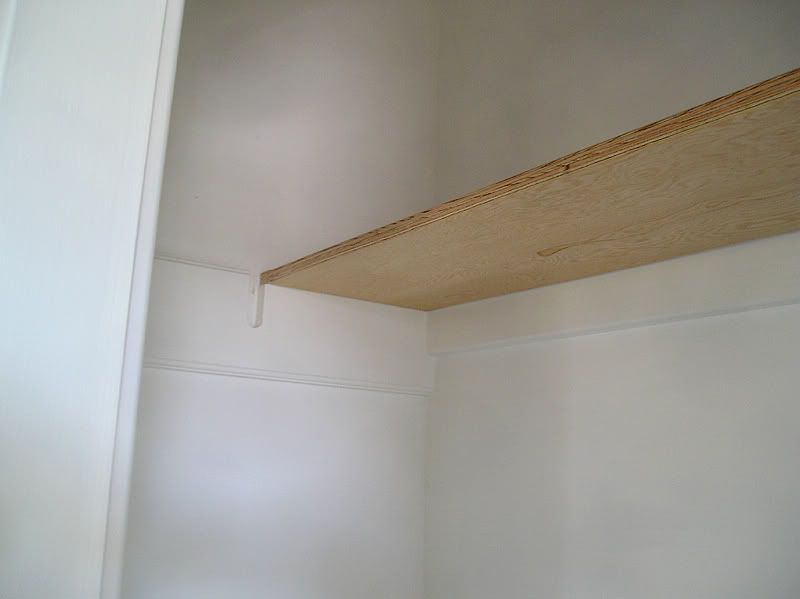
The closet shelf.
Note (and I know it's hard to see in the photos) that I was very picky about how nicely finished and "fitted" that I wanted the shelf to look. The supports are notched down so that the finished shelf is level with the sides of the support, and the edges are routed with a decorative "Roman Ogee" to echo the trim on the windows (and that I'll reuse elsewhere to match). I also rounded the front of the plywood shelf.
Then I took a better shot of the partially built closet wall. Please ignore the huge piles of furniture/junk:
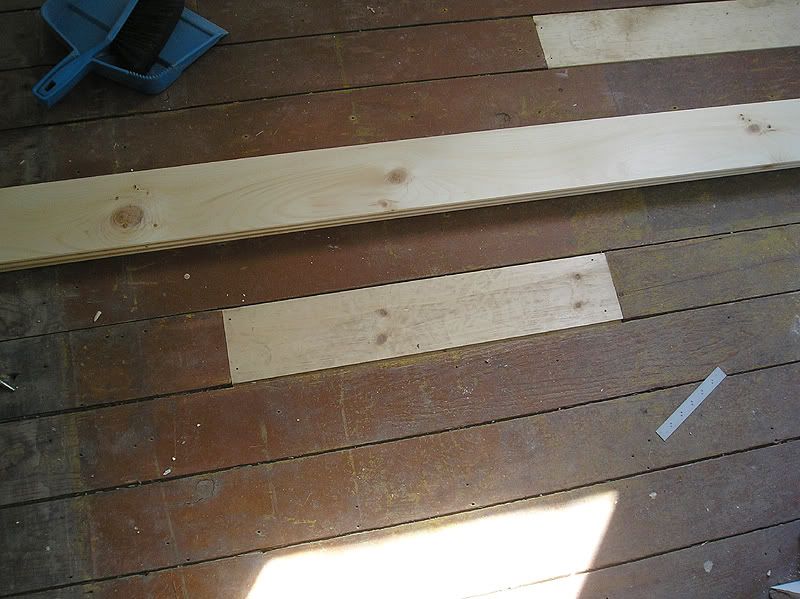
Repaired t-g patches:
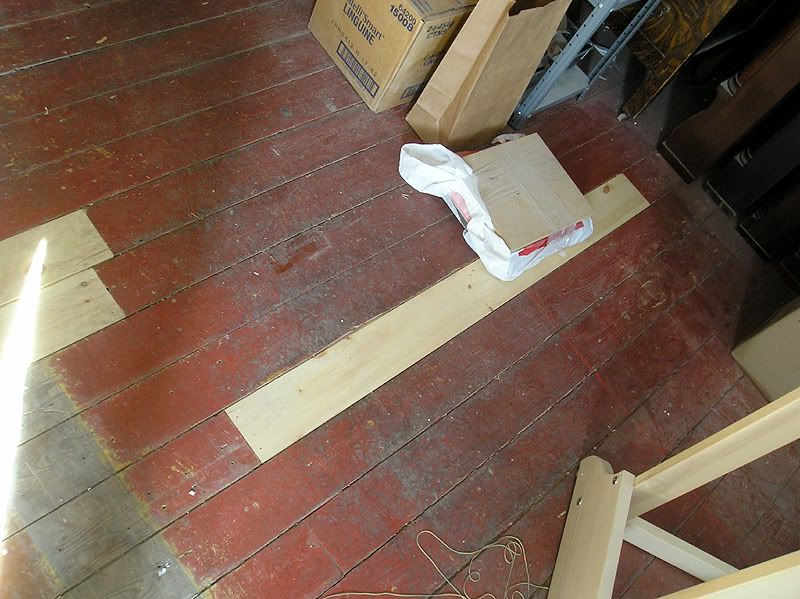
They're not all done yet.
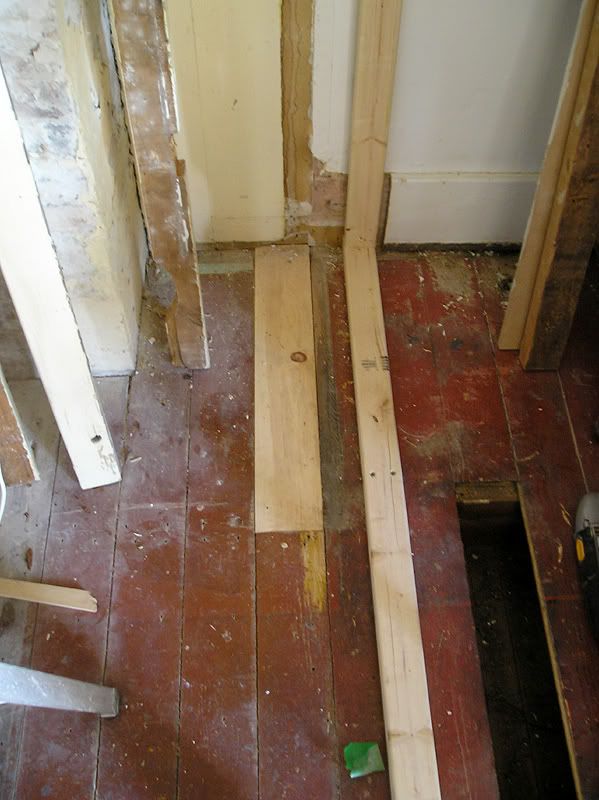
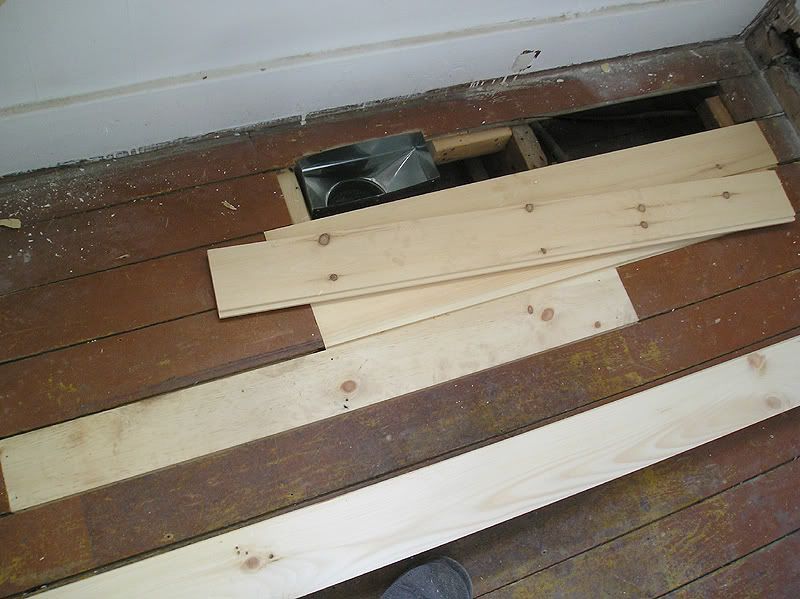
I started to do around this vent but the gaps in the floor are so wide that I'll need to modify my boards to make them wider. As-is they're the same size as the originals, but the floor has shifted so much in this spot that if I use them as-is they will barely interlock (weak joints) and I'll have HUGE gaps between the boards.
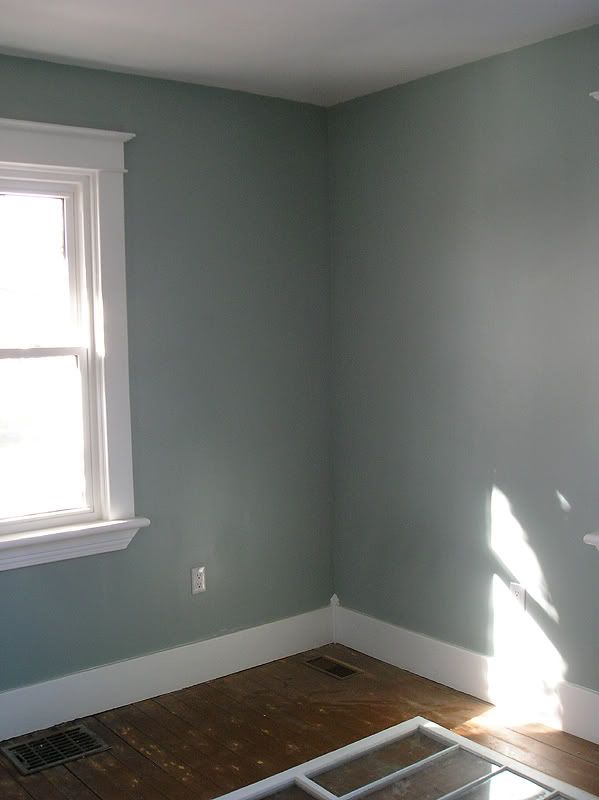
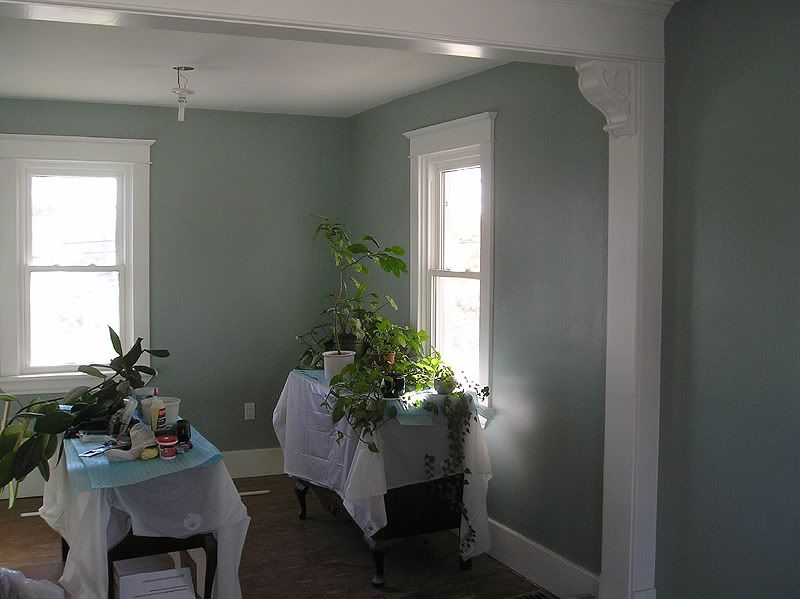
Here are a bunch of photos I was not planning to take/show until the Master Bedroom was done, but since it's taking FOREVER, and I probably won't have the floor done until next spring due to the fumes, I figured I'd show it off now, and again later.
Still left to do is to finish the painting in the closet, rewire/repair the matched antique light fixtures & put them up, and paint the floors. I also need to hook-up the other cold air return.
The doorway visible in the hallway is the bathroom door.
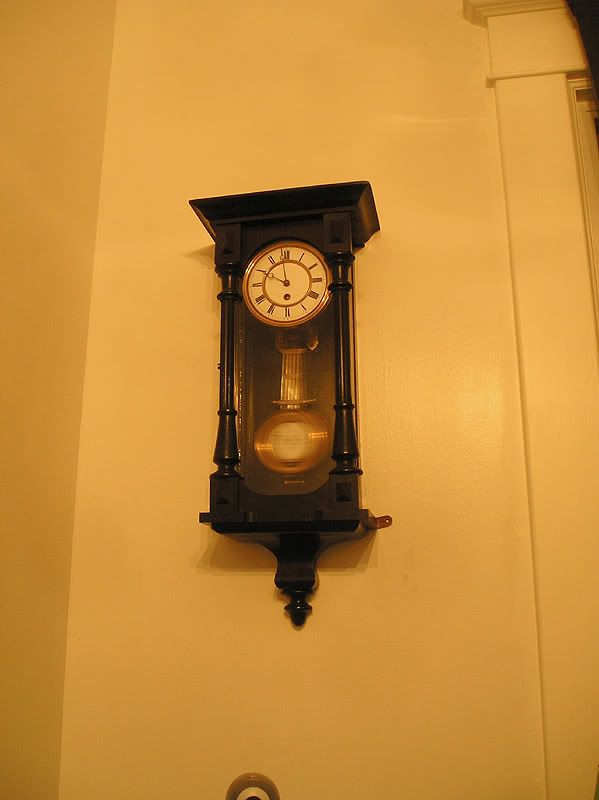
Lastly, I was really tired of not having many of my clocks up and running, and I missed one in particular. I was going to wait to put up the wall ones until I knew where I wanted them (to avoid unnecessary holes in the walls), but I decided to put this one up. It's one of my favourites.
Info: The clock is a miniature (very hard to find) spring Vienna (not a true Vienna regulator, since those are always weight driven). From top to finial it's only barely 23". The quality of the mechanism and parts (mounting bracket, pendulum, nuts/bolts) on this clock are also phenomenal. Best of all, I got in on eBay for a song.
Here you can see it (taken from the same angle as I see it while sitting at the PC) hanging in the wall of the Office over the computer (you can see my dusty webcam), illuminated by the soft orange glow of my old light fixture.
More detailed photos of this clock are here:
http://s1018.photobucket.com/albums/af308/clockmaker15/#!cpZZ3QQtppZZ16
First up is this stupid thing that's been drying for 2 1/2 weeks and shows no signs of being dry enough any time soon *grumble*.

The putty on it is still soft and icy cold to the touch (meaning it's still pretty moist inside). I've kept it in the upstairs bedroom since I thought it would dry nicely, but I guess not. By the feel/look of it I'm gonna assume it will be ok to paint in 4 weeks (1 1/2 weeks from now)-ish.
The closet shelf.
Note (and I know it's hard to see in the photos) that I was very picky about how nicely finished and "fitted" that I wanted the shelf to look. The supports are notched down so that the finished shelf is level with the sides of the support, and the edges are routed with a decorative "Roman Ogee" to echo the trim on the windows (and that I'll reuse elsewhere to match). I also rounded the front of the plywood shelf.


Then I took a better shot of the partially built closet wall. Please ignore the huge piles of furniture/junk:

Repaired t-g patches:

They're not all done yet.


I started to do around this vent but the gaps in the floor are so wide that I'll need to modify my boards to make them wider. As-is they're the same size as the originals, but the floor has shifted so much in this spot that if I use them as-is they will barely interlock (weak joints) and I'll have HUGE gaps between the boards.

Here are a bunch of photos I was not planning to take/show until the Master Bedroom was done, but since it's taking FOREVER, and I probably won't have the floor done until next spring due to the fumes, I figured I'd show it off now, and again later.
Still left to do is to finish the painting in the closet, rewire/repair the matched antique light fixtures & put them up, and paint the floors. I also need to hook-up the other cold air return.


The doorway visible in the hallway is the bathroom door.

Lastly, I was really tired of not having many of my clocks up and running, and I missed one in particular. I was going to wait to put up the wall ones until I knew where I wanted them (to avoid unnecessary holes in the walls), but I decided to put this one up. It's one of my favourites.
Info: The clock is a miniature (very hard to find) spring Vienna (not a true Vienna regulator, since those are always weight driven). From top to finial it's only barely 23". The quality of the mechanism and parts (mounting bracket, pendulum, nuts/bolts) on this clock are also phenomenal. Best of all, I got in on eBay for a song.
Here you can see it (taken from the same angle as I see it while sitting at the PC) hanging in the wall of the Office over the computer (you can see my dusty webcam), illuminated by the soft orange glow of my old light fixture.

More detailed photos of this clock are here:
http://s1018.photobucket.com/albums/af308/clockmaker15/#!cpZZ3QQtppZZ16
Saturday, November 05, 2011
Closet Shelf
I finally FINALLY installed the shelf in the MB closet. It's been what? a year? Yeah. Something like that. But I only ordered the plywood about a week ago.
And I'm sick, so it's surprising that I did anything at all today. I've got some kind of fever mixed with postnasal drip. Not fun.
Now the shelf just needs to be caulked (which I might do tonight), primed, and painted, and then the whole closet can be given a final coat of white.
I'm also planning to start building the built-in for the upstairs hallway. Part of the sheet of plywood that I cut for the shelf will work out nicely to make the sides for the built-in.
Thursday, November 03, 2011
Progress Pics
Here are a few shots from this evening.
The first pieces to go up were the 2x3s along the ceiling. To line up the floor pieces, I decided to use a good old fashioned plumb bob. I happen to have one that I picked up at a yard sale a few years ago (never actually thinking I'd ever need to use it), and it worked great!
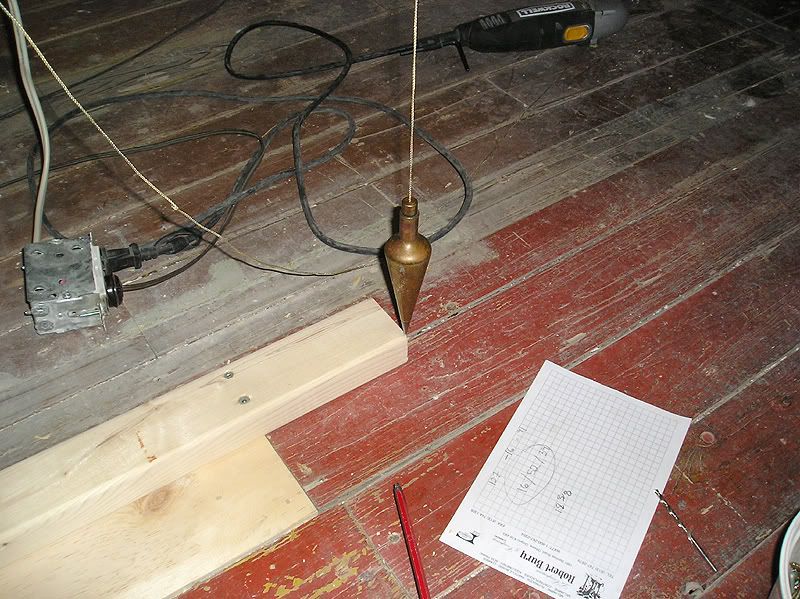
I just tacked a nail on the edge of the upper 2x3 and hung the bob. I did this to line up both pieces.
For the wall pieces, I started by framing out the door where I wanted it. I found that there was a pretty decent sag in the ceiling, so I actually cut the studs to the same length as the outside wall measurement, and then hammered/forced them in place (thus shifting/leveling the ceiling).
The rest of the studs will be set up in a continuous pattern (ignoring the location of the door frame), so I need to figure out the best place to start them (from the door vs the outside wall).
This isn't the best shot, but you can kinda see how nice and straight the wall is (so far).
The first pieces to go up were the 2x3s along the ceiling. To line up the floor pieces, I decided to use a good old fashioned plumb bob. I happen to have one that I picked up at a yard sale a few years ago (never actually thinking I'd ever need to use it), and it worked great!

I just tacked a nail on the edge of the upper 2x3 and hung the bob. I did this to line up both pieces.
For the wall pieces, I started by framing out the door where I wanted it. I found that there was a pretty decent sag in the ceiling, so I actually cut the studs to the same length as the outside wall measurement, and then hammered/forced them in place (thus shifting/leveling the ceiling).

The rest of the studs will be set up in a continuous pattern (ignoring the location of the door frame), so I need to figure out the best place to start them (from the door vs the outside wall).
This isn't the best shot, but you can kinda see how nice and straight the wall is (so far).

Tuesday, November 01, 2011
Floors
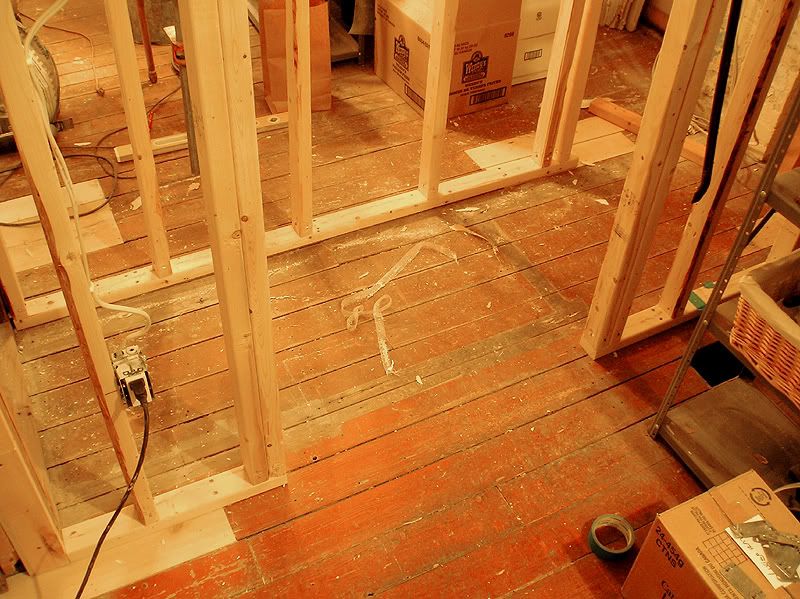
I've been doing some more patching here and there in the L Room, little by little. I want to start the new wall soon.
Subscribe to:
Posts (Atom)