Wednesday, November 23, 2016

Victorian Farmhouse - Part 18 Salvaged Front Door

So for me, the two most rewarding projects so far on this house (and depending who you ask this might be different) have been the opening of the archway in the living room, and the re-installation of the side door (front door).

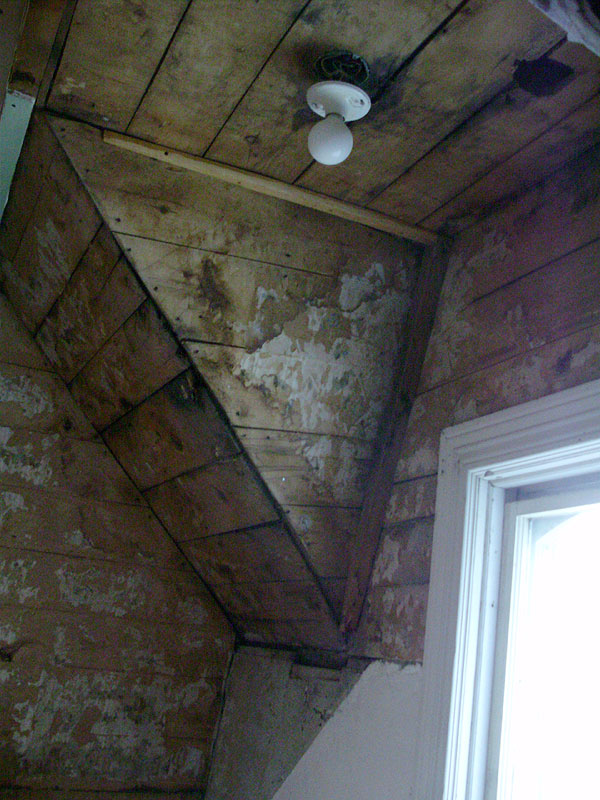
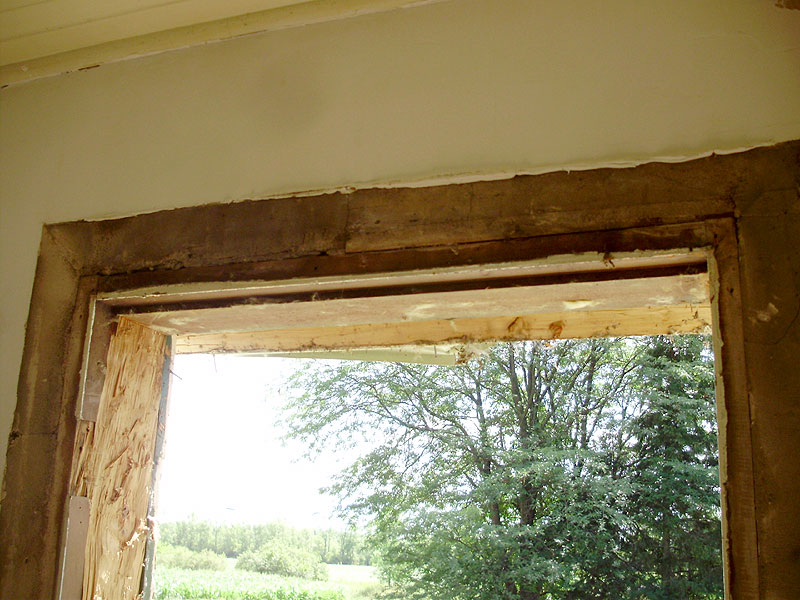
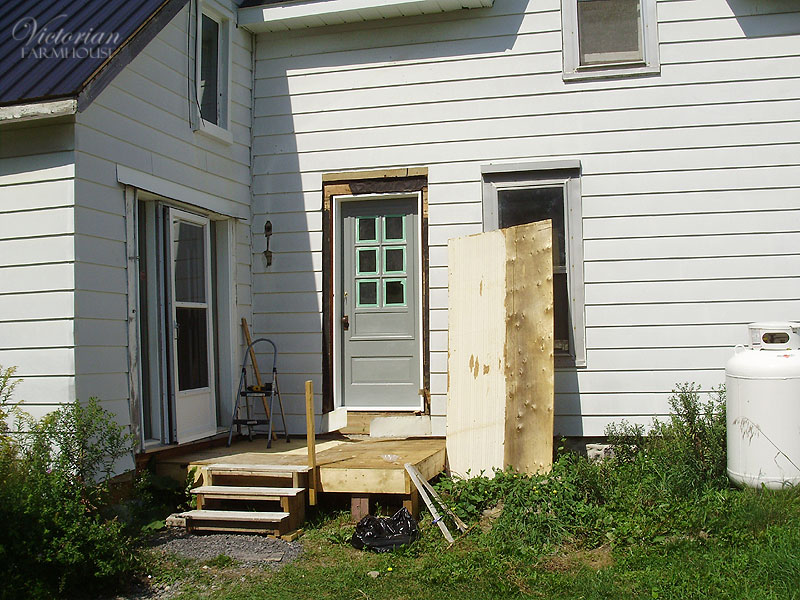
As a memory jogger, you may remember that there was once a door here, but it had been converted (very poorly) to a window with shelves in it.

P8050129

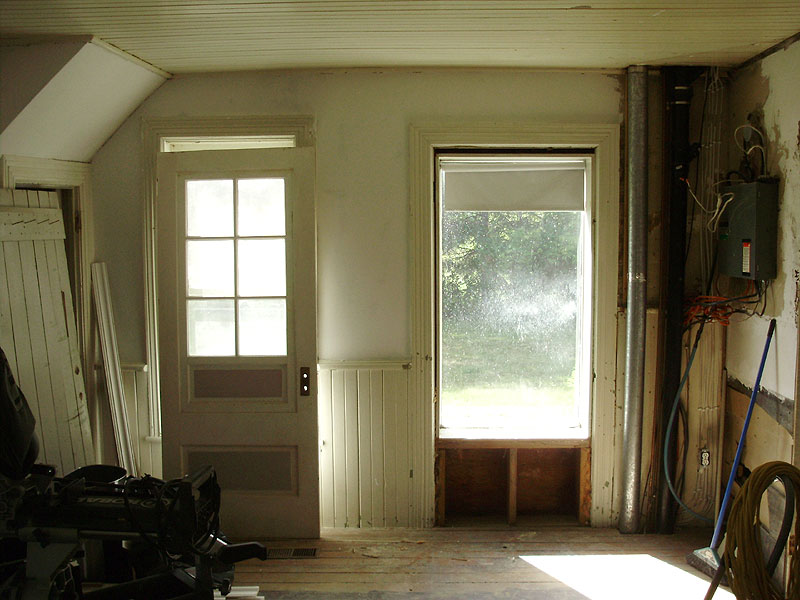
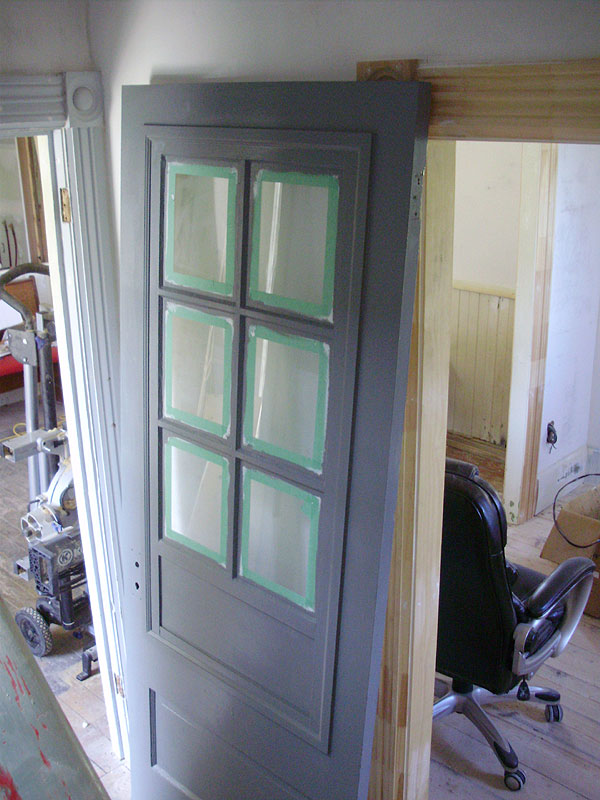
I offered Pierre and Angie one of my antique doors (I have several that I will never use). This particular door is around 1920-1930 or so, and it came from a neighbour's house two or three doors down. The window panel was removable, but it has been sealed and painted shut.

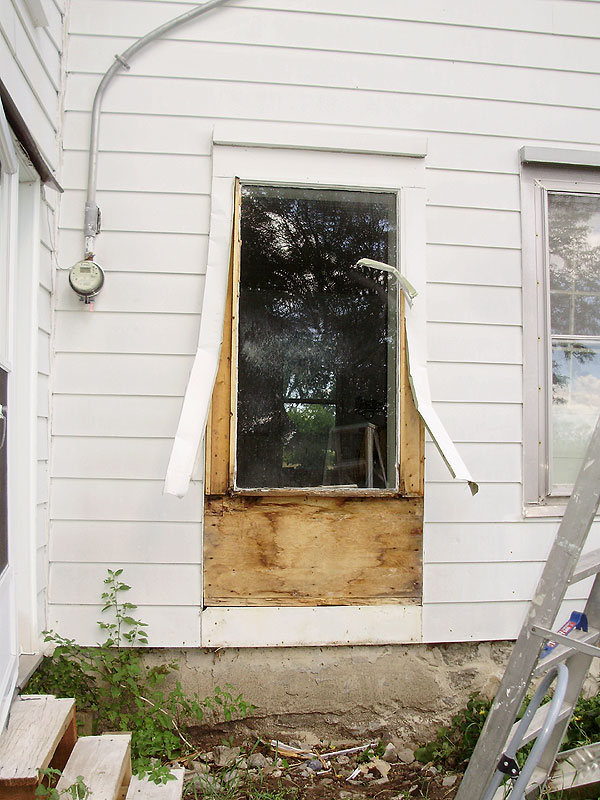
Removing the awful old thermopane window and cobbled together bookcase was a huge pain.

P8050130

P8050131

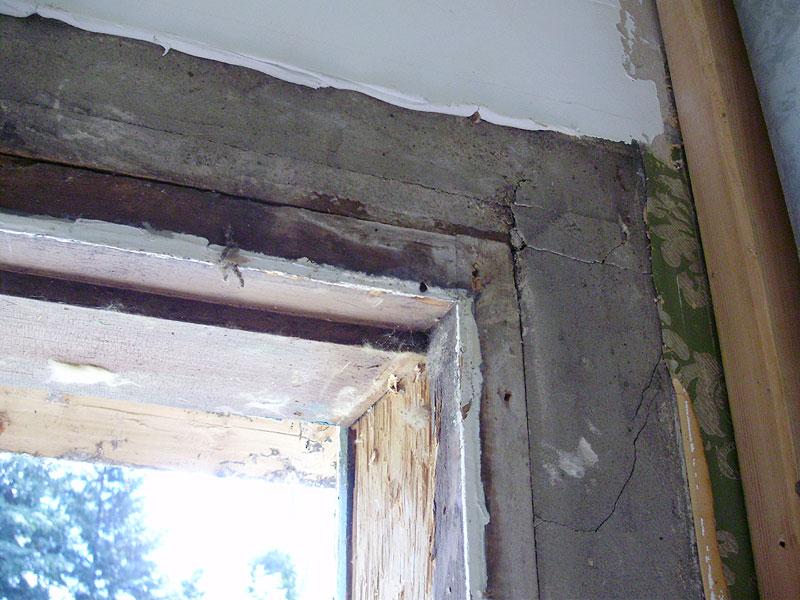
It's too bad that the original door jamb was completely butchered, because it was nearly 2 inches thick, and extremely well made. I spent several days custom making a new one. No photos of that were taken, but the jamb was built from 2x10s that had to be cut down, trimmed, routed and grooved, and the door had to be fitted with the hinges in the frame before installing it in the opening, etc. If you want more details on that, see the posts about my own front door: http://my1923foursquare.blogspot.ca/2015/09/salvaged-front-door-project-part-4.html

P8050132

P8050134

P8050135

P8050137

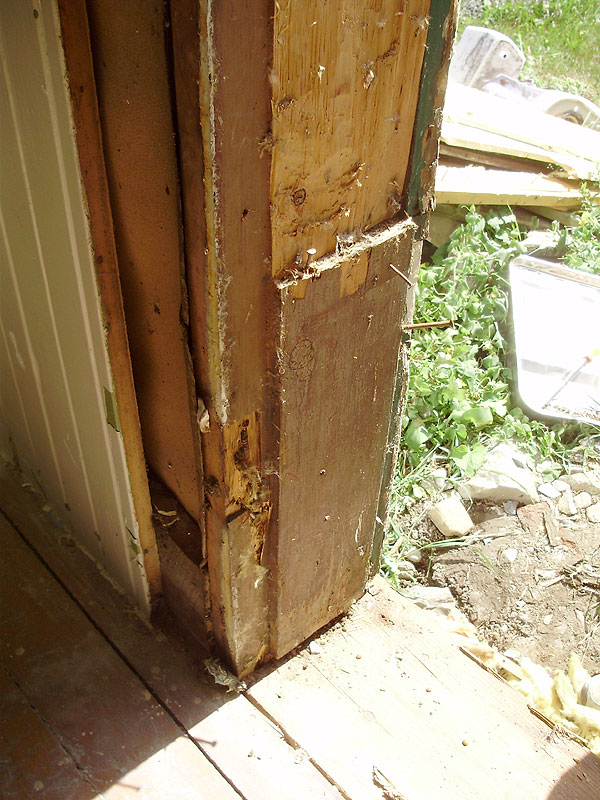
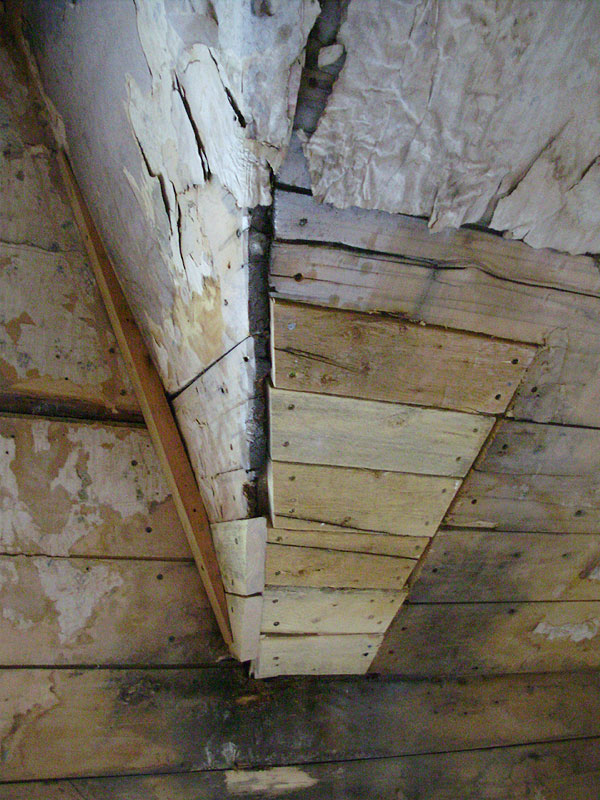
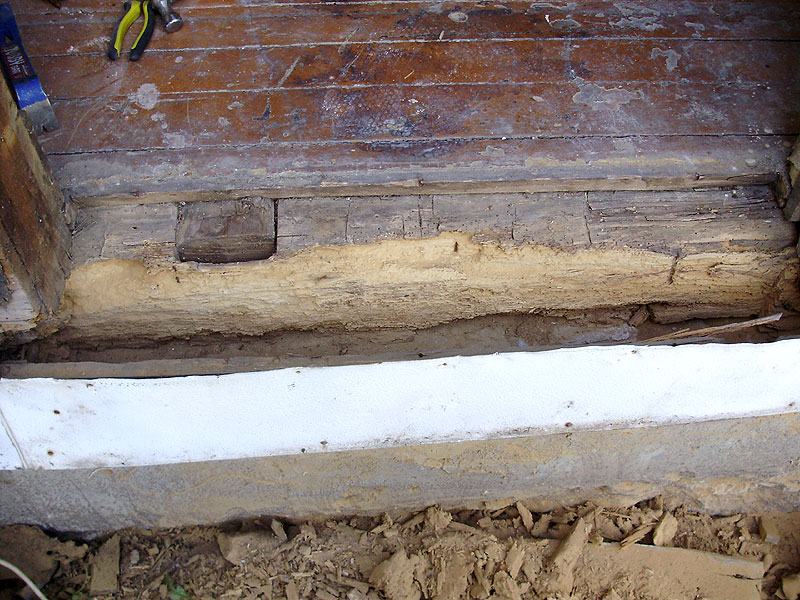
After removing the old door jamb, and the exterior casings, we found that the bottom exterior beam of the house was badly rotted.

P8050144

P8050146

P8050147

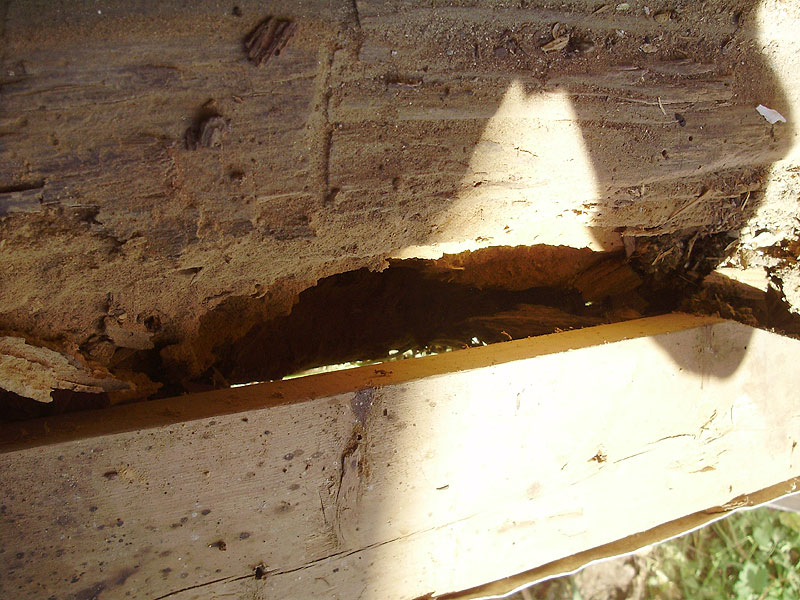
The inside half was still fairly solid, but the outer half was practically dust.

P8050149

Part of the damage was due to poor corner joints and leaks in the window frame, along with leaks in the original jamb, and insect damage over the years. I suspect that half the house may be like this around the perimeter. Since we can't rebuild all this, we fixed it as best as we could.

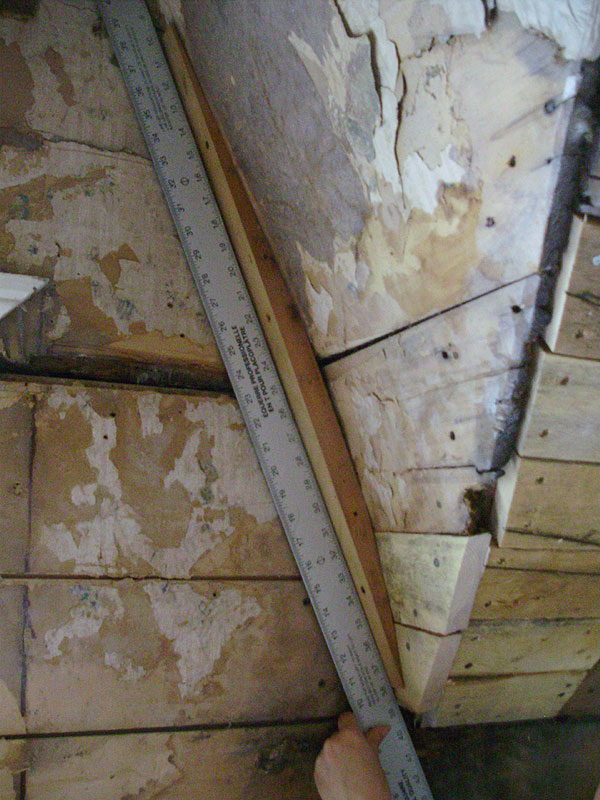
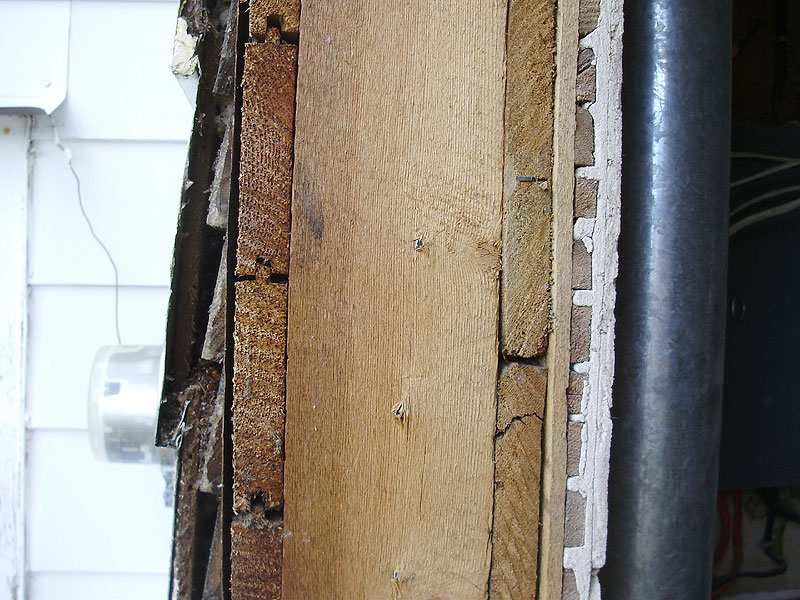
Here we can see the original construction. Small (narrow) cedar siding, tar paper, 3/4" tongue and groove, wall studs (4" side), interior tongue and groove or barn boards, cardboard (not easily visible), lath spacers, lath and plaster.

P8050150

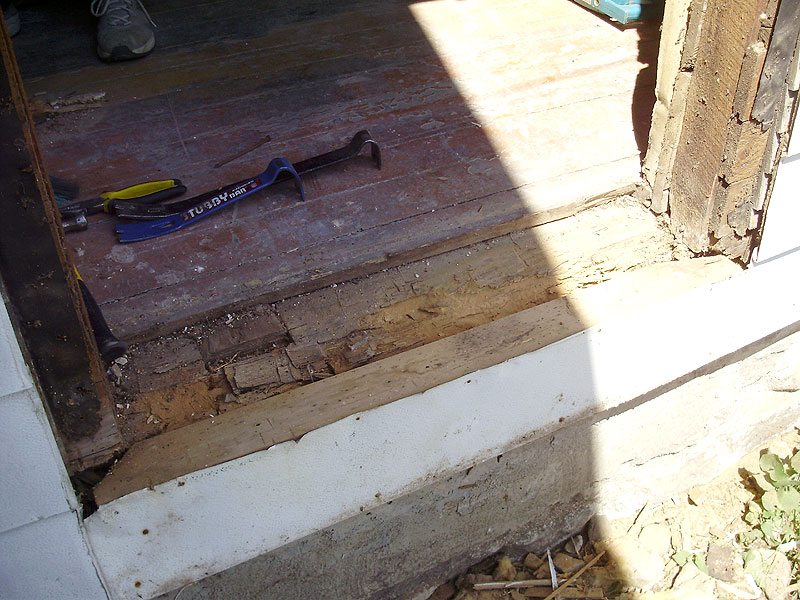
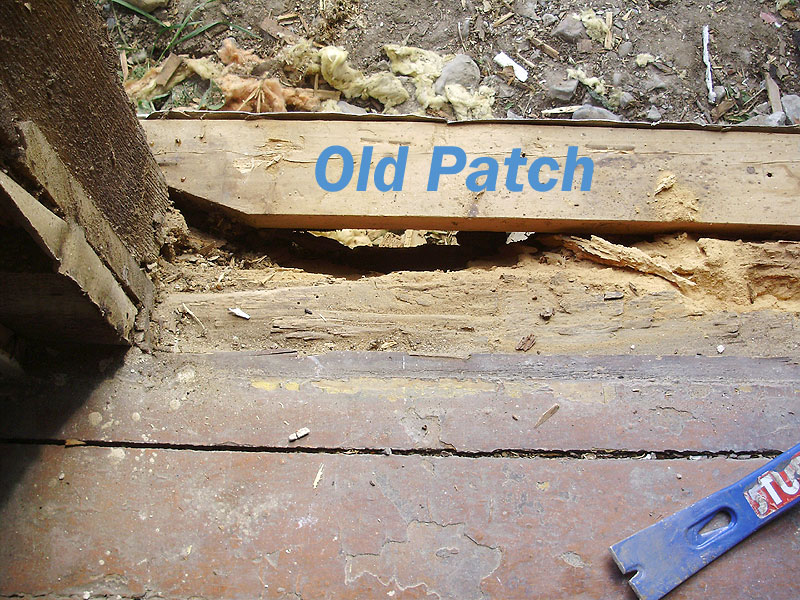
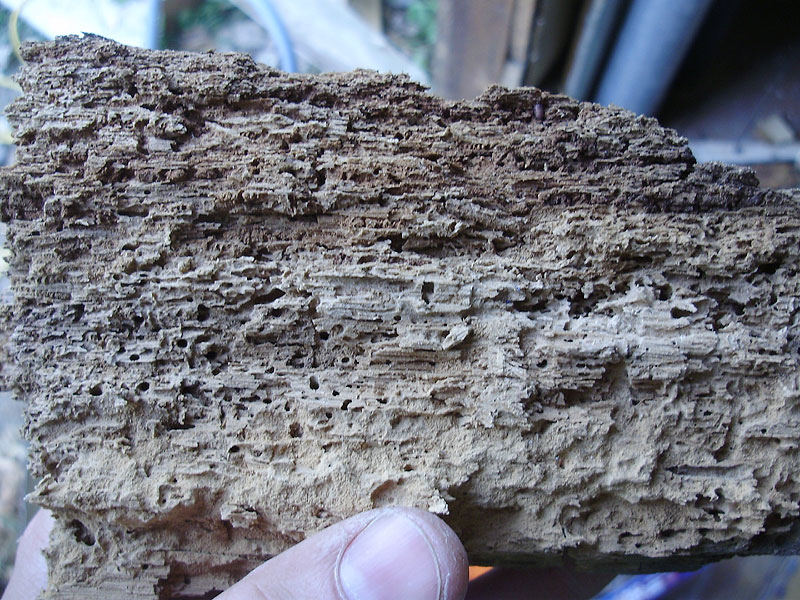
The outer rotted half was cut away.

P8050151

P8050152

Completely toast.

P8060153

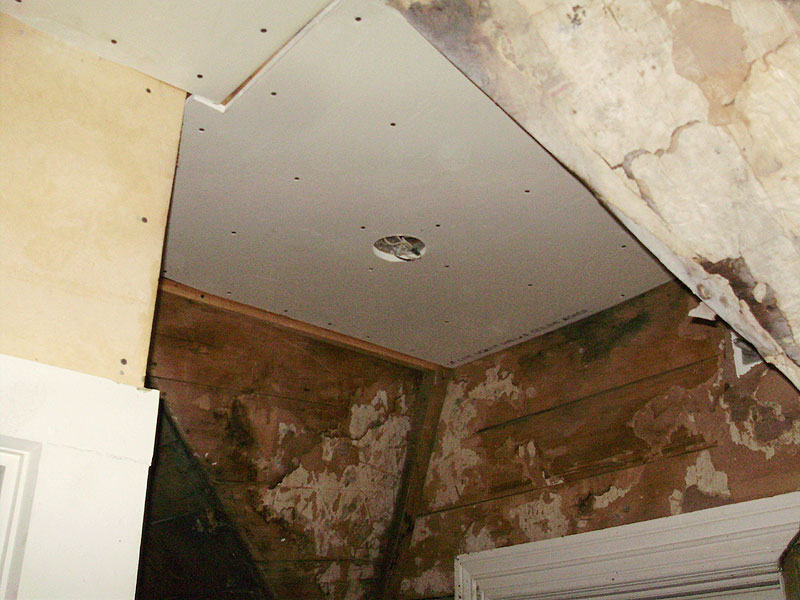
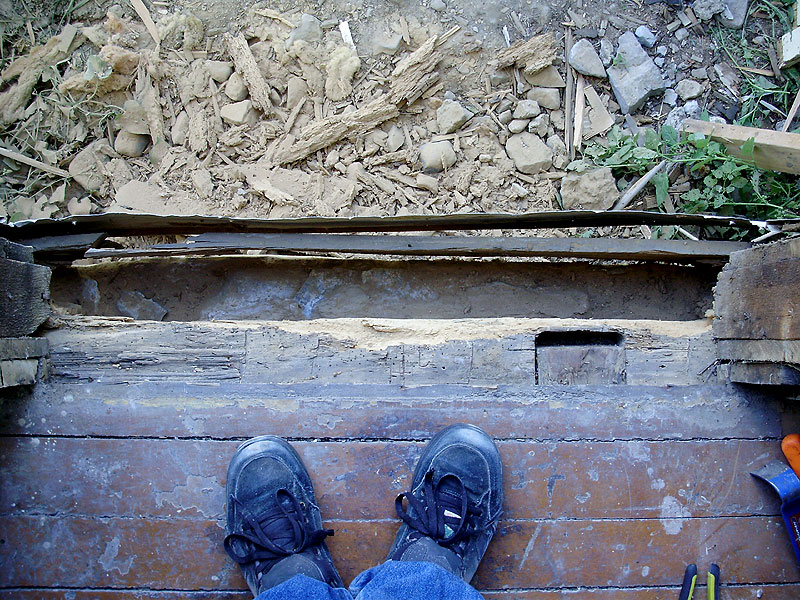
The cavity was filled with treated lumber, and small gaps were filled with sand and gravel (like the rest of the stone foundation).

P8060156

P8060157

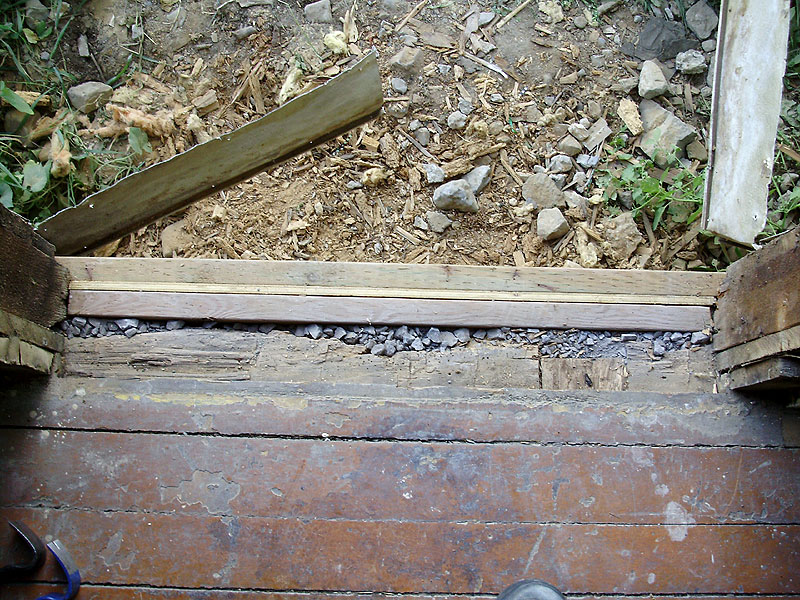
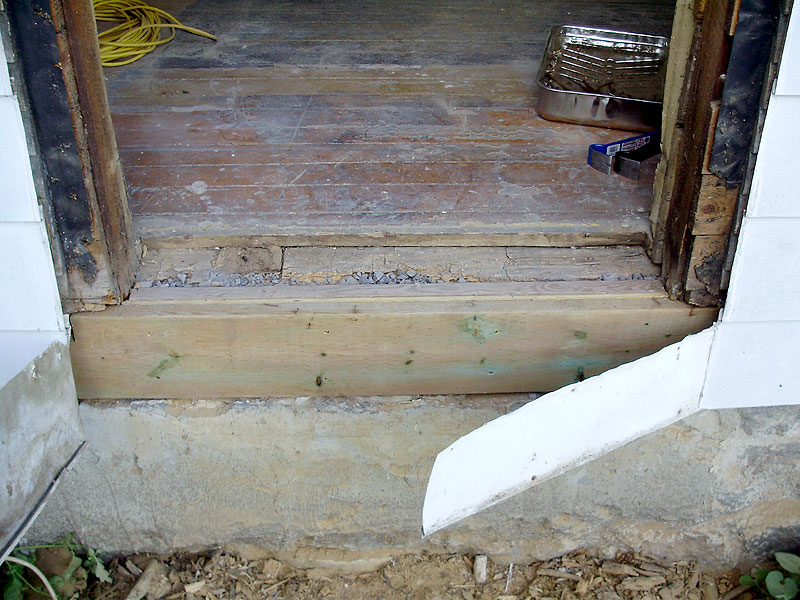
There will eventually be a covered porch here, so rot will not be an issue.

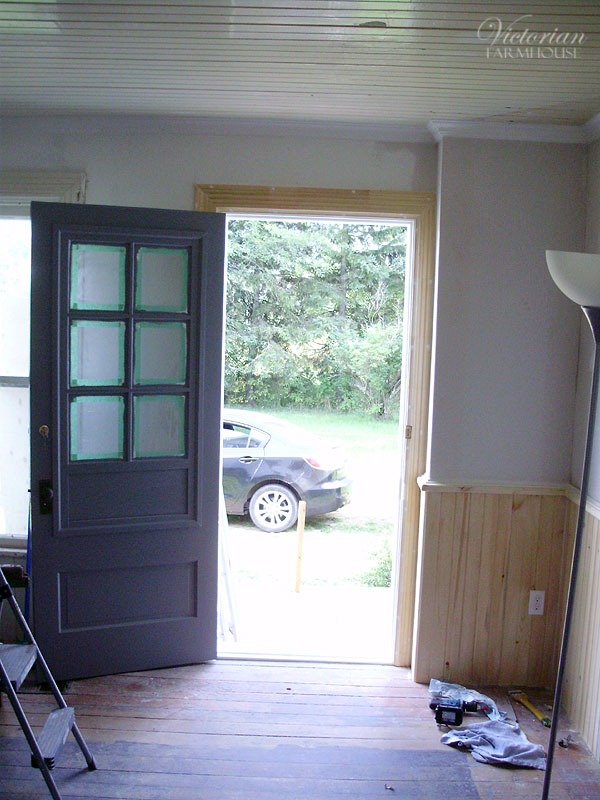
I added a cap moulding on the door to make the window portion more solid and permanent. Pierre then painted it (dark grey).

P8240358

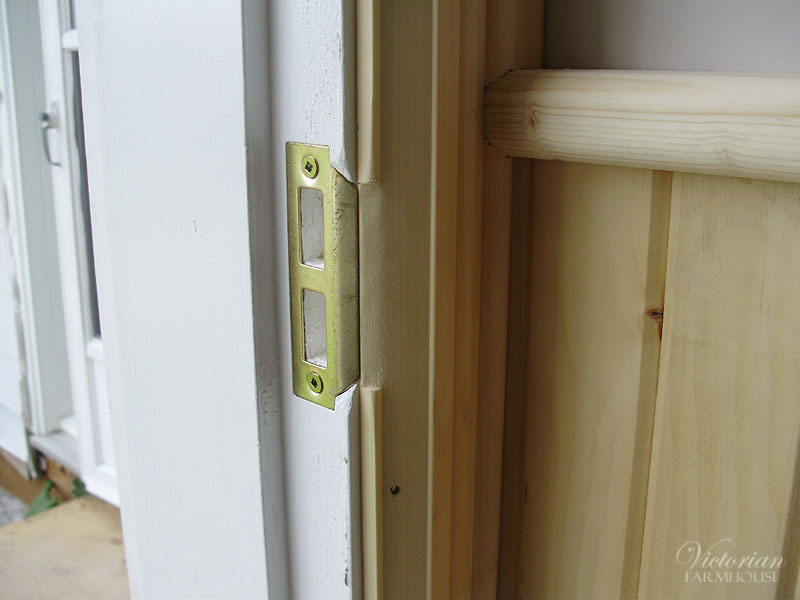
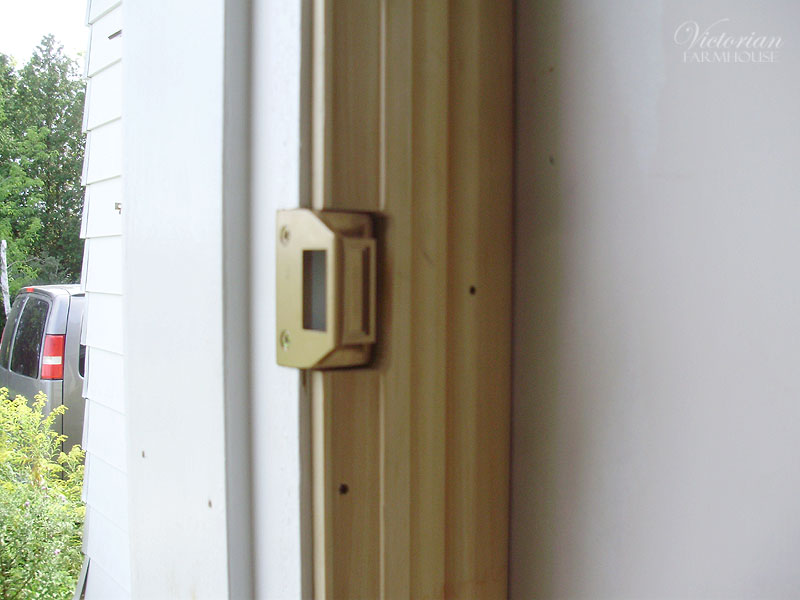
Jamb, door, and lock installed.

P8250005

Some of the details. Because of how the plate was made, I also had to tweak the door casing edge.

P8250008

P8250009

P8260012

To protect the door from the weather, and add a layer of insulation, a new aluminum door was installed on the outside. Photos of that will be posted later.

For those keeping track, this was not too bad as far as time. I had all these photos already prepared, so it's now only 12:24am.

Tuesday, November 22, 2016

Victorian Farmhouse - Part 17 Upstairs Hallway Ceiling

The hallway upstairs presented a bunch of really complicated problems for us. A lot of these problems are largely due to how the house was constructed. I have mentioned this before, but will repeat it here for clarity. The main floor was finished with lath and plaster (which was expensive), and anywhere that they could, they saved money by installing tongue and groove instead. This is why the living room ceiling and the lower half of the walls are all wood. I have seen old houses where there is NO plaster or drywall anywhere (tongue and groove walls and ceilings through the whole house).

Anyways, in this particular house, the plaster was largely in the entry hall with the staircase, and in the living room (now the office). The plaster goes up the staircase wall, but it ENDS right at the window in the peak. All of the walls upstairs are wood. Just wide wooden planks of barn board. Originally it was all just covered in wallpaper. Layers upon layers upon layers of wallpaper. We counted close to 15-20 layers of wallpaper in the different rooms upstairs.

Later down the line, part of the rooms had paneling or drywall added on top. The master bedroom (the pink room) has drywall, and part of the hallway (bedroom and bath side).

Now that we're trying to fix up the house, we're aiming for an updated "drywall or plaster everywhere" look. This means that we need a smooth surface on the wall that is half plaster and half barn boards.

We could NOT slap drywall on top, because it would end half way into the window, and if we did new drywall on the entire wall (down the stair wall) we would be burying most of the edge of the stairs (the wood trim), and messing up the window mouldings.

The solution that I came up with was to cover just the barn board wall with VERY THIN plywood. 1/8". This was HARD to find, but we eventually found a place that sold some. It was oak veneer on one side, and cheap mahogany on the back. The mahogany was better for what we wanted.

Before we installed the plywood, we had to square-up the ceiling slopes. They were INSANELY crooked, but easy to fix. The new wood in this photo was partly because this corner was rotted, and partly for when we fished some wires.

Note the huge curved dip in here. This side needed just this filler piece.

P7270034

Compare it corner to corner with a ruler.

P7270036

The other corner had the top corner too far inwards, so I had to make a vertical spacer, and a new piece at the top. It doesn't look that bad in the photos, but it was very very crooked in person.

P7270042

The only place we needed the special thin plywood was the window wall. Everywhere else we installed regular 1/2" drywall.

P7270043

P7280058

P7280059

P7280060

Finally here is the 1/8" plywood being installed. We used a LOT of small #4 3/4" long screws to attach this. The plan is to tape this and seam it just as it it were drywall. You can see where the plaster finishes just below the window (at the edge of the plywood).

P8110252

We had a similar problem on the master bedroom wall, but here we used 1/4" plywood, which will give a smoother surface (and it was cheaper). You can see the board walls above the plywood, with some of the wallpaper removed.

P8110253

The rest of the 1/8" thick plywood on the window wall. The plaster ends about a foot down from the window top on the left. See next photo. This lines up with the bottom of the ceiling slope.

P8110259

P8110260

With seams taped and first layers of drywall compound added.

P8240355

P8240356

P8240357

There are still touch-ups to do on the corner seams, but this is going to look really awesome once it's freshly painted!

Victorian Farmhouse - Part 16 Bathroom

Alright folks, it's currently 11:14pm and we'll see if I can put up THREE posts tonight. I have posts regarding the bathroom, upstairs hallway, and the salvaged front door ready to post about.

I'm at the point where I'm so far behind that I'm skipping some boring bits, and hopping around between projects, so posts might not be in correct chronological order, however, they will be more focused on specific areas. Hopefully no one really cares about that and they just enjoy the photos and the progress.

As of right now, the floors have all been refinished, and half the main floor is all beautifully painted. We did have one major disaster but I'll get to that later.

So the bathroom. In order to be able to have a working toilet, and install the drywall, we decided to pull out the old one, fix the floor, and sand the area around the toilet.

We also filled the back wall with insulation and installed vapour barrier.

You can see the board that was chopped for the plumbing. This was poorly nailed, so I cut and fit a new one.

P7200008

In case Pierre and Angie (or any future owner) needs to pass any wires up to the attic, we built a small wooden trough to prevent the insulation from trapping the wires.

P7200009

Insulation installed, and new floor patch, bracing, etc. installed.

P7200011

New moisture proof drywall, and the floor partly sanded. Pierre and Angie had the floors professionally sanded, but we did just this part around the toilet, and at the edge of the bath.

P7210014

P7210015

P7210016

Light switches and outlet above sink.

P7210017

At the time, we weren't sure what kind of wood this was. It has very little grain, and slight colour changes. It's definitely a hardwood, and I suspected it might be Basswood. It turns out I was correct.

P7210018

P7210019

Bath Installed:

P7270039

Toilet Installed. Quick story about that! This is the 3rd or 4th toilet we had to buy before we had one that fit correctly. The sandard spacing from the drain to the wall is 12". This one was closer to 11" or 11.5". The nice toilet (identical to this one) that P&A had bought did NOT fit. There was about an inch difference and no way to cheat the spacing. The other toilet they had (for downstairs) also didn't fit, and we had also got another toilet very early on (used) and I think that one was returned.

When we went to a local store, we checked all the toilets, and even though the spacing was supposed to be standard, it really wasn't. Generally the spacing is called the "backset" but most toilets DON'T TELL YOU what it is. We looked at all the floor models on display and measured them. We found this toilet below (same as the one they liked) and luckily it was pretty well priced. This is something you definitely need to check when renovating an old house.

P8080184

Monday, November 21, 2016

Flooded With Spam

If I wasn't already having a hard time keeping this blog going, I've just been hit with a wave of spam (which is not letting up), and Blogger doesn't seem to have any decent way to deal with it, other than marking each comment (manually) as spam. I can't block that particular account (which would be the easiest solution).

This is my inbox as of a half hour ago. All of these are from the same account under the name "Blogger":

Spam

Those (above) are just the latest ones, with about 20 spam comments over the past few days:

Spam-2

Spammer: If you see this, please stop. It's really fucking annoying.

Monday, November 14, 2016

Finally A Post About MY HOUSE

So this is going to be short and sweet, but it's mostly just a bit of an update post.

As most of you might know, I'm currently hella-broke, so I haven't been working on anything house related. I've been doing clock repair jobs and occasionally working at the upholstery shop (it's been very slow this year), so I'm just managing to pay bills.

If any of you would like to support me, or are looking for some nice inexpensive original art, framed and ready to enjoy, I have a selection of Rorschach paintings (not prints or copies) in my Etsy shop. Shop now and I can have them sent before Christmas! These are nice in a group, and I also have about 20 or 30 additional unframed paintings. Each is unique, and painted on archival black paper.
https://www.etsy.com/ca/shop/JCsArtPieces

I want to get into oil painting after having seen some amazing tutorials on painting still-life scenes. So far I have almost all my supplies ready, and I'm hoping to start that soon. If that goes well, it could be a way to make a bit more income.

As for the house-related bit of this post (hence the title) I've decided to tear-down the dinging room ceiling and the ceiling in the kitchen. I haven't started this yet, but the DECISION to do it has been made. After all the work on the Victorian Farmhouse (my friends' place - which is still under construction, but getting close to 90% done) I decided that I really REALLY want to expose and repair the original tongue-and-groove ceilings in the dining room and kitchen. They are currently covered-over with drywall.

The only part of this that sucks is that I will have to tear down all my nice crown moulding in the dining room, and hopefully be able to reinstall it. I COULD cheat and just cut the drywall flush with the crown and put another moulding to hide the drywall edge, but I want everything to match and be done properly, so no cheating.

I don't want to start ripping down the ceiling until after Christmas. There shouldn't be anything to buy for this demo/restoration other than maybe a bit of trim paint, so I might start that in early January.

Otherwise there's not too much new to report. I have about 6 or 7 more posts to do on the Victorian Farmhouse to catch-up (I just don't have the time), and I haven't really bought much of anything new for the house except a yellow throw pillow for the grey wing chair, and a few pieces of framed art (Victorian prints, lithographs, etc).