Tuesday, February 28, 2012

Trim Photos

I'm pretty much ready for wall paint, so hopefully that will go on in the next few days.

Here's how the hallway looks with the new and repaired trim painted, and a fresh coat of paint on the ceiling. You'll notice the difference in the white around the door edges and near the ceiling (since I just overlap all the corners and edges by a few inches).


The interior of the built-in did not get stained and varnished yet. I'm waiting until I fit the shelves for it, so I can do everything in one shot. The door and drawer faces will also be made later, and will go white with antique style hardware.

Monday, February 27, 2012

Painting~ (I see a theme developping)

Alright, another unexciting post, but this evening I painted the last coat of white on the casings in the upstairs hallway. This means as soon as it's fully dry (I may wait 2 days) I can tape it all, and finally paint the walls.

Sunday, February 26, 2012

Cornwall Homes - Rankin Apartments

This is another old building that I walk by on a regular basis. The building dons a cement plaque identifying it as the Rankin Apartments 1938. The building seems to be currently unoccupied, and several windows have been boarded up. Up until a few months ago, it was occupied. I see a padlock on the front door. Plywood over windows is usually not a good sign, so I fear the worst. It's looked this way for a while (partially boarded up) but I've seen nothing being done to it. I don't know if there was a fire (doesn't look like it), or if they're renovating.


The building still has all the original windows, front door & side lights, and there's probably a very good chance that a bunch of the original features on the interior are still present.


I'm thinking that maybe I should leave a letter at the door asking what's up, but seeing that the past 2-3 houses I've left letters to never called back, I don't know if I should even bother.

Painting~

Again, I did some more painting. Nothing too exciting, and no pics. I just painted the ceiling in the upstairs hallway. I might roll-on another quick coat, but otherwise the ceiling is done. This means I have one more coat of white on the casings, then I can finally paint the walls (which I'm looking forward to - since it's COLOUR!)

So yeah... more soon.

Saturday, February 25, 2012

Painting~

I finally did the first coat of paint on the casings upstairs (the ones that got primed about a month ago). Yay!

Bathroom Indecision

BATHROOM:

The bathroom is STILL not done after living here for nearly 2 years (coming up April 30th). Most of the work was done by about the year-and-a-half mark. All that's left in the bathroom is cabinetry, a door, , fan cover, and plumbing (sink/faucet though the faucet is already bought).

I've been tossing around lots of different ideas for the bathroom for *months*. I want something nice, something vintage looking, and something that doesn't look too "perfectly built-in". I really liked the idea of using an old piece of furniture as the vanity, and putting a marble or granite top on it, but I don't like the idea of having a dead space along the wall next to the door (which will just trap dirt/dust/hair). However, I had set up the sconces and plumbing with that idea in mind (the lights would be perfectly centred over the sink, and everything would line up. So should I compromise my original idea for the vanity, and go with something asymmetrical, and built-in up to the wall, or stick with the nicer looking, but slightly more impractical idea? I say impractical, because having the vanity top continue up to the wall would give me more counter space (about 4") and I could put something like glass canisters/candles in the corner.

These are some of the ideas I had for the vanity. If I go with a centred cabinet, I would make it symmetrical (2 doors and maybe a false drawer at the top), whereas if I go flush to the wall, I would want 3 drawers near the wall, and a door on the left (otherwise the doors would be off centre from the sink and that would drive me nuts).


I quite like the look of this one:


I also haven’t decided what I want to use for the vanity. I want wood. Either birch, Maple, Oak, Ash, Cherry, or Mahogany (though the last two would be pricey). But I want dark brown or a reddish orange (like old cabinetry).

As for the vanity mirror, I had originally wanted this:


But it will need to stick out of the wall at least 4", and I'm not convinced that it will look good between the sconces. So now I'm thinking about using a flat mirror on the wall (see farther down).

If I have no medicine cabinet, I'd need another storage option, so I was thinking about making a wall cabinet (non matching) to go over the toilet, between the window and corner stack. The only possible issue there, is the possibility of dropping something into the toilet if I’m clumsy :S But as far as room (space for having a cabinet sticking out of the wall), and placement (free space around it/looks) it would work fine.

Here’s how the room looks (as a refresher).

From the hallway looking in:


Where the vanity will go:


I have this really nice antique bevelled glass mirror that I’ve been thinking of using. I even think I would leave it with it’s “shabby chic” distressed mint-green paint.


It fits the space nicely, and it would look like this (isn’t it fun to have a tripod!?)


This is the spot where I would put the wall cabinet. I would only make it 4" or 5" deep.


And here are some ideas for a wall cabinet. I could make it in any wood/veneer, and in just about any style. I would not use clear glass (if I go with a glass door). I’d use frosted glass, or a wood door instead.


I have more images of wall cabinets in this album:
https://picasaweb.google.com/100215997649394579880/HouseInspiration?authuser=0&feat=directlink

I need input.

L Room Update & Office Ceiling

MORE DEMO!

Let's start this post with some more demolition photos! Yeah! (Can you tell I'm in a good mood?)

For those of you who remember the original house tour photos (one of the first posts), you will remember that the house had 3 built-ins on the East wall (where there used to be 4 windows, but now there's a building). One was just a small shelf in the Laundry Room/Kitchen (upstairs), one was a bookcase (the one below), and then there's also an odd looking curved top shelf in the Office.

The laundry room (now being called the Guest Bedroom) had the shelf (and everything else in the opening) removed last year, but I decided to do the same with the L Room wall bookcase.

For the longest time, I was thinking of simply replacing these with nicer versions of the same thing, but with matching trim (like the windows/doors). But now, I'm reconsidering this. In the upstairs bedrooms (Guest Bed and L Room) having the built-ins in those two walls REALLY limits furniture arranging options. Even if I have the built-ins high enough off the floor, I think it might just be better to not have them. This seems a bit sad, since it was an option to do something fun/cool, but like I said, it will make the rooms much more useable. Your thoughts? Nothing is 100% decided yet.

This was the tear-out of the bookcase. Please note that the thing is covered in dozens of coats of paint, and it was also damaged in one corner.


Removing the trim revealed MANY layers of wallpaper. The last one had flowers (Chrysanthemums?) with thin black leaves/lines. The really unusual thing about this paper is that it looks like it's hand printed. Like... with paint. You can sort of see the details in the photo where the edges of the different colours on the paper have small ridges of paint around the edges of the "stamps" used for the different parts. This just seems so ODD. This paper can't be THAT old, but it's reminding me of the type of hand printed papers I've seen in homes built in the 1840-60 range. It looks too detailed to be a DIY project. Thoughts? There's only a small section of paper, and I removed as much as possible (to save it).


There are several weird things about these built-ins (where windows used to be). It looks like the opening was originally blocked-off (flat) with 2 vertical wood side boards, and tongue and groove wood scraps nailed over this (then drywall). Later, someone removed some of the upper t-g boards, and fitted-in this bookcase. This seems like the most likely scenario, since the vertical (since) boards wouldn't have needed to go the full length (up/down) if they were fitting the bookcase originally (plus there are nail holes along the edges of the vertical boards). The cement (from when the building next door was constructed), fills the entire width of the window opening (between the side boards). I still think it's very odd that they didn't board-up the window openings from the OUTSIDE of the house before constructing the cinder block building next door. They did remove the original exterior window trims (sill, casings, and crown), so there would have been lots of room to install some 3/4" t-g or plywood/scrap wood to end up flush with the exterior siding around the windows. Instead it looks like they just capped the window openings from the inside of my house, and then they built the building next door (thus all the glops of cement.

Also, that pile of brown fluff is probably an old mouse nest. There was nothing in it.


Cleaned, and empty opening. And yes, that cinder block is the building next door. There's MAYBE an inch of space between the two buildings, and on that side, I have the original cedar siding.


OFFICE CEILING!

Since I moved the duct work over towards the corner by quite a lot, it meant that I'd have to patch the ceiling (and later, the floor). I decided to do this last night. It didn't really take that long, since I decided to use some of the original (and mostly ruined/broken/splintered) t-g from the kitchen (I had removed about 4 boards from the wall a few weeks back). This t-g is the same as what's used on the ceiling, and also the same as what was used for the chimney stack/cubby in the kitchen.

Before:


Looks like a mess...


But with a little bit of sanding, and some really good primer...


A second post about the bathroom will be posted in the next 15-20 minutes!

Sunday, February 19, 2012

Unfortunate Victorian & Paint Colours (Again)

I just made a quick, and fairly restrained post about this house over on Old House Web, but as my fellow blog readers, you get the uncensored version.

Since I moved into this house, I've made it a point to walk all the nearby streets in the neighbourhood, to see the houses, and look for original details for my own renovations. For the most part, a large number of the houses in this area are pretty run-down, and heavily remuddled. 95% of all the houses are covered in vinyl, and the remaining 5% are rotting. The ones that are in good shape tend to be the brick houses, which usually escape the more drastic remodel ideas (moving windows, painting, capping in vinyl) since they aren't as easy to modify.

My area of town is a bit farther north than the older parts of town, so most of the houses in this neighbourhood are from the 30s, 40's or later, with the exception of maybe 4-5 Victorians.

On such house is just 2 blocks away, and I pass by it regularly. It's capped in vinyl, and the original windows are gone, but it's in generally good shape. The real show-stopper on this house, however, were its original set of solid wood entry doors. I loved these doors.

Last weekend, coming back from a trip to Home Depot with my Mom, we passed by the house, and I screamed in terror (not kidding, she stopped the car) when I saw what they had done.

These are the only before photos I have, and they are pretty low-quality screen grabs from Google Maps.


This is why I was so horrified:


I just can't believe someone would do this. Those doors were gorgeous. They not only removed the door, but they also destroyed the original curved transom windows. And I can't understand why they did this. The doors looked like they were in fantastic shape. They weren't even painted! I was so pissed and sad about this that I wrote them a rather nasty letter (trying my best to stay civil and polite about the whole thing).

It just looks so awful compared to before. And those cheap pieces of sh*t doors won't last. I have the same kind of awful metal doors on my house. They were installed the year before I bought the house (2009), and two are already not opening or closing properly, even though they were "professionally installed". The front door needs to be slammed to close properly, the back door is crooked (but works ok), the upstairs one is ok, but the worst of the bunch is the side door, which I literally have to body-slam to close it. Even slamming it as hard as I possibly can, doesn't always close it completely.

And the weather stripping on these doors is pretty crappy. Several of mine are already nicked and torn. These are all reasons why I want to scrap them as soon as I find nicer old wood doors.

Paints:

I promised some better photos of those colour samples. So here you go:


Then these are some samples I've been tacking-on to the wall for the dining room. Again, I'm nowhere near ready to paint, but I am pretty sure that I want to go with a golden yellow/orange for this room.

I was originally inspired by this photo, but I think it might be a bit too dark in my house.


This one also looks quite nice.


These are some of the swatches I started out with:


And then I removed one that was a duplicate, and all the ones that were too dark, or the wrong shade.


Out of those, I like swatch 3, third and fourth from the top, and swatch 4, fourth from the top. I'm still not sure. I always tend to pick colours that turn out to be WAY darker once they're on the wall, so I'll be getting samples before I commit to anything.

Thoughts? Opinions? Does anyone already have a similar colour in their house?

Saturday, February 18, 2012

Sad Cornwall Homes 1

I want to start a new series of occasional posts. This one being the first.

Cornwall has a lot of really beautiful older homes, but for the most part, the people living in them are leaving them to rot. Many people are on very low incomes, and houses are not cheap to maintain, but sometimes it's just very sad. I don't want to post only the bad, I also plan to showcase some of the nicer well-kept homes (there are many of these, too).

This post is about a 2 1/2 storey (I think?) brick foursquare just a few houses away from my Mom's place. She's the one who told me about it.

She told me that they have been taking out bins full of stuff from the house, and she thinks it will be torn down.

So I decided to go have a look, since I wasn't' sure which house she was talking about. As it turns out, it's one of the houses that I rather liked. I've walked by it dozens of times. Like my house, it's a foursquare, and was being used as a rental property. I know that there's a rather nice archway between the living room and dining room.

There's a sign on the front window for a building permit for "exterior cladding & framing" but why are all the windows boarded up? Then there are 3 notices from the city on the door, saying that they need permits for the interior work, since apparently they ripped out all the floors and some walls (or something) and the floor joists are sagging "beyond acceptable levels", and one said that one of the exterior walls looked as though it may not be structurally sound.

So yeah, what a nightmare.

At this point, I decided to write a letter to the owner, and I wedged it in the door frame next to the notices. Basically, if the place is being torn down, I'd like to be able to save doors, hardware, the stained glass, and any other interesting items (if there are any left).

This is more or less the view from my Mom's place, which shows the back side of the house, which is in really rough shape. The whole balcony looks like it's rotting and falling apart.


The front of the house still looks pretty good. I love the overall foursquare look, and especially the top third floor over the roof. It has windows on 4 sides!


All the old houses in this area of town have these nice painted blue and white numbers, and several corner houses had the street names on them. I'm seriously thinking of adding a set to my house. I still have my original blue & white house number. Also note the original dentil moulding.


If the house is indeed being demolished, this is the piece I want to save the most. It's a rather beautiful stained glass (sort-of transom) on the front window of the house. This particular style and the general colours and textures in the glass are typical of the era. Many older houses have similar pieces. The Victorian houses, however, tend to have just plain coloured squares around a clear window. So this is a rather "fancy" piece.

It's hard to make out the colours, but you can see a ruby red border, orange highlights, and the vase looks like a light yellow.


The west side of the house looks as though it had a staircase added, and later removed; possibly in the past month, due to the caution tape, since I can't remember if it had one up until recently or not. I mainly walked past the east side of the house.


So yeah, hopefully I can turn this into an opportunity to salvage some neat stuff, and hopefully they're not tearing it down.

Wednesday, February 15, 2012

Ducts & Paint Samples (Photos)

Alright, here are a few photos showing the finished section of duct for the L Room.

PLEASE IGNORE THE GIANT MESS OF WIRES. These will all be fixed and organized later.


A few pwople commented about the wiring, and I wanted to show a few areas that I organized, as a bit of a preview.


Now for the fun part: PAINT! (Keep in mind that I'm nowhere near ready to paint).

The two samples shown below are the light grey for the office (left) next to the darker grey-brown that will be going in the upstairs hallway.


Mrs. D pointed out the new "trend" with all the grey and beige tones (affectionately called "greige" by someone on Old House Web - a term I'm now using very often). The colours themselves (grey and beige) have been popular for centuries (French Grey for example, and Antique White) but the fad nowadays is to have an ENTIRE HOUSE painted in grey or beige (rather than white). This sounds rather odd or funny, but I've seen it in person. Several of the new houses I work in (installing kitchens & baths) are painted entirely in one shade of beige or light grey. Most of the time it looks pretty good, but I find it a bit boring.

I rather like some shades of grey, beige, taupe, light brown, etc. But I also LOVE green and blue, as well as other neutral shades, so that's where I think I don't really fall into this "trend". I am using some trendy/modern colours, but only here and there.


Below is the sample of the green. It doesn't show up very well in the photo, but I have another accompanying photo to go with it. This green is a shade called "Olivine" by Behr, and my aunt used it in her living room. I *LOVE* this green. She's actually gotten tired of it, and is planning to change it, but the paint sample below is from her.


And this is what it looks like in person. This is a photo of one of her cats, Justin. He's my favourite. But the green wall behind him is the colour above, and the colour I want to use in my living room. It's not the best photo for showing the wall colour, but it's the best I could find.


Comments?

Tuesday, February 14, 2012

L Room Ductwork DONE

I finished connecting/assembling/taping the rest of the run for the duct work going up to the L Room. I had to get a little creative with the pieces I had left, but it worked out well, and looks great! I'll post photos tomorrow since I'm off to bed (and I didn't take any photos yet anyways).

I also picked out a paint colour for the Office. Basically, I got the colour from my coworker's house. His kitchen/dining room are painted a really nice, mellow shade of grey-beige, so when I had to chip away a piece of drywall around a door (to fit a casing properly - while we were installing his new kitchen), I saved a piece of the painted drywall paper, and I got a colour match for it at Home Depot. He was supposed to ask his wife for the name of the colour for me, but I didn't want to wait forever (since he tends to take forever to get back to me when I ask him for something), so I didn't "steal" their colour, hahaha. Well, not *technically*.

The colour, oddly enough, is pretty close to the colour of unpainted drywall (the grey type), and it's a very similar shade to the darker grey-brown that will be going in the upstairs hallway, so it should blend-in quite well with the colours I have picked out so far.

I should also show you guys the green that will be used in the Living Room, since I've had that one picked out ages ago.

Monday, February 13, 2012

Fixed (Photos)

Alright guys, the photos are all showing/working properly. I had used the wrong set of links for all the photos, which is why none of them worked. What a royal pain.

I really hope you guys go back and have a look, and post comments.

Links:
Alright, Photo Time! (Part 1)
Alright, Photo Time! (Part 2)

Sunday, February 12, 2012

Alright, Photo Time! (Part 2)

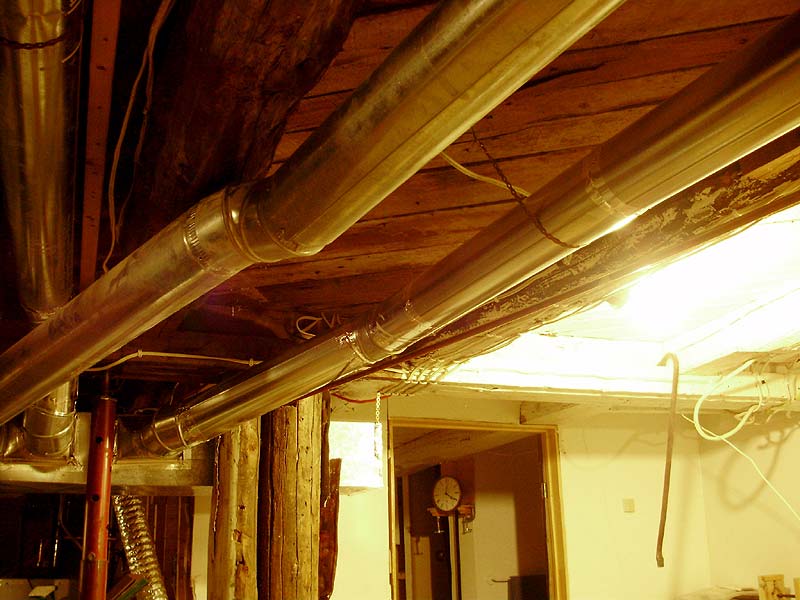
This is the Office floor register I mentioned earlier. The way it was set-up, the house used to have several ducts that were basically just the spaces in between the log beams filled-in with boards on each side, or along the bottom (as in this case), and tinned on the bottom. They reused part of this when they did this newer duct, but they had left all the useless large bits of wood along the beams. I wanted all the extra head room, so I took that all down. This was a bit tricky since there were a few wires that passed through these boards.


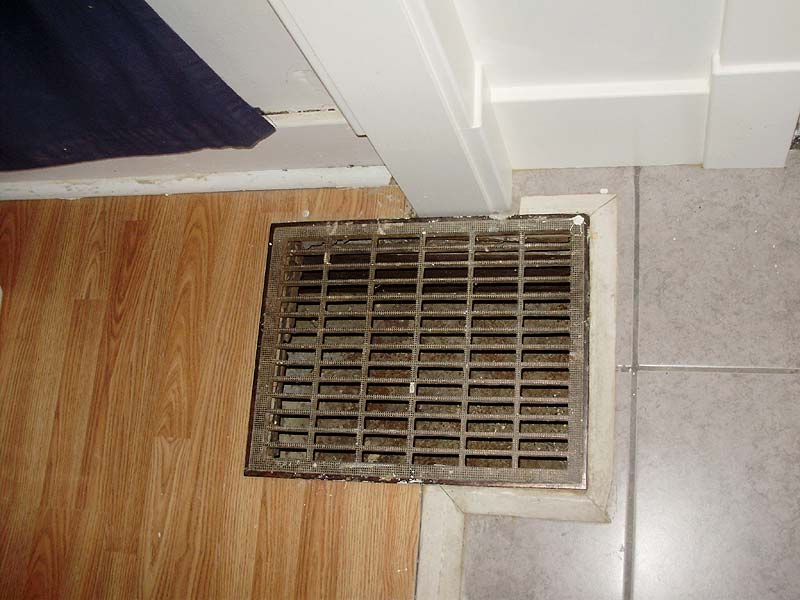
One of the boards can be seen on the right, and the other one on the left is a vertical one, which I had to partially chop. I wanted to remove it entirely, but for some odd reason it goes into the foundation (into the cement) and is nailed into the wooden log in many places, so I left it. There's a similar one on the opposite side (both facing the front of the house. I would have thought that they might have been for a porch, but it would mean that the porch would have been a LOT wider, and I'm pretty sure the existing one is original, so these are a mystery.


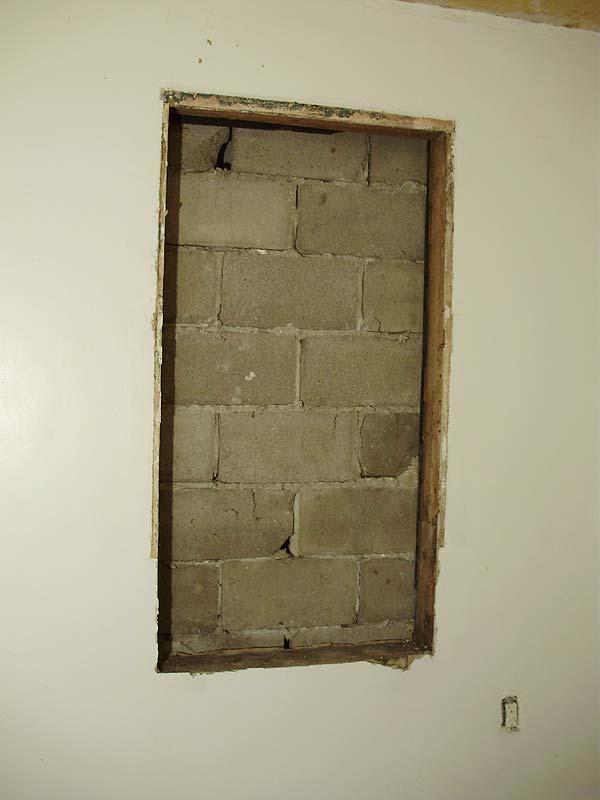
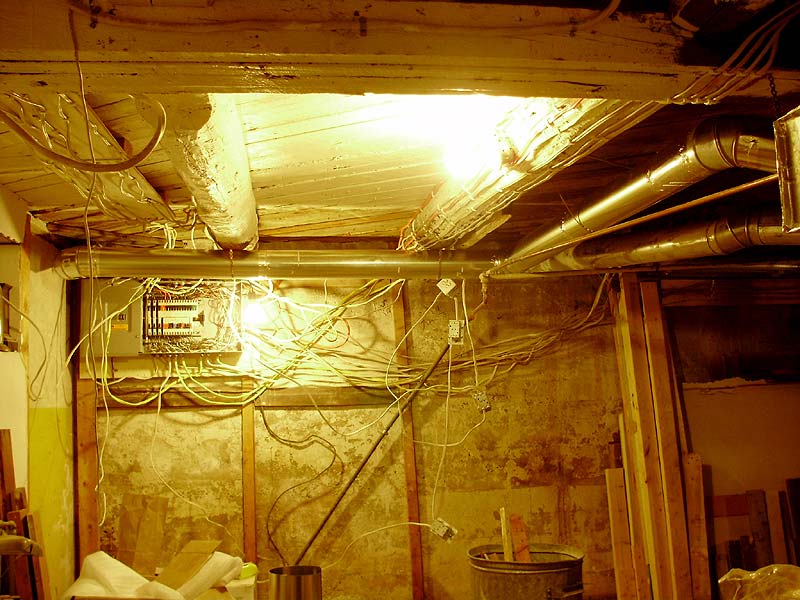
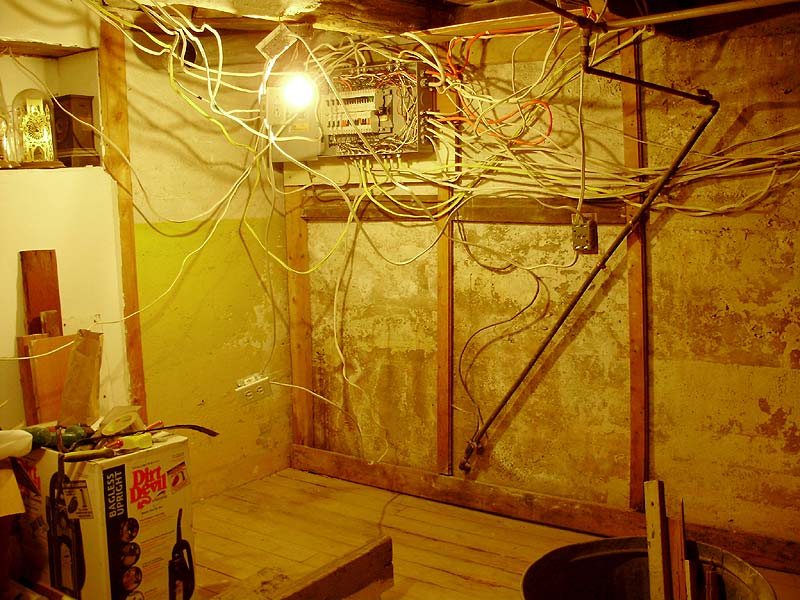
This is an updated photo as of tonight. You can sort of see that I decided to also remove the old drywall and scraps of wood on the left side of the electric panel. I also cleaned out all the wood/dirt.


Fixing the duct/floor upstairs in the L Room was a fairly routine job by now. Cut out old damaged planks, mark for the location of the new register "boot", add supporting blocking below floor, and patch. Also note that I fixed the loose cable wire and put a cable plate/outlet for it.


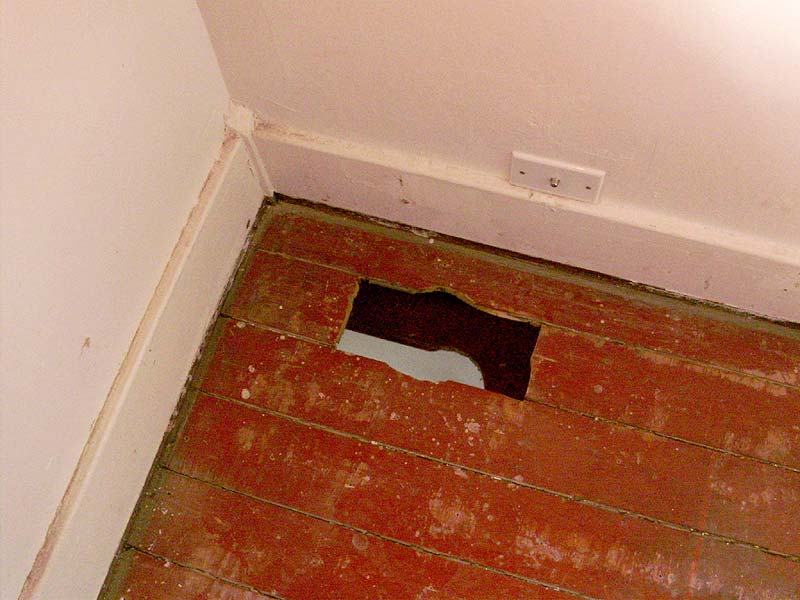
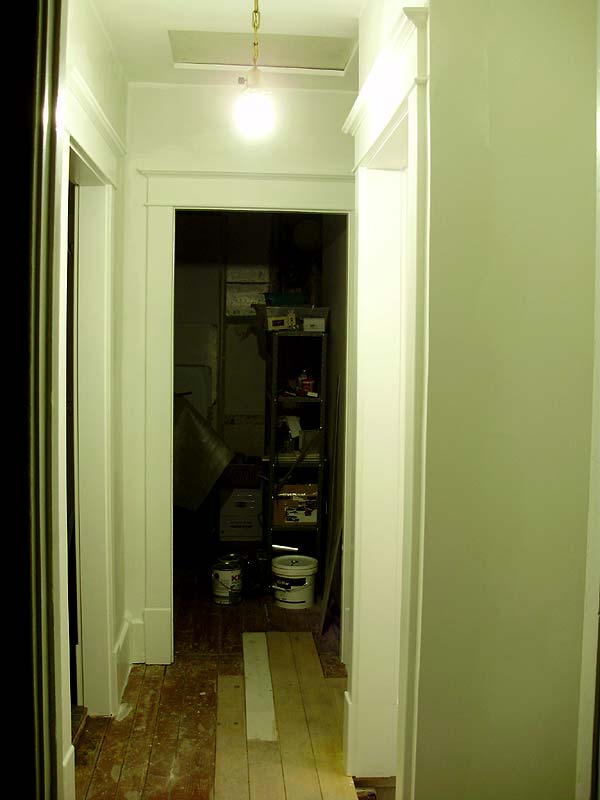
You can see down into the Office!


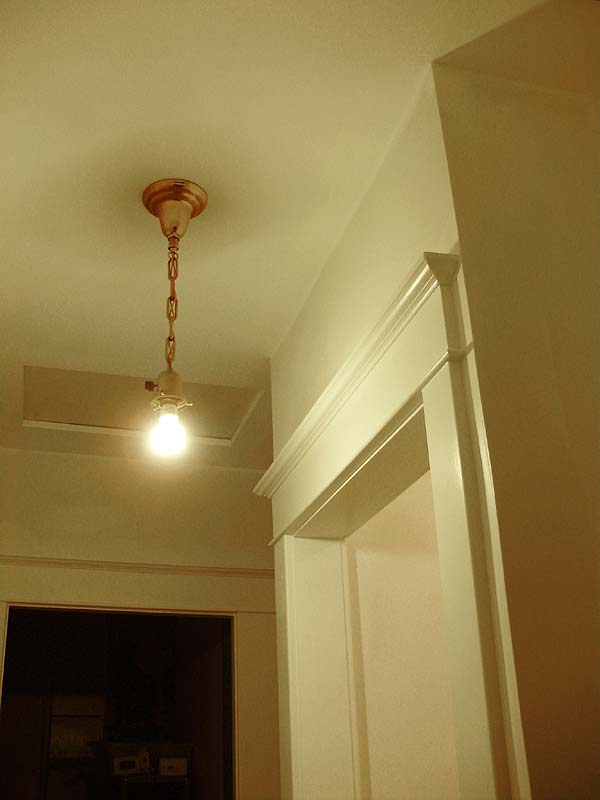
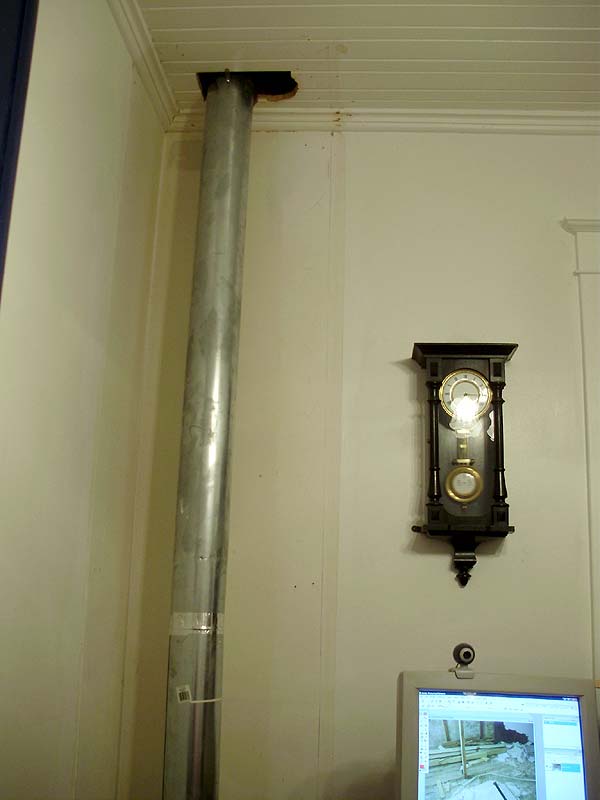
Ta-Dah! You can see light shining up through the vent since I had not installed the round stack yet.


Stack redone:


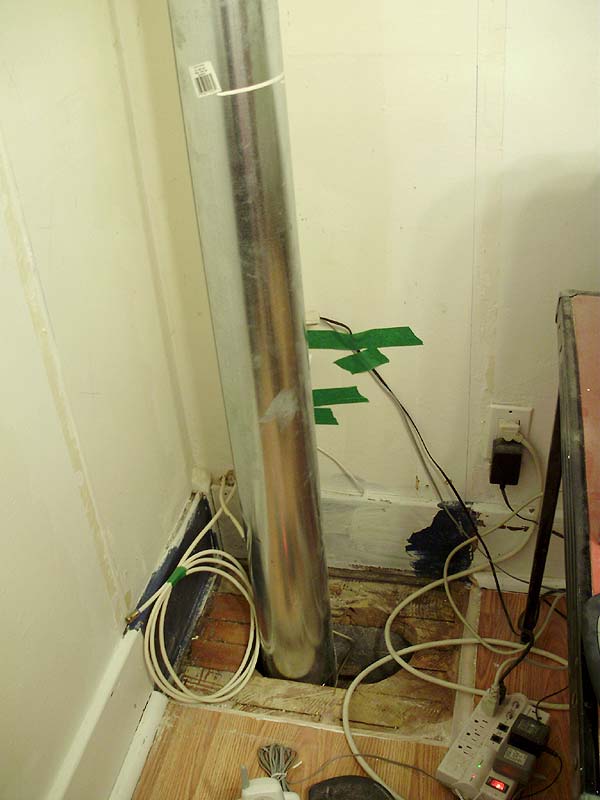
This area is still a mess of wires until I start to do the actual column and reroute some of the wiring, like that spare cable.


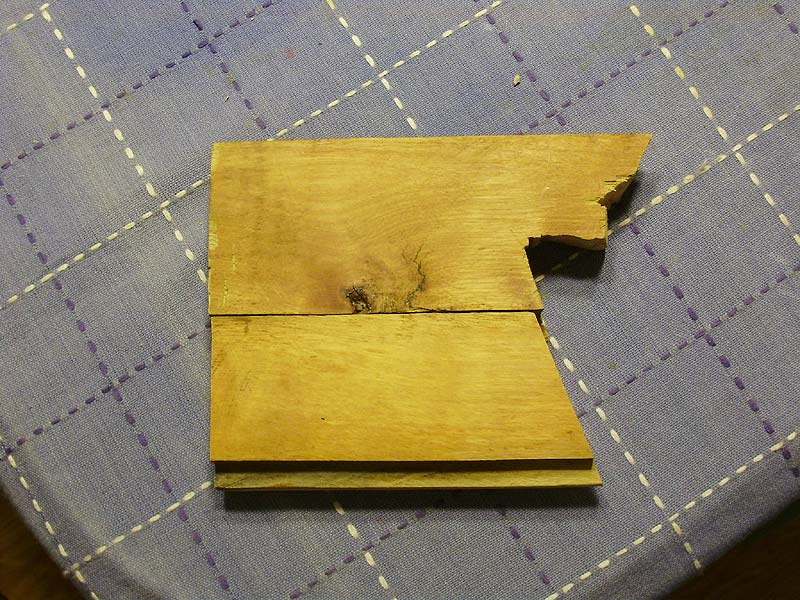
As I was working in this particular corner, I was able to reveal some of the GORGEOUS original hardwood. It's actually not maple, as I had thought, but Birch, which has a beautiful orange-yellow glow to it. These two pieces were cleaned-up and have pretty much no original finish left on them.


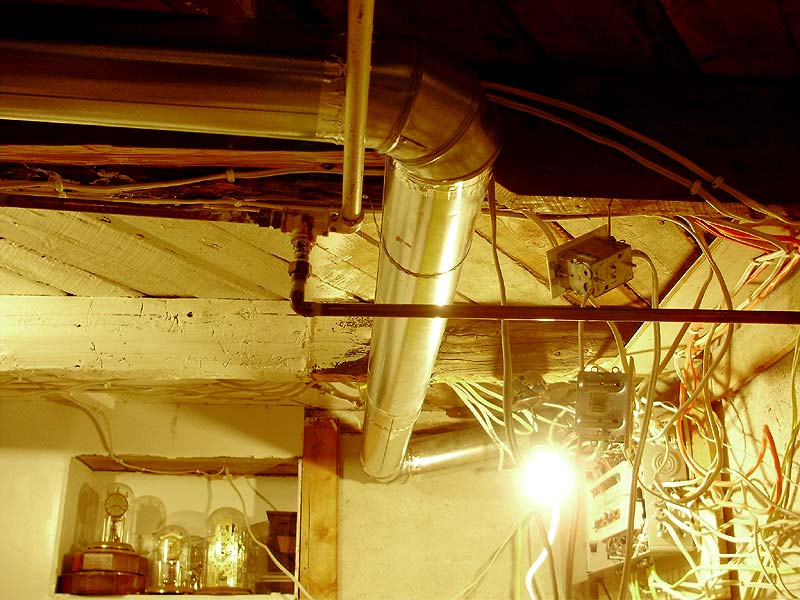
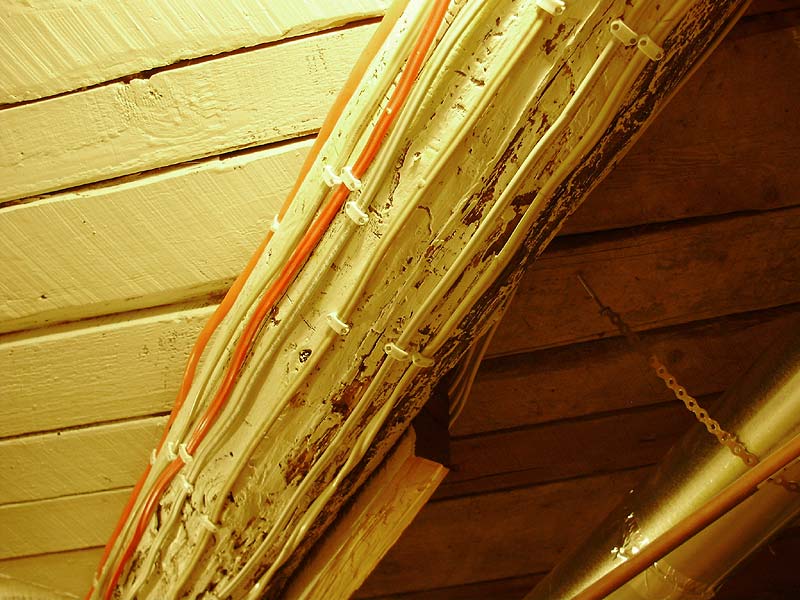
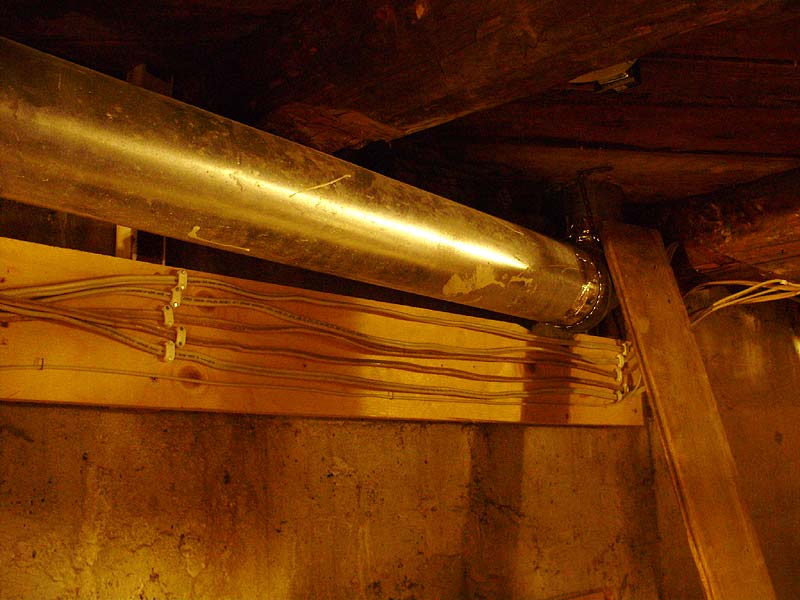
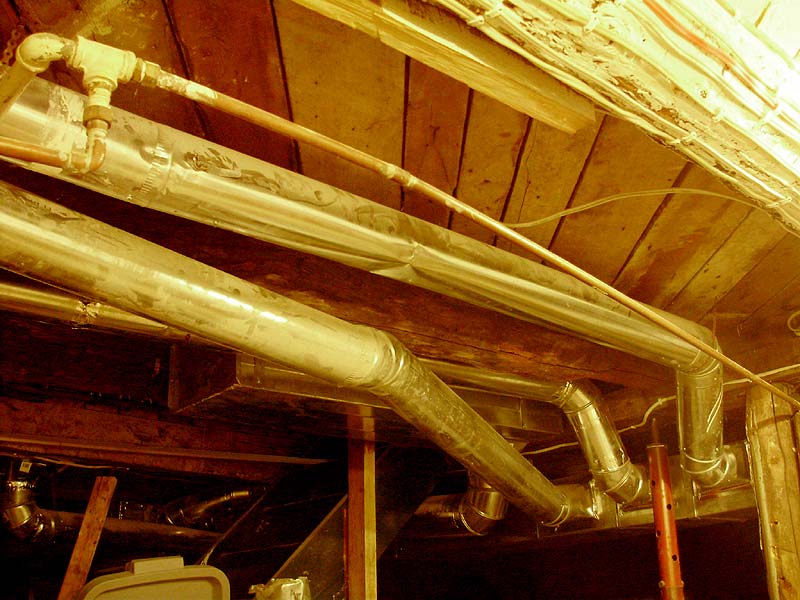
This is how far I got with the duct in the basement. I ran out of reusable pieces, since some were either too butchered, or too short to use. I will try to get more tomorrow. The pipe comes down at a slight angle because I want to continue the duct tight under/across the trunk beams. I also added that diagonal cross-piece to help support the sub-floor properly since the floor isn't really supported where it's cut through the diagonal boards.


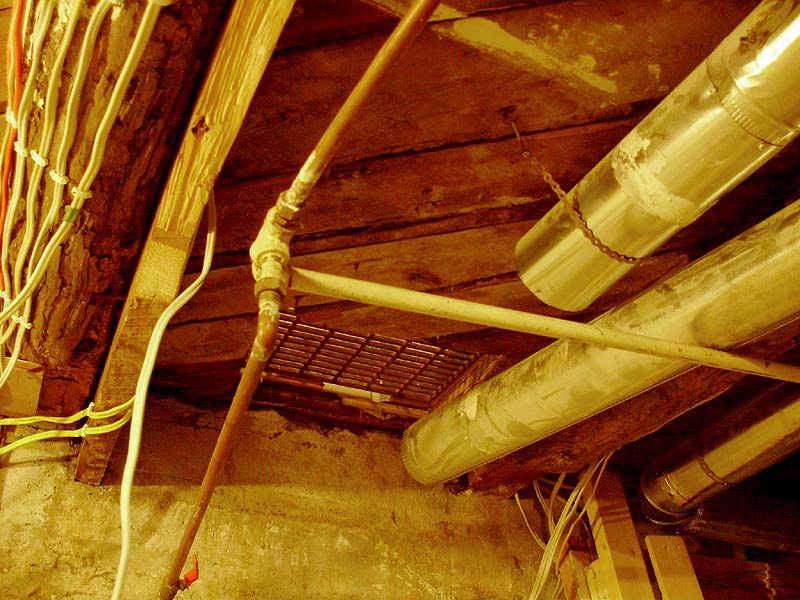
This photo shows the underside of the Office floor register. You can also see the beam that I partially cut to be able to pass the duct later. If you look at this photo and the next one, you can see that the two ducts used to criss-cross over each other. The shorter one used to feed the Office, and the longer one, the L Room, but I plan to switch the two, and run them side by side, which will look/work much better.


This is the end that was jammed up into the floor of the L Room. It's so mangled and mutilated (this photo really doesn't do it justice) that about a foot or more of the piece is now completely unusable.


Now, fun stuff! I finally got hinges. I already went on about them 2-3 posts ago, but here they are. They are Stanley hinges (Stanley would very likely have been the same company that made the original hinges for the doors in the house, which is pretty neat, since they're still around). They are brass-plated steel, with solid brass tips/pin. I love how they look, since they are nearly exactly the same as old hinges, but I don't like how they connect/assemble together. I actually had a very hard time disassembling the first hinge until I figured out how they work. USUALLY, the bottom ball is fixed in place permanently, and the top ball is attached to the pin, which lifts out. Hinges have been made this way for AGES. But these work very differently, and If I had really forced them, I would have broken one. To get the pin out, the bottom ball has to be removed first. The second photo explains why.


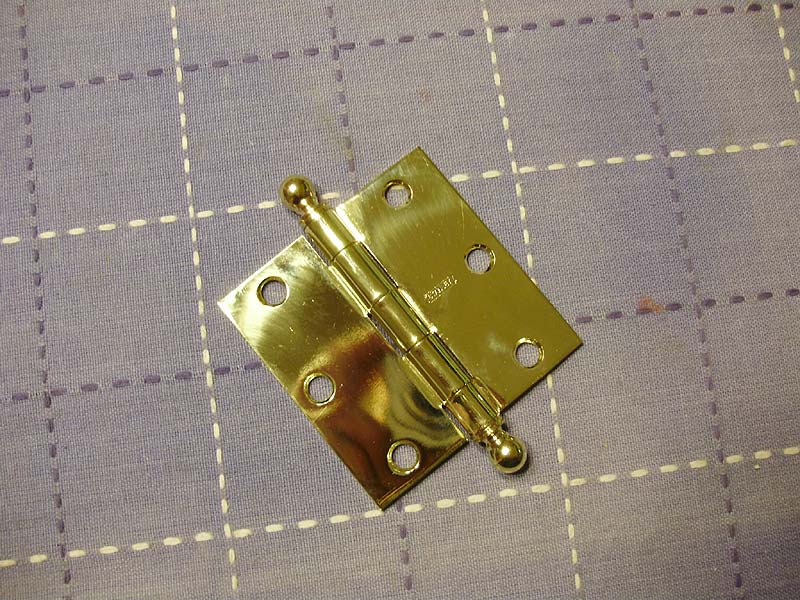
Basically both ball tips screw on. Not the best system, since most people wouldn't automatically think to remove the bottom ball. But at 7$/hinge, they are decently priced, and they're the only usable hinge I've found in this style w/o having to order them online (and most of those are even more expensive anyways).

I stripped the lacquer on this first batch. I'll be picking up another batch soon (possibly tomorrow), and once they're all ready I'll antique them all at the same time.


They look about the same, but the lacquer is now off. I used hot water (just barely simmering) with a bit of TSP. Worked great! Soaked them over the stove on low for a few hours.


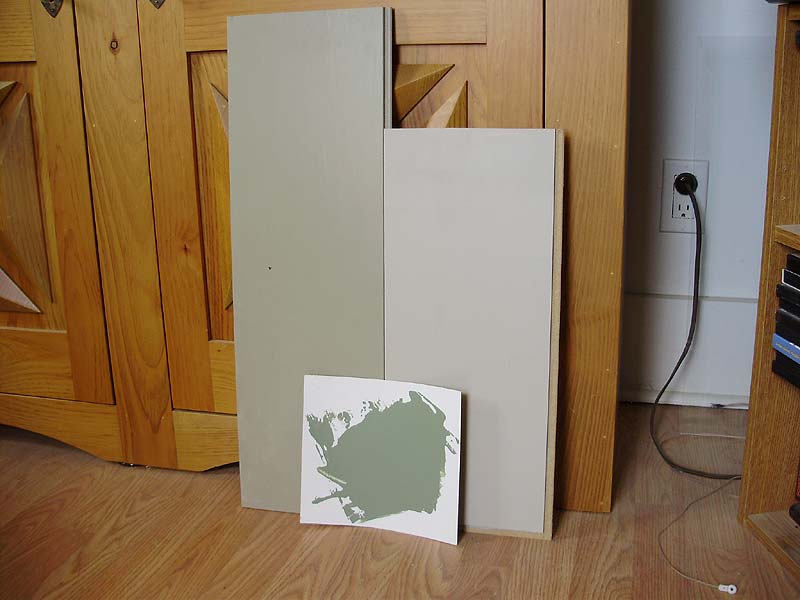
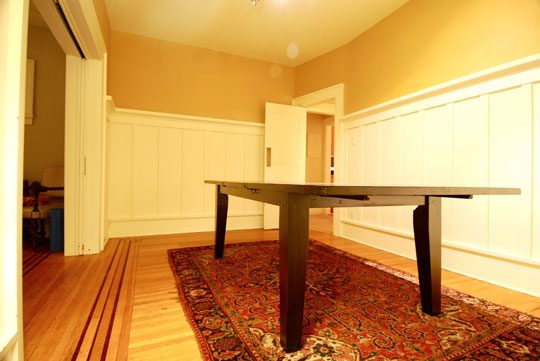
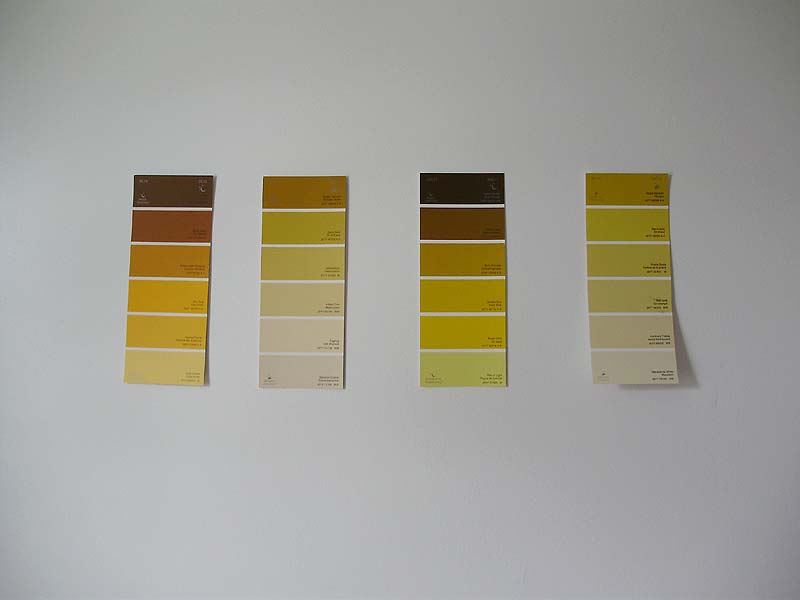
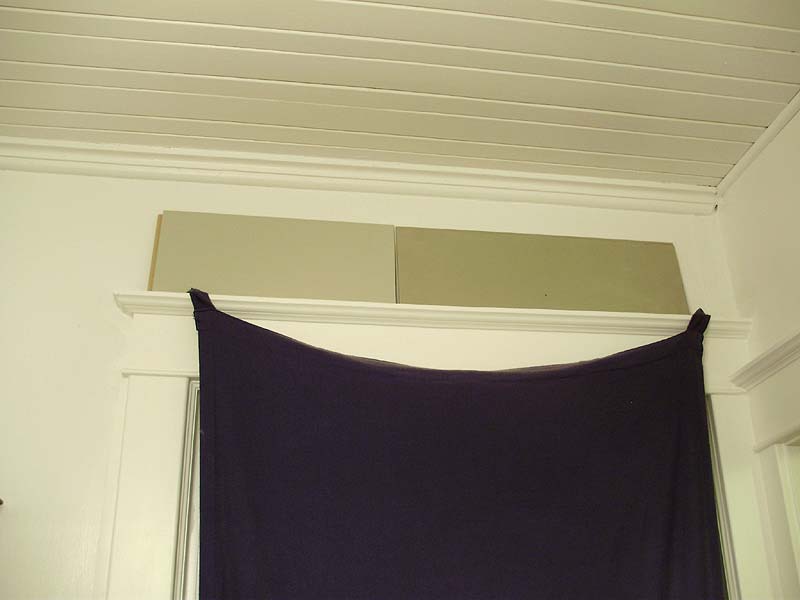
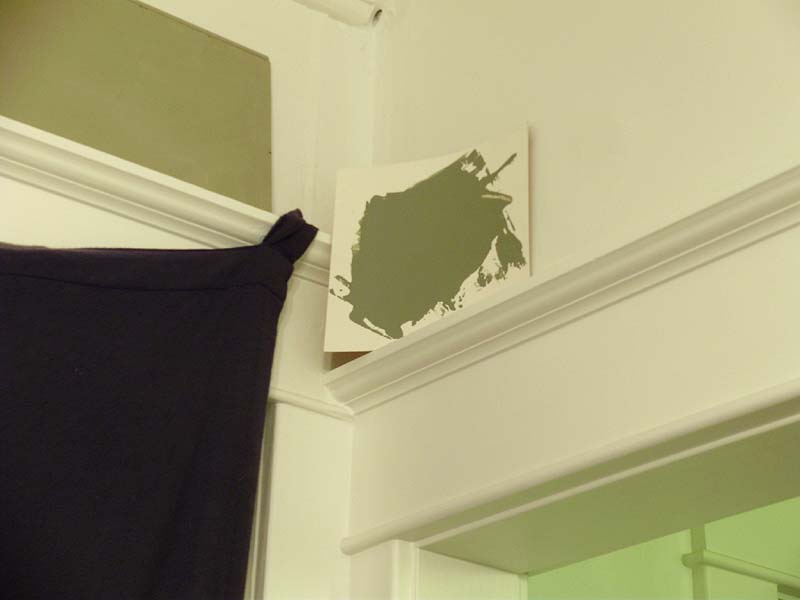
Lastly, this is a photo of Mark. This is the sample of orange-gold-brown that I had on hand. I want the dining room to be a sort of yellow-gold, but I don't want it too bright, or too dark, or too brown/bronze, so finding the right shade will be very tricky. This one is NOT a good candidate, but I wanted to post it anyways. If anyone else DOES like the colour, I have the recipe/code from the sample for it.


I will try to get another photo in natural light later.

That's it for now. That only took like an hour or two.

EDIT: There! Finally all fixed! Enjoy~!