Friday, November 30, 2012

Spice Jars!

It seems like, for the first time in months, the house is not a total disaster. I mean, it's FAR from clean or organized, but since I finished the Gramophone cabinet, put it back together, and moved a few other things, I have so much extra space in the dining room and kitchen.

I badly need to sweep upstairs, since I did drywall a few weeks ago, the entire floor is coated in fine dust. The fact that I have glossy wood floors doesn't help. I ALSO need to clean the bath/shower. It's getting gross.

Otherwise, I have been a little bit productive around the house. I spent the last 2 days completely reorganizing my spices. Since I moved in, my spices have been disorganized and in 2-3 places. The main ones were literally all tossed in a cardboard box on the floor in the kitchen (I don't have any cabinet space to store them anywhere - YET), and most of the others were in my wooden spice cabinet. A few others were on a shelf next to the sink.

Yesterday I went to the Dollarama to see if they had any kind of decent spice jars (I wanted something fairly specific), and I came across the PERFECT ONES for my needs. They are a pretty decent size, and they can fit an entire "spice packet" of 150g (standard No Name and Wal-Mart type packets) and have easy to use screw-top lids in several colours, and the jar openings are large enough to fit a big soup spoon. I bought 20 of them, but I might want another 4 or 5. These would be a perfect fit in a cabinet drawer, and I will label the jar lids for easy and quick reference.

This is something that I've been wanting to do for YEARS after my aunt did something very similar (she always has such great ideas).

I went through ALL my stuff, and I combined several stray/forgotten duplicate bags, emptied dozens, and finally got rid of all the cheap, mismatched plastic spice jars. Now, the bulk of my most used spices are in the new glass jars, and all the others and refill packets are in the spice cabinet.

The only issue right now, is that I have no space for the new jars yet. I'll figure something out. I also need to make labels, but for now, the spices have loose tags inside, although I can tell what 99% of them are simply by looks or smell.

Thursday, November 29, 2012

House-Relate Pet Peeve

I just ran across a photo that urged me to write this post.

There are a lot of things people do in their homes, or TO their homes that annoy me, but I try not to judge, since the homeowner can do whatever he/she wants.

However, one trend that I absolutely hate is the really popular idea of hanging a flat screen TV over a fireplace.

In RARE cases it looks good, but I find that it almost always looks extremely tacky.

It just seems really ridiculous to me. The fireplace is meant to be a focal point in the room, and it's like putting a big neon sign over it. Not to mention that if the fireplace is working while you're trying to watch TV, it's incredibly visually distracting. It seems like a really trashy way to put something really modern over something old and traditional. I also find that the TV ends up being much too high on the wall. Why wouldn't you want it at a comfortable eye level when you're seated on the sofa?

I don't really know if there's one specific reason why I hate it so much, but I just really do. I guess I see the fireplace as more of a special area over which to hang a fine piece of art, a beautiful mirror, or some other treasured object. NOT FOR A TV.

:S

Wednesday, November 28, 2012

A Rescue

I decided to take a quick walk around the block last night (garbage night), and I actually found a few awesome items, including this great Art Deco night stand:


It's in near perfect shape except that one of the drawer runners had come loose (easy fix), and the finish on it needs help (also an easy fix since it's the original shellac finish still on it). Check out that awesome original handle, too! I estimate just an hour or two on this and it will look awesome. The hardest part will be to remove the Mactac shelf liner, since it seems glued-on pretty well. It's not really my style, so I might end up selling it, but it was FREE.

Also not pictured, were two large window sashes (about 30" x 30", which I might only keep for the antique glass), and the three pieces of trim that went with them (not the casings, just the thin moulding with an ogee detail). Usually I wouldn't have bothered with the small trim, but it was in perfect shape and not butchered.

Tuesday, November 27, 2012

Gramophone Cabinet - Complete!

I'm very happy to report that this project is finally finished. I'll be leaving the doors open on it for a few days so that it can keep curing/drying out, but it's finished.

I think this is a wonderful piece of furniture. It was free, and I only spent about 25$ to refinish it, and replace the knobs. The knobs that were on it were mismatched and one (possibly both) was not original. I settled for two antique brass knobs from my stock of old hardware.

The cabinet will live in the corner of the dining room, since this seems like the best place in the house for it, but I might change my mind later on, depending what kind of dining room furniture I end up with. I kind of want an antique table, chairs, and either a sideboard or hutch. These can sometimes be had for very cheap at auctions.


You can BARELY even see my two repairs on the drop-down door. They're practically invisible, which makes me very happy.


Compare with the before photos:


BTW: Can you believe my father was just going to put this at the road? It wasn't in great shape, but it's such a wonderful cabinet! I'm so glad he asked me first. I would have been extremely upset with him.

Update

Not too much to brag about, but I had a few miscellaneous photos I thought I would hare.

I'm currently finishing-up the gramophone cabinet project. I'm not happy with how the finish on it turned out, but it's "ok". It looks fine, really, but it didn't turn out like some of the other pieces I've done using the same varnish. I didn't thin the first coat, and it didn't go on as smoothly. Bleh. (What can I say, I'm my own worst critic, and I'm a perfectionist).

No photos of that until it's all put back together.

I started to put up a few festive decorations. I had bought some large foam snowflakes a year ago, and I didn't use them yet since I needed some suction-cups to attach them.

The porch definitely needs a splash of red, so I'll probably be adding a large red bow to the wreath on the front door. I might also add a second wreath to the exterior door, but I haven't decided yet. I also want to put up some lights. Possibly ones I already have on hand, or maybe some new ones. What do you think: multicoloured, or just clear/white ones? Side note: You can see the new mail box here for the first time.


It annoys me that the porch always looks crooked or lopsided because of the deteriorating lattice/frame. I'll be so happy once that's replaced.

Next up is a bit of a super short "Cornwall Homes" post. Super short, because I noticed that the other half of the building posted here:
Cornwall Houses, Woodworking Projects, & Misc. (October 08, 2012)
is now up for rent. I snuck-up onto the porch and took a few photos. This side is in as good condition as the right side. The only difference I see is that the back door has been painted white, and the finish on the grates is in much better shape. I never noticed the cool stripes! I haven't seen any other registers finished this way. Totally cool.


I'm jealous of their beautiful unpainted wood trim.


Lastly is a small restoration project I did out of sheer boredom.

I picked up this beautiful Victorian plaster frame at a yard sale a few blocks away last summer. I love these frames, but they are usually in TERRIBLE shape. They tend to be very fragile, and, let's face it: people aren't careful with things. But this one was in near perfect shape, with the exception of just one corner.


So I worked my magic on it, built-up a repair, and painted it to match. It's not a perfect repair (which would have involved making a mould, and casting a section to replace the missing one), but it's a good enough repair that no one would really notice it, unless they were really looking for it.


I'm really not sure what to put in this frame yet, but I'd love to have it hanging somewhere on the main floor. I have a few other beautiful frames, but they're packed away at the moment.

Saturday, November 24, 2012

Brushes Found!

Home Hardware had a pretty decent selection (half and half pure bristle, and polyester bristle in a range of prices). I ended up getting an "economy 10 piece combo pack" and one "good" expensive angle brush for varnishing (ie: this current project).

So now I have the first coat on the backs & bottoms done (once that's dry enough, I can flip everything and do the rest).

Friday, November 23, 2012

Annoyed (A Rant About Brushes)

WARNING: This post is a rant. If you're not in the mood, skip it.

So I was hoping to get the first coat of varnish done on the cabinet today, but it's not looking as though that's going to happen. It still might, but probably not.

Why?

Well, I was a bit lazy and I didn't leave the house early enough to get what I needed to do it. I wasted most of the afternoon on the web, and then I left after supper. I needed only TWO things. 1: Varathane satin spray (varnish), and 2: a 1 1/2" natural bristle brush.

Since Wal-Mart is nearby, I thought I could find the Varathane there, but unfortunately they only had the Minwax (no thanks). They also didn't have anything decent as far as brushes. While I was there, I looked around to see if there were any deals on DVDs, etc. By the time I left, it must have been nearly 8:00.

I then walked over to Home Depot (which isn't too far, but it's at least another 15 minutes). I found the varnish there, but here's where I got really annoyed (pissed off, really):

They have probably a selection of about 50 or more different paintbrushes available. At least 4-5 different sizes, some for specialty jobs, and some with angled bristles, and even cheap "throw away" and foam brushes.

But out of ALL THOSE DAMNED BRUSHES only TWO were natural bristle. Two (excluding the super cheap throw-away ones). They were in only one brand, and they had only a size 3", and 2", which were both too big for what I need. I really need a 1 1/2" max. I was pissed. I looked through every damned box, and every single rack on the wall, and that's all they have.

All their brushes are now made with "polyester fiber" or "mixed polyester" bristles, which I absolutely can't stand. I hate the way they feel, I hate how they spread paint, I don't like how rigid they are (natural fibers are much more flexible), I just plain hate them. And it's not that I haven't tried them. I have. I just think that they're garbage. I avoid them like the plague. I know people seem to have a very strong preference when it comes to brushes, and that's fine, but synthetic fiber brushes just don't float my boat. I remember hearing rave reviews about Purdy brand brushes being "the best of the best", and I saw them at Home Depot, and I was not impressed with them. First, they were synthetic (yuck), and second they were very pricey. Now I don't mind paying good money for a quality brush, but I wasn't willing to pay a butt-load of cash for a brush I was very likely not going to like.

So now I'm kind of screwed until tomorrow. The only other natural bristle brushes I have are either too big or too small, and then I have my two good ones that I'm keeping specifically for painting the house trim/floors (brush 5 & 6 below).

Basically, I've used only two brushes to paint everything in the entire house. This includes casings, baseboards, all the coloured walls (cutting in corners), the porch, and even the upstairs floors in oil paint. One is a "30mm" (roughly 1 1/4") for detailed work and touch-ups, and the other is an angled bristle 2 1/2". I've cleaned them well, and I've never had to replace them. They also haven't shed too many bristles, and now that they're "worn-in" they haven't lost any more. Similarly, my Dad has brushes that he's used many times over the years (he's probably had them longer than I've been alive), and as long as you clean them well, they basically last forever.

Since this post got so long, I thought I would add a photo. Here's the bulk of my paint brush collection (NOT counting my 100's of artist's brushes). Not shown are 2 other black-bristle (natural bristle) brushes. One is a 1", and the other, I think, is a 2 1/2" or 3". Both of those are in another box and are used only for paint stripping.


1. This is a very large quality brush that was found at a second hand shop along with brush number 3. I haven't cleaned it up yet, but it's in pretty good shape. I believe I paid less than 1$ for both brushes.

2. 2" angled bristle brush. I had forgotten I had this one, and it would be pretty adequate for my current needs, BUT, it had powdery white residue in it, from some sort of white paint or primer. I could probably clean it, but I'd rather not risk getting white flecks in my clear varnish. :(

3. This brush is probably antique. It looks like it's never been used (but it has), and it's had the owner's name "Alexander" scratched into the ferrule.

4. This is a "Shur-Line" brush that I picked up either at Wal-Mart, Home Depot, or Canadian Tire, and it's a Polyester bristle (crap). If you want it, I'll mail it to you.

5. This is my workhorse. The paint brush that has touched nearly every surface in my house so far. I don't remember where I bought it, but for some reason, I think it was from Canadian Tire.

6. This is my second most-used brush (for house painting), and I used it when I did the built-in doors.

So yeah, I guess I'll be heading out again tomorrow, probably earlier, to look for a decent brush.

And since I haven't mentioned it or explained it yet, I want the spray varnish simply to do the door (which would be a headache to do without getting runs and drips everywhere because of the intricate pattern), and to quickly do the door and shelf edges (which are also a pain). Pretty much everything else will be done by brush.

2:00 AM

I realize it's very late, and I *am* headed to bed in a few minutes, but I thought I'd share my next project.

Earlier this afternoon, I worked some more on the office curtains, and I'm not at all happy with the results, so I am sorta abandoning that for now (until I decide how I want to fix it).

Instead, since I have the kitchen table all laid out for painting (ie: clean, with nothing on it), I've chosen to finally cross another long-awaited project that's been sitting around since summer 2011 off my to-do list.

CAN YOU GUESS WHICH ONE?

Yes? No? Maybe?

Here's a hint: It's a cabinet that's currently in pieces in the dining room.

Still not sure? It's the gramophone/radio cabinet that my Dad gave me. Remember this thing? Last time you guys saw it, it was literally "ready to varnish" and it's been that way since summer 2011. The only reason it never got done is because I hate this part of any cabinetmaking project - the finishing. Especially since I have to do it all entirely by hand. Like... with a paint brush. Yeah...


Well, since it's been sitting around SO FREAKIN' LONG, I've moved it around, it's COVERED in dust, and I set down a dirty paint brush on it while I was working on the crown. OOPS!

To remove the white paint out of the wood, I used my knowledge of chemistry (as far as household chemicals go - since I have a ton of them) to remove the latex paint. Generally, getting paint off of wood is not easy. The strongest chemical would be lacquer thinner (which will actually strip paint and varnish if you're not careful), but I didn't want to remove the layer of stain on the cabinet either. The second strongest choice would be acetone, but it, too, might screw up the stain. What I ended up choosing is simple alcohol. Here in Canada it's Methyl Hydrate (methyl alcohol - or ethanol extracted from wood), and in the USA, you would find it as "Denatured Alcohol".

Alcohol will easily melt latex paint (even fully cured paint that's been on your walls and fully dry for over 5 years - ASK ME HOW I KNOW). But it's gentle enough, and not quite compatible with the oil based stain, so it was the best choice.

Well that was overly lengthy for nothing. Now it's already 2:16...

Here's the paint splatter half removed (you can just barely see the dull outline of the "wet spot".


With the stain fully removed - even from deep in the wood grain, using a wire brush, I then put a very light coat of the same stain to blend it.

While I was at it (staining), I also had to stain the new back board for the cabinet. The old one was ok, but my Dad had made huge holes in it for wires when he was using it for stereo stuff, so I opted to replace it altogether.

Here are the parts being cleaned and readied for varnishing (new back under the fancy door):


And the new back stained (so that it can dry overnight). It's a hair lighter, but it won't be noticeable:


More soon!

Thursday, November 22, 2012

Soooooo Excited!!!

Alright, I was too excited about getting this done, so I'm posting about it immediately.

The built-in doors are painted, finished, and installed! And they look wonderful! In the end, they did need a third coat, but I had time to do one last night, one early this morning, and one this afternoon, so I just finished installing the hardware and putting them in.

Installing these doors was pretty simple. The hardware was attached to the doors in the correct places, and then the doors were set into their openings, and held in place with shims. This makes the job super easy.


Once they're in the right spot, the screw holes get punched (my casings/frames are pine, so I didn't need to pre-drill anything), and then screw everything in place. It's important to note that the second half of the door catch (the strike, or "keeper") should be put in place LAST. You want it to line up properly, and no amount of careful measuring will be as good as simply installing it once the doors are hung, and everything works.

Note the wall colour sample, which is a nice warm light grey.


Basically, this is the view as you walk in the front door, and turn to your immediate right, in the office doorway. Also note that I haven't made the bottom casing for the "window opening" yet. I need to have it specially made at work to match my other ones.


Upstairs hallway linen closet.


I still haven't cut the shelves for it yet.


This is the "evening photo" without the bright light on in the other room. This is how it would normally look.


For this one, I had to have the hinges offset towards the door side, simply because I had so little room between the door and the casing. This doesn't affect the hinges or the door, and no one would really notice that they're off. You can also see the nice SLOT HEAD SCREWS. Nothing bothers me more (renovation or cabinetry wise) than modern screws on old (or repro) hardware/furniture.

Aaaargh!

I'm a bit annoyed at the moment. I am *this close* to being done my curtain panel, and now I can't find my iron. I have NO IDEA where I put it, and I haven't seen it in around a year (since I demolished the cabinets in the guest bedroom/laundry room upstairs).

And now it's too late to go over to Mom's place to use hers (since she just went to bed about 1/2 hour ago.

***

In other news/updates, I got the two topcoats (paint) on the doors, and will start the fronts/edges tonight/tomorrow.

In preparation for the doors to be ready, I've also stripped the lacquer off the new brass hardware for the doors. If all goes well, I might have the doors installed by tomorrow evening, with photos on Saturday morning.

By then, the curtain project should also be done.

Wednesday, November 21, 2012

Finished Crown Photos

Here are some photos of the finished crown. As I mentioned previously, I decided to use a new crown in all the main rooms, and restore the missing pieces of original crown only in the living room and office. The main reason for this is because it will be very difficult to match it. If we had a very similar cutter at work, I would have made matching crown for the entire first floor, but that's not the case. The new crown is still a very nice match to the door casings (mini crown on the door and window tops).


View from the kitchen door. Office door to the left, front door in the centre.


Front door to the left, living room door in the centre, and stairs to second floor on the right.


I decided that I'm going to use my "oops" paint for the main hallway. This was a "slightly too dark" shade of beige that I had originally bought for the bathroom. This was an expensive "boo boo" at 50$ for the 4L can, but I think it will work nicely in this hallway. I haven't decided how I want to address the division at the living room wall/door leading up the stairs. Any suggestions? Ideally, I would paint the entire stairwell opening up to the second floor the same colour, but I don't know if I want to do that (it's going to be a huge pain, and I have a bunch of drywall repairs/patching to do up there.

Here's a shot of what I'm dealing with (I literally laid on the floor to take this). Living room door to the left, and you can see the bathroom fixture/fan opening upstairs. Just out of frame is the ceiling light fixture in this stairwell, which will eventually be that 4-light chandelier.

Note: the rectangular hole in the drywall at the top of the stairs on the right was from when I redid the sloped/angled ceiling part in the kitchen. It hasn't been fixed/patched yet.


Here are a few shots of the crown in the dining room.


Facing partially into the kitchen. The garage (ugly metal) door is visible. Note the beautifully repainted/restored arch. I'm very happy with how it turned out. This entire casing is warped. Like a LOT. I have about a half-inch thick gap filled with caulk in the top against the wall. You can't tell, though. And that's despite the crazy amount of nails I put into it, to try and flatten it out. It's solid white Ash (which is harder than oak), so that's the best I could do. There's also a TON (50+) of huge chips and holes in the front board that have all been carefully filled/patched.


Here you can see the basement door opening, and then the opening to the front hallway (where the first photo above was taken).


As for the doors project, so far I have the double coat of primer done on two sides. Next will be a very quick light sanding, and then the first coat of final paint.


***

Side note, remember the other day how I mentioned my "ghetto curtains" situation? Well, I thought I'd share that. This is the one in the living room window, and the office window is the same. Basically just two nails in the top crown (where the holes won't show), and some old tab curtains from my old apartment.

Tuesday, November 20, 2012

What I've Been Up To...

Over the past week, I've completed the crown moulding/casings "project", and I haven't really decided what to tackle next. There are a lot of things on my "to do" list, but I don't feel like working on many of them.

Recently, I bought a bit of fabric and supplies to do a window treatment for the office. It will be very simple, and I'm not sure if it will be permanent, but I'm sick and tired of the ghetto-looking curtain that I've been using for the past 2 years (hung on 2 nails). So that will be a project I'll do soon.

The other thing I started doing was restoring/rehabbing old lock sets. I recently bought a whole lot of them for 9.99$ (plus 30$ shipping), but there were about a dozen locks and several mismatched handles in the bunch (well worth the price if you consider that I can resell any lock for at least 15$):


Here's one of my "before" shots (some of the ones I haven't cleaned up yet):


A typical "before and after" from this particular bunch of locks:


It's surprising what a good scrubbing with steel wool, and a Dremel wire wheel (brush) plus a quick coat of paint will do.

I discovered a wonderful (and very quick/easy) way to restore the nice soft black finish on most of these for under 5$. I bought some cheap Wal-Mart flat-black spray paint. The "Color Place" brand that is around 3$/can. One light coat on all the parts (marking off the brass front plate) gives a nice flat finish.

However, I noticed that after the paint dried, simple handling caused the paint to buff (note finger prints on the left piece). So I gave the painted parts a buffing with a soft cotton rag (ie: an old sock) and I got a wonderful soft shine.


For the lock above, I actually got REALLY LUCKY, and one of the spare parts from the junky lot above was a "near perfect match" for my missing piece. It was so rusty (before I cleaned it and repainted it) that it was orange. Check it out!


These old locks are incredibly well made. All the parts in this one are solid cast iron.


Likewise, several of the other locks in the bunch were quite sturdily made, boasting cast pieces. This one (below) is my favourite of the bunch. It has a flashed copper face plate in very good shape, and the internal parts still retain their original plating (not so much for the other locks). Unfortunately, I probably won't be using this one, since it has a very odd spacing/arrangement for the location of the latch/bolt. I'm not sure who the manufacturer is, but there is a club shaped leaf logo with the letters Y&T. The key is a spare from my collection that fits/works perfectly.


Here's another "before and after". This lock is HUGE, and it has a very odd setup. The latch is operated by a rectangular button on the bottom of the lock. I assume that it worked with some kind of handle that had a thumb latch that would have pushed upwards on the "button", but I'm really not sure. Additionally, the lock arrangement is very weird. I'm not sure what kind of key this lock would have used (shape-wise) but it would have had a large flat end with notches for the three "tumblers".

This lock was absolutely FILTHY. It was also badly chipped and rusted. You can see the paint chips through the new paint in the after shots. I scraped off anything that was loose and flaky.


These are all the ones I've cleaned so far.


Note the "really nice one" with the key, flashed copper face, and odd spacing on the extreme right. The second from the right is chrome plated on the face (so I can't use that one either). All of these are copper or flashed copper, except for ONE brass one. I might still use the copper ones (mixed-in with brass ones) since I don't see much point in buying more locks when I already have so many).


And if you're wondering, yes this was a lot of very messy work. Each lock took at least a half hour, and I've done one to three per day for the past little while. I'm out of steel wool, actually. I have at LEAST another 10 locks to do, since my other "good" locks that I set aside for my doors also need rust removal (even though the outsides look nice and clean, they look awful on the inside). I have another dozen or so that will stay filthy until I decide what to do with those. These are ones removed from salvaged doors over the past year. I may reuse them on their original doors, or I may not. Depends what I do with the doors.

Speaking of hardware, I'm still in need of some plates. The ones I need are shown below. They can be covered in 20 coats of paint, and lightly rusty (I don't care sicne some won't be visible), but I don't want to pay much more than 10$ per plate. I've been trolling around on eBay and Etsy without much luck for the past few months. These are fairly common plates.


***

Lastly, and possibly even more fun and exciting, is the latest project that I started just a few hours ago. This has been "ready to do and waiting" for probably over a month, and I just haven't felt like doing them. I still don't. Painting items like these, with multiple sides that need to be flipped, and that need edges done (without drips and runs) are a huge pain in the ass. But at the same time, I'm really looking forward to installing them, and putting the beautiful old fashioned brass hardware on them.

For these, I'm going to try 2 coats of primer + 2 top coats of white. I want to see if it will turn out a bit nicer (since my "good" white trim paint really isn't that great).


Stay tuned!

Saturday, November 17, 2012

PAINTING (Part 2)

All of the first coat of white is now done, as well as the touch-ups. Looks pretty nice, but the paint seems more runny than last time I used it, and it will definitely need a second coat, possibly a third (or just touch-ups here and there after the second coat).

Friday, November 16, 2012

PAINTING! And How to Install Crown Moulding by Yourself!

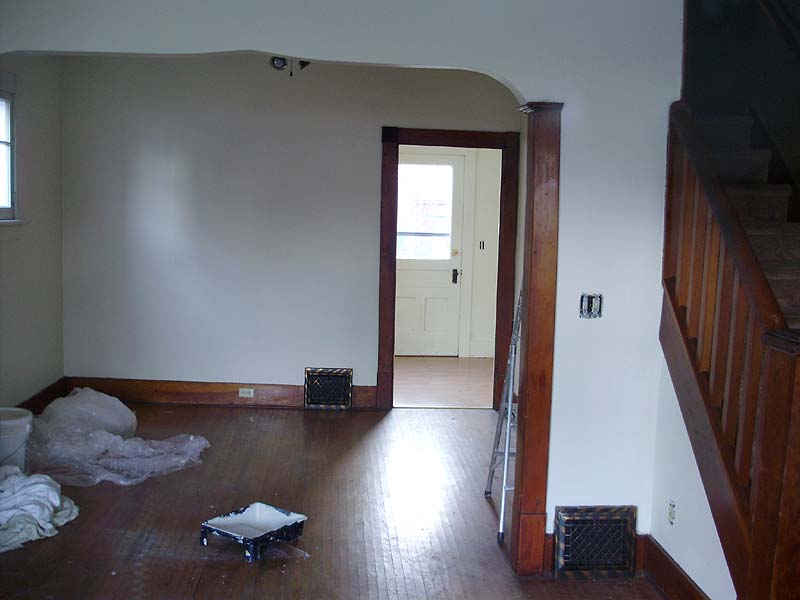
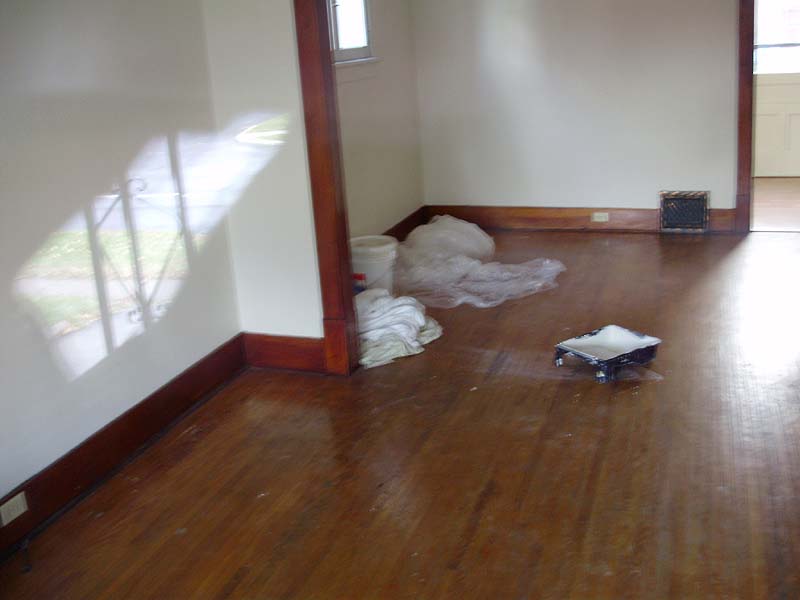
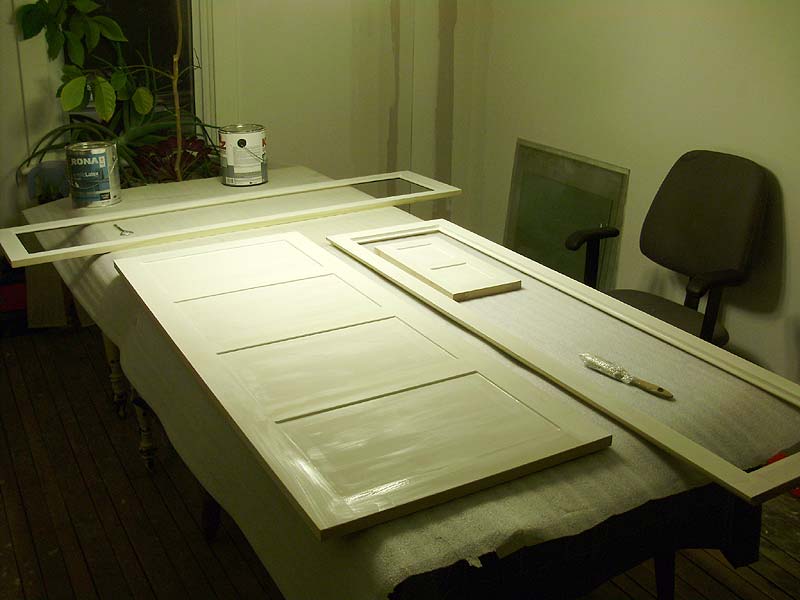
Oh man. So much painting... Well, technically just priming so far.

I put a coat of BIN (the shellac one which is super runny) all over the pine trim (all the crown in the hallway, all the crown in the dining room, and several pieces of random trim like the left hand side of the living room casing, the ones on the office built-in, etc).

After that, I did a regular primer (I use the super cheapo contractor grade stuff from Home Depot at 15$/4L can) on everything. I did the guest bedroom trim, the living room doorway, the dining room arch, the office built-in, and all the crown (hall and dining rooms).

Things are looking pretty good!

I didn't do the trim in the "L Room" bedroom, since I still have a few baseboards and all the caulking to do. While I was at it, I marked-off all the spots (throughout the whole house) that will need touch-ups. Things like door casings that got scuffed or dinged.

***

A quick "how to" for installing crown moulding (alone):

I decided I did not want any joints in the crown, so I bought 16 foot long lengths of clear pine crown. The price was actually pretty decent at 2.99$/linear foot.

Because this is an old house, I decided to use coped corners for all the interior corners. The original crown in the other rooms (what little remains of it) was done with just regular 45 degree mitres, but the house has shifted and settled so much that getting perfect angles would be a total nightmare.

Another reason to do coped corners is because I don't have a mitre saw. Yup, you might be surprised that a "highly skilled professional cabinetmaker" doesn't own a mitre saw, but there's a reason. I don't really want to get a crappy one, and the one I want is 800$.

That said, ALL the crown was done using only these two saws:


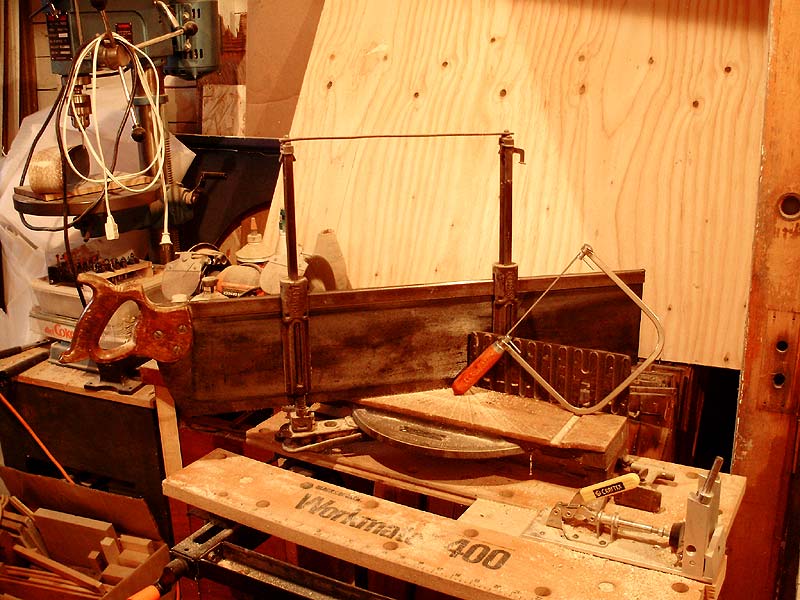
The old mitre box is actually a very well made Stanley that's probably as old as the house (a very nice yard sale find), and the small coping saw is also just a yard sale cheapie. I actually have a much better quality one (or 5) but I'm not sure where I put it, so I used this one (which doesn't hold the blades very well).

The only other tools I used for the crown were very basic ones: pencil, stud finder, nail punch, hammer. I also cut some of the pieces to length with a Japanese Ryoba saw (Google it, they're awesome!).

I'll also add that although I'm very skilled at installing trim (mostly from having installed tons of it through work doing custom kitchens/baths), this is actually the first time I do coped joints. They are tricky, but give very nice results.

Step 1: Cut the longest pieces FIRST. I started with the long wall. Cut the ends square and flush at both ends.

Step 2: Attach your first piece starting in the centre. This makes it easier to handle.


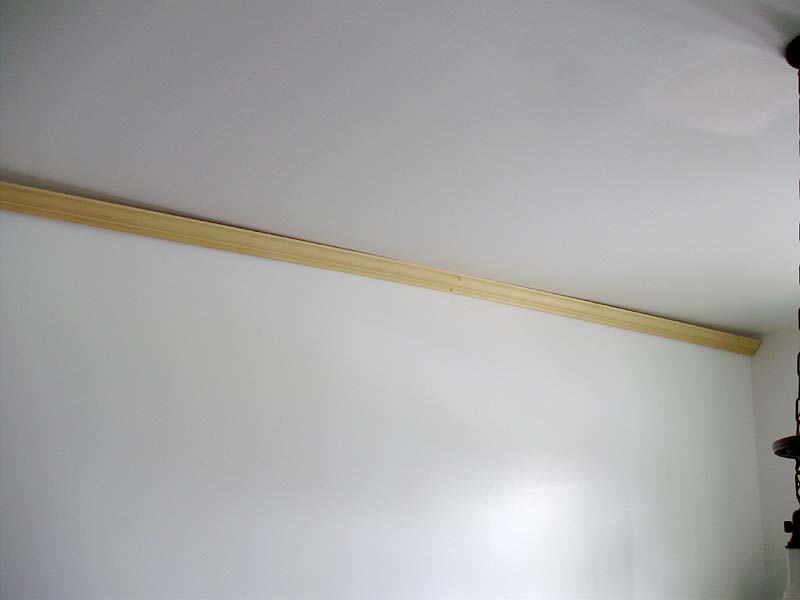
Work your way to the ends, making sure that your crown sits properly squared with the wall/ceiling. I used overkill 2 1/2" spiral nails (which is what I used for all the door casings, baseboards, etc), but you can use a brad-nailer, or shorter regular nails. Just make sure you hit solid.

On my main interior wall, everything was nice and straight, so I only nailed it every 2 studs. If your walls are more uneven, nail it wherever it's needed.

Step 3: Once your longest piece is in place, continue with your next piece. If you're working in a plain rectangular room, the easiest method would be to do one full piece, then go around the room in a circular fashion. The second and third boards would have one cope and one square end, and the last piece would have a cope at both ends. Note: If instead, you did two full boards on opposite walls (with double square ends), you would then be left with two boards with double coped ends, which are harder to get "just right". If your room ends with an open wall, start at one end and work your way around. Don't start in the middle. It's easier to adjust your angles as you go around the room. If your crown needs to end abruptly, do a return. If you're not sure what that is, look up photos, but basically it's like the crown turns to end into the wall.

When installing your second board, you can't start in the centre, since you want a fight fitting joint at your coped corner. To hold it in place (as an extra set of hands), use two nails. The holes will be covered with caulking later (unless you're using pre-finished wood mouldings).


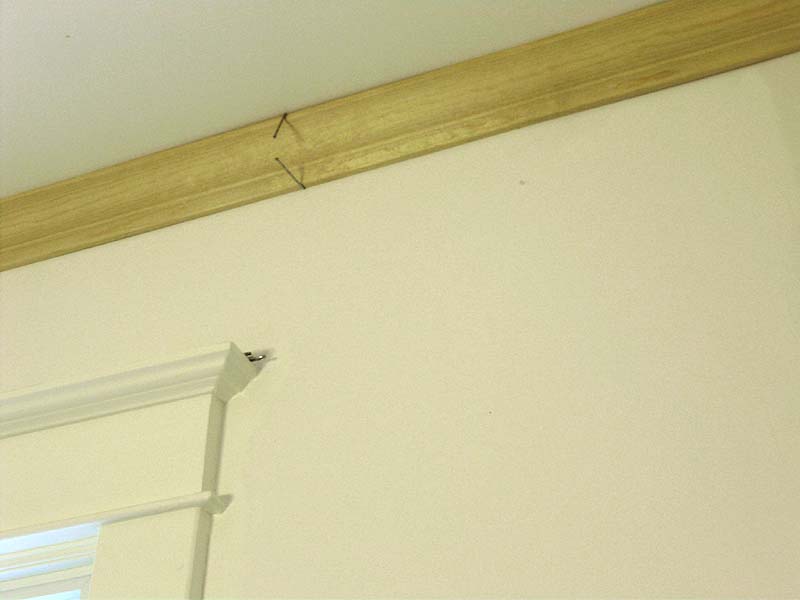
The two nails will allow you to slide the crown around and position your corner nicely before nailing it in place.

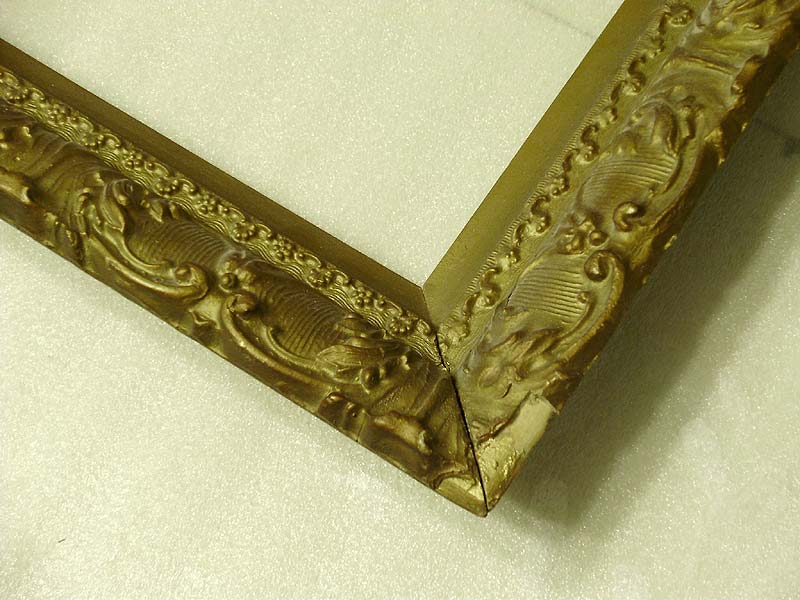
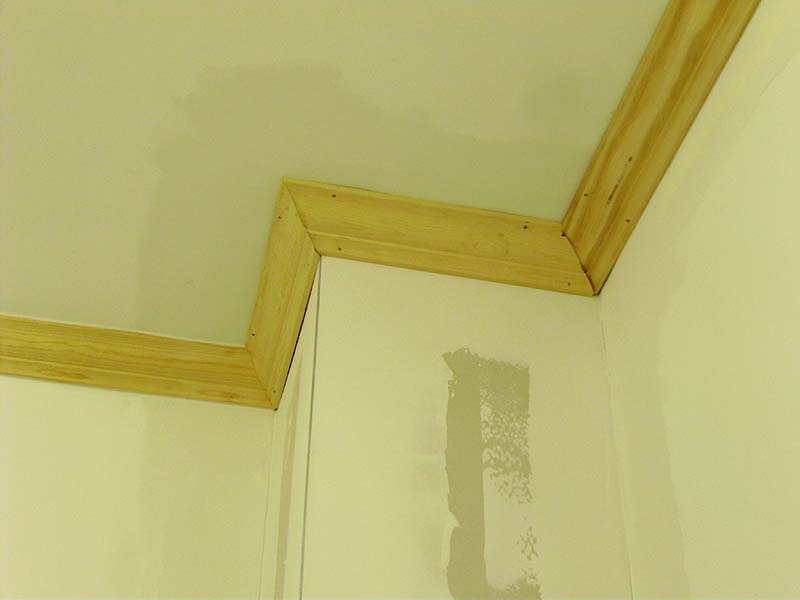
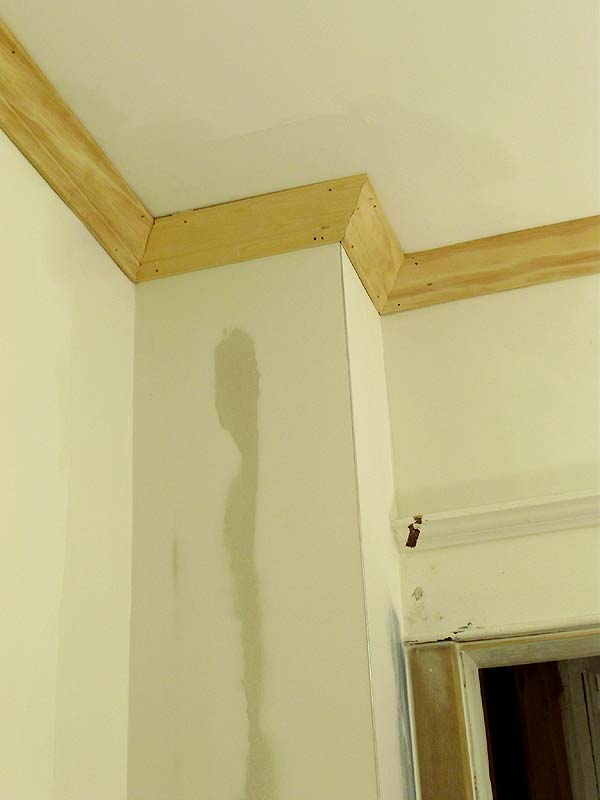
In my dining room, I had 2 corner walls, so I used short ends to make these, and used a cope in the interior corners and a mitre on the outer corner. Make sure to glue the outside corner. This is the spot that must look the best and most accurate, since it will be highly visible.

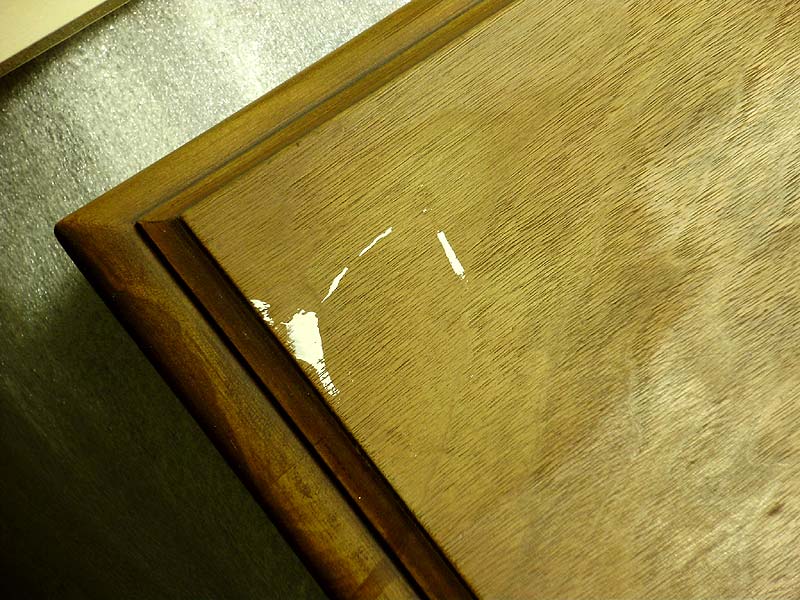
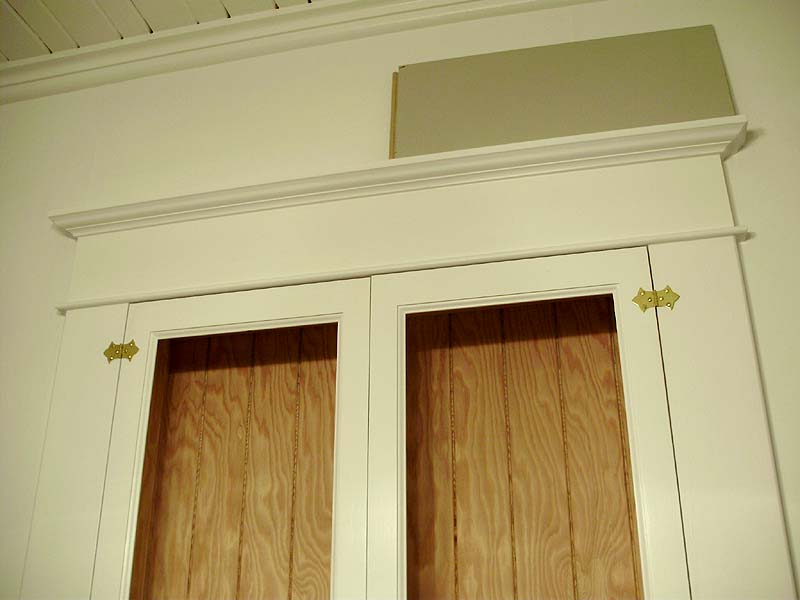
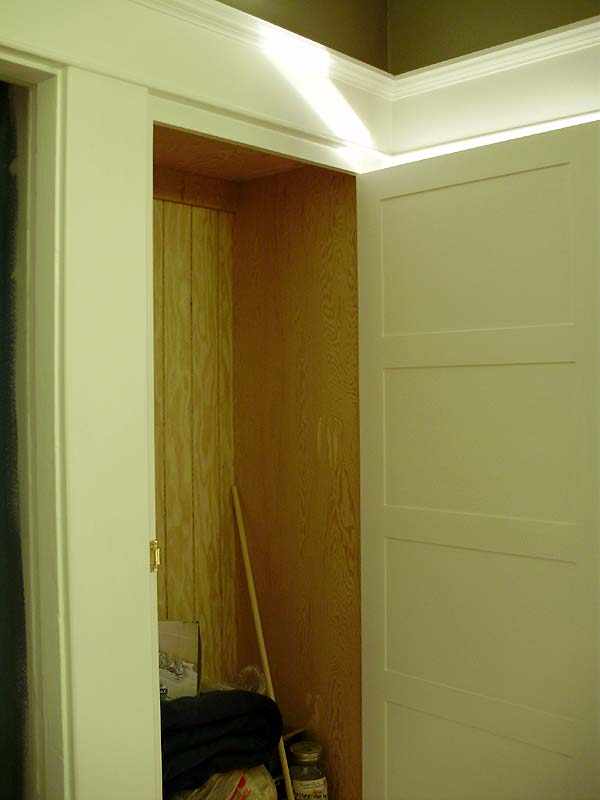
Below shows my "crappiest" corner (on the upper right). You can also see a bow in the wall on the left, and a wedge shaped gap on the right. These are fairly small and were filled with caulking.

Once the glue on the corner is dry, putty and sand it carefully to end with a nice crisp profile.


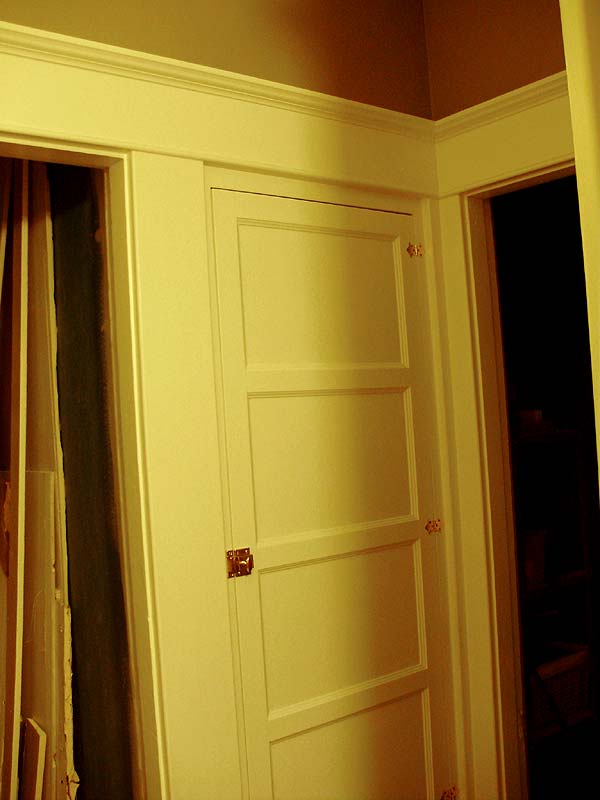
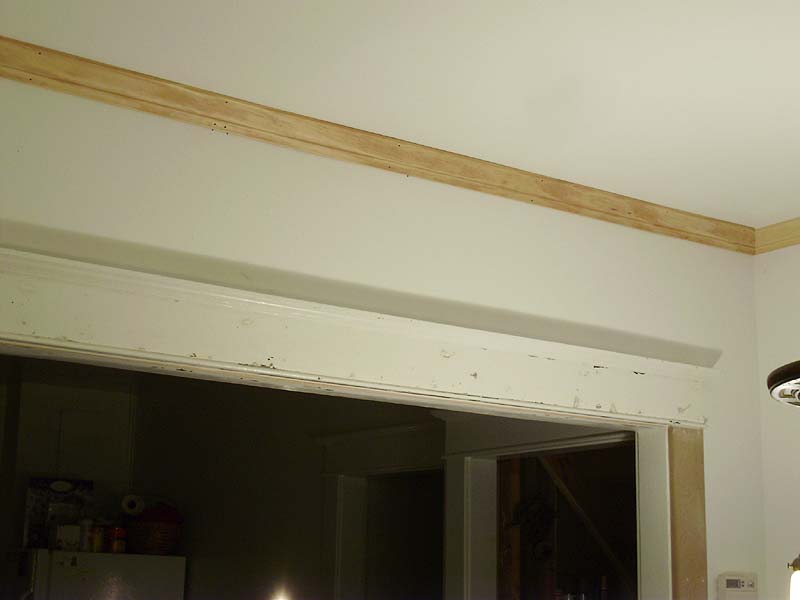
This shows the other corner, which had a different problem. The ceiling slopes so much in this spot that I had to use a shim (and extra caulking) in the upper left corner. I could not get a good joint otherwise.


***

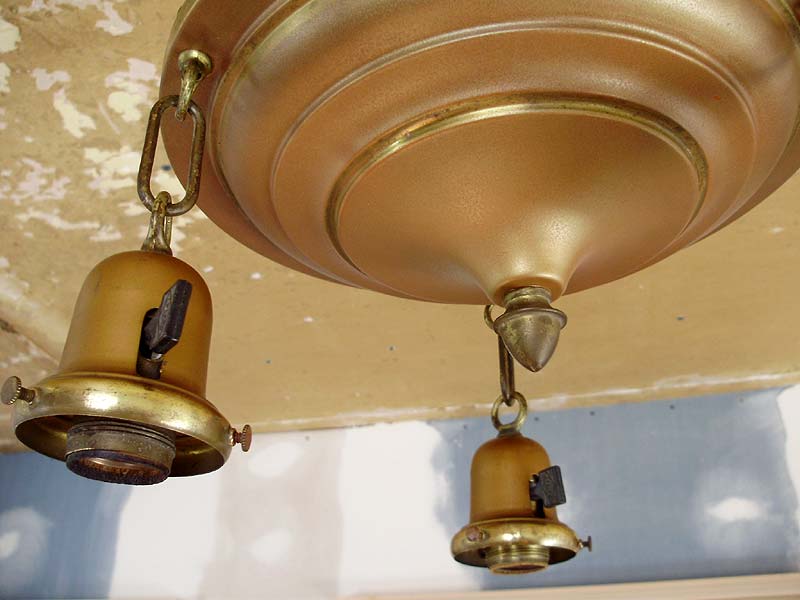
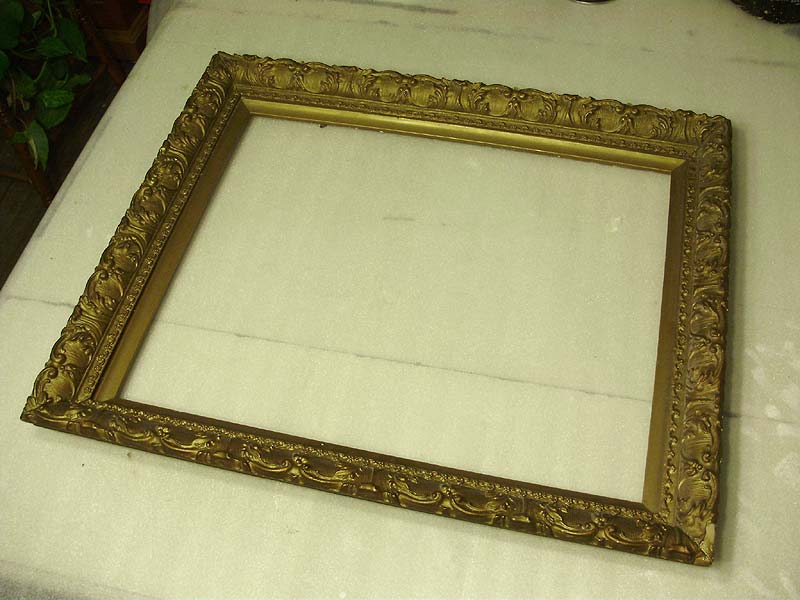
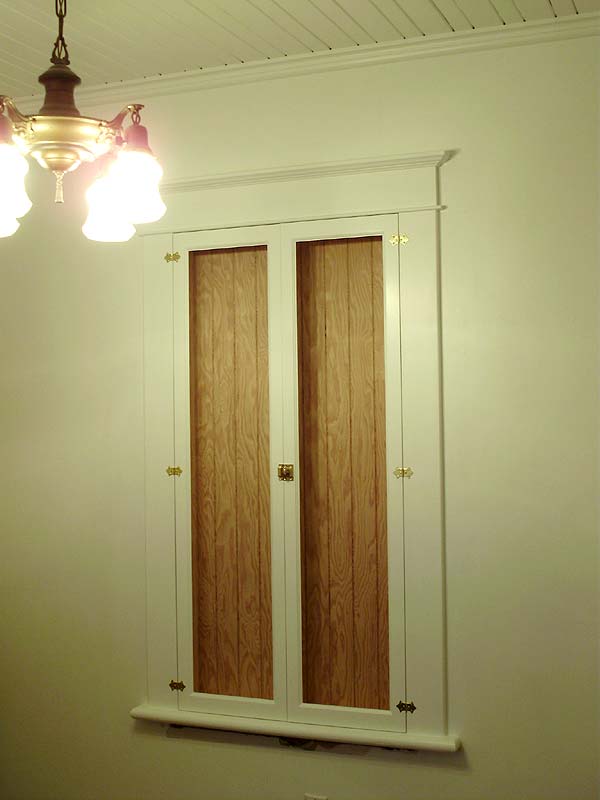
Yesterday I finally decided to pick a colour and refinish one of the two remaining pan fixtures (the one for the "L room"). It came out quite well, and I'll probably do the exact same finish on the other one for the staircase.

Here's how it will look (light fixture & shades for "L Room"):


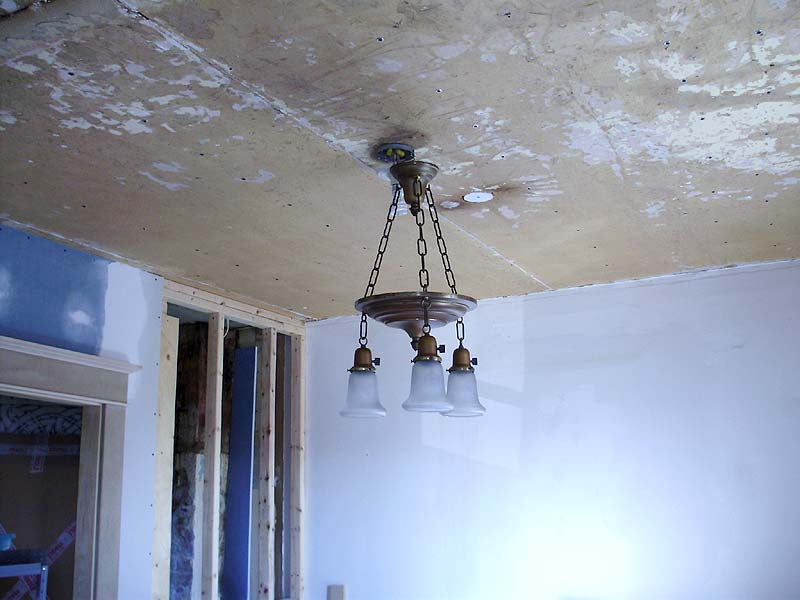
Basically, I was trying to match the original paint on the shade bells (which were not originally with this fixture), but the paint is nearly impossible to match, so this was as close as I could get, using 3 different colours. It was also a challenge to keep some brass "rings" w/o paint to match the look of other original fixtures, but I found a trick to do this.

I'll probably be adding paint to the bells to get a better match.