Saturday, August 24, 2013

News! Tons of Neat New Stuff

Alright, lots of interesting and exciting things to discuss today! I have over 75 new photos to share!

Upholstery News:

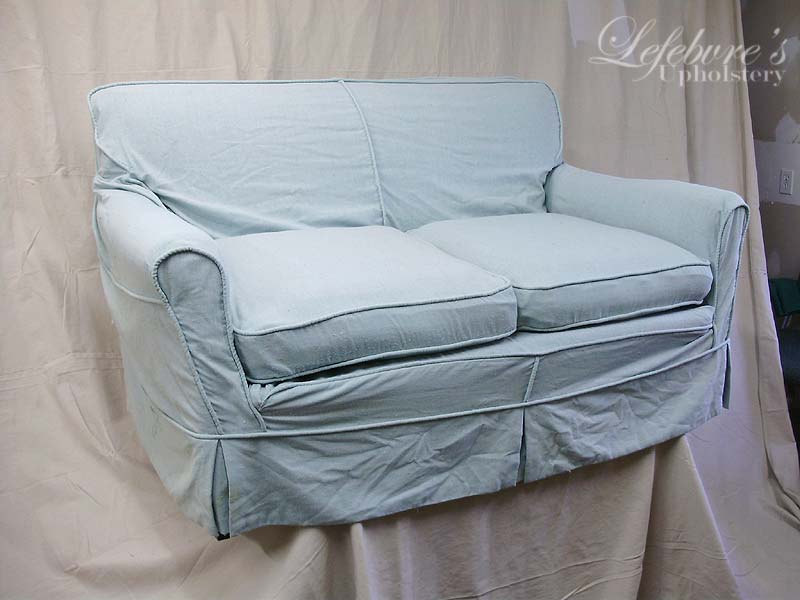
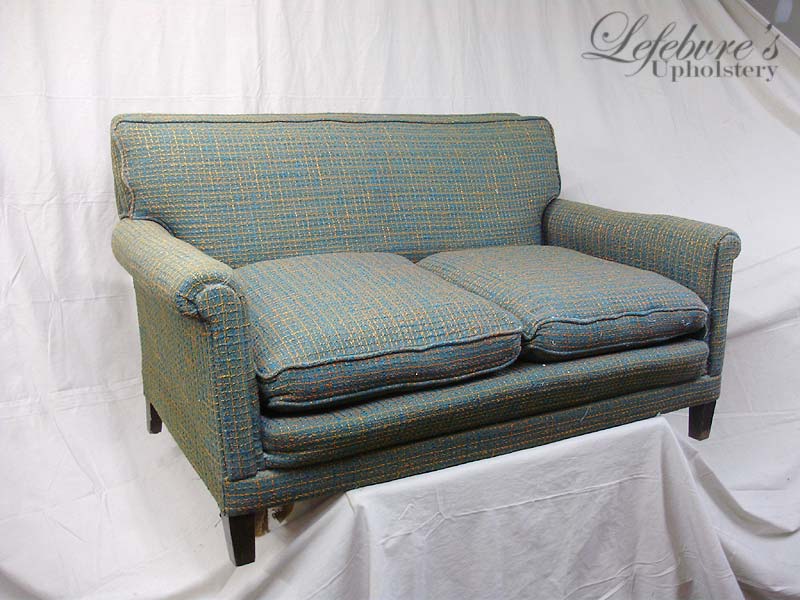
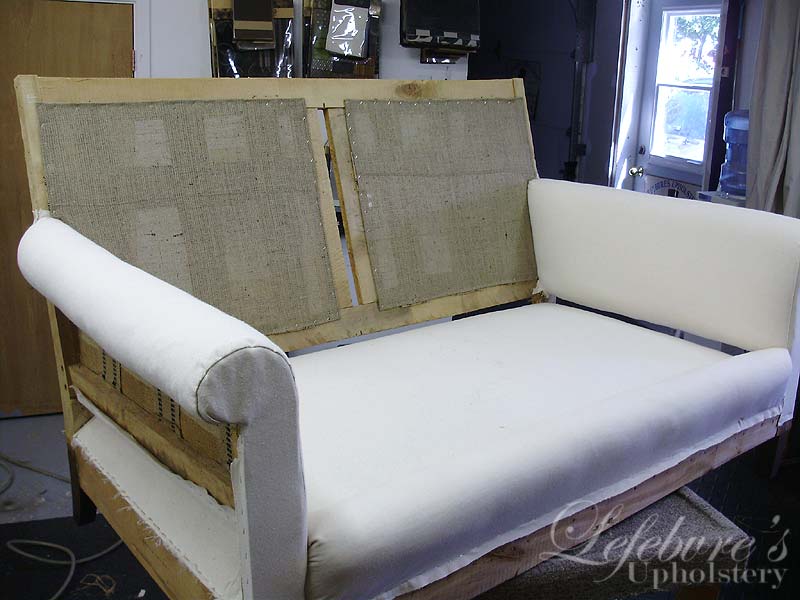
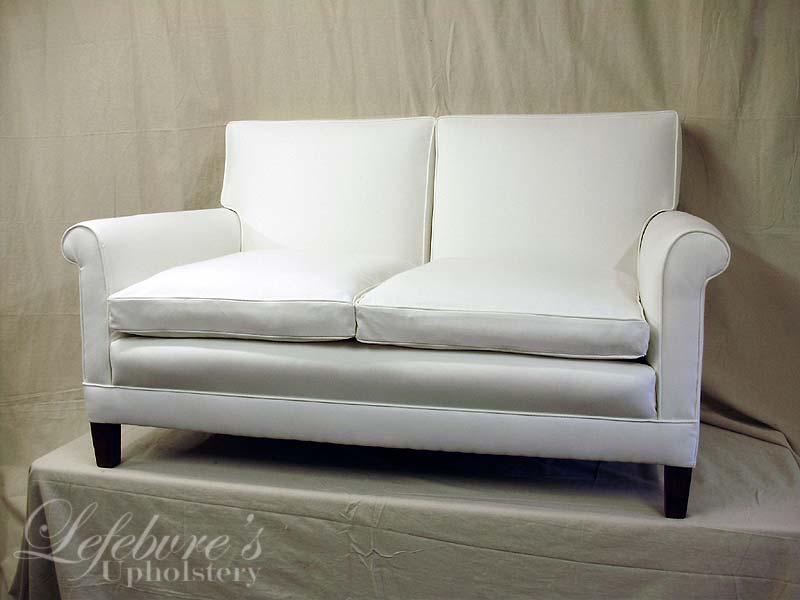
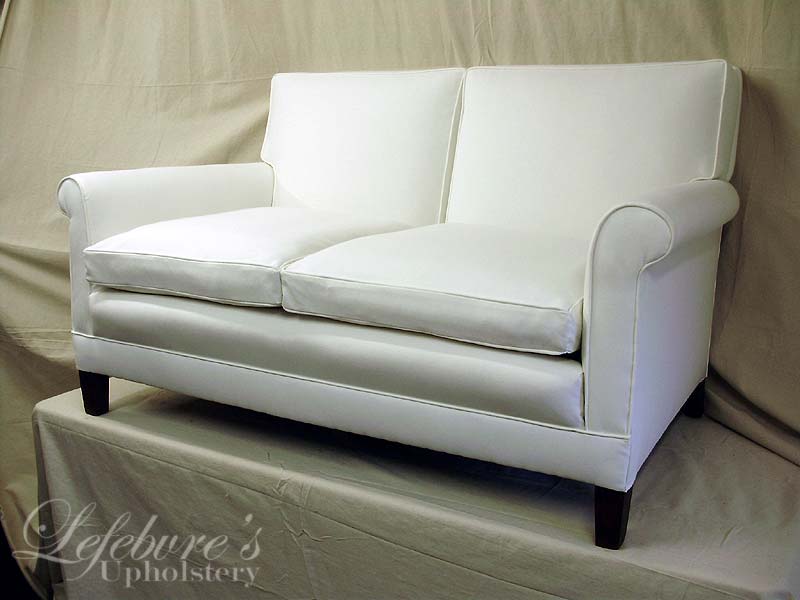
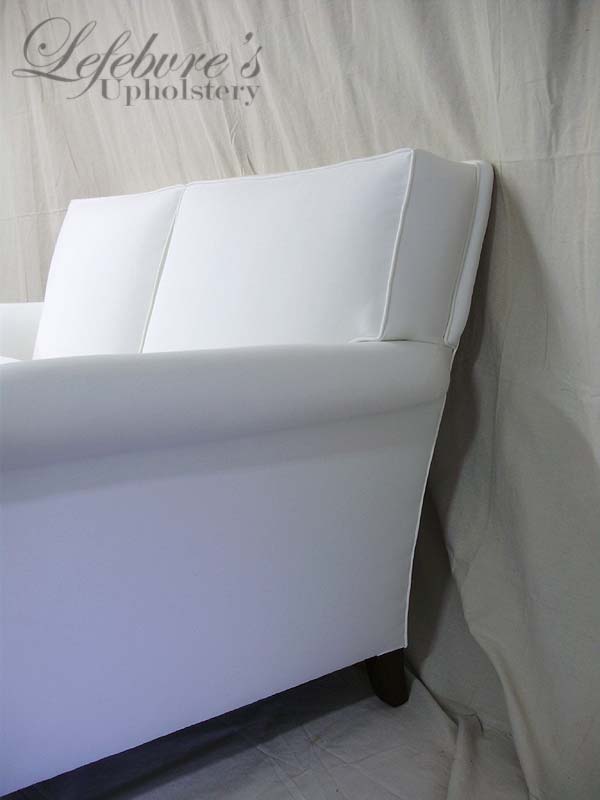
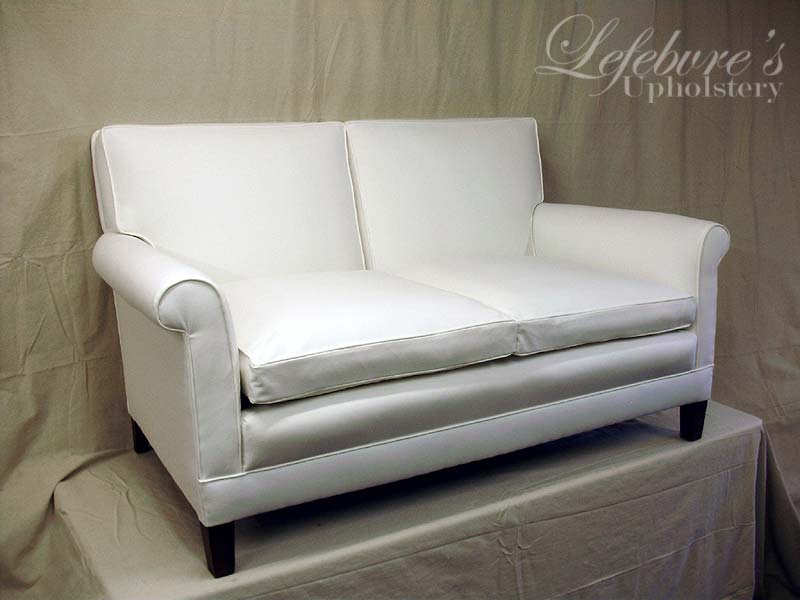
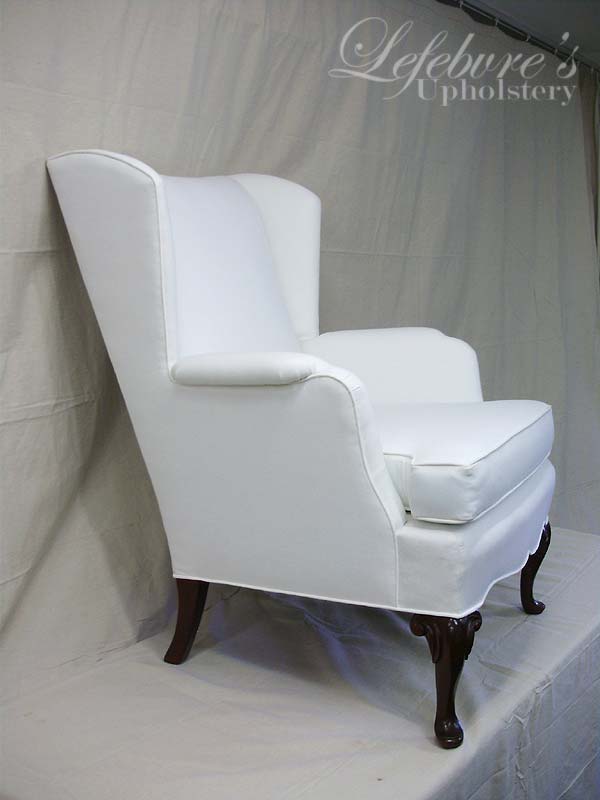
First, I started a new blog for all the upholstery. There's just too many interesting and beautiful pieces that we've been working on, and I don't want to flood my "old house blog" with all the upholstery photos, so that's all being moved to the new blog "Lefebvre's Upholstery". That blog will be updated frequently with some of the better/bigger projects we're working on (we don't bother to post, or even photograph, the more mundane items like vinyl boat seats and chair repairs). I hope all of you who find upholstery to be fascinating, or who just love to see some rather dramatic "before and After" photos will enjoy following that blog. You can find it here:

Lefebvre's Upholstery Blog

I currently have 54 new upholstery photos that will be posted shortly, plus the reposts of the ones I already showed on this blog. If there isn't anything up on the blog yet, just be patient with me, and check back tomorrow.

Foursquare News:

I bought some furniture!

Well, that's a bit of an understatement since I walked away with 14 pieces of furniture, consisting of an entire matched 12 piece dining room set in mahogany, plus two freebies: a leather top (mahogany) coffee table, and an upholstered (beaten-up and falling apart) Eastlake style Victorian chair.

I saw the set advertised locally through Kijiji, and it only had 4 small photos, with a 500$ asking price. I could see one of the chairs poking out from the edge of a photo, and the table with 8 chairs seemed worth the asking price on their own. The set also came with a glass-door china hutch, a large sideboard, and another cabinet.

I contacted the seller (who was conveniently 2 blocks away on 4th street - note: I'm on 5th), and made plans to have a look at the set on Thursday night. I was very excited when I saw it, and that's when the owner also offered me the coffee table and Victorian chair "free if you want them". He also said he could deliver it (SWEET!!!)

I wanted to post about it on Thursday night or Friday, but I didn't want to jinx anything and I waited until today.

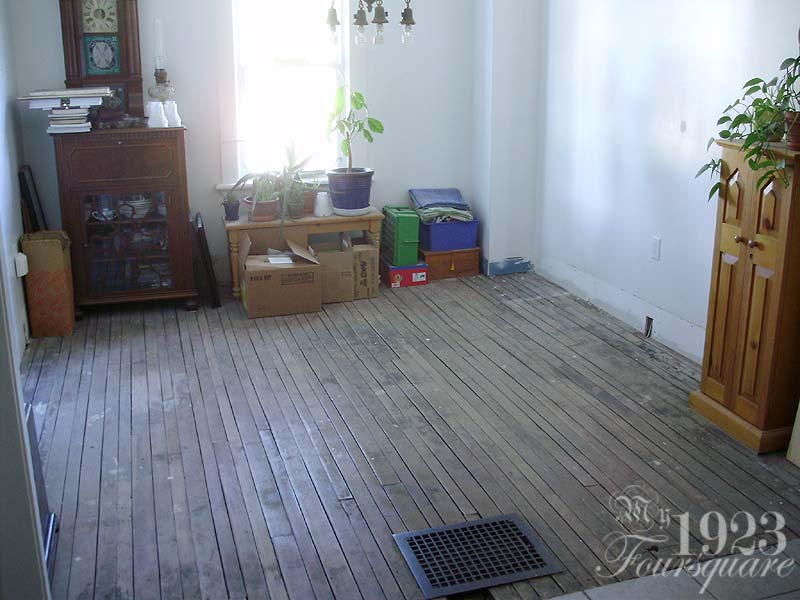
I spent all morning and part of Friday cleaning up all the clutter and junk around the house and in the garage to make the place look half decent, and to clear some room. This morning I moved my old chairs to the basement, and dismantled the crappy old table I had.

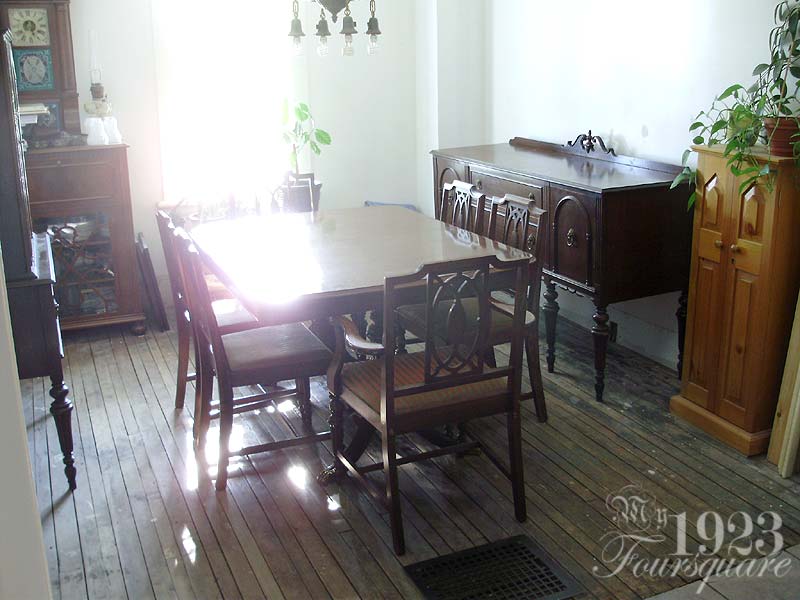
Dining Room ready for the new arrivals!


The chairs (before taking them inside from the garage):
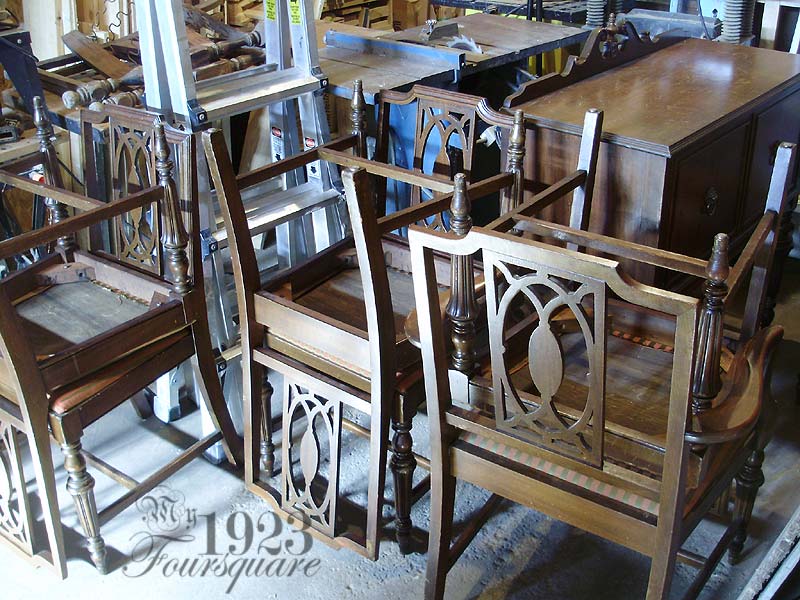


Ta-Dah!


Hutch:


I started to really look over the set, and I noticed quite a few nice details. One of the signs of a high-end set is that the back legs on the larger pieces (sideboard, hutch, etc) are carved/turned. Many of the more basic sets usually have plain back legs.

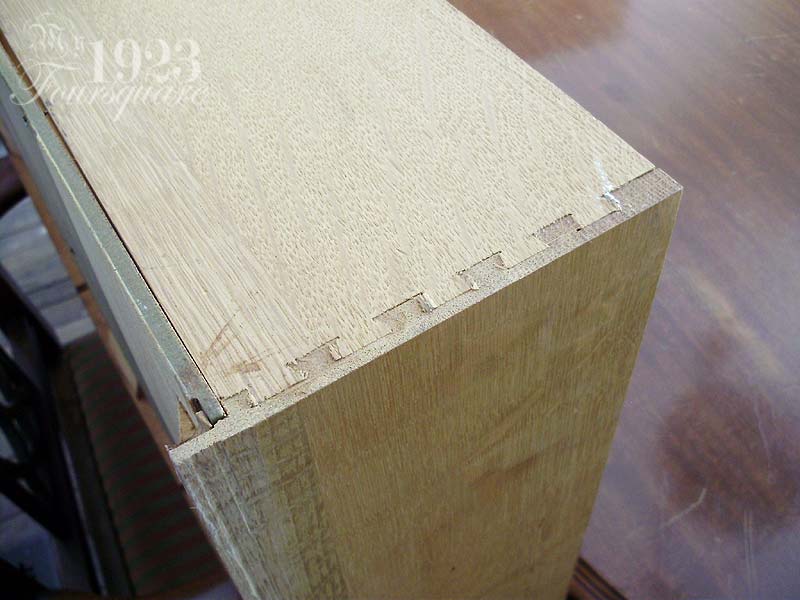
Next, the drawers. Wow. Not only are they well made, but this is the first time I've seen internal drawers that are made with 1/4 sawn White Oak. For those who don't know, quarter sawn lumber is when the wood is cut radially through the tree (think pie wedges). This means that the grain running through the board is running perpendicular to the board (stripes as opposed to curved lines when you look at the end of a board). This causes a lot of waste, but the wood is more stable, less likely to warp, and it's also the only way to see those beautiful "tiger stripes" that are present in all pieces of Oak. Regular "flat sawn" wood will have shallow curves in the wood grain, and they're more likely to cup/warp, but it's much cheaper and easier to do. Almost all the solid wood furniture you'll see today is flat sawn.


Then there's the dovetails. Most people know that dovetails are good, and a lot of older stuff will have them (machine cut or hand cut are equally good). These drawers not only have dovetails at the front...


But also at the back! This is something that you will RARELY see. NONE of my other antiques have this with the exception of my little mahogany night stand (which has just one drawer).


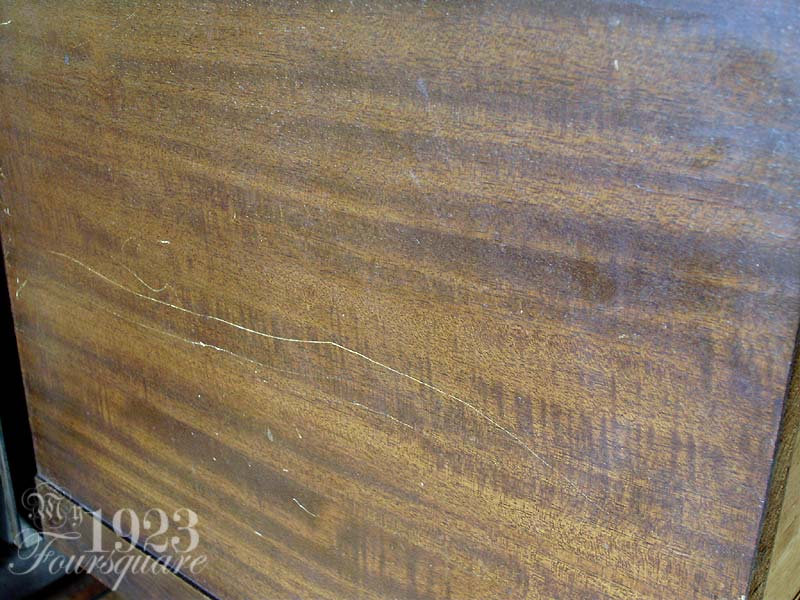
When I had first seen the set I thought it was all Walnut (which is very typical for this style of 1920s set) but when I looked at it in the light, I could see that it's mahogany. All of the legs and mouldings are solid mahogany, and the sides/tops are mahogany veneer.


With all these signs of quality, I was incredibly surprised to find that there were absolutely NO markings on the pieces except for pencilled numbers. Some of the chairs are numbered "9310" and the smaller cabinet is numbered "9312".


From what I can tell, it says "9312 Bottom" "Nov 5 1945" "RossKerr" and something along the lines of: "Like is nany Chuck" (?) These were the only markings I could find.


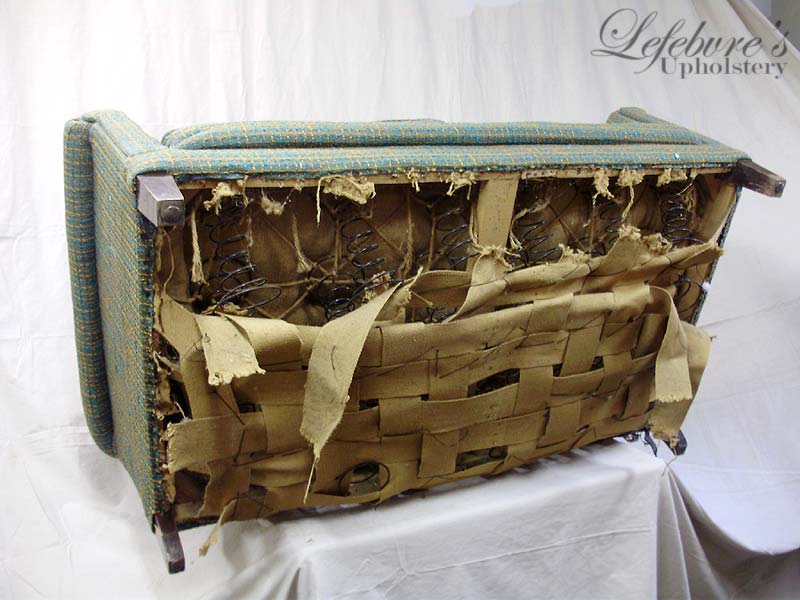
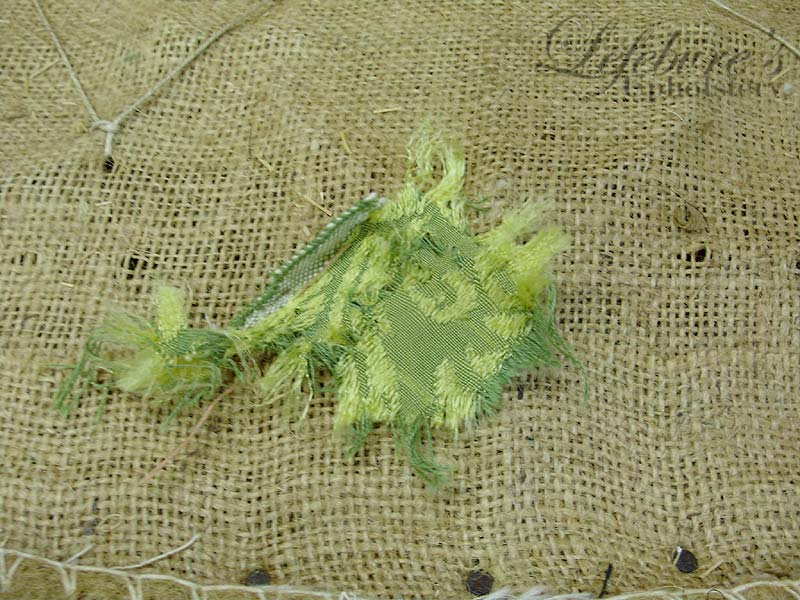
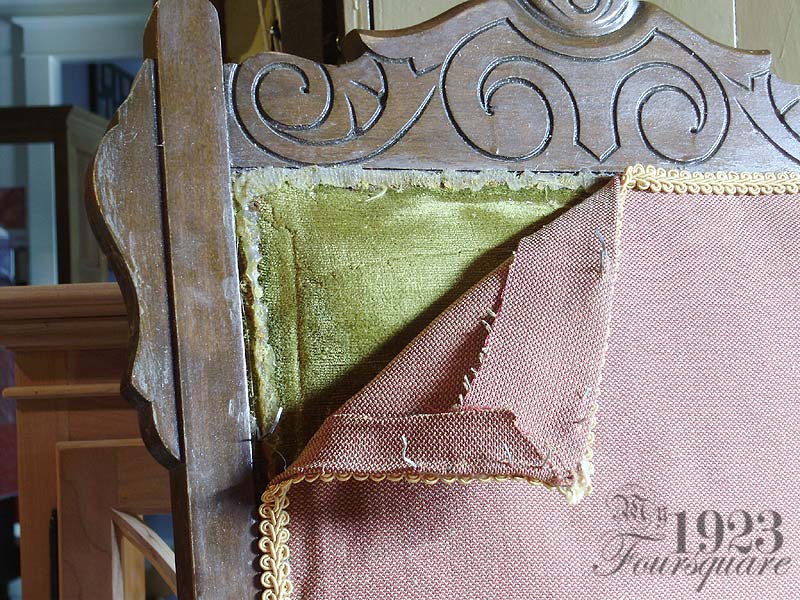
I had thought that the pink and gold-green fabric on the seats was original, but one of the torn ones proved otherwise.

The fabric is actually dark pinkish red, with the green added afterwards. In some of the excessively worn-out places, the bright pink shows through a lot. The green stripes almost look like ribbons. It's quite an interesting/nice fabric and it goes well with the set.


Here's that other piece. I don't have room for this one, so it will be used in another room.


Now, my final thoughts on the set: It's kind of big. I was surprised how much space the table takes up with the chairs. I will have to rearrange the pieces, because currently the sideboard is so deep on that side that I can't even open a drawer half way, or pull-out a chair properly. The table is off-centre from the room by 4" (because the window and light fixture are 4" off) so it might work better on the opposite side (since I'll gain that 4"). Worst case scenario is that I have to "get rid of" (move to another room) the sideboard. I don't really understand why it's so deep in the first place. It's about 21" deep, while the hutch is only 17" deep.

Then there's the freebies. The chair has definitely seen better days.

The fabrics don't even match, and the upholstery job on the seat is just terrible. Look at all the creases and bunching on the right corner, and on the back left side.


Pierre tells me that the greenish gold velvet isn't original because it's textured velvet.


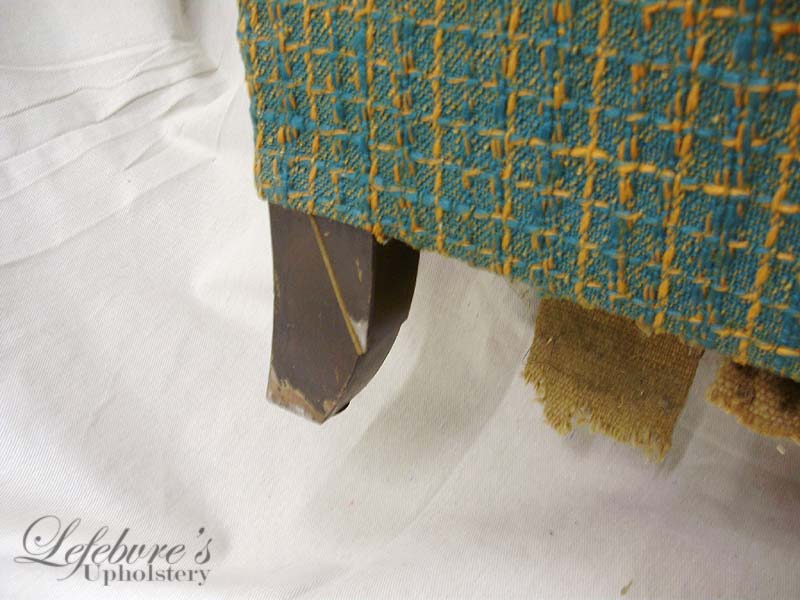
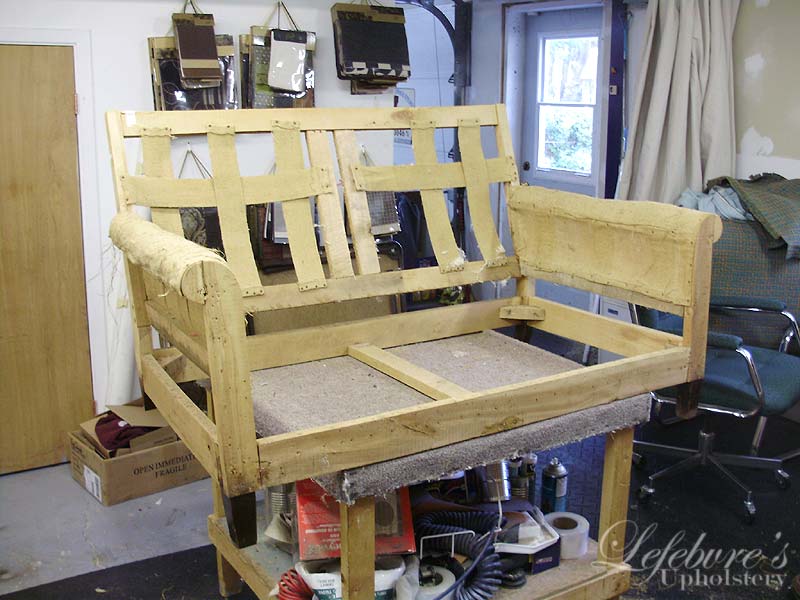
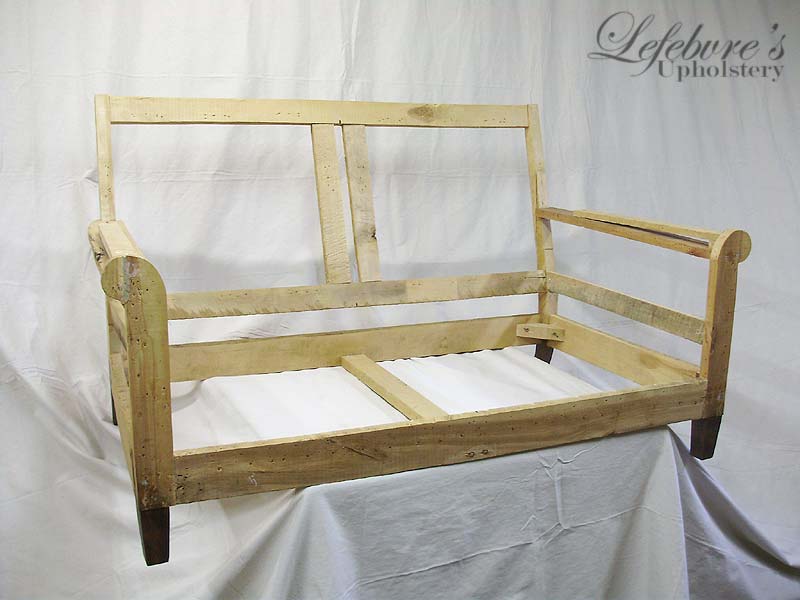
Note the crack in the stretcher below. The whole chair is rickety and falling apart. The finish isn't the best either, but it has potential to be really nice. The casters have brass wheels.


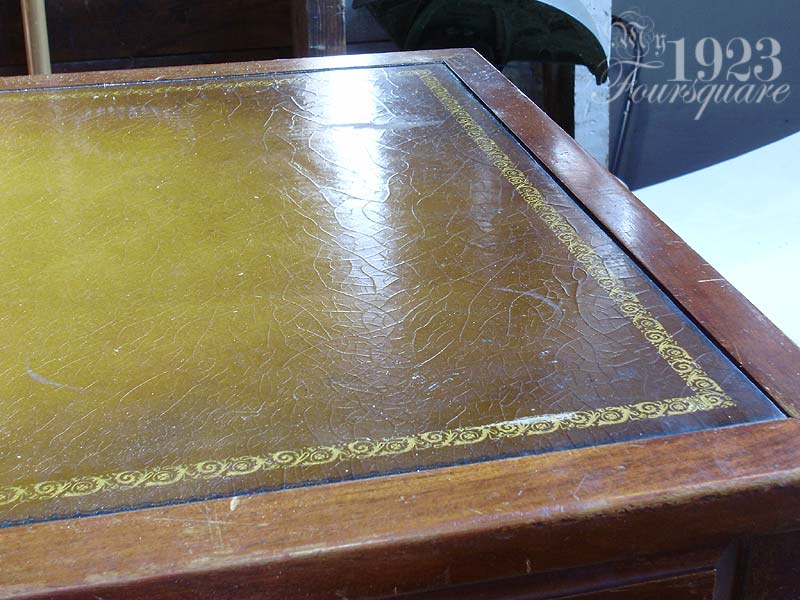
The coffee table. This one I'm not too fussy about, but I love the cute little casters with the square tips. The table looks like solid mahogany (no veneers), and the top might be leather. It looks and feels like it's fake, but there's a deep gouge in it at one end, and it seems fuzzy, so it could be real leather.

Note broken corner moulding.


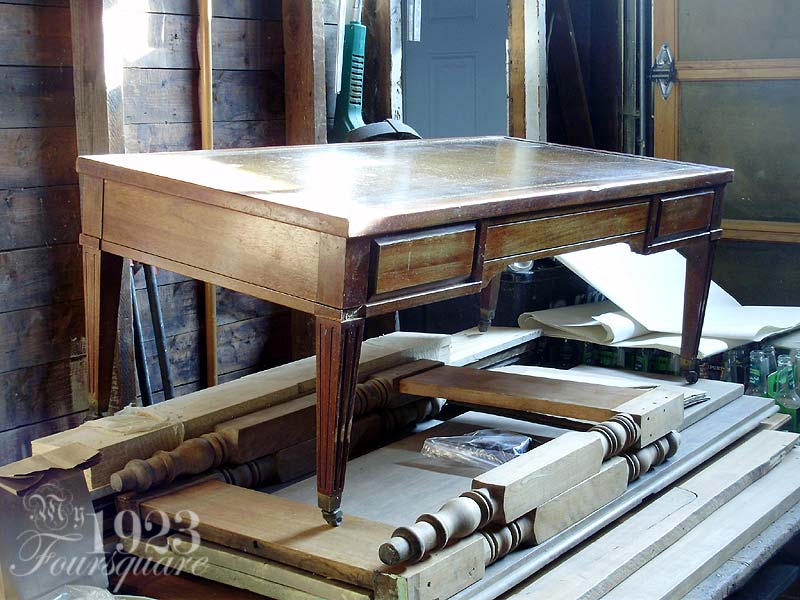
The finish on it is in horrible shape (both the wood, and the thick varnish coating over the leather).


That's it for now, but I also had some houses/buildings I'll be posting soon.

Sunday, August 18, 2013

Surprise Project Revealed - Staircase Ceiling Done & Light Fixture!

I vaguely hinted at this project "wanting to get the restored light fixture installed soon" but I didn't expect that I'd finish this project so soon.

My boss let me borrow his folding ladder, so this helped quite a bit. I thought I could get the ladder to fold in a different configuration, but it wasn't working out, so I ended up using it in combination with a chair and a 2x4 "bridge".

These 2 photos are a bit blurry since I wasn't using my tripod.


This tiny little ceiling was in AWFUL shape. It had several badly patched screws, defects, and a horrible seam job on all 4 sides. I normally don't post too many drywall photos, but these will give you an idea of how much patching and sanding I had to do.


Popped screws/nails in the centre 2x4 on the narrow wall:


Round 1:


Note semi-finished door casing (I had done all of it except the top crown since I couldn't get to it.


Casing/crown installed and painted (this was the first coat, but I didn't re-photograph it after). Also note: the hallway always looks green in photos due to the lighting, but it's light brown/taupe.


Round 2 was more mud along the ceiling portion of the drywall tape (didn't photograph this). This was after the ceiling got freshly painted with spot touch-ups in primer, and 2 coats of flat white ceiling paint. What a huge difference!

Also, luckily the electrical here didn't really need any work other than adding another screw to anchor the box more securely.


Restored fixture. This is the best I can do for a "natural lighting" photo since this staircase gets no direct sunlight from any direction.


I was going to go for "40w" CFL bulbs in here, but I've had problems with them in places that get frequent "on/off" situations, like bathroom lights. They seem to burn out quite quickly, and I just didn't seem to want to pay 13$ for 4 bulbs that might not last, so I went with 4 incandescent 25w bulbs. It gives a more historic look, isn't too bright, won't look stupid from below, and will likely last a very long time. They only set me back 2.50$ and I don't think I'll be losing too much in energy savings here either.


View from the bathroom:


View from the main floor looking up.


I couldn't be happier with it. The height is great, and it's just long enough to reach the globes to change the bulbs or clean the shades, and it's far enough away to be well out of the way of your head (at least a foot).

Upholstery: Projects of the Month

I've been eager to share with you this particular pair of pieces. They are both quite different, but for the same client (the owner of the gorgeous early 1800's home I featured in this post), and were both done in the same white fabric. We are also working on two other chairs for him as well, but they aren't done yet (they were prepped for new upholstery, but we're still waiting for confirmation on which fabrics to use).

The two pieces featured here are an old love seat likely from the 1920s or 1930s (it's difficult to date accurately since it is such a simple style), and a beautiful wing chair which is likely made by Coombe Furniture around the 1950s (I think) (my boss is sure of this, and I tend to agree 99% since I saw a reference to another chair online by them that had the exact same legs. They are also known for making frames in Elm, as was the case with this chair). Pierre was pretty obsessed with this chair. He absolutely loves it, and I'm just a tad surprised he didn't want to work on it himself. It does have great lines to it, as you'll see on the finished piece.

Love seat as received (with dusty blue slipcover):


Minus slip cover (note the way the back was done - one piece):


Broken rear leg:


The bottom was SLIGHTLY collapsed.


Before I continue, let me just say: this sofa needed "the works". Everything had to be redone on it. It had to be stripped down, disassembled, scraped, sand and refinish the legs, and then reassemble the frame. After that: new webbing, re-install the springs, retie the springs, new burlap, redo the berm (edge roll), re-web the back, reattach all the stuffing, and then reupholster everything. It took a lot of work, but I think the finished piece is gorgeous!

Alright, lets continue. Here's the frame with most of the stuffing and springs removed. Note the sagging rear straps, and somewhat loose side panels (arm tops are stuffed with straw).


Frame completely knocked apart (except for two larger H sections that were still solid).


Frame after reassembly, and ready for upholstering. And yes, that's all there is to an average sofa frame (new or old).


New webbing. I love doing this part. There's something rewarding/fun about stretching and tacking the webbing down. Most newer sofas and chairs have "no sag" (zigzag) springs, but usually coil springs are better (because of how they're attached to the frame on both the top and bottom of the rails).


Tying the springs. Not a fun part. The string is very hard on the hands and there are a LOT of knots involved. This is what's known as the "eight way hand tied".


New burlap and re-attached (original) edge roll (hand sewn in place):


Deck and arm pre-covers done (a rough fabric cover to help contain all the straw and horsehair that made up the original stuffing), and new webbing on the back rests. Also note how the back of the frame is divided in two sections. This is because the original sofa had a double "attached cushion" on the back as you'll see on the finished piece below (compare with the photo at the beginning where they had eliminated this detail).


Better photo showing the rough covers, and the back rests with new burlap.


That's it for the "in progress" photos, so here's the finished sofa! I love the shape (narrow arms, and square pillows). I don't think I'd ever want to have a white sofa, though. While I worked on this, I had to wash my hands about every hour to keep from getting the fabric dirty (which was almost like an ultra-white denim type fabric).

Also note that the seat cushions are slightly domed since they are the original spring cushions (basically they have a mini mattress type box of coiled springs inside them, wrapped in cotton padding). A lot of times these get replaced with foam cushions since they are often more comfortable, but the owner loves antiques and prefers things original. I didn't actually try sitting on the finished sofa, so I can't really say how comfy they are. Apparently the sofa won't be getting much use, and will be more of a "show piece", so it's not a big issue.

Note how the back cushions look like regular loose cushions, but they're attached to the frame.


The back has a very interesting detail where there is a huge 1 inch band of piping that follows the contour. It's a detail I haven't seen very often on other pieces.


The leg that was broken:


Back detail:


And now the wing chair. This was a bit more of a challenge to work on, since the chair arrived to us as a bare frame. This meant that we had to redo the stuffing and create new patterns from scratch. The chair also needed a few pieces repaired. Both wing tips were damaged (and loose on the frame), and one leg (the right one) was completely detached.


This small scrap of light green and yellow fabric was likely the original fabric on this chair (it was found under a piece of webbing).


Fixing the wings:


3/4 of the way through, just before attaching a side panel:


The finished chair! It really came out well. I especially like how the arms and wings look. Very crisp details.


The legs were touched-up (to remove scratches), and given a wax polish.


Till next time!