Sunday, February 19, 2017

Finished Shop Hutch

This post is almost a year late by now, mostly because I wasn't happy with how the photos turned out (poor lighting and many with a yellow hue), but I decided not to retake the photos and just post what I have.

The hutch has been an on-and-off project since I started building it some time in 2012. Here are the relevant posts I was able to find about it.

http://my1923foursquare.blogspot.ca/2012/08/shop-storage-hutch.html
http://my1923foursquare.blogspot.ca/2012/11/alright.html
http://my1923foursquare.blogspot.ca/2013/04/shop-hutch-update.html
http://my1923foursquare.blogspot.ca/2014/12/end-of-year-wrap-up.html
http://my1923foursquare.blogspot.ca/2016/07/summertime-update.html

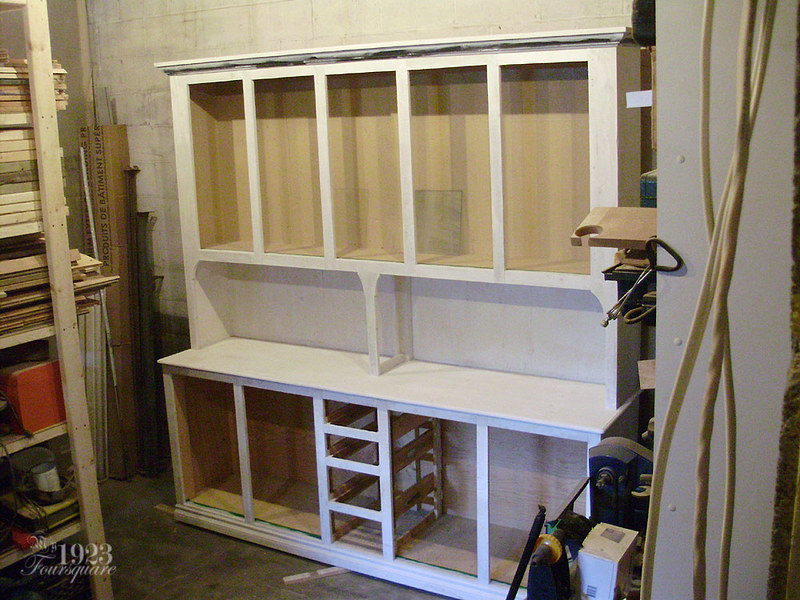
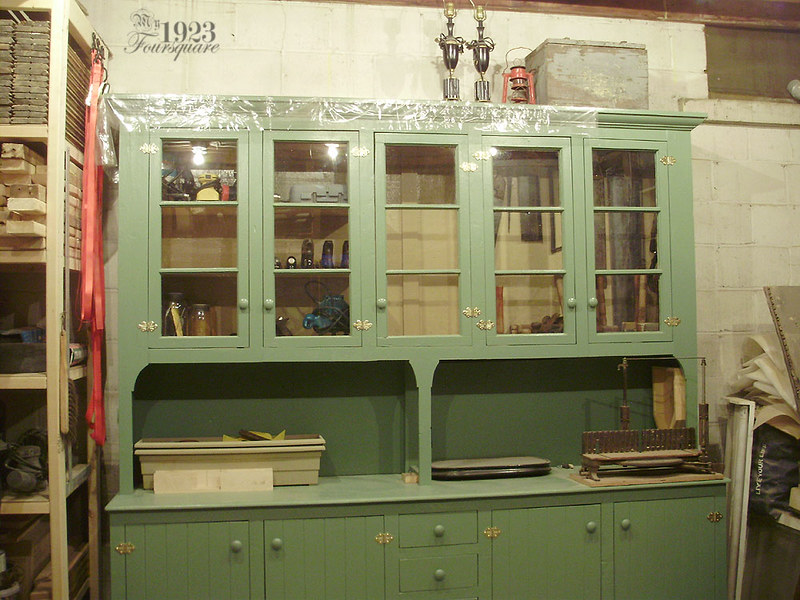
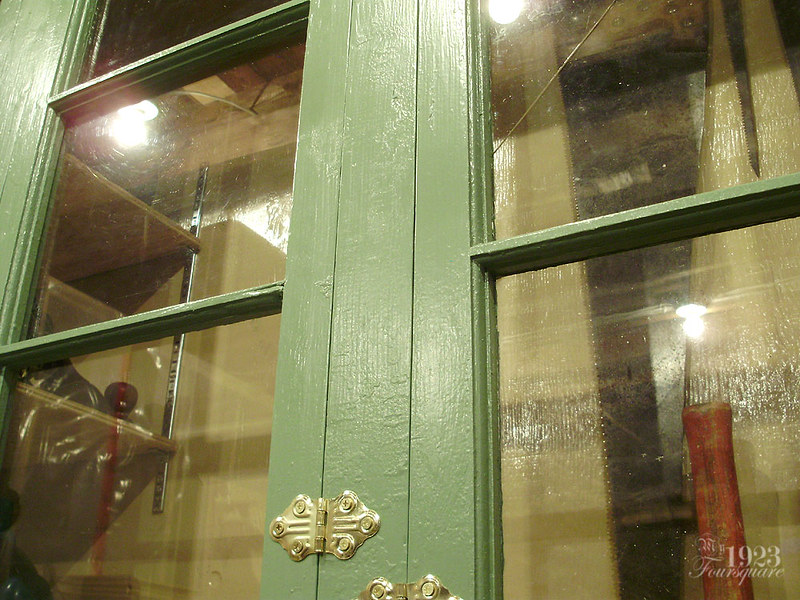
To recap the project just quickly and generally: this is a large cabinet I decided to build entirely out of scrap materials. I spent almost no money on this build. The only expenses were hardware (13 wood knobs at about 20 cents a piece, plus several inexpensive brass hinges), and paint. A lot of it was built from scrap 2x4s, scrap 3/4" thick pine (lots of which was already coated in old paint and full of nail holes), and scrap plywood removed from the house (sub-floor and other bad repairs). The upper doors were made from salvaged basement windows (found frequently in the trash). As mentioned in the last post above, the hutch was finished last summer.

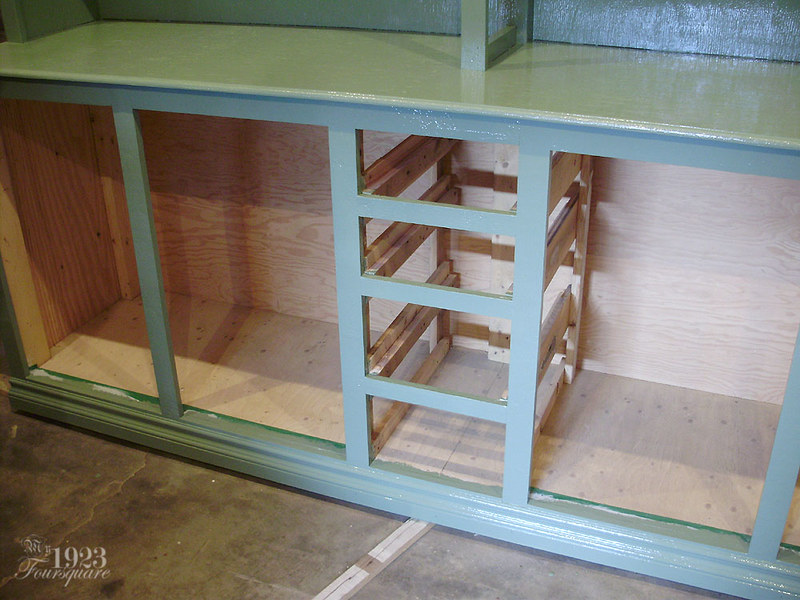
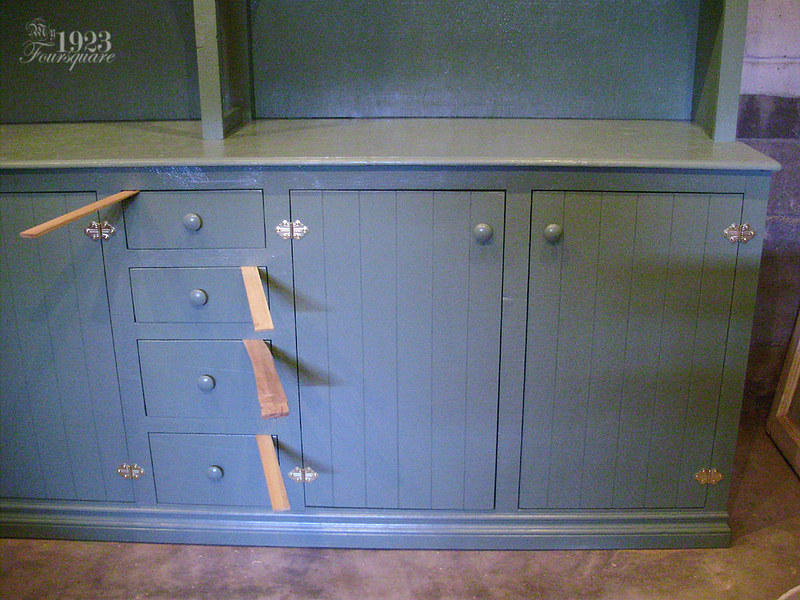
For the longest time, the part of the hutch I was avoiding finishing was building the drawers, and fitting the lower doors. The lower doors were made from the painted plywood doors from the old laundry room cabinets upstairs (demo'd sometime in 2010 or 2011). I decided that fake tongue-and-groove doors would look a lot nicer than flat doors, since I was going for a 1920s look, so I routed grooves into them. The drawer runners and spacers were also finally installed (all junk wood), and I cut the drawer faces to size (also from the old plywood doors). Once these elements were done, all the exterior parts were ready for paint. They look painted already, but it's all old existing white paint.

P6040349

P6040350

P6040351

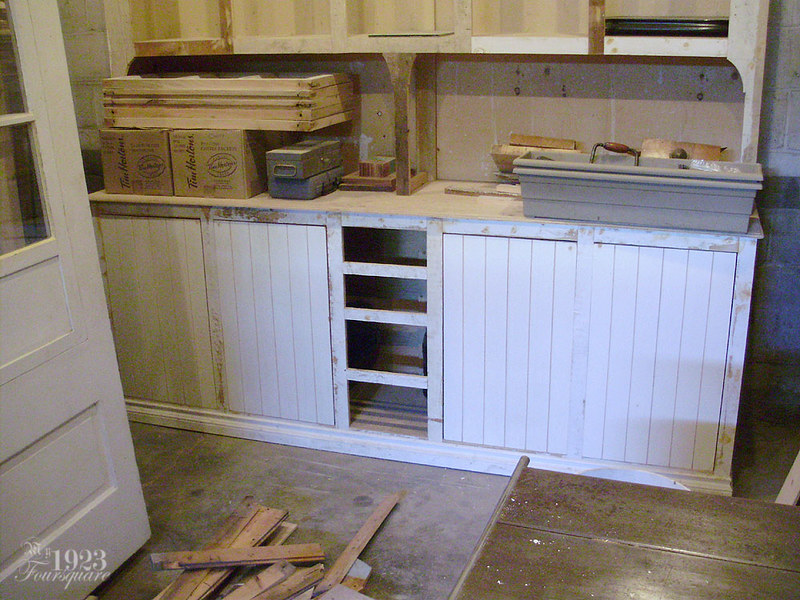
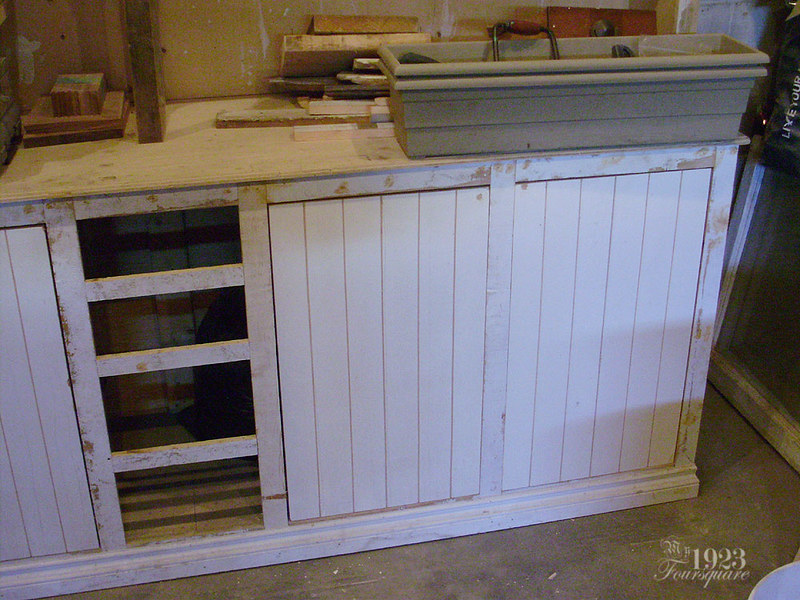
I decided to prime all the raw plywood, since I knew it would suck up too much paint if I skipped that step. I also puttied most of the holes, and put acrylic caulking along the crown and in any wide gaps or holes.

P6050354

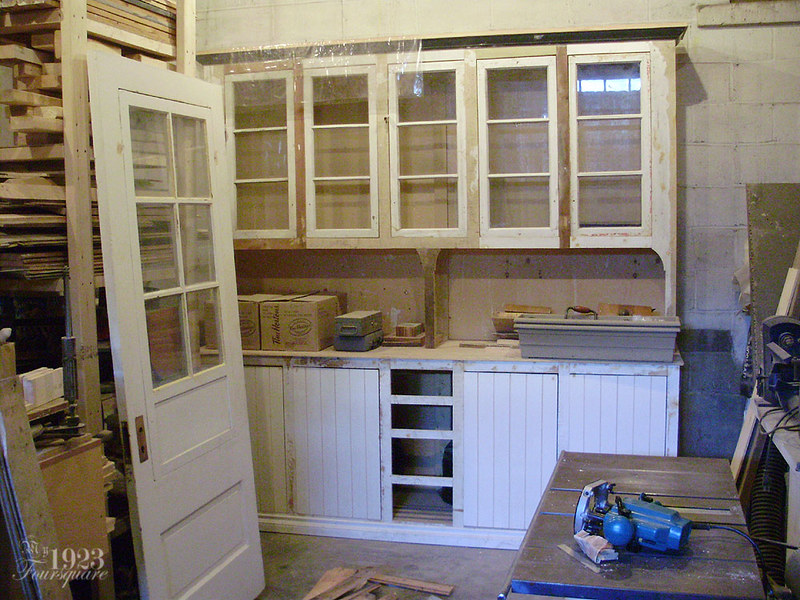
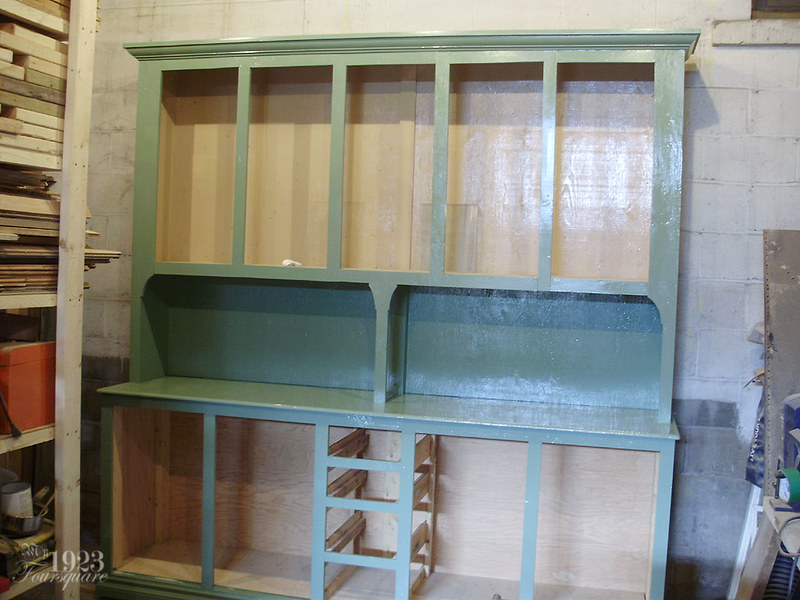
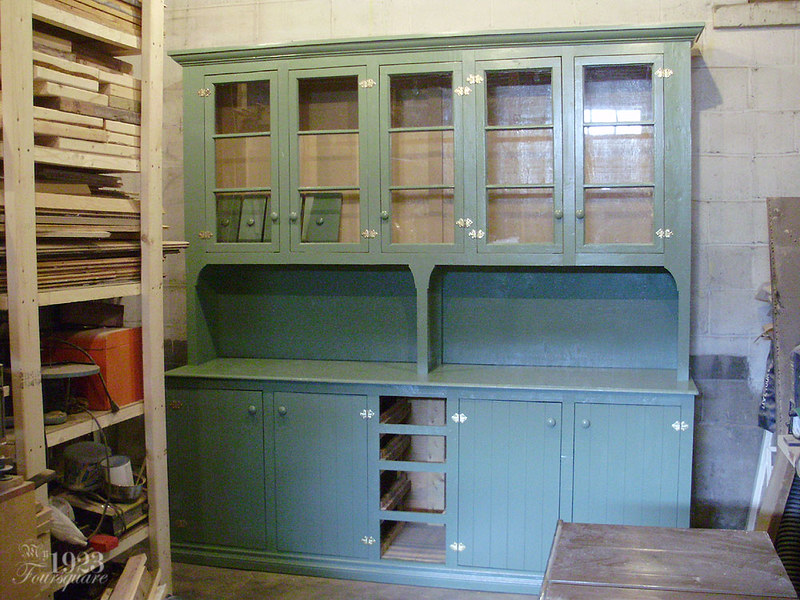
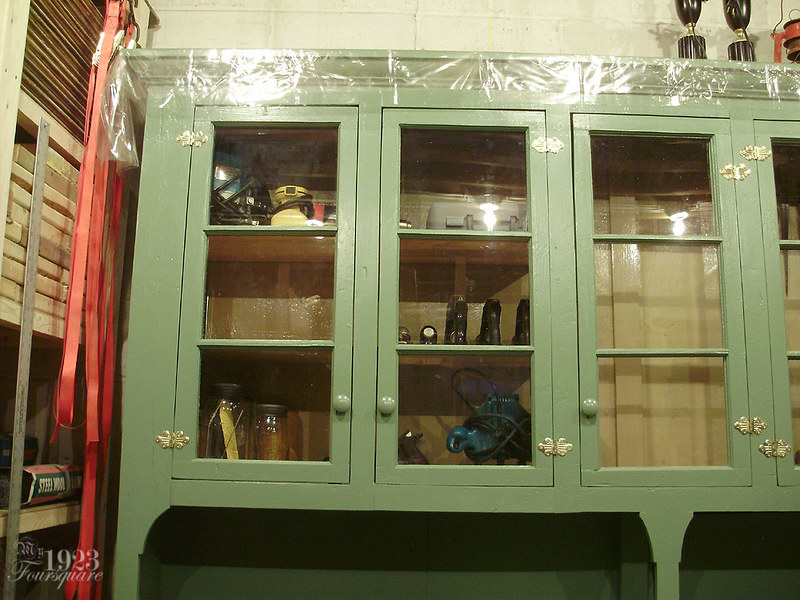
Note that the interior (top part) had already been painted with "sand" colour oil paint (a few years back). There's also some of the replacement pieces of glass in there for the doors.

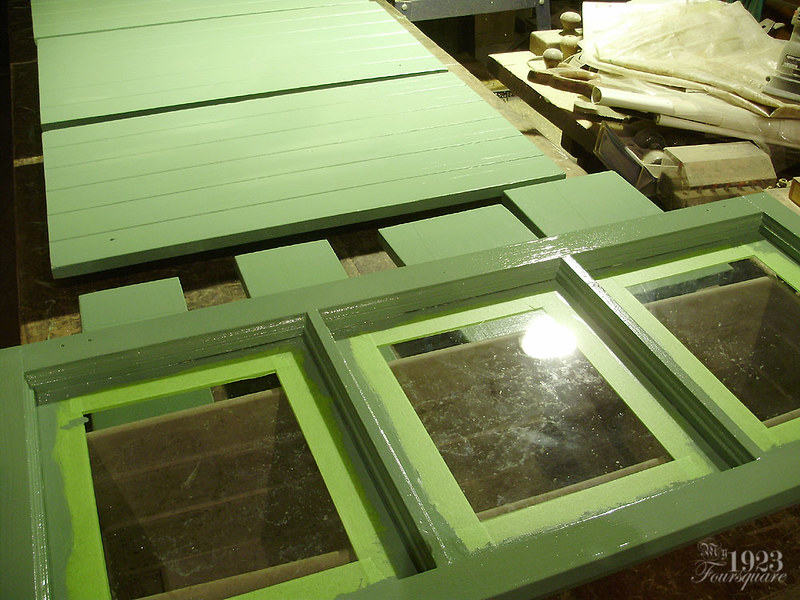
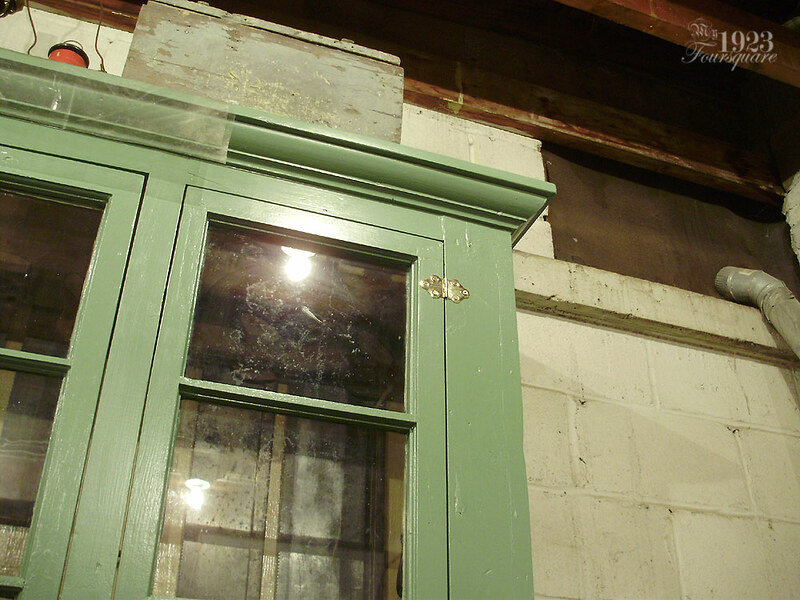
It took me a while to pick a shade of green, but I ended up picking something very close to the green in the room upstairs "Olivine". This was custom tinted oil paint. Why green? No specific reason, but some woodworking tools tend to be painted a similar green, and green tends to look nice next to raw wood and white (walls will eventually be just white).

P6050355

P6050356

P6060357

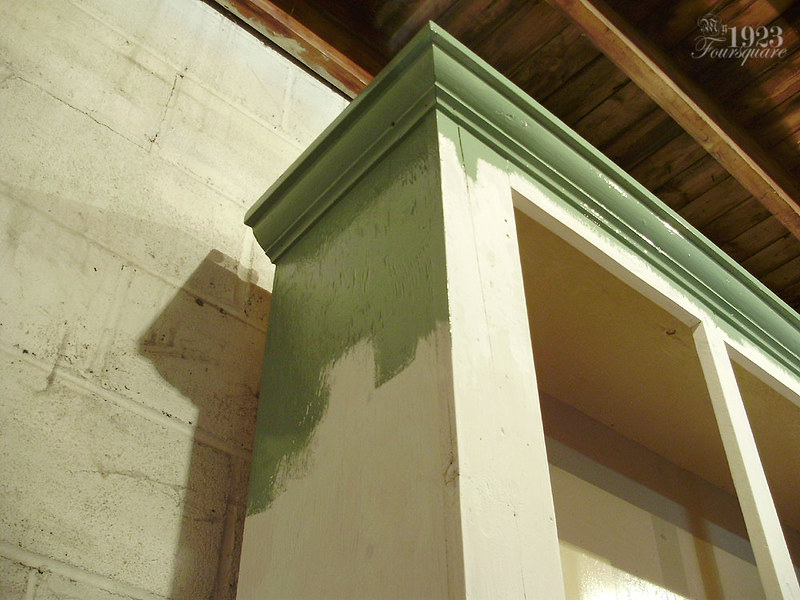
I think I only did one good coat of the green oil paint.

P6060359

P6060360

The doors and drawer faces had to be done one side at a time, because it's just too sticky and awkward otherwise.

P6060361

P6080419

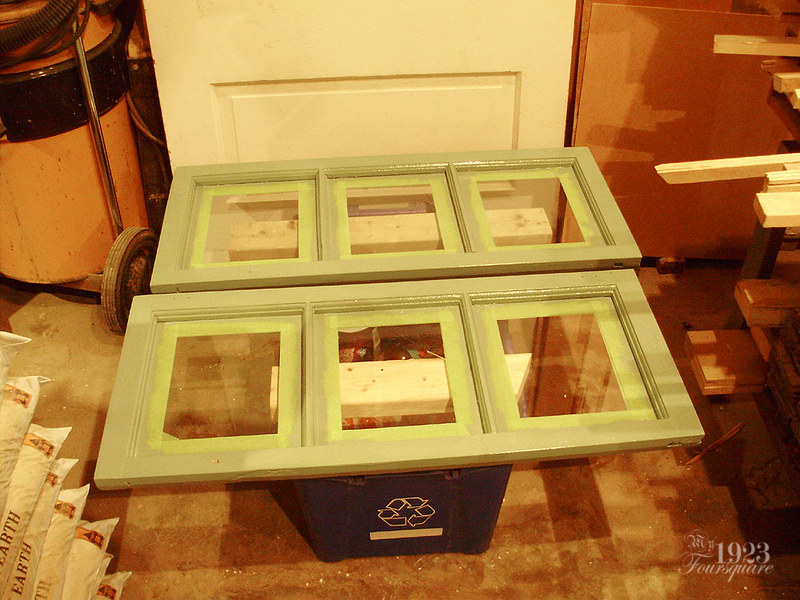
Doors were painted on both sides. It's always better to start on the backs, and finish with the fronts.

P6080421

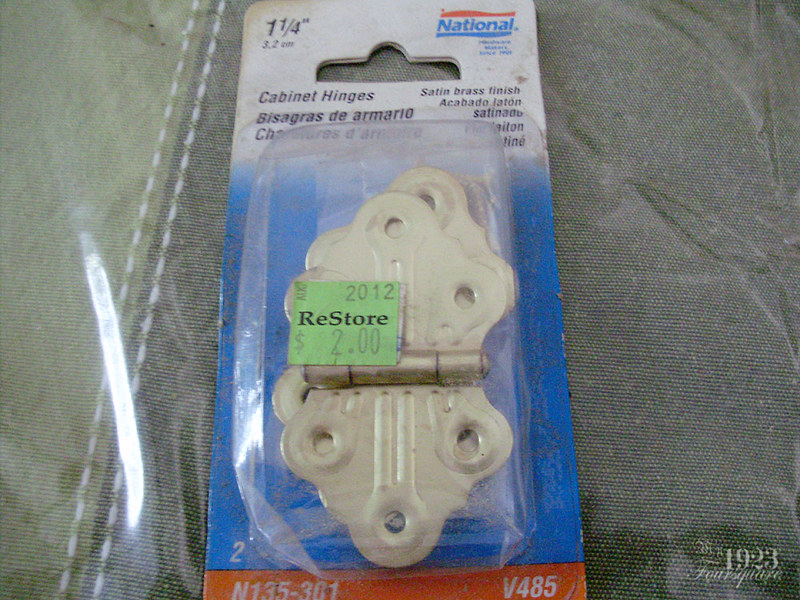
A bunch of the brass butterfly hinges were bought on sale, but I also found some at the Re-Store (Habitat for Humanity).

P6080426

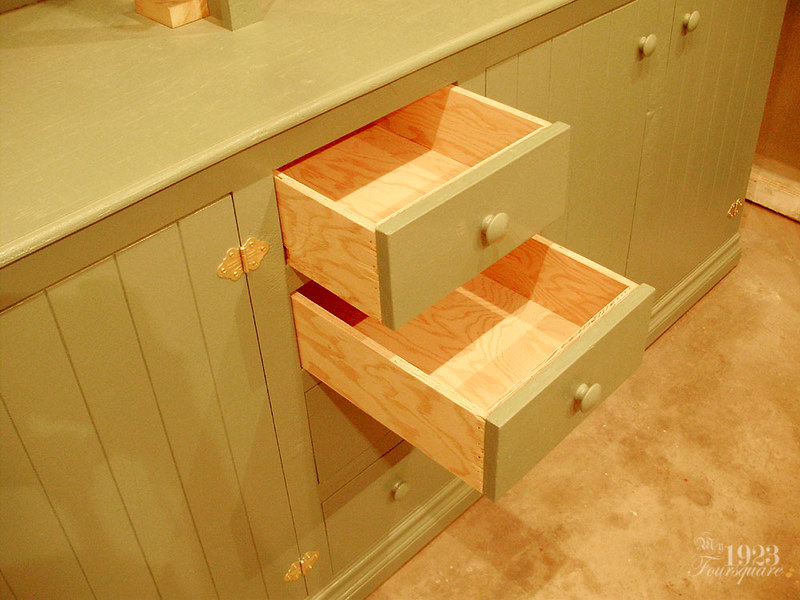
At this point, I hadn't built the actual drawer boxes yet, so these were just mocked-up for show.

P6080427

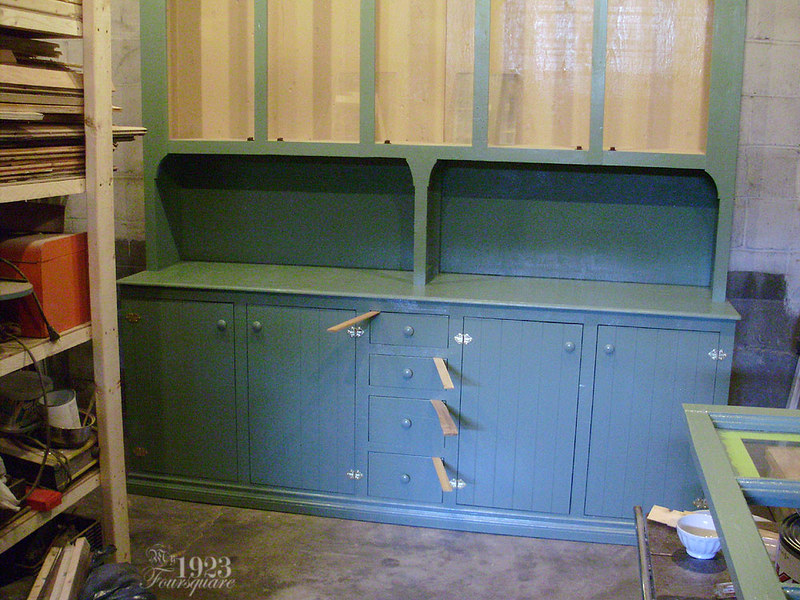
I really like wooden knobs on furniture. They seem to have largely fallen out of style though. Most people prefer metal ones.

P6080429

P6090431

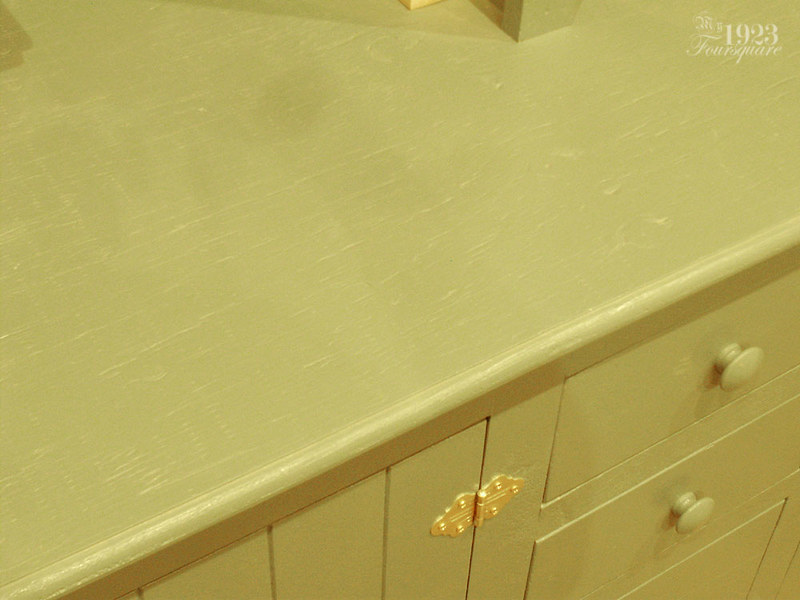
Fast-forward a few weeks, and I had built the drawer boxes, and also installed some shelves in the upper left. You might get a vague idea of the size from this photo also. The hutch is just shy of 98" tall (just a hair over 8 feet), and the countertop area is 8 feet wide exactly (I made it so that the top could be made from a sheet of plywood). Countertop is about 3 feet high, and 23" deep.

P6160032

P6160035

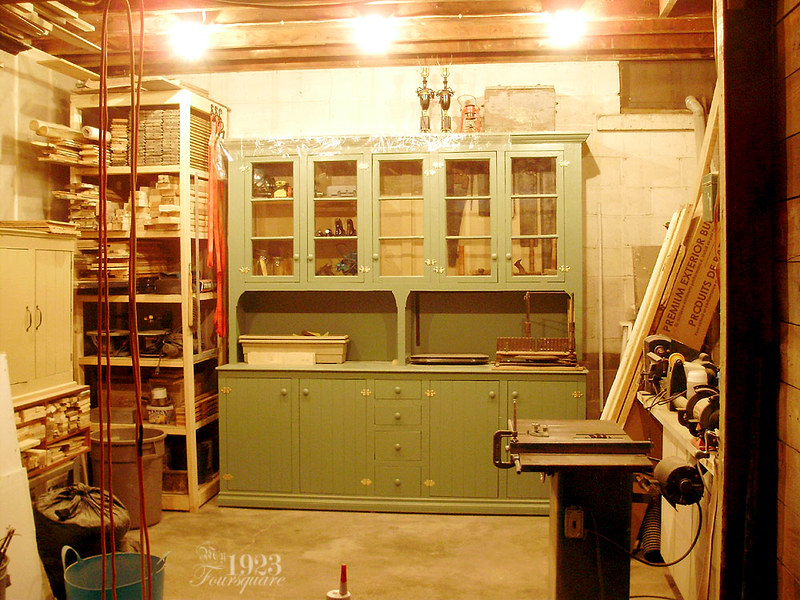
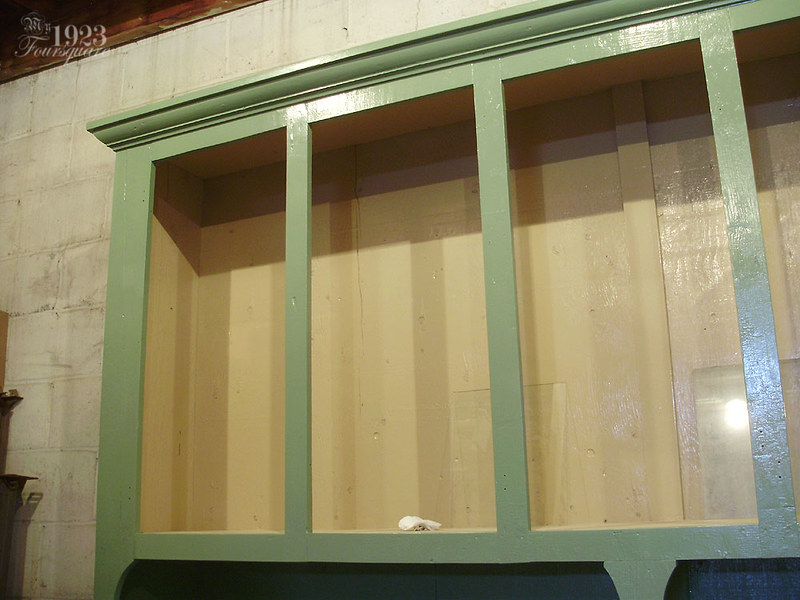
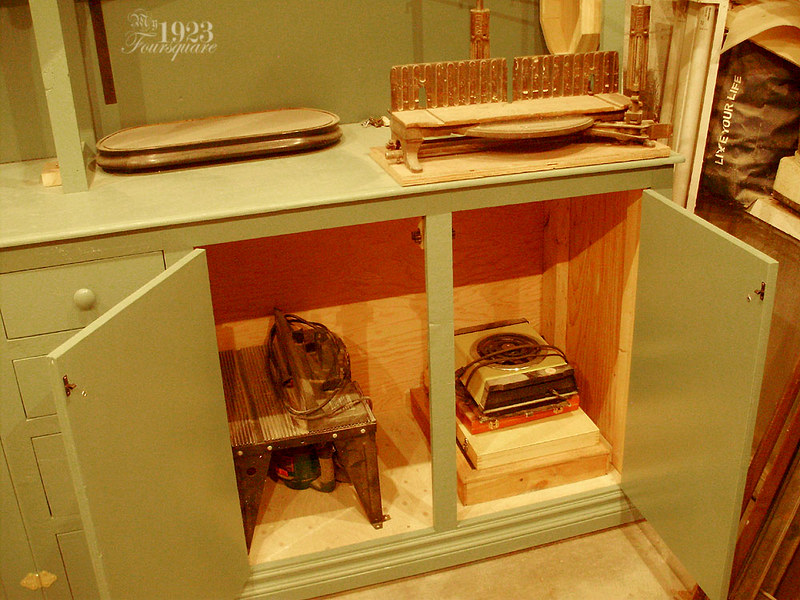
The shelves hold tools like my router, hand planes, and some sanding items.

P6160038

The other half holds a lot of my larger hand tools like my saws. I have a few hooks on the right for ear protection and more saws.

P6160040

I still want to add a shelf on each side of the base.

P6160041

P6160042

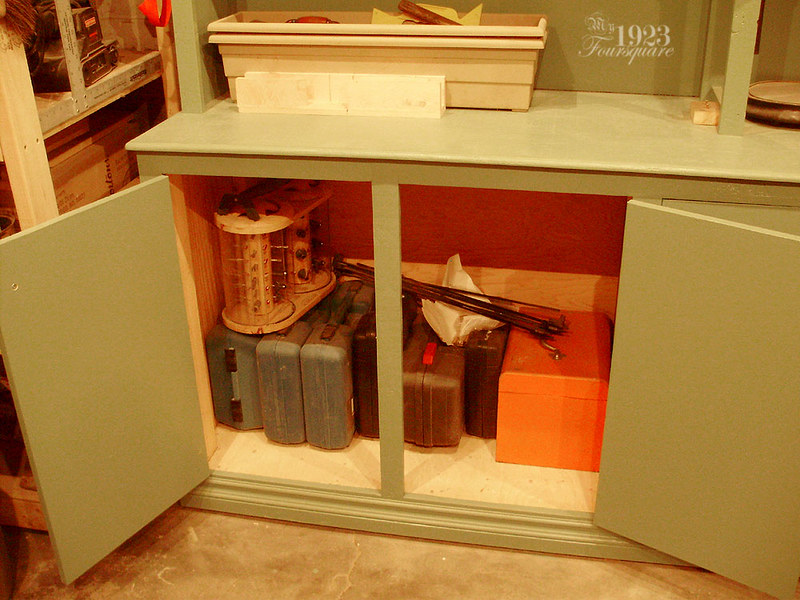
The drawers are just simple plywood boxes. They currently hold things like chisels, router bits, and a few other odds and ends.

P6160043

I want to stress that while the cabinet looks great, and I'm super happy with it, it's really nothing fancy. I can do precision master carpentry, but this is just a very rough piece that is 90% nailed together. There are a lot of crappy saw cuts, several crooked lines, and rough parts. Some pieces are thicker than others, some have cracks, dents, and broken bits. There are also two cracked panes of old glass that I left alone (the missing ones were replaced).

P6160046

The crown was a donation from a guy down the street who saved them for me (a few different lengths). They were going to the garbage. You could easily just make a 45 degree crown or a cove crown cut on the table saw instead. There's also always places like the Re-Store that sell all sorts of crown for a few dollars per piece.

P6160047

A lot of it is also cheap plywood, so you can see all the rough texture of it. If you had more money for better plywood (or MDF, or solid wood), a hutch like this could be made much nicer.

P6160052

All that said, I have maybe 50-60$ in this, but obviously LOTS of time. I am really happy with it. Eventually I will also restore that giant Victorian countertop cabinet (with the 15 drawers) and a bunch more of my tools will go in there too.

Saturday, February 18, 2017

Dining Room Ceiling Part 5 (Done!)

I could have divided this into two parts, but in the end I didn't want to. This was a pretty big job, especially since there was "nothing wrong" with the drywall ceiling, but I have no regrets. The painted wood ceiling is a million times better than the drywall, especially since it was already there and didn't cost me anything to install.

Here is the list of previous posts for this project:
http://my1923foursquare.blogspot.ca/2016/12/destroying-dining-room.html
http://my1923foursquare.blogspot.ca/2017/01/dining-room-ceiling-project-part-2.html
http://my1923foursquare.blogspot.ca/2017/01/dining-room-ceiling-project-part-3.html
http://my1923foursquare.blogspot.ca/2017/01/dining-room-ceiling-project-par-4.html
http://my1923foursquare.blogspot.ca/2017/02/dining-room-ceiling-update.html

The only expense for this project was 1 can of Bin shellac sealer (25$ for a quart), 1 can of white paint (a gallon on sale for 20$), and a 2.50$ tube of acrylic silicone. I should add that the paints were bought with gift cards and points, so the total cost of those was only about 10$.

As I said in the last update, I picked at the ceiling for what seems like an eternity until I reached a point where I just had enough. There were a few strips of tongue-and-groove along the back wall that looked fine (no chipping or loose paint) so I left those alone. I also left a few of the stubborn areas alone.

Next step was to move out the sideboard, tarp-off the buffet, and protect the floor.

P1310046

I used a bunch of old cardboard from when I painted upstairs, and plastic table cloth covers.

P1310049

Before installing the crown, I had to patch all the top edge of the walls where the crown was before.

P1310050

P1310051

I also did a bit along the line of the baseboard, and later (not shown) I also fixed around all the plugs.

P1310054

P1310055

Crown reinstalled. This was easy since all the cuts and joints were already done, haha.

P2010057

Caulking and nail holes puttied.

P2010066

P2010067

Shellac sealer/primer. This is the most important step, and the likely reason why the previous paint job failed. This is a semi-transparent, and sort of beige sealer coat. It is made with shellac, and because of this, it's VERY messy, and you can only clean it off using alcohol (methyl hydrate in Canada). It is great, however, at blocking stains, oils, odours, varnishes, and it sticks to pretty much anything (including glass, and metal).

I decided to do the shellac primer BEFORE puttying the old screw holes in the ceiling from the drywall. This is because they were just too hard to see against the dark wood.

P2020070

P2020071

P2020072

P2020074

The white shellac also helped get a feel for how the finished ceiling would look, and it highlighted any of the flaws I might want to fix or patch before the final paint coats.

P2020077

P2020079

Overall I was pretty happy, but there were still a LOT of places where I went back over and nit-picked at for hours. Some spots were original flaws like cracked knots, but there were also the screw holes, and many little chippy paint bits along the edges of boards. I also had to blend-in some of the patched repairs and I used drywall compound for that (it's the easiest to sand).

P2020081

Once I was "happy" with the ceiling (or gave up and said it would be good enough). I started the first of two coats of white semi-gloss paint. This is not the same white trim paint I already have, because I think it's being discontinued. This paint is actually an exterior paint, but that just means it's made to hold up better to extreme weather and temperature changes. Indoor use id fine. It's a bit shinier than the rest of my "semi-gloss" trim paint, but I don't really mind.

P2050082

P2050085

P2050087

Looking pretty good.

P2050088

I did not fill any of the cracks or gaps in the ceiling (just to see how it would turn out), but after the first coat was done, I had just a few spots like these where I did go back and fill with acrylic caulking before the second coat of white. There were only about 10 spots that needed gap-filling. I wanted some thin cracks so that it matches the other ceilings on the main floor.

P2050090

You can really see how much difference there is between the shellac sealer and the white paint. If you wanted to, you could also do a regular acrylic primer over the shellac sealer.

P2050091

P2050095

I think this was during the second coat of white. It's hard to tell the difference in the crummy lighting.

P2050098

FINISHED CEILING!

P2050107

Depending on the light (angles) you can still see all the thin chippy areas, but 90% of the time it doesn't show up.

P2050108

P2050109

P2050110

P2050111

If it's anything like all the rest of the "glossy" paints I've used, it will dull down over time. For now it's nice and shiny, which actually helps reflect the light much better.

P2050113

P2050114

It was SO NICE to finally move everything back into the room. It's been a month and a half that I've had dining room chairs in the living room, and clocks all over the floors in the office and living room. I did move around a few pieces. I shrunk down the table (removed the leaf) and I moved that pine cabinet out of the room. I also got rid of the bench with all the plants in front of the window. The lemon tree was moved to a sunny window upstairs.

I still don't know what colour I want to paint the room. I want a light colour. Green would look good, but I already have 2 green rooms. Same for blue. I wouldn't hate pink, but it's not my favourite colour either. I've toyed around with yellow, but none of the shades I sampled were any good. I'm open to suggestions.

P2060116

P2060117

P2060118

P2060119