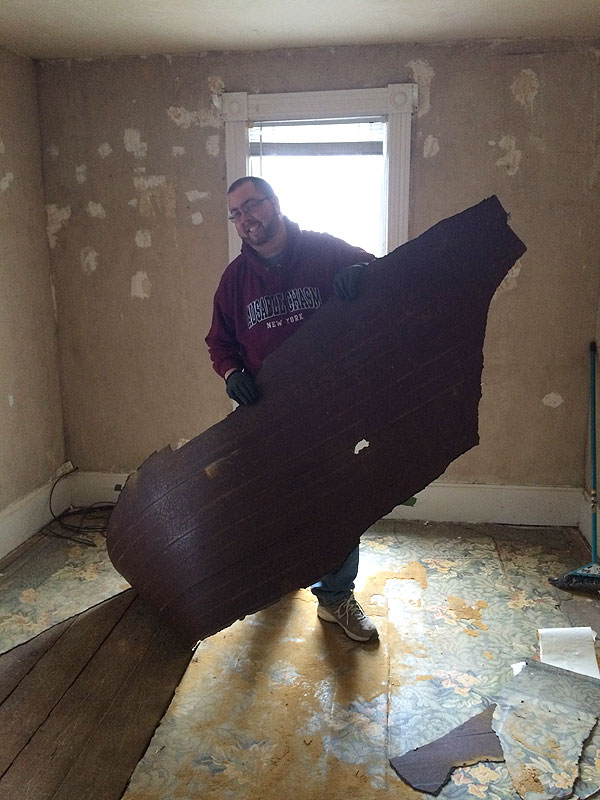
With my friends' permission, I'll be posting occasional updates on the renovation of their Victorian Farmhouse.
As I mentioned earlier, my friends have been looking to buy a house for a while. They had tried to buy a home a few months back closer to Ottawa (where they currently live), but the deal fell through. All the houses they've looked at have been either priced too high, or in poor shape. In the meantime, they've had this old farmhouse on the back burner and they weren't quite sure if they could do much with it, or how much it might cost to make it livable again. The farmhouse is also not exactly in an ideal location for them unless my one friend leaves her job, so they've been thinking about it on and off for a while. There are definitely a lot of pros and cons with this house, but I think after all the enthusiasm I showed for the place, they've decided to see if they can fix it up.
My friend had actually shown me some photos of the house on her phone months ago, but at the time, it didn't look too exciting. It wasn't until I actually visited the house in person that I really saw the potential in it.
Here's the rough scoop on the situation: the house is basically theirs if they want it. As in... FREE (minus all the renovation costs). The house, I believe, was her aunt's place (not 100% sure of this), and no one has been living in it for over 3 years, other than a few cats. Originally there was a bunch of disputes and reluctance about giving her the house because they didn't quite know how much renovating and modifications she wanted to make to the house. My friend is actually quite a bit like me (she loves old homes and she worked for many years at Upper Canada Village), so she didn't want to ruin the house, but rather save it and make it livable again, since it was already badly in need of repairs and maintenance. I assume that things were discussed and that everyone is okay with everything now.
I was told right off the bat (months ago) that if I visited, the house definitely smelled like cat pee. Lovely. When I actually did see it, however, it really wasn't that bad. Apparently there was awful shag carpeting everywhere that my friends had already taken out, as well as several layers of old linoleum. With all that out of the way, the bulk of the smell went away.
Without any further babble, let me start adding some photos. Here is the main farmhouse in all it's glory.

Attached to the rear is a rather dilapidated old barn. I'm not exactly sure when this was added, but the barn actually looks older than the house.

Now I know what some of you might be thinking: Yikes! And I wouldn't blame you too much for thinking this. I think all of us are thinking this to varying degrees.
One of the first things we're doing (other than removing all the added junky renovations) is to cut down all the trees, bushes, and vines that are growing against the house.
A few more quick notes before I move on. That back barn half is partially on a foundation. The rest (the back portion with the 2 garage doors) is sitting in the ground and sinking slowly. This barn is all made from hand hewn (enormous) log beams. The second floor is largely held up by just a few 20 foot long horizontal beams with no centre supports. It's kind of incredible, but also kind of terrifying. All the corner joints are notched and pegged together (very old construction). I really think that this whole back part is 2 separate additions, HOWEVER, from the inside, the roof seems continuous. I'll show photos farther down.
Anyhow, the back part of this that's sitting on a foundation is the kitchen (with the 3 part window and a door on the right).
Before things get confusing, here's a quick and rough floor plan of the farmhouse.

Notes on the floor plan:
The main road runs parallel to the front porch. The peaked gable is on the left side of the house.
Kitchen: The kitchen is in the barn addition, and as a result it is sunk down about a foot lower than the main farmhouse. It also has a bit of a low ceiling.
1. This section is part of the house that's on the cement foundation (the main farmhouse has a stone foundation). These are the steps that lead down into the farmhouse's stone foundation.
2. This section is NOT on a foundation, and it leads into a back (unfinished) section of the attached barn.
Living Room: The living room had a side door (facing the peaked gable and leading onto the deck) and we plan to install a main door here again. The house has no fireplaces, but there's a huge old grate from a wood furnace in the ceiling. Oddly enough, there is no additional floor protection where the stove would have sat (stone, or sheet metal, etc).
Office: This was likely the original parlor or library room of the house. The dotted line shows the place where an original archway was sealed-up in the 1920s (we've opened this up again already - pictures in the next post). We're not sure if the current archway was there, however, since the mouldings on it don't match, and neither does the flooring.
3. and 4. in the small bedroom are some built-in closets that make the room feel even smaller. I'm not sure if we're removing these yet, but there's a good chance we are. This room still has the old carpeting.
5. Closet in the pink master bedroom (plank door).
6. These two thin lines represent the sloped ceilings.
Bathroom: The bathroom is teeny tiny, maybe 6 feet square.
Alright, on to the house tour. Keep in mind that this house has had many renovations over the years, and that the little old lady was VERY fond of wallpaper.
Kitchen:
The kitchen will probably be the most challenging room to work out. This entire room sits on a foundation that might not have been built/poured correctly, and I have no idea what the plumbing or electrical is going to be like in this room. This addition is very old (the construction is all old barn wood) and it has had a few alterations already. The current door (the metal door leading onto the deck) is VERY crooked, and there are visible air gaps where you can see outside at the top. The room currently only has the one window, plus the windows of the side lights of the main door. The current plan is to gut the room and close-up that door to replace it with a window instead. The main door would then be switched back for the old location in the living room (leading onto the deck).
Despite all the problems with this room, it's a huge room with a lot of potential! There is definitely enough room to do an island, and there's room for half of it to be a dining room as well.

The sink is currently in a terrible location. Also note the drop in floor height.


Living Room:
The living room has the most character and a really wonderful atmosphere. It is the best lit room in the house, with 3 windows. The issues in this room include a really big hump (or two) in the floor, and some ugly HVAC and plumbing bump-outs in the walls. The main electrical panel is also in a really awful place right in the "V" corner between the kitchen and deck. I don't have a good photo of it (until later on). The current plan is to see if the main electrical panel can be relocated in the basement below, or into the kitchen side.
This room features an original tongue-and-groove ceiling, and wainscoting. All of the old farmhouse also has its original old windows. The current plan is to fix them (they're in fairly good shape).
The other issue is all the wallpaper. There are at least 4 layers of wallpaper over the original rough plaster. We've removed 80% of it so far.


This is pointing towards the deck side. The main door will eventually be the opening on the right with the roller shade in it. Also note all the plant hooks in the ceiling. I think I must have removed about 10 of them.


The original mouldings in this room all match this profile except the archway into the office room.

The office room archway has this profile:

Here are some of the wallpaper layers. There's a stripe, the green damask, and a blue and grey bouquet pattern. On top of all this was also another pink and beige floral, which you can see in the photos above. The green damask is actually kind of nice (it has a metallic look) but I think it would have looked quite dark in the whole room.


I didn't get too many good shots of the office room. It's a rather small room, maybe 10' x 10', and this wall shows the outline of the original archway and mouldings, which would open up into the main hall with the staircase. The room has 2 windows. One looks on to the front of the house (main road), and the other faces the right side of the house.

This is from the office, facing into the living room, with the kitchen doorway just visible. The built-in bookcase in the living room used to be a window at one point. This room was also covered in wallpaper, but my friends had already removed it, and it had come off easily. The blocked archway is just to the left.

The front rooms of the house all use rosettes (including the windows of the office) but this pair don't match all the others. They are, however, old enough to have been installed with square nails, so they've been there a very long time. Also note that the casings match the profile on the opposite side (photo above).

Main Hall & Staircase:
By far the prettiest feature in this entire house is the Victorian Staircase. I don't really know the age of the house, but it's old enough that it didn't originally have electricity, plumbing, a kitchen, or a decent heating system (wood stove). It sits on a stone foundation, and I assume the only source of light would have been candles and oil lamps. I believe the electrical system only dates to about the 1950s or 60s.
In this photo you can see the front door, which leads into a later porch (small with a low ceiling). The original archway into the office/parlor would have been on the left wall. Some ultra sexy features of the room include acoustic ceiling tiles, and 1/8" plywood on the walls, covered in wallpaper. The thin (later) mouldings at the ceiling and covering the plywood seams are all in baby blue plastic/PVC.

You can see, however, that the hall still has all the original mouldings, with casings that match the ones in the living room, except that they use rosettes instead of mitered corners. The rosettes are 5 1/4" square, and 1 1/4" thick! The original casings are 7/8" thick. Not exactly something you can still find at your local lumber yard.

The staircase is WONDERFUL. It does, however, need work. The banister is very loose, as are all the spindles. Aside from that, it's in great shape!


You can see the edge of the plywood next to the rosette.

Every single spindle on the staircase is hand turned, and very much "eye balled". None are exactly consistent, and I absolutely adore this.

The main problems with the main hall are largely cosmetic except for a huge buckle in the floor at the base of the steps. I'm talking like 2-3". It's practically a small hill. We'll be checking this next time I go over. We might be able to pull it down.
Second Floor
Landing:
Here's the second floor landing at the top of the staircase. The upstairs has only 2 rooms plus the tiny bathroom and landing. This window is the one in the gable peak on the side of the house. To the immediate left is the master bedroom, behind me is the small bedroom, and to the right is the bathroom.


There's a section of the Ottawa Farm Journal stuck to the floor at the top of the stairs with the date October 30 1925.

Bathroom:
The bathroom is roughly 7' square. It's teeny tiny. There's only enough space for the toilet, vanity, and bath. Lavender anyone?


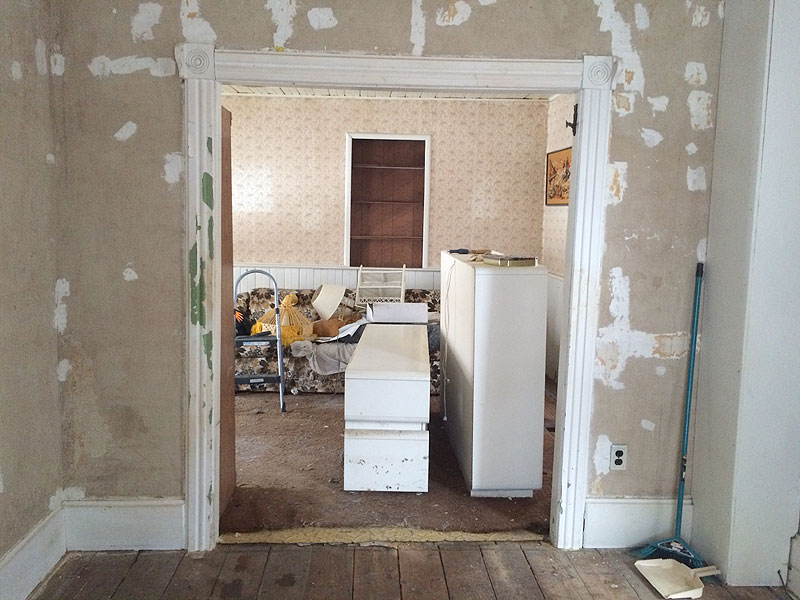
Small Bedroom:
I guess the small bedroom would be the guest bedroom or spare bedroom. I believe she said her grandfather occupied this room. It currently has some pretty atrocious decor. Wallpaper, wood grained paneling, and a green shag carpet. It is currently still filled with old furniture. There are 2 rather large and bulky closets in the room.


The original doors upstairs were a rather lovely 3-over-3 style with rim locks. One of the locks is intact, and the other is missing. Two of the three doors are still original (the bathroom door is newer). I might see if we can find a matching old door for the bathroom. The closet doors (in the living room and master bedroom seem to have always been just plank doors).

Master Bedroom:
This room is a great size, and it has 2 bright windows overlooking the main road (front of the house). The room has had drywall added over the plaster. I'm not sure if we're leaving this alone. or removing it. At least one section will need to be patched (old roof leak).

I'm not exactly sure what ran through here. I assumed it was from a stovepipe, but below this is the main hall, and there was no corresponding hole found under the acoustic tiles. We plan to patch this, and the original pine floors will be repainted and kept.

Plank door to the master bedroom closet, with beautiful Victorian hardware.

Master bedroom main door, looking through the landing and into the bathroom. Note the electrical light switch is currently set up over the drywall, and on the wrong side of the door. This is the door with the missing rimlock set. It still has the catch, and keyhole escutcheon, but the mechanism is missing. We actually found one in the old detached barn, but it's missing parts, and VERY rusty.


Barn:
Here is the attached barn addition. This is what's directly over the kitchen! It looks like it used to have an exterior wall that ended where that chimney is (fitted for a wood stove), but the rest of the roof seems continuous over the length of the whole building. There's a single window behind me to the left. If you go back to the top of the post, you can see where this chimney pokes through the roof in the second photo.

Just forward of this (with a lower floor) is the really saggy back portion of the barn. The entire floor curves down in the middle by several inches. This part of the barn is in no way weatherproofed aside from the roof. The far wall has gaps where you can see outside. There are also weak floor boards and holes, so you have to be very careful where you walk!

The stairs leading up/down into the barn are up against the back part of the kitchen (on a foundation), and it looks like it has traditional exterior wood siding.

My friends would love to level this back part of the barn, and seal it up to make it usable, but we have no idea how much that would cost. It's a huge building, and it would need a proper foundation, as well as additional bracing and supports to level everything out. For now we're focusing on the main house.