Saturday, December 27, 2014

End of Year Wrap-Up

Ho boy, I've been lazy with my blog and updates, and I sincerely hope you guys and gals haven't abandoned me, or given up hope on this blog, since there's still so many more projects left to do (and hopefully some big ones coming this year).

This post is going to wrap-up a whole bunch of projects I've talked about this year, but that I haven't posted any photos of yet. These mainly include mundane/uninteresting projects, but I'm still posting them for you (and for my own record keeping).

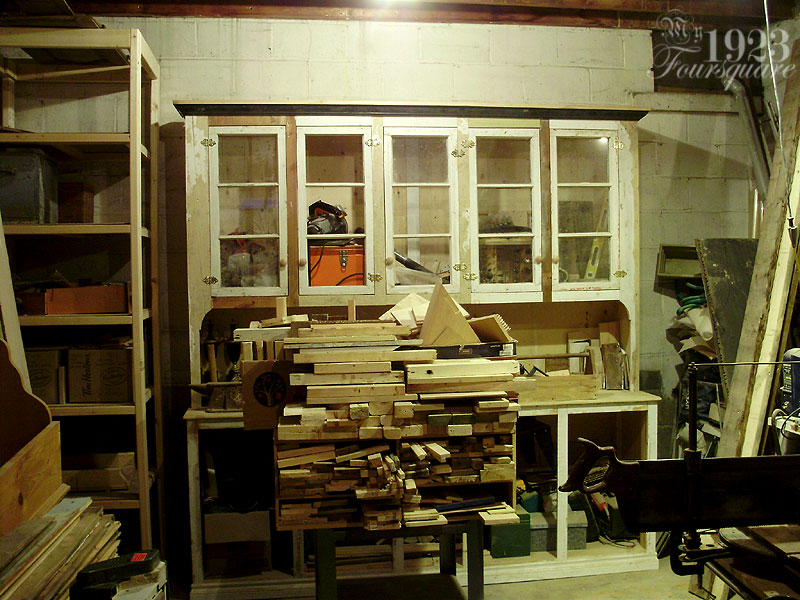
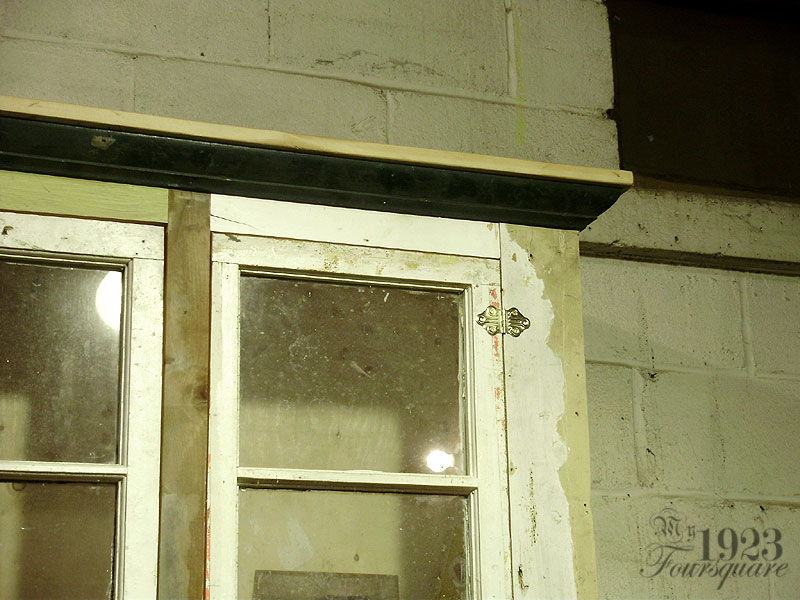
First, OLD projects. I mentioned making a bit more progress on the "shop hutch" earlier this summer. This included fitting all the doors (old windows), installing the hinges and knobs, and installing some old salvaged crown moulding to the top. I still have the 4 bottom doors to cut and fit (just plain flat doors), and 3-4 drawers to make in the centre opening.

Another project that I never showed is the large (9 foot tall) storage rack/shelving unit that I made (which is standing in the left corner next to the hutch in this photo below). It's hard to tell the scale, but trust me, it's massive. The hutch is 97" tall (a hair taller than your average 8 foot tall ceiling), and the shelving unit is a foot taller than this.


Crown moulding detail:


Again, this entire hutch is just crudely built, and was made entirely out of SCRAP wood, and junk parts (other than the hardware). The crown moulding was free.


Next I'll show the work that was done in the back staircase. This "room" is hard to photograph, and there's also some junk in there currently (old doors, and a bicycle) so the photos are likewise awkwardly taken.

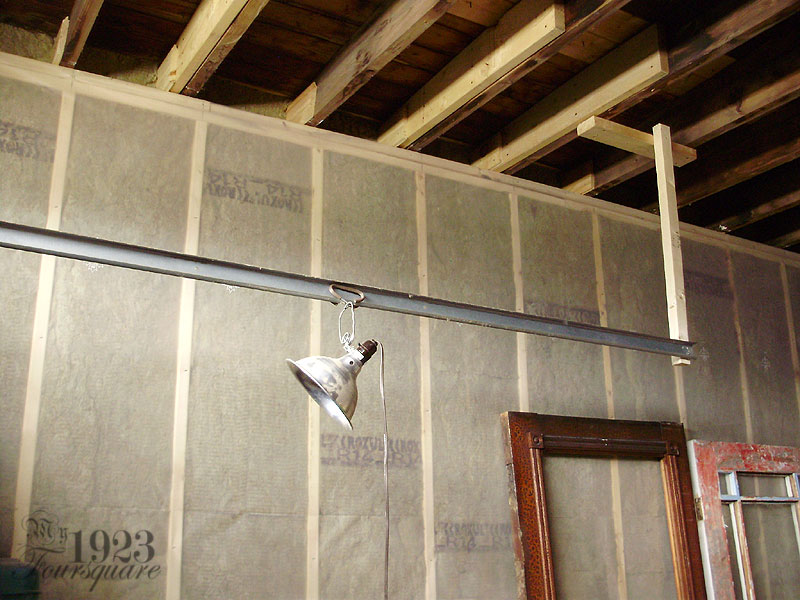
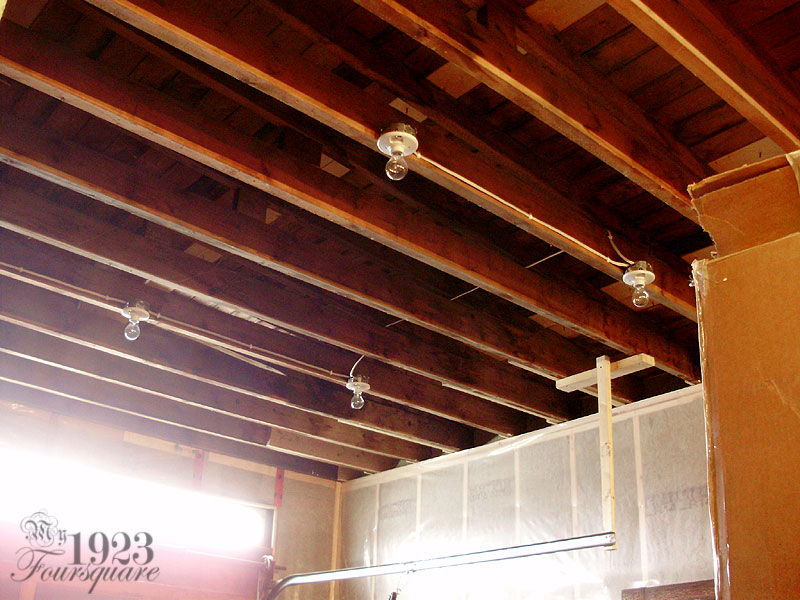
Basically, if you can remember YEARS ago before I gutted this room, the ceiling was horribly sloped (see photo). This was because the wall with the window ended on the flat roof, which has a 1:12 pitch. The made it very awkward for the drywall, and this was why it was all crooked. It also didn't transition well into the straight lower section (garage ceiling). I spent a bunch of time basically calculating the new angles, and arranging a set of guide wires, and installing new 2x4s in the correct locations. This fixed the ceiling, and once the new drywall is installed, it will look great. I also insulated the whole space, and installed (or started installing) a vapour barrier.

Before:


Now:


I spent a considerable amount of time relocating the light fixture to the centre of the room. Originally (you can spot the old hole) it was near the top of the door. Now it's closer to the centre of the ceiling, and if I want, I can install a hanging fixture which won't interfere with the door.
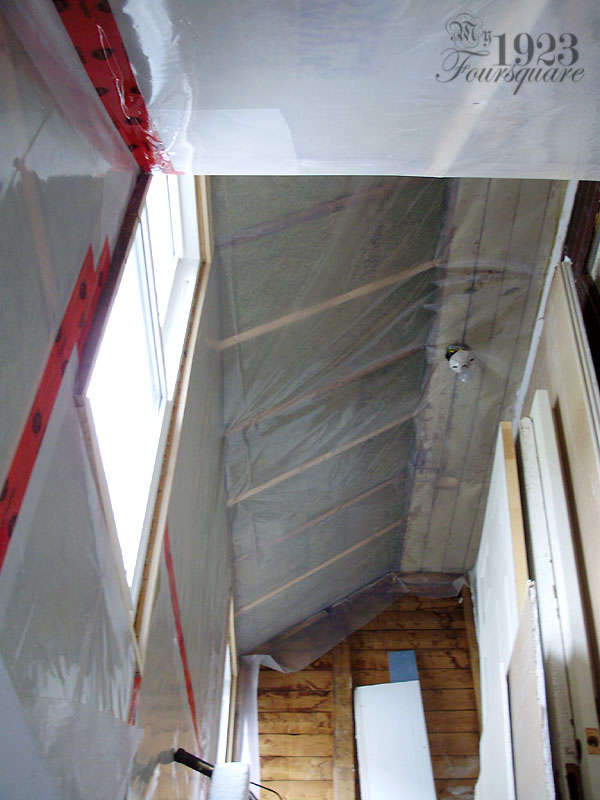


I still have that back wall to insulate (it's only the thickness of a 2x4 though (and I have no idea why since all the other walls are 3 1/2" deep).

These are the wood strips around the windows that I needed to install. The drywall will end next to them, and they will be completely covered by the new mouldings. You can also see one of the two new outlets I installed (in case I want to have Christmas lights in these two windows - and somewhere to plug a vacuum, etc).


By far the biggest undertaking this year was the rebuilding of the entire 28 foot long exterior wall of the garage. Over the past few months I've been installing insulation and vapour barrier on it in preparation for drywall (the entire interior of the garage will be finished in drywall, and painted, along with window and door casings (eventually).


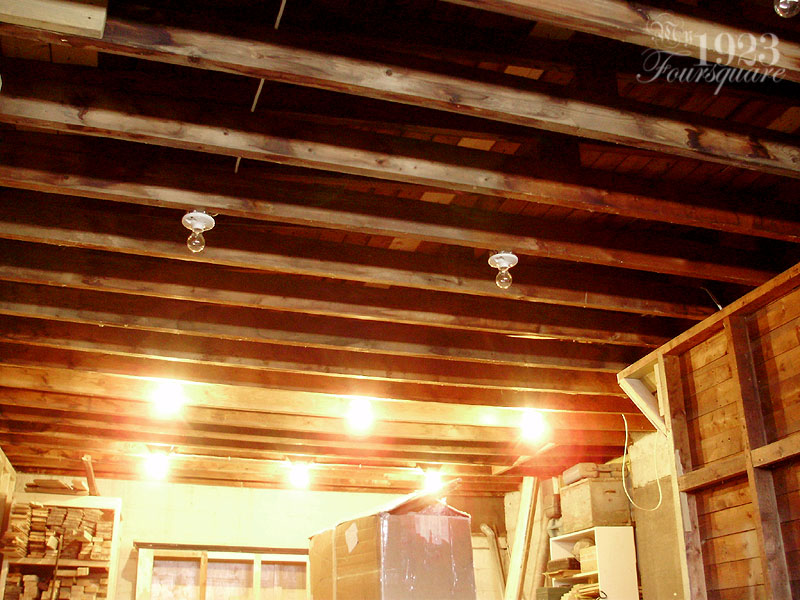
I also installed new (old fashioned and inexpensive) light fixtures. These are new octagonal boxes fitted with plain porcelain fixtures and clear bulbs. They're on 2 circuits, one having 4 lights, and the main one having 6.


Next, I have a few fun woodworking projects to show off.

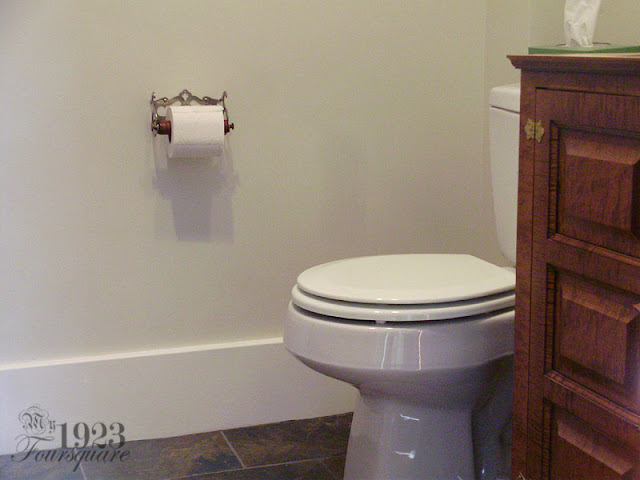
For about 1 or 2 years (or possibly even longer?) I've been making do with this metal rod to hold my rolls of toilet paper, all the while planning to make a suitable replacement for the missing original. Since I was making this new, I decided that it should match my curly maple vanity (most antique ones are just painted black).

Before:


After examining several photos of original toilet paper holders, and even buying a beautiful old set of chrome bathroom accessories (the holder was not the same size though), I found a fairly simple way to reproduce the roll holder. I used spare clock door handles for the knobs, and added some wider flanges on their bases. These were then threaded, and matching brass inserts were made for the wooden rod. The inserts were hammered in place (very snug friction fit), and then I finished the parts to match the vanity.

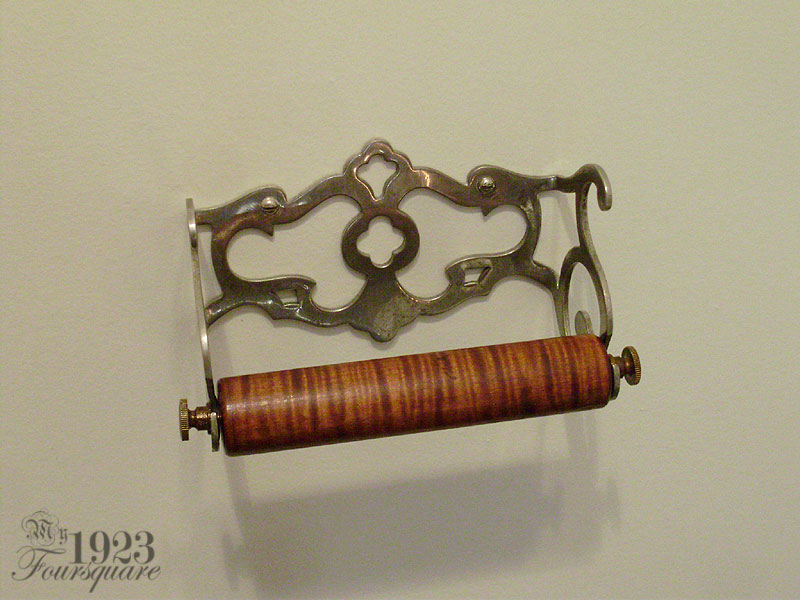


The brass knobs were antiqued with a thin spray of coloured lacquer.
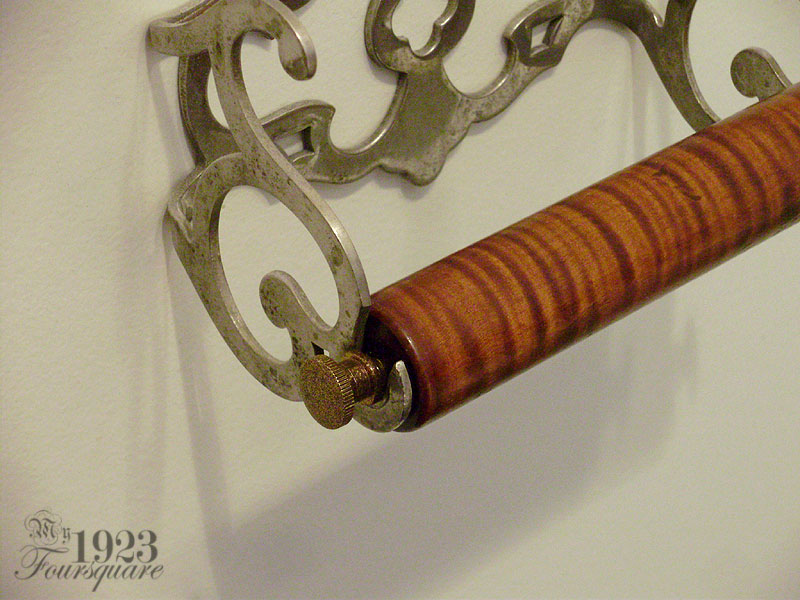


You can see how the reddish brown is a perfect match to the vanity (I used the same wood, and the same stain).


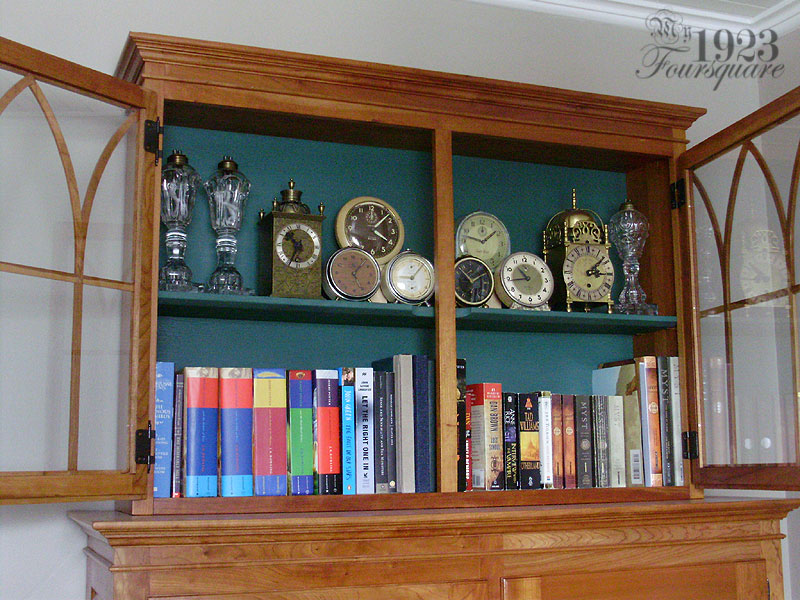
Then I finally made the top display shelf for my Cherry Bookcase. I may want to change around the display in there, but currently I have 2 small clocks, several old alarm clocks that were in my grandfather's old things, and 3 of my early whale oil lamps (and books).


The shelf was made in pine, and bevelled on the front edge to make it look a bit thinner. I also had to make a curved cut out at the front to allow room for the two door catches. I painted the shelf to match the backboard.


Lastly, I have just two more oddball bits of news to share.

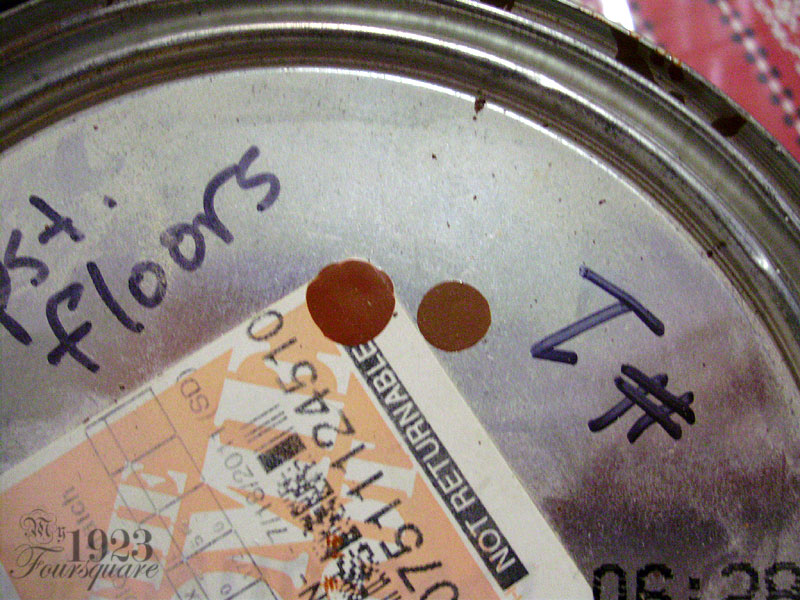
First, I was THRILLED to find one store that still had a bit of tintable oil paint for sale. As some of you might know, pretty much ALL oil based (alkyd) paints have been taken off the market, except for spray paints, and a few "Rust Paints" like Tremclad. Unfortunately, I still haven't painted the upstairs floors (there's the spare room left), and I still need oil paint.

The man was able to match the colour through the computer (I knew it was Florence Brown off the top of my head) but when I got home, I noticed it's not the same shade. AT ALL. It's fine though, since I'll simply use it for the first coat, and I should have enough of the "L" Room floor paint to do the second coat.

My original colour is on the left, and the new (lighter and less reddish) is on the right.


The last bit of news was a failed house explore that I'm still sad about.


This is a gorgeous, and rather large house near the outskirts of town. It has been slowly decaying for at least close to 10 years, and just this past year or so, part of the front porch has rotted and collapsed. I wasn't sure at first if it was really abandoned or not (and I'm still not 100% sure - you'll see why in a minute), but it has a rotting roof fascia, at least 2 or 3 broken or open windows (note the basement window on the side of the house is tilted open), and from walking by it, it looks largely empty (almost no curtains, and no visible furniture). One of the attic windows is wide open (and according to Google Maps has been wide open at least since summer 2013).

I went to go look at this place about a month ago, and it was quite cold outside. Despite the fact that the house appeared completely abandoned, there was a sign on the side door (which looked ajar) that said "Private Property", and it appeared that the house was still be hooked up to electricity (the meter was still there, and looked to be working). This left me quite confused. There was also a boat parked in the open-front garage at the back.

I was just about to head for the side door when a man across the road yelled at me: "Hey! That's Private Property!" So I just told him I was looking around, but he kept an eye on me, and I just left. I assume he might be the owner, and I *SHOULD* have just asked him, but he really didn't seem too friendly so I don't think I'll be headed back there. I had gone around 10am on a Tuesday, so if this guy wasn't at work then, he's probably retired, or he works from home. Since he's already spotted me, it's too risky to go back. I don't want to get caught or have the police called on me, so it's not worth returning, but part of me REALLY wants to see the inside. I guess it just wasn't meant to be.

Other than this house, I've pretty much exhausted the supply of abandoned houses in town. There are around a dozen, but all of them are sealed-up tight.

Tuesday, November 25, 2014

Adventure Time!

And I don't mean the mathmatical kind! (100 points of you catch the reference!)

Over the past week or so, I've stumbled across some great "urban exploration" videos on YouTube. Basically, videos of people visiting abandoned buildings, old farm houses, and industrial sites. Some of the houses are simply jaw-dropping, while others are eerie, mouldy, and packed sky-high with years of trash and filth.

So far, I have two favourite channels DaaDeeOh, and TikiTrex (and both happen to be in the southern Ontario area). Below is a sample video from each channel so you can go find them if you want.

DaaDeeOh is one of the first I found, and all his videos are filmed with no voice or commentary. He has some really wonderful finds (also check out the video for "Abandoned 19th Century Farm House at Taunton Rd." which was my second pick to feature).

Abandoned 1870 Victorian House North Durham:


Then there's Pam (TikiTrex), who also has quite a lot of great videos. She tends to be a bit slower, or skips over stuff I'd like to see, but she also has some great house finds!

Untouched Abandoned Farm House:


Having watched dozens of these fascinating videos, one of the things I learned very quickly is that the vast majority of these places are easily accessible. Either the doors are wide open, unlocked, or there's some sort of gaping hole (or window) where you can easily enter to explore the building.

For months now, there's been a boarded-up Victorian just down the road from me (near a busy intersection) that I've really wanted to explore, but in this case, it's completely boarded-up, locked, and inaccessible.

That didn't discourage me, though, and I went out today actively looking for an accessible house I could explore. I decided to walk around the streets in the really poor end of town to see if I could get lucky, and stumble upon an open building.

And I did!

Now, when I say the "poor" end of town, I MEAN it. Some of the houses were in such rough shape that it's hard to believe they are actually inhabited. It's not uncommon to see windows covered in plywood or plastic, so I really had to look for the right clues. One clear indication that a building is abandoned is that the doors and windows are boarded-up, but I often had to double check. I saw about 3 or 4 of these, but none had access. Another good sign is if the power has been cut off.

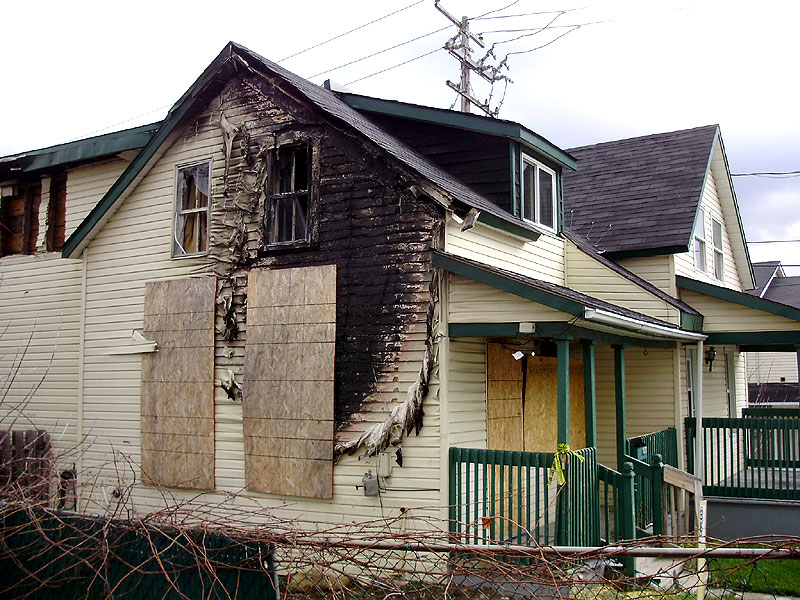
The house I came across was a lucky break. It is a duplex located on a street corner, where one half has suffered damage from a fire. The half of the house nearest the corner appeared to be completely undamaged.


Going down the sidewalk towards the back of the house, I noticed that the power was disconnected, and I spotted an open door on the back porch (the barely visible screen door), so I decided to go around the house and check it out. In the photo, the porch with the yellow caution tape leads to the boarded-up (burned) half.


Here's the burned half.


It's too bad this half of the house wasn't accessible (and it wouldn't have been safe), because this part is actually much older, and it still had the lovely old wooden windows.

Moving on, I quickly darted around into the back yard, and up to the back porch of the undamaged half. The screen door was ajar, and the door leading into the kitchen was closed, but unlocked. In this photo, I'm standing in the kitchen, and you can see into the small back porch a bit (note old computer chair).


Walking into the house, I was made immediately aware of the sound of running water coming from the basement. The house had been cleared-out, and it was clear that no one had been around for quite a while.


I did peek into the fridge and freezer, and yes there were a few items of mouldy food left behind. Eww.

Aside from this, the kitchen was quite cute, and I like the simple layout.

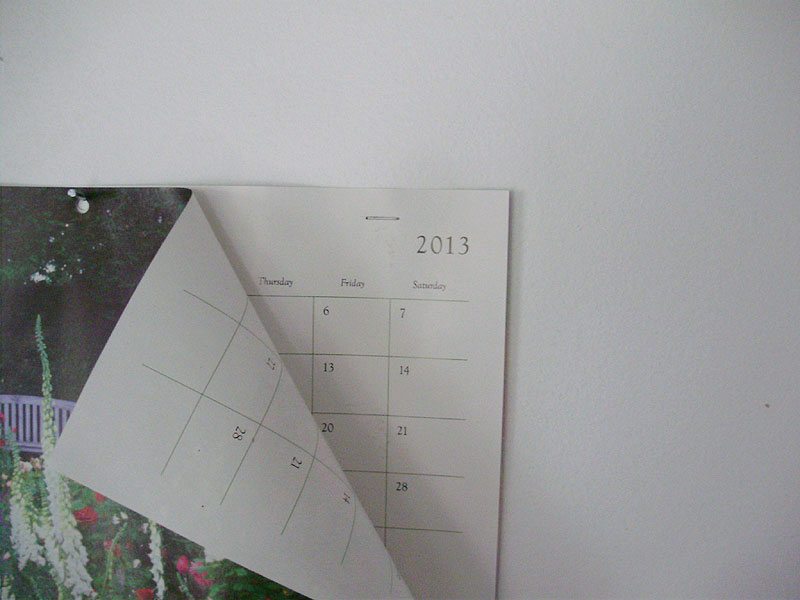
A calendar next to the basement door was left open on January 2013. I'm guessing it's been empty for about this much time (almost 2 years).


The kitchen is open to the living room with a large open archway (right next to the calendar wall).


As I headed towards the stairs, I noticed that the front door was also unlocked.

The house was definitely fairly old (1920s? 30s?) and you could feel a slant going up the stairs. I had expected the house to smell like fire/smoke, but it didn't really have any smell. The fire was completely contained to the other half (and there was no access from this half, it's literally two separate houses stuck together).

The house is pretty tiny. The entire first floor is just the living room, the stairs, and the kitchen, and the upstairs was even smaller because of the sloped ceilings, with 2 bedrooms, and a small bathroom.

The bathroom was directly ahead of the stairs. It had a toilet (with a chunk broken out of the base), a shower stall (no bath), and a small sink and vanity. The area to the left of the toilet was just a small area of floor with a trash can. Over the top right of the toilet was a small (built-in) storage cabinet, with the rest being an alcove (presumably for a dresser) in the small room on the other side.


Not much was left behind, but there was shaving cream, and a few toothbrushes in the medicine cabinet.


Here's the top of the stairs. The landing is quite small, and it led to 2 bedrooms, and the bathroom. There's a larger room at the front of the house (2 windows over the front porch), and one at the back of the house (1 window over the back porch).


Just about the only thing in the entire house that would have been "worth taking" was this old cast iron floor grate (which matches mine) but it was broken. I'm 99% sure this place will be demolished at some point, which is sad, since it's a cute little house.


Here's the front bedroom, overlooking the front porch, and the street corner. The windows looked pretty new. Note all the junk in the front yard across the road.


Then here's the second bedroom. It was quite small, and it had a large exercise machine in the middle. The bathroom is just on the other half of the left wall.


There wasn't really much to see in this house. No interesting old fixtures, no interesting old junk, so I headed back down to the first floor. Here's the calendar which gives us an idea of when it was vacated.

Throughout the entire explore, I was really surprised to see no signs of vandalism (other than the broken toilet upstairs, which could also have been accidental). This is a house you can just walk right into, and it's in a very sketchy neighbourhood, and it's in near perfect shape.


The only place left unexplored was the basement.


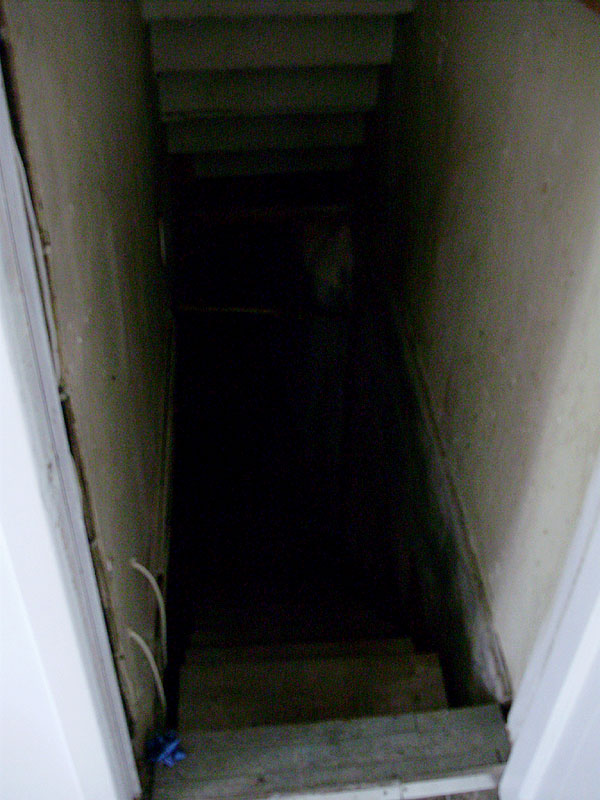
It looked quite dark, and I really didn't know if I should go down there or not. I came prepared with a small flash light, so looking down, the stairs looked very solid, and I decided to go have a look.

Again, I'll mention that there was the sound of constantly running water coming from the basement.

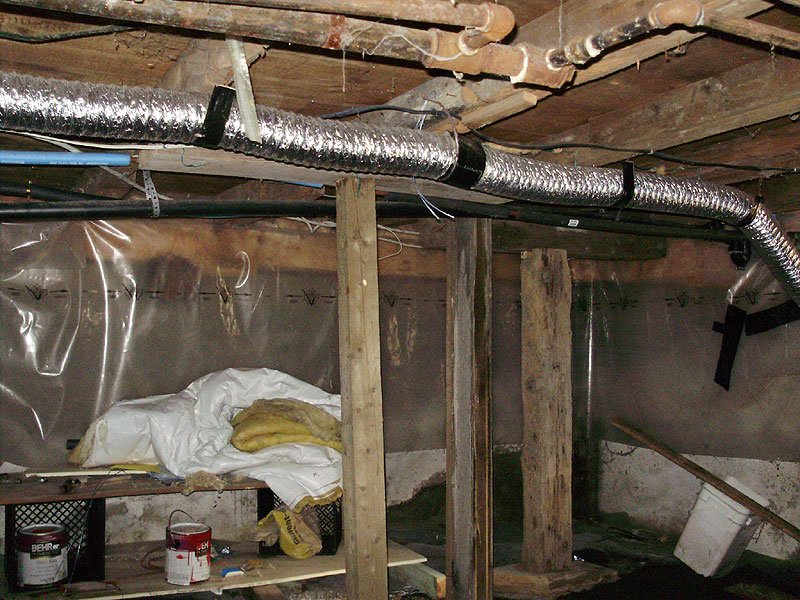
The basement actually wasn't too dark, since there was a small window, but it was very low (5 feet high?), and definitely a bit creepy (though I wasn't really creeped out).


I thought it was neat that it had a tree-trunk beam, similar to my house.


It also had bits of old knob and tube ceramic insulators (making it definitely old, 1930s or earlier).

The entire floor was covered in crushed stone (I'm guessing it's a dirt floor?), and the rushing water was coming from this disconnected water pipe next to the hot water tank.


The main water line (and the shut-off) was just next to the bottom of the stairs, but the valve didn't seem to work, so I couldn't shut the water off.

Otherwise, nothing really interesting to see in the basement. As I came back into the kitchen, I noticed that the pipe from the washing machine hookup (just to the left of the closet in the first photo) was also leaking onto the floor.

Overall, a very neat little adventure. It's really too bad about this little house. I think the burned half could be knocked-down and this half rented out, but who knows what will happen to it. It might be fun to find out who owns it, but I don't think I'll bother.

After the initial thrill of this house, I also tried to get into this wonderful old foursquare nearby, but without any luck.


As you can see, both electric meters have been removed, but there's also a power line going to another spot in the porch (an old fuse panel?) which I think isn't hooked up (but who knows). The general state of the house seems to indicate that it could be abandoned (look at the roof!) but the front door (leading to 2 separate doors) was locked, and I wasn't 100% sure if it was empty or not. The entire front porch was piled with old junk, and so was the alley way on the left. The mailbox was also crammed full of old faded mail.

I did keep looking for other houses, but my adventuring was ended by the weather. It started to rain, so I got on the bus and headed home. I'll definitely be keeping my eyes open for other house exploring opportunities. I know I missed a FANTASTIC opportunity to explore an old house 2-3 years ago. It had an open side door, and it looked empty (and gorgeous, with unpainted woodwork, old grates, hardwood floors, etc), but I chickened-out and it was demolished not long after that.

Friday, November 07, 2014

Apartment Renos

For the past few weeks, (at work) we've been renovating and painting my boss' rental units (two of three which are in a building right in front of our shop). Basically, the main floor tenant moved out, so we fixed-up the main floor apartment (gutted the bathroom, changed the light fixtures, fixed a few doors, and painted everything). Then the basement apartment tenant moved into the main floor apartment.

Now that I've been working in the basement unit, I can't help but really appreciate my tall ceilings, and large, ornate casings. The basement apartment's ceiling ends just about an inch (or slightly less) above the thin colonial casings (the standard ones you tend to see everywhere). It's not too bad for most people, but when you're 6' tall like me, it just seems really low. I much prefer having a ceiling high enough that I can't touch it.

I should take just a moment to point out that the building is quite nice, and sturdily built. It dates from around 1936 or so (according to my boss, and also according to the dates on some of the oldest drywall fragments found). The main floor still had some of the original (thick) mouldings, including a beautiful archway in the hallway.

While I'm at it, here are some of the renovation photos (first floor apartment). To make it more simple (fewer photos and explanations) I've set these up as grouped "before and after" shots.

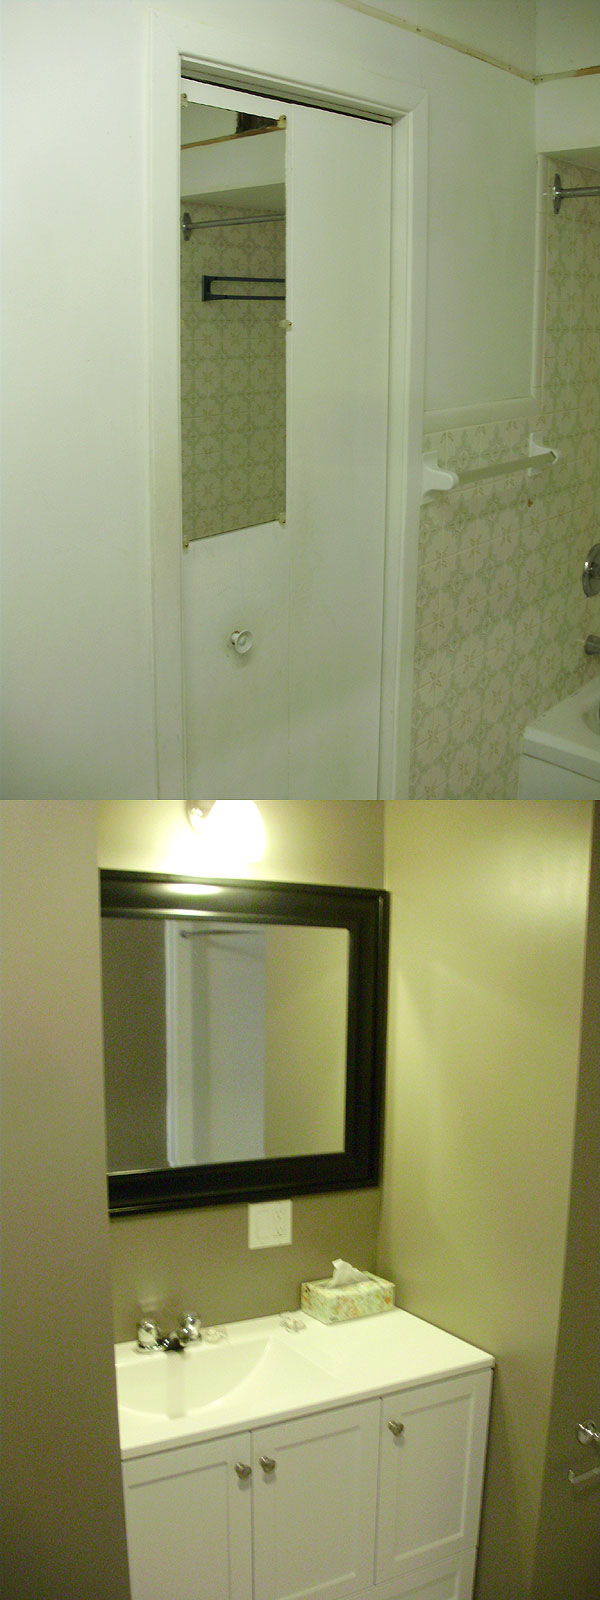
Here's the bathroom. This was gutted to the studs. New drywall, new floor, etc.


Completely new tub and surround. The old tiles were quite nice, and came off easily, so I salvaged 95% of them, as well as the old ceramic towel bars.


This entire wall was knocked-out (including the closet on the other side) and completely rebuilt to fit the vanity here.


Another shot of the new vanity. It's kind of neat because it has a bottom drawer, which works well if you have plumbing coming off the wall.


We installed a larger door so that the washer/dryer could fit inside.


Here's the much improved kitchen (doors taken down, painted, and everything reassembled)


Lastly, two photos showing some of the nice old details. Not many of the old mouldings remain, but what's there was quite nice.


Anyhow, that random side note aside, the only other house news I have to report, is that I've done more work in the back staircase (attached to the garage). I've pulled- down some of the insulation, and relocated the light fixture at the top landing. After this was done, I replaced the insulation, and finished attaching my vapour barrier.

I also installed wooden filler strips along all the necessary doors and window openings. Normally the window openings come up flush with the drywall, but in this case, the original window openings had been modified, or not meant to work well with a drywall installation, so the strips were needed. These strips just give a clean edge where I will be able to attach the finished mouldings, and decorative "stop mouldings" around the inside "jamb" to hide the insulation round the window insert edges. I'll show this in more detail later.