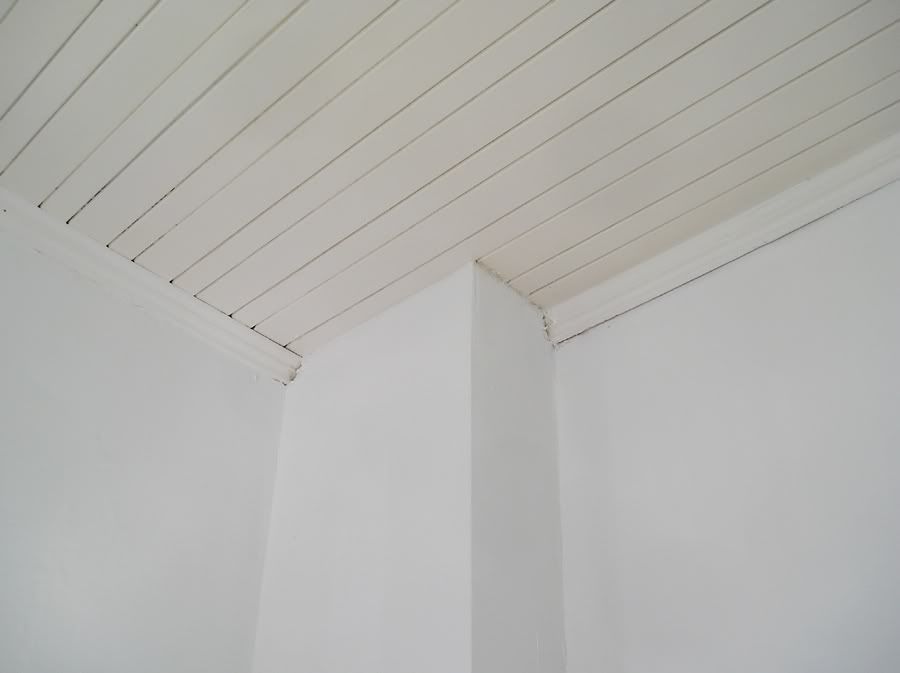
Today I did the first coat of white (trim paint) on all the crown in the Office & Living Room, as well as the LR door casings.
I'm still not sure what I want to do with the ceiling t-g. I am thinking about painting it with just one coat of the trim paint (semi-gloss "natural white") but another option would be to use a flat ceiling paint. The flat would hide the imperfections a bit better, but I think the glossier paint would look nicer with the light reflections off the shadow lines (grooves).
What do you think?

Tuesday, April 30, 2013
Monday, April 29, 2013
Painting
I have a "love-hate" relationship when it comes to painting. Trim is annoying, but once I get started I find it to be enjoyable. I hate the cleanup, and even more, I hate when the brush picks up floating chunks in the paint (usually when I'm nearing the bottom of the can).
That said, I've painted 2 coats of BIN 1-2-3 (shellac) primer on the pine portions of the crown mouldings, as well as on the exposed "old shellac" spots. This will ensure that there is no bleed-through of the varnish or pine sap.
I've also spot-primed all the wall repairs in both the Office and Living Room. I also painted the primer on the door casings for the LR door.
Next will be to prime all the new drywall and corner seams, and re-coat the crowns with the acrylic primer. I wanted to do this all today, but I noticed that I'll need to do several additional drywall touch-ups before I go ahead with this. I'm waiting because I want to do the front hallway (prime the new drywall) and the L-Room walls all at the same time, since I'll have a roller dirty (that's 4 rooms).
Hopefully I can do all those touch-ups soon, since I'm itching to paint the Office walls.
Sunday, April 28, 2013
Work Continues...
I installed all the rest of the reproduction crown today in the Living Room. This means that all of the crown (for now) is done. The only room left that will be getting crown is the kitchen, but that will be farther down the road.
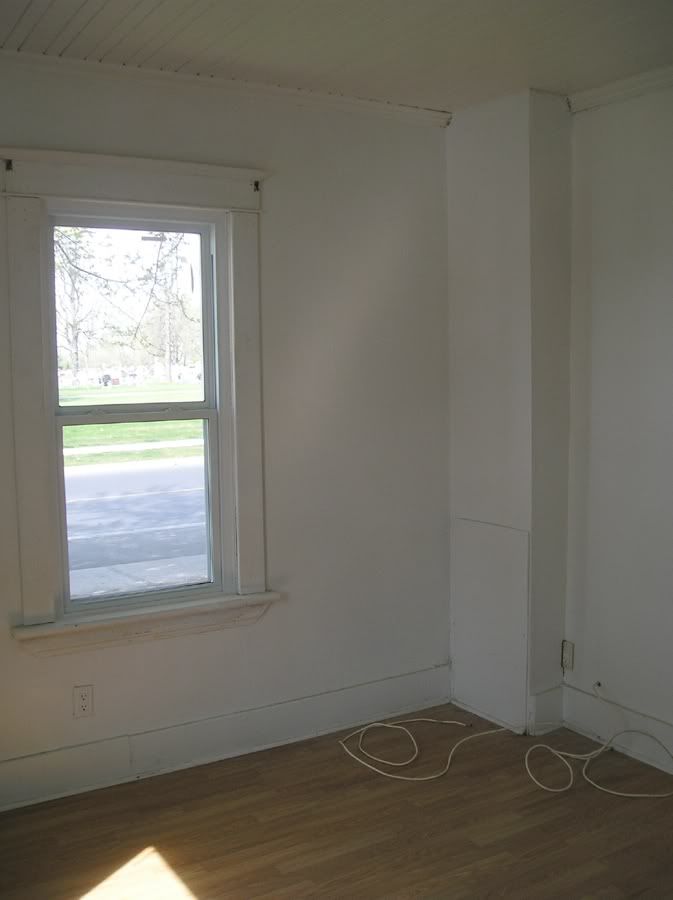
Here's the "Master Bedroom return ducts" corner:
For reference, the right hand wall is the centre wall (Dining Room on other side), and the left wall faces the graveyard).


And as a fun reminder, here are two of the old (first day I got the house) photos. What a mess that was.
Here's the other duct corner (Master Bedroom closet vent). This was the one that I had to cut out a few weeks back.

This guy:

Here's another view. Centre wall on the left, staircase/entrance to Living Room on the right.


Here's where the crown meets back up with the rest of the original stuff (exterior walls). The arrow points to the drywall corner repair that I did. You'll understand why it's funny to point out in the next photo.

Here's the before. The darker spot that's visible is actually just a sh*t-ton of acrylic caulking finger-painted into the crack. They did a poor job on their drywall install, and because the ceiling is so sloped/crooked here, they had a triangular wedge (hole) in this spot. Instead of patching it with paper tape and mud, they just used caulking. -_-
I also went ahead and made that matching repro moulding for the Office built-in. It was made out of 2 pieces combined/glued together, and it's a near-perfect match to the other originals (even better than the other repro ones I had gotten made at work).

So now I just have one or two other small touch-ups (deep gaps to fill in corners with the caulking), and then all the trim in the Living Room, AND Office will be ready to paint. Actually, once the trim is painted, I can also go ahead and paint the walls (which I'm excited about!)
Stay Tuned!
Here's the "Master Bedroom return ducts" corner:
For reference, the right hand wall is the centre wall (Dining Room on other side), and the left wall faces the graveyard).
And as a fun reminder, here are two of the old (first day I got the house) photos. What a mess that was.
Here's the other duct corner (Master Bedroom closet vent). This was the one that I had to cut out a few weeks back.
This guy:
Here's another view. Centre wall on the left, staircase/entrance to Living Room on the right.
Here's where the crown meets back up with the rest of the original stuff (exterior walls). The arrow points to the drywall corner repair that I did. You'll understand why it's funny to point out in the next photo.
Here's the before. The darker spot that's visible is actually just a sh*t-ton of acrylic caulking finger-painted into the crack. They did a poor job on their drywall install, and because the ceiling is so sloped/crooked here, they had a triangular wedge (hole) in this spot. Instead of patching it with paper tape and mud, they just used caulking. -_-
I also went ahead and made that matching repro moulding for the Office built-in. It was made out of 2 pieces combined/glued together, and it's a near-perfect match to the other originals (even better than the other repro ones I had gotten made at work).
So now I just have one or two other small touch-ups (deep gaps to fill in corners with the caulking), and then all the trim in the Living Room, AND Office will be ready to paint. Actually, once the trim is painted, I can also go ahead and paint the walls (which I'm excited about!)
Stay Tuned!
Tuesday, April 23, 2013
Shop Hutch Update
Today I decided to spend the afternoon and early evening (it's 8pm and I just quit for the day) working some more on the "shop storage hutch".
It's turning out to be much more of a rustic antique reproduction than I had originally planned, but that's alright.
Today I cut and installed the back for the upper section, cut and installed a centre support, trimmed and hung the doors (they still need fine tuning), and installed the 5 upper face frame pieces (the ones over the doors).
Here's the photo of the hutch from the last time I worked on it. In this pic, I had the 5 doors just propped into the door openings as a preview.

And here's all I got done from today:

I LOVE the old "doors" (old windows). I often see people throwing away these old basement windows, and I try to pick them up whenever I can. I have another larger one which I might also make into another cabinet. And as a quick reminder, this entire cabinet is being made essentially from trash. I'm using anything available (old barn wood, rough painted scrap pine, 2x4s, old plywood with nail holes, used baseboards, etc). The only items I paid for were the hardware (brass hinges/catches), a few new sheets of glass, and the paint.


A few of them will need new glass. Two have a cracked glass, but they are clean breaks, and I like the old wavy glass, so I won't bother to change them.

Lastly, it's hard to convey the size in just photos. The hutch is 8 feet tall, and 8 feet wide (I'm 6' when I'm not slouching).

Still left to do:
- Cut, bead, and hang the 4 bottom doors.
- Make/install 3 or 4 drawers in centre of base.
- Make/install some kind of crown moulding.
- Paint.
It's turning out to be much more of a rustic antique reproduction than I had originally planned, but that's alright.
Today I cut and installed the back for the upper section, cut and installed a centre support, trimmed and hung the doors (they still need fine tuning), and installed the 5 upper face frame pieces (the ones over the doors).
Here's the photo of the hutch from the last time I worked on it. In this pic, I had the 5 doors just propped into the door openings as a preview.
And here's all I got done from today:
I LOVE the old "doors" (old windows). I often see people throwing away these old basement windows, and I try to pick them up whenever I can. I have another larger one which I might also make into another cabinet. And as a quick reminder, this entire cabinet is being made essentially from trash. I'm using anything available (old barn wood, rough painted scrap pine, 2x4s, old plywood with nail holes, used baseboards, etc). The only items I paid for were the hardware (brass hinges/catches), a few new sheets of glass, and the paint.
A few of them will need new glass. Two have a cracked glass, but they are clean breaks, and I like the old wavy glass, so I won't bother to change them.
Lastly, it's hard to convey the size in just photos. The hutch is 8 feet tall, and 8 feet wide (I'm 6' when I'm not slouching).
Still left to do:
- Cut, bead, and hang the 4 bottom doors.
- Make/install 3 or 4 drawers in centre of base.
- Make/install some kind of crown moulding.
- Paint.
A Very Busy Weekend
I had a pretty busy weekend these past few days.
On Friday we celebrated a friend's birthday and had a nice social evening at her parents' place.
On Saturday, I helped my friend Devin install a patio door in his back room. This job consisted of sawing a hole into the exterior wall where there was currently a window. When the previous owners had built it, it was supposed to have a patio door there, but they never installed it, and instead it had an awkward window. The window opening was the right size, and around the right height for the new patio door, so it was FAIRLY simple to install the new door. It still took most of the day, though. I took one or two "before" photos, but no "after" photo. I'll probably post one later on.
Here's the "before" with the window removed and part of the wall sawn. On the left is Devin, and on the right is another friends' father. Devin's dad also showed up a bit later and helped us out.

After the patio door was in, we got showered and changed, and left for another friend's birthday celebration, which consisted of a lovely meal at a nearby local restaurant, and then an evening at a bar for drinks/karaoke.
On Sunday, I returned to Dev's place to finish installing the mouldings around the patio door, and patch all the wall panelling, which took most of the afternoon. After we got done, I was invited over for supper with his parents. When I got back home, I was in a productive mood, so I installed all the crown mouldings in the Office, and caulked and puttied them.

Note: I had to redo this entire corner seam, since the paper seam was literally peeling off the wall because it was so poorly installed.


I'm incredibly happy with how the replacement crown turned out. It blends in seamlessly with the original.

Today (Monday), I went outside to do a bit of yard cleanup. I started with just picking up a few fallen branches, and then I somehow ended up 15 feet up a ladder sawing a rotten limb on the maple tree.


I thought this was going to be EASY, since it was a mostly dead branch, but as it turns out, it still had a live portion growing on the very end (see blue arrow), and most of the bottom of the branch was still VERY sturdy. It took me probably 10-20 minutes to saw that (I was using a hand saw).
Note, this photo and the next one were taken from my bedroom window, with the camera about 5 feet off the floor, to give you an idea of how high these branches were.

The bad stump that I really wanted to get rid of, however, was on the other trunk, and can be seen below:

This is the remnant from that branch that had fallen down a few years ago:

I wasn't able to bring myself to get that high on the ladder. It's about 20 feet off the ground, and the ladder I've got is an old, busted-up piece of crap. That, and I would have needed a hatchet or a chain saw for this one (I have neither). I'm not too worried about the tree's health, but I'd definitely like to have that rotted stump removed. It's infested with bugs/holes and I'm sure it's not doing the tree any good.
I also got some help from the landlady* next door, who was there to do some cleaning-up and checking on the building. She was there with another man, and they cleaned out a lot of the junk in between the garage and my other neighbours.
* She also informed me that my chimney has been shedding bricks apparently, which isn't surprising, considering the atrocious shape it's in. She was concerned that I'd need to fix it, but I told her I'd be removing it completely.
The branches I trimmed, plus the ones in between the houses left me with 2 full trash cans.

Another quick repair was FINALLY getting around to patching this extra hole in the foundation. It looks like a hole for a PVC pipe (same as the other 2 next to it), and it does go all the way through the foundation, but for some reason they didn't use it, and it was patched only on the inside (a few inches deep) with just a bunch of wadded-up plastic bags in the hole on the exterior.
Rather than fill the ENTIRE cavity with cement (which would have been hard, since the foundation wall is something like 8-10" thick), I removed the old bags, and re-stuffed the middle cavity with insulation. I patched the last 2 inches with hydraulic cement. If I ever need that hole again, it should be fairly easy to drill it back out.

I also removed this ugly/useless metal bracket on the side of the house (same wall as above). I have NO IDEA what it was for, or why they left it there, but I wanted it GONE. It was just a strap with 2 L shaped hooks on each end pointing upwards. You can see it in the "fallen limb" photo a few pics back. It was held in place with 2 large square head bolts (top one was loose). The top "hook" was in the way when they did the siding, which is why there's a notch in it now. I managed to carefully undo the bottom bolt, and I patched the hole with cement, since I had a bit left.

A few hours later, I made a trip to Home Depot for wood/mouldings so that I can recreate the missing piece to go under the built-in (the bottom casing) in the Office. I'll also need one for the Kitchen built-in (which isn't even made yet, or 100% decided) but I got enough wood for 2 pcs.
Oh, and I also did another coat of drywall on the last Living Room drywall corner (so that I can get it done, install the crown, and then paint all the trim (since it will need shellac primer, and I only want to do that ONCE).
So yeah. Busy weekend.
On Friday we celebrated a friend's birthday and had a nice social evening at her parents' place.
On Saturday, I helped my friend Devin install a patio door in his back room. This job consisted of sawing a hole into the exterior wall where there was currently a window. When the previous owners had built it, it was supposed to have a patio door there, but they never installed it, and instead it had an awkward window. The window opening was the right size, and around the right height for the new patio door, so it was FAIRLY simple to install the new door. It still took most of the day, though. I took one or two "before" photos, but no "after" photo. I'll probably post one later on.
Here's the "before" with the window removed and part of the wall sawn. On the left is Devin, and on the right is another friends' father. Devin's dad also showed up a bit later and helped us out.
After the patio door was in, we got showered and changed, and left for another friend's birthday celebration, which consisted of a lovely meal at a nearby local restaurant, and then an evening at a bar for drinks/karaoke.
On Sunday, I returned to Dev's place to finish installing the mouldings around the patio door, and patch all the wall panelling, which took most of the afternoon. After we got done, I was invited over for supper with his parents. When I got back home, I was in a productive mood, so I installed all the crown mouldings in the Office, and caulked and puttied them.
Note: I had to redo this entire corner seam, since the paper seam was literally peeling off the wall because it was so poorly installed.
I'm incredibly happy with how the replacement crown turned out. It blends in seamlessly with the original.
Today (Monday), I went outside to do a bit of yard cleanup. I started with just picking up a few fallen branches, and then I somehow ended up 15 feet up a ladder sawing a rotten limb on the maple tree.
I thought this was going to be EASY, since it was a mostly dead branch, but as it turns out, it still had a live portion growing on the very end (see blue arrow), and most of the bottom of the branch was still VERY sturdy. It took me probably 10-20 minutes to saw that (I was using a hand saw).
Note, this photo and the next one were taken from my bedroom window, with the camera about 5 feet off the floor, to give you an idea of how high these branches were.
The bad stump that I really wanted to get rid of, however, was on the other trunk, and can be seen below:
This is the remnant from that branch that had fallen down a few years ago:
I wasn't able to bring myself to get that high on the ladder. It's about 20 feet off the ground, and the ladder I've got is an old, busted-up piece of crap. That, and I would have needed a hatchet or a chain saw for this one (I have neither). I'm not too worried about the tree's health, but I'd definitely like to have that rotted stump removed. It's infested with bugs/holes and I'm sure it's not doing the tree any good.
I also got some help from the landlady* next door, who was there to do some cleaning-up and checking on the building. She was there with another man, and they cleaned out a lot of the junk in between the garage and my other neighbours.
* She also informed me that my chimney has been shedding bricks apparently, which isn't surprising, considering the atrocious shape it's in. She was concerned that I'd need to fix it, but I told her I'd be removing it completely.
The branches I trimmed, plus the ones in between the houses left me with 2 full trash cans.
Another quick repair was FINALLY getting around to patching this extra hole in the foundation. It looks like a hole for a PVC pipe (same as the other 2 next to it), and it does go all the way through the foundation, but for some reason they didn't use it, and it was patched only on the inside (a few inches deep) with just a bunch of wadded-up plastic bags in the hole on the exterior.
Rather than fill the ENTIRE cavity with cement (which would have been hard, since the foundation wall is something like 8-10" thick), I removed the old bags, and re-stuffed the middle cavity with insulation. I patched the last 2 inches with hydraulic cement. If I ever need that hole again, it should be fairly easy to drill it back out.
I also removed this ugly/useless metal bracket on the side of the house (same wall as above). I have NO IDEA what it was for, or why they left it there, but I wanted it GONE. It was just a strap with 2 L shaped hooks on each end pointing upwards. You can see it in the "fallen limb" photo a few pics back. It was held in place with 2 large square head bolts (top one was loose). The top "hook" was in the way when they did the siding, which is why there's a notch in it now. I managed to carefully undo the bottom bolt, and I patched the hole with cement, since I had a bit left.
A few hours later, I made a trip to Home Depot for wood/mouldings so that I can recreate the missing piece to go under the built-in (the bottom casing) in the Office. I'll also need one for the Kitchen built-in (which isn't even made yet, or 100% decided) but I got enough wood for 2 pcs.
Oh, and I also did another coat of drywall on the last Living Room drywall corner (so that I can get it done, install the crown, and then paint all the trim (since it will need shellac primer, and I only want to do that ONCE).
So yeah. Busy weekend.
Friday, April 19, 2013
Computer Desk Inspiration
I've been wanting a new computer desk for quite a while now. I've been hoping I could find an antique desk or a table, but so far (the past year), I haven't found what I've been looking for yet. I'm really starting to get tired of the current CARD TABLE set-up I have now (since I moved in nearly 3 years ago).
Here's what I had in mind. I could definitely build it, but it would likely cost as much as an antique (and I'd rather have an antique).


This one would be ideal!

*sigh*
Here's what I had in mind. I could definitely build it, but it would likely cost as much as an antique (and I'd rather have an antique).
This one would be ideal!
*sigh*
Thursday, April 18, 2013
Drywall Rant
If you're a homeowner you know how much of a drag it is to do any kind of drywall work in your home. From the dust that settles EVERYWHERE, to the pain of applying it and sanding.
For me, one of the most annoying parts is actually the WAITING. Depending how thickly you apply it, it takes forever to dry. There were some particularly bad spots that took days to dry.
I'm currently nearly ready to install my new crown moulding (I really want to get this done), but I'm still patching drywall. I have 2 more spots drying in the Office, and a huge portion of the drywall stack in the corner of the living room is going to be wet for another few days (I put the mud on it last night, but some spots are over 1/8" thick and will take quite a bit of time to dry). Currently it's only about half dry after ~24 hours.
:(
Wednesday, April 17, 2013
Another Small Project Done
I got another piece of art framed.
I went out to pick up some more drywall compound, and I stopped at Winners. I ended up finding a beautiful antique reproduction frame for only 10$. Lately, I've been sure to keep a list with me of the art I have (dimensions) and empty frames (needing art) and a small tape measure. This frame was close to a perfect fit for one of my prints, and the style matched.

The print of the church with the dark blue-green matte was a 4.99$ find at Value Village (I've had it for over a year).
This is seriously an awesome price. Not even a sale price, either! Some of the quotes I got for custom frames ran in the HUNDREDS of dollars.

The existing matte was a 1/2 inch wider in both directions, but it was easy to trim it to fit. I am absolutely thrilled with how it looks. I wasn't sure if the black(ish) frame would play nicely next to the dark blue-green, but I absolutely love it. The frame is actually made from cast resin mouldings with some sort of antiqued painted effect, but it looks like a genuine antique frame. I'm leaving the cardboard corners on the frame until I'm ready to hang it.

I went out to pick up some more drywall compound, and I stopped at Winners. I ended up finding a beautiful antique reproduction frame for only 10$. Lately, I've been sure to keep a list with me of the art I have (dimensions) and empty frames (needing art) and a small tape measure. This frame was close to a perfect fit for one of my prints, and the style matched.
The print of the church with the dark blue-green matte was a 4.99$ find at Value Village (I've had it for over a year).
This is seriously an awesome price. Not even a sale price, either! Some of the quotes I got for custom frames ran in the HUNDREDS of dollars.
The existing matte was a 1/2 inch wider in both directions, but it was easy to trim it to fit. I am absolutely thrilled with how it looks. I wasn't sure if the black(ish) frame would play nicely next to the dark blue-green, but I absolutely love it. The frame is actually made from cast resin mouldings with some sort of antiqued painted effect, but it looks like a genuine antique frame. I'm leaving the cardboard corners on the frame until I'm ready to hang it.
Monday, April 15, 2013
Update
I realize that the actual house updates lately have been few and far between, but lately, I've been making progress on both the Living Room and Office. I'm currently doing all the drywall patching and corner/seam repairs, fixing all the popped screws from the poor drywall installation, and I've changed all the old outlets in the Office (the Living Room ones were done a while back).
Once I have the drywall done, I'll be putting up the crown (which I'm very excited about), and I'll paint the Office walls. I already have the paint, and I can paint the whole room except that the baseboards won't be in until after the floors are refinished.
The Living Room (if I finish the drywall and crown) would also be ready to paint, but I haven't bought the paint yet (but I've had the colour picked since BEFORE I OWNED the house).
Saturday, April 13, 2013
New Crown Is Ready!
Yesterday was way too cold, and for whatever reason, I just couldn't warm myself up most of the day, despite an extra warm sweater and raising the heat. That said, I didn't go out to get more sandpaper, I didn't sand the crowns, or cut the back mitres.
But all that got done today.
I ended up only sanding the crowns with 80 grit paper. This removed 90% of all the saw marks, and smoothed the round portion quite nicely. They could be sanded more, to FULLY remove all the saw marks, but I'm pretty sure that they won't show up under the 4 coats of paint that will cover them (white shellac sealer, primer, 2 coats of white). And even if they do, they'll be 3 feet above eye level.
I'm very happy with how they turned out.
Side note: They don't look very long because of the angle, but they're 10 feet each (120").

If you look closely at the coved profile, you can see some of the faint diagonal cut lines I'm talking about. It would be a lot of extra effort to remove them completely, without much payoff.

So now that those are done and ready to install, I started to rip out the old "replacement mouldings" which are just a 3/4" quarter-round (eye rolling). And I also have a few drywall corner seams to redo before they can go up, but I'm excited!
But all that got done today.
I ended up only sanding the crowns with 80 grit paper. This removed 90% of all the saw marks, and smoothed the round portion quite nicely. They could be sanded more, to FULLY remove all the saw marks, but I'm pretty sure that they won't show up under the 4 coats of paint that will cover them (white shellac sealer, primer, 2 coats of white). And even if they do, they'll be 3 feet above eye level.
I'm very happy with how they turned out.
Side note: They don't look very long because of the angle, but they're 10 feet each (120").
If you look closely at the coved profile, you can see some of the faint diagonal cut lines I'm talking about. It would be a lot of extra effort to remove them completely, without much payoff.
So now that those are done and ready to install, I started to rip out the old "replacement mouldings" which are just a 3/4" quarter-round (eye rolling). And I also have a few drywall corner seams to redo before they can go up, but I'm excited!
Friday, April 12, 2013
Making Custom Crown Moulding (From Scratch)
Today's post will be one of those posts where I'm going to be putting out all the details for this DIY, but I honestly can't picture many people ever going through the trouble to actually DO this. I have seen in the past on a few of the blogs I follow, where some people have made their own mouldings to match one or two missing boards, but it's rare. These days, most people tend to pick one of these two options instead:
- Buy whatever stock moulding is "close enough".
- Pay through the nose for custom milled exact reproduction trim to be made.
There are always other options, too, such as replacing all the trim to make it match, or salvaging old trim, but those are not always convenient.
That said, the point that I'm trying to make is that it's really not THAT HARD to match some mouldings. Especially if you only need a few pieces, and you have basic woodworking skills.
Although I'm a professional cabinetmaker and I've been working with wood for over 10 years, I am still confident that most people can do this particular project.
Tools:
As some of you already know, I'm pretty broke, and I don't really have the best tools in my shop (yet). I have a very flimsy (old) table saw, and the only other two tools I used for this project were a router (and 2 bits: V groove, and 45 degree chamfer), and a small hand plane. You will also need clamps for your table saw set-ups.
I've been putting off this project for MONTHS, simply because I was hoping to find an easier way to make this crown other than by hand. But now that it's done, I'm really wondering why I didn't do it much sooner, because it didn't take long, it looks good, and it was easy.
I started by just very quickly making a short piece of the crown (a sample) in MDF to see how close I could get it with just a few quick cuts on the table saw.

From my sample, I could tell that the moulding will be close enough (that I won't even notice a difference), and that I could improve several of the cuts on my finished mouldings.
Theory:
If you own a table saw, you may not know that it can be used to make some interesting mouldings. You can buy moulding cutter heads, but that's not what I'm referring to.
By running boards into the blade from an angle (even up to 90 degrees: sideways into the blade), you can recreate just about any imaginable curved cut. Passing a board at a slight angle will give a deep profile, and passing it at 90 degrees would give you a very shallow profile.
Things to note: When cutting this type of moulding, you need guide rails on BOTH sides of your board to keep it at the correct angle, and to avoid any possible accidents. You also want to take shallow passes. Since I was using pine, I only did 2 passes, but if you were making mouldings in a hard wood such as maple (which I've had to do before), you may need to make up to 10 passes. USE A SHARP BLADE, and USE A PUSH STICK.
Also: don't be terrified to do this. I know it might sound crazy to want to push wood into your saw blade at an angle, but this is a "tried and true" technique used by thousands of carpenters, and as long as you're careful it's very safe, and it won't ruin your saw.
I described this process in an old post back in 2011, when I fixed the original siding in the porch. You can have a look at that tutorial (and photos) HERE.
Step 1:
Using a piece of your original moulding (you need an actual sample to work with), set up your saw for the full depth cut of your coved profile cut.
Set up both your fences leaving enough slop to be able to gently slide your moulding stock (10 foot lengths of clear pine in my particular case) through them without binding, but snug enough that it won't wobble around.
Note, I should have had a 4th clamp in the upper left corner, but because of the table top on my saw, I couldn't put one there. My front clamp was tight enough.

Step 2:
Back your blade down and make your first cut. Repeat your cuts until you have the correct depth for your profile. On your last pass, try to move your stock slowly and evenly, and if possible, avoid stopping (try to pass the entire piece in one continuous motion if you can do this safely). If you stop and start a lot, each place you stop could potentially leave a deeper groove or a burn mark in the wood.

Step 3:
The rest of the steps will be different depending on what moulding profile you're copying, but for the rest of this tutorial I'll just be referencing to this particular classic Roman Ogee profile.
For this step, I need a V groove in between what would otherwise be a simple "ogee" (an S curve). On my sample, I had cut this groove with 2 saw cuts, but a much better option is a V groove router bit, using a fence on my router*. You can also do this on a router table, and if all you have is a table saw, that will work just fine, but there's more set-up involved in getting your cuts just right (and more saw marks to sand off later).
When using a router with a fence, you must make sure that you are running the router in the correct direction. In my case, if I am holding the router in front of me in both hands (in the ready-to-route position), I have my fence on the left side of the cutter. This means that I want to have the router fence on the left side of my board, and I want to be pulling the router towards me (left to right down the length of the board, walking backwards). If I were to start at the other end (same exact setup, routing on the left side of the board), but cutting right to left (pushing the router away from me, walking forwards) then the blade rotation will want to push the router away from the centre of the board towards the edge (and totally screw-up your cut). When routing in the proper direction, the bit wants to pull towards the centre of the board, and keeps the fence snug along the edge of the board. Trust me on this, and don't argue. I've ruined my fair share of beautiful fluted columns (usually when they're nearly finished) by routing accidentally in the wrong direction.
* Quick side note: The router is one of the few "good" tools that I own, since I knew I'd be getting a lot of use out of it. It's a Makita like the ones we used to have at my old job (they take a licking and are nearly indestructible). I got an amazing deal on it (barely used at a pawn shop for 90$ with all the attachments/case).

Step 4:
Cut the outer mitres (I used a 45 degree chamfer bit with a bearing for these). One side is a deeper cut than the other on this particular profile. The large flat face (right side) might look a bit odd at the moment, but the bevel that will be cut on the back (where the wall will be) will fix this.

Step 5:
Finish-off the rounded portion of the profile by using a hand plane to shave off the square corners. This might look hard/annoying/time consuming, but it isn't. This part took about 10 minutes (or about the same amount of time as routing the centre V grooves). It won't look 100% perfect, but most of it will be smoothed out in the sanding.


Step 6:
Finish your mouldings by cutting the back-bevels (which can vary). These are usually two 45 degree cuts, but not always. On steep crown they can be 60/30 or 40/50, but either way, both angles should add up to 90 for normal applications. (not done yet - It's too cold, and it was late, so I'll do this tomorrow).
Step 7:
SAND, install, prime, paint (not done yet - stay tuned!).
One thing that I will mention, though: with cove-cut mouldings on the table saw, there is a LOT of sanding involved. It's not too bad if it's pine or another softwood, but hardwood (especially if you want it to be stain-grade) will need a LOT of sanding. Sometimes you might want to invest 10-20$ on a goose-neck scraper to scrape some of the rougher areas out of the cut before sanding. Alternatively, you can use very rough grit paper (starting with 40 or 60 grit and working up to around 80-100 for pine or 150 for hardwood).
Step 8:
Rejoice in knowing that this 30 feet of custom crown moulding in clear pine only cost me 37$ to make (as opposed to several 100$ to have them made).
- Buy whatever stock moulding is "close enough".
- Pay through the nose for custom milled exact reproduction trim to be made.
There are always other options, too, such as replacing all the trim to make it match, or salvaging old trim, but those are not always convenient.
That said, the point that I'm trying to make is that it's really not THAT HARD to match some mouldings. Especially if you only need a few pieces, and you have basic woodworking skills.
Although I'm a professional cabinetmaker and I've been working with wood for over 10 years, I am still confident that most people can do this particular project.
Tools:
As some of you already know, I'm pretty broke, and I don't really have the best tools in my shop (yet). I have a very flimsy (old) table saw, and the only other two tools I used for this project were a router (and 2 bits: V groove, and 45 degree chamfer), and a small hand plane. You will also need clamps for your table saw set-ups.
I've been putting off this project for MONTHS, simply because I was hoping to find an easier way to make this crown other than by hand. But now that it's done, I'm really wondering why I didn't do it much sooner, because it didn't take long, it looks good, and it was easy.
I started by just very quickly making a short piece of the crown (a sample) in MDF to see how close I could get it with just a few quick cuts on the table saw.
From my sample, I could tell that the moulding will be close enough (that I won't even notice a difference), and that I could improve several of the cuts on my finished mouldings.
Theory:
If you own a table saw, you may not know that it can be used to make some interesting mouldings. You can buy moulding cutter heads, but that's not what I'm referring to.
By running boards into the blade from an angle (even up to 90 degrees: sideways into the blade), you can recreate just about any imaginable curved cut. Passing a board at a slight angle will give a deep profile, and passing it at 90 degrees would give you a very shallow profile.
Things to note: When cutting this type of moulding, you need guide rails on BOTH sides of your board to keep it at the correct angle, and to avoid any possible accidents. You also want to take shallow passes. Since I was using pine, I only did 2 passes, but if you were making mouldings in a hard wood such as maple (which I've had to do before), you may need to make up to 10 passes. USE A SHARP BLADE, and USE A PUSH STICK.
Also: don't be terrified to do this. I know it might sound crazy to want to push wood into your saw blade at an angle, but this is a "tried and true" technique used by thousands of carpenters, and as long as you're careful it's very safe, and it won't ruin your saw.
I described this process in an old post back in 2011, when I fixed the original siding in the porch. You can have a look at that tutorial (and photos) HERE.
Step 1:
Using a piece of your original moulding (you need an actual sample to work with), set up your saw for the full depth cut of your coved profile cut.
Set up both your fences leaving enough slop to be able to gently slide your moulding stock (10 foot lengths of clear pine in my particular case) through them without binding, but snug enough that it won't wobble around.
Note, I should have had a 4th clamp in the upper left corner, but because of the table top on my saw, I couldn't put one there. My front clamp was tight enough.
Step 2:
Back your blade down and make your first cut. Repeat your cuts until you have the correct depth for your profile. On your last pass, try to move your stock slowly and evenly, and if possible, avoid stopping (try to pass the entire piece in one continuous motion if you can do this safely). If you stop and start a lot, each place you stop could potentially leave a deeper groove or a burn mark in the wood.
Step 3:
The rest of the steps will be different depending on what moulding profile you're copying, but for the rest of this tutorial I'll just be referencing to this particular classic Roman Ogee profile.
For this step, I need a V groove in between what would otherwise be a simple "ogee" (an S curve). On my sample, I had cut this groove with 2 saw cuts, but a much better option is a V groove router bit, using a fence on my router*. You can also do this on a router table, and if all you have is a table saw, that will work just fine, but there's more set-up involved in getting your cuts just right (and more saw marks to sand off later).
When using a router with a fence, you must make sure that you are running the router in the correct direction. In my case, if I am holding the router in front of me in both hands (in the ready-to-route position), I have my fence on the left side of the cutter. This means that I want to have the router fence on the left side of my board, and I want to be pulling the router towards me (left to right down the length of the board, walking backwards). If I were to start at the other end (same exact setup, routing on the left side of the board), but cutting right to left (pushing the router away from me, walking forwards) then the blade rotation will want to push the router away from the centre of the board towards the edge (and totally screw-up your cut). When routing in the proper direction, the bit wants to pull towards the centre of the board, and keeps the fence snug along the edge of the board. Trust me on this, and don't argue. I've ruined my fair share of beautiful fluted columns (usually when they're nearly finished) by routing accidentally in the wrong direction.
* Quick side note: The router is one of the few "good" tools that I own, since I knew I'd be getting a lot of use out of it. It's a Makita like the ones we used to have at my old job (they take a licking and are nearly indestructible). I got an amazing deal on it (barely used at a pawn shop for 90$ with all the attachments/case).
Step 4:
Cut the outer mitres (I used a 45 degree chamfer bit with a bearing for these). One side is a deeper cut than the other on this particular profile. The large flat face (right side) might look a bit odd at the moment, but the bevel that will be cut on the back (where the wall will be) will fix this.
Step 5:
Finish-off the rounded portion of the profile by using a hand plane to shave off the square corners. This might look hard/annoying/time consuming, but it isn't. This part took about 10 minutes (or about the same amount of time as routing the centre V grooves). It won't look 100% perfect, but most of it will be smoothed out in the sanding.
Step 6:
Finish your mouldings by cutting the back-bevels (which can vary). These are usually two 45 degree cuts, but not always. On steep crown they can be 60/30 or 40/50, but either way, both angles should add up to 90 for normal applications. (not done yet - It's too cold, and it was late, so I'll do this tomorrow).
Step 7:
SAND, install, prime, paint (not done yet - stay tuned!).
One thing that I will mention, though: with cove-cut mouldings on the table saw, there is a LOT of sanding involved. It's not too bad if it's pine or another softwood, but hardwood (especially if you want it to be stain-grade) will need a LOT of sanding. Sometimes you might want to invest 10-20$ on a goose-neck scraper to scrape some of the rougher areas out of the cut before sanding. Alternatively, you can use very rough grit paper (starting with 40 or 60 grit and working up to around 80-100 for pine or 150 for hardwood).
Step 8:
Rejoice in knowing that this 30 feet of custom crown moulding in clear pine only cost me 37$ to make (as opposed to several 100$ to have them made).
Sunday, April 07, 2013
Cornwall Homes
I seem to have found a temporary (?) workaround to the problem I am having with Picasa.
This post will feature a follow-up to a house reno I've been following with you guys, as well as a handful of "pretty" Cornwall homes. I still have a large stock of fresh photos I took of other old homes, but I want to post them gradually.
About a week ago in this post, I posted a photo of the "Adams Sherwood Swabey & Fallon" lawyers' offices (reposted below), and I wanted to share with you guys a night shot. I don't have the best camera for night photography, but it's one of the best lit homes in town, and worth sharing.

It's a bit hard to make out, but if you look at the centre window over the main door, you'll see that each window is fitted with a custom shaped lit frame of small white lights. In addition, the house is lit with flood lights from below.

Next up is another of my favourite foursquares. This one sits on one of the main historic streets in town, and across from one of our high schools.
I especially like the robust columns, and porch railing (which you can see farther down), as well as the front door.

The following photos are more recent (the one above was taken in the summer). The house has an amazing side porch which is very hard to photograph because of a large lilac bush (on the left) and the fence. The screens were added later. Note the railing on the right.


Note the scroll appliqués on the door, the stained glass panels, and the original light fixture on the t-g ceiling.

This home (a few blocks away from the previous home) has some beautiful and unique Gothic details. The front doors are typical mid-to-late 19th century examples with deep mouldings. There is a very simple centre beam decoration over the central peak. The house has the original windows.

What really makes this house unique, however, is the Gothic detailing on the roof sides, and the original tin roof with dentil peak details (which I haven't seen on any other Cornwall homes).


Lastly, here's the reno house I mentioned. This is a house I've been following for quite some time (since it's on my street farther down, and part of my neighbourhood), but I haven't posted any updates to it in ages. In fact, the original photos I'm reposting are so old that they predate my switch to Picasa (back when I was still using Photobucket).
My first post about it was back in August 2011. For the longest time, it had been boarded up and abandoned, and in the past few years, they've been fixing it up. The following photo was taken shortly after the house had been opened-up again, and I noticed they were making repairs.
Fast forward a bit, and last fall, they had repaired and repainted about half the exterior. I took these shots a few weeks ago. I'm not thrilled with the new colours, but I don't hate them either. I'm ecstatic that this home is being saved. I'm also happy that it's being saved in a historically accurate way (rather than slapping-on some new siding). I assume that they're having the stained glass window repaired, since it was removed.

The roof still needs to be replaced (badly!) and the chimney needs repointing, but they're getting there! I *REALLY* should write them some kind of "you guys are awesome" letter/note.

They haven't done this side yet.

This post will feature a follow-up to a house reno I've been following with you guys, as well as a handful of "pretty" Cornwall homes. I still have a large stock of fresh photos I took of other old homes, but I want to post them gradually.
About a week ago in this post, I posted a photo of the "Adams Sherwood Swabey & Fallon" lawyers' offices (reposted below), and I wanted to share with you guys a night shot. I don't have the best camera for night photography, but it's one of the best lit homes in town, and worth sharing.
It's a bit hard to make out, but if you look at the centre window over the main door, you'll see that each window is fitted with a custom shaped lit frame of small white lights. In addition, the house is lit with flood lights from below.
Next up is another of my favourite foursquares. This one sits on one of the main historic streets in town, and across from one of our high schools.
I especially like the robust columns, and porch railing (which you can see farther down), as well as the front door.
The following photos are more recent (the one above was taken in the summer). The house has an amazing side porch which is very hard to photograph because of a large lilac bush (on the left) and the fence. The screens were added later. Note the railing on the right.
Note the scroll appliqués on the door, the stained glass panels, and the original light fixture on the t-g ceiling.
This home (a few blocks away from the previous home) has some beautiful and unique Gothic details. The front doors are typical mid-to-late 19th century examples with deep mouldings. There is a very simple centre beam decoration over the central peak. The house has the original windows.
What really makes this house unique, however, is the Gothic detailing on the roof sides, and the original tin roof with dentil peak details (which I haven't seen on any other Cornwall homes).
Lastly, here's the reno house I mentioned. This is a house I've been following for quite some time (since it's on my street farther down, and part of my neighbourhood), but I haven't posted any updates to it in ages. In fact, the original photos I'm reposting are so old that they predate my switch to Picasa (back when I was still using Photobucket).
My first post about it was back in August 2011. For the longest time, it had been boarded up and abandoned, and in the past few years, they've been fixing it up. The following photo was taken shortly after the house had been opened-up again, and I noticed they were making repairs.
Fast forward a bit, and last fall, they had repaired and repainted about half the exterior. I took these shots a few weeks ago. I'm not thrilled with the new colours, but I don't hate them either. I'm ecstatic that this home is being saved. I'm also happy that it's being saved in a historically accurate way (rather than slapping-on some new siding). I assume that they're having the stained glass window repaired, since it was removed.
The roof still needs to be replaced (badly!) and the chimney needs repointing, but they're getting there! I *REALLY* should write them some kind of "you guys are awesome" letter/note.
They haven't done this side yet.
Subscribe to:
Posts (Atom)