Showing posts with label Mud. Show all posts

Saturday, June 07, 2014

"L" Room Drywall Update

I figured that a boring update would be better than no update, but at least this one will include a bunch of photos! :D

If you've read my last post, you know that I'm finally pushing to have the "L" Room upstairs DONE and start using it. The last steps are the ceiling and painting (and if you want to get picky, there's still no doors, and I'll work on the closet interior later).

Today I sanded all the ceiling and corners (at the top of the walls). What a mess. Just when I thought I had done a pretty good job, and that there'd be minimal sanding, I end up being totally wrong, and making a huge mess.

Overall, though, the ceiling did turn out nicely, and I had only one spot that needed touch-ups.

Here was the third (touch-up) coat from yesterday (drying):


I mentioned that I got some new drywall trowels and I thought I would show them. Pictured are the two new trowels (the corner trowel and the 10 inch trowel) along with my trusty 6" trowel which I've been using for years. You can see that the blade is spotty (from accidentally leaving it damp which caused rust spots to form).


This was a photo (a "selfie" if you will) of me from this afternoon right after I had finished sanding everything. There was dust EVERYWHERE, including some that was caked-onto my sweaty t-shirt, and it billowed all the way through the hallway upstairs.

Shortly after this, I cleaned up all the dust (shop vac), dusted myself off, and took a shower.

And the reason my mouth is open is because my nose was a bit plugged-up.


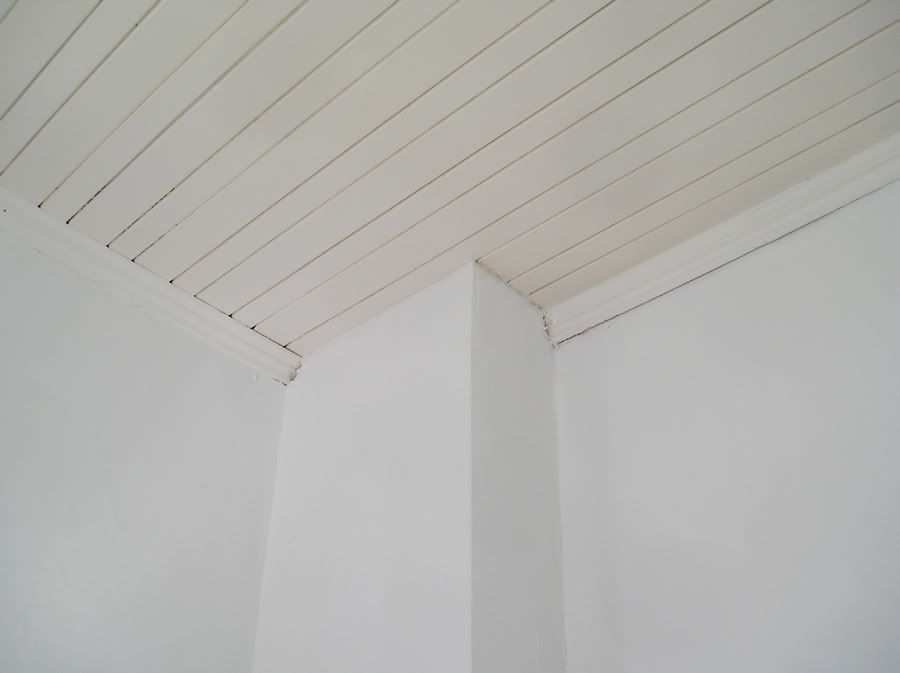
Sanded ceiling shots:


I'm really glad that I decided to protect the floor with this cardboard stuff. It's a construction-grade cardboard used both as a floor protector, and as a layer under hardwood (to prevent squeaking). I'll be using some when I redo the hallway on the main floor, but it comes in a huge roll for something like 15$.

One of the main reason for laying that down was for the paint drops (from primer, ceiling and wall paint), but I ended up also dropping several blobs of drywall compound everywhere (which would have been a nightmare to clean out of the gaps in the old floor).


As a last minute decision, I decided to go ahead and install the last panel in the corner (see photo below). If you remember a long time ago, I had loosely fitted this piece, but I didn't attach it because I wanted to be able to have easy access around both sides of the chimney for when I knock it down. Well, I figured I'd have enough room from the other side, and that it would be so much easier to just finish this room completely -all at the same time, and be DONE with it. Otherwise I would have needed to go back later and mud/paint this section maybe a year from now when the chimney is gone.

So this just made more sense. I cut the hole for the outlet, screwed-in the panel, mudded it (first coat only), and once it's good, I'll install that last corner block and length of baseboard, paint those, and then paint the whole room in one shot.


I figure that if things dry fairly quick, I could be done with this room by next weekend.

Wednesday, June 04, 2014

"L" Room Update

I don't have much of an update, and I didn't think to take any pictures yet, but rather than pay someone, I've finally caved and decided to mud the ceiling in the "L" Room myself. I did 3/4 of the scratch coat a week or so ago, and then ran out of mud. I bought more mud about a week ago, and I finished the scratch coat a few days ago. That brings us to today, where I did the first topcoat on the seams and corners.

It actually went really well, and I attribute that success to some new tools. I watched a few drywall videos on YouTube several weeks back, and they always make it look SO Fast and EASY. I mean, it's not HARD by any means, but there's a lot of technique involved.

What blew my mind though, was the corner trowel.

Some of the best DIY videos I've found (including the detailed ones I used as a reference to install the new vinyl siding on the garage) are from Shannon at House Improvements (one of his videos is below).

In this drywall video, you see him use the corner trowel at around the 3:10 mark.


I don't know how I went so long without even knowing that this tool existed. For YEARS now, I've been tediously doing my corners mostly (or partly) one side at a time, because a regular trowel always leaves an odd edge in the corner. I've also been doing most of all my drywall with only a 6" trowel (which isn't really wide enough for finishing coats).

So after having watched a few of his videos, I decided to invest in both a wider trowel, and a corner trowel. These range in prices, and I went with an inexpensive set at around 10$ each trowel.

Today was my first time using both, and wow! What a difference! The job went faster, the joints are smoother, and the corners and joints look wonderful!

I think I can probably get away with just another light pass, some light sanding, and then I'll be ready to paint! I've already had the wall paint bought for months now, and I still have leftover ceiling paint, so I have pretty much everything already on hand.

Friday, May 09, 2014

Garage Wall Progress

Although I haven't posted much about it yet, the rebuilding of the garage wall is progressing nicely. So far I have:

- Jacked-up the roof for temporary support.
- Jacked-up the wall.
- Cut away the bottom of the wall.
- Cleaned-out about 200 lbs of rotted wood and dirt at the base of the wall.
- Made custom concrete forms for the new footings.
- Hand-mixed and filled the forms (26 1/2 bags of concrete, which was pure hell).
- Installed the bottom plate (pressure treated wood).
- Temporarily re-supported the wall at each 2x4 to remove the braces.
- Cut away the top of the wall.
- Installed the top plates (2 layers of 2x4s).

Now I'm at the point where I can install the vertical 2x4s (the easy part). I need to go pick up some more nails, and mark all the crowns in my 2x4s (the crowns are the cupped or curved edges).

I've been working at the "wall project" several hours a day, and I'm quite happy with the pace I've been managing to keep. The garage will be so nice and solid once this job is done. It will also mean that I can finally have the roof (safely) replaced. The roof should have been redone right after I bought the house, but after I discovered the condition of the wall I was afraid to have any workers up there.

I also plan to add electrical (probably with a small sub-panel) new lights, and drywall + paint.

I only plan to show a recap (photos) once the whole project is done (the wall - not the entire garage).

***

I've been keeping quite busy here. Aside from the "wall project" I've also redone the framing for the sloped ceiling in the back stairwell (which was quite tricky to figure out). That's now pretty much ready for insulation and wall covering (either drywall or beadboard).

I also started to do the taping and mudding in the "L" Room upstairs. I've been procrastinating about doing it for almost a year, and I was going to hire someone else to do it, but in the end, I'll do it myself. My imperfections (I'm only so-so at drywall) will just match the rest of the house.

Sunday, April 28, 2013

Work Continues...

I installed all the rest of the reproduction crown today in the Living Room. This means that all of the crown (for now) is done. The only room left that will be getting crown is the kitchen, but that will be farther down the road.

Here's the "Master Bedroom return ducts" corner:
For reference, the right hand wall is the centre wall (Dining Room on other side), and the left wall faces the graveyard).


And as a fun reminder, here are two of the old (first day I got the house) photos. What a mess that was.


Here's the other duct corner (Master Bedroom closet vent). This was the one that I had to cut out a few weeks back.


This guy:


Here's another view. Centre wall on the left, staircase/entrance to Living Room on the right.


Here's where the crown meets back up with the rest of the original stuff (exterior walls). The arrow points to the drywall corner repair that I did. You'll understand why it's funny to point out in the next photo.


Here's the before. The darker spot that's visible is actually just a sh*t-ton of acrylic caulking finger-painted into the crack. They did a poor job on their drywall install, and because the ceiling is so sloped/crooked here, they had a triangular wedge (hole) in this spot. Instead of patching it with paper tape and mud, they just used caulking. -_-


I also went ahead and made that matching repro moulding for the Office built-in. It was made out of 2 pieces combined/glued together, and it's a near-perfect match to the other originals (even better than the other repro ones I had gotten made at work).


So now I just have one or two other small touch-ups (deep gaps to fill in corners with the caulking), and then all the trim in the Living Room, AND Office will be ready to paint. Actually, once the trim is painted, I can also go ahead and paint the walls (which I'm excited about!)

Stay Tuned!

Thursday, April 18, 2013

Drywall Rant

If you're a homeowner you know how much of a drag it is to do any kind of drywall work in your home. From the dust that settles EVERYWHERE, to the pain of applying it and sanding.

For me, one of the most annoying parts is actually the WAITING. Depending how thickly you apply it, it takes forever to dry. There were some particularly bad spots that took days to dry.

I'm currently nearly ready to install my new crown moulding (I really want to get this done), but I'm still patching drywall. I have 2 more spots drying in the Office, and a huge portion of the drywall stack in the corner of the living room is going to be wet for another few days (I put the mud on it last night, but some spots are over 1/8" thick and will take quite a bit of time to dry). Currently it's only about half dry after ~24 hours.

:(

Sunday, February 10, 2013

Furniture and Drywall

Nothing too exciting to report, but I at least have some photos.

I just did another small batch of drywall repairs in 3 rooms.

Around the new vent in the Office:


The corner seams on the Living Room cold-air returns (to Master Bedroom):


And the long seam in the kitchen.


The furniture portion is the "sprucing-up" of the little Art Deco night table trash find. Here was the "as found" photo:


Step 1 was to remove the awful Mac-Tac stuck to the bottom shelf. It was pretty well stuck down, but with a little bit of heat from a heat gun (on low), it softened the plastic film enough to get it started, and most of it came off fairly easily. The finish under the Mac-Tac turned out to be in near perfect shape, so that was a big bonus. With old furniture, sometimes you just never know. There could have been a big stain, scratches, failed finish, or all kinds of other horrors under a later covering (or paint), but sometimes you get lucky.

The drawer handle was removed and cleaned (just warm water and dish soap). It's a cheap die-cast alloy metal with a gold paint finish. The upper part is a semi-transparent celluloid plastic with marbling.

While I was working on the drawer, I noticed one side was unglued. I just coated the mating surfaces with a bit of carpenter's glue, and clamped it back together. If this were a heavier wearing item, I would have taken more time to scrape out any old glue first.


The back plywood along the bottom shelf was warped and loose, so that was nailed-in with additional new nails.


If this were a more high-quality item, I would have taken the time to also repair the loose veneer along the back of the bottom apron (near hammer tip in photo), but it wasn't worth the trouble on this guy. This area is never visible.

The top had a few issues as well. There were two smallish holes through the veneer, and the side pieces, which are made of a cheaper wood that was painted (it was done this way originally on many pieces) a brownish red colour to match the Walnut veneer, was chipped along most of the length on both sides. The original shellac was also chipped and damaged over the entire top surface.


The holes were filled with a dark red (matching) wax, and the chipped edges were touched-up with a specialty furniture touch-up marker.

The entire piece was given a rub-down with a stain/scratch cover polish.

If I wanted the top to look new, I would have stripped it, and refinished it (just the top not the entire piece), but I wanted only a minimal (quick) restoration on this piece. The stain covered most of the imperfections, and I went over this with a light spray of satin varnish (aerosol). The spray varnish was done ONLY on the top. All the rest of the finish on the piece was fine.

This is the finished piece. It still needs a quick coat of wax polish (which won't take long) but I'm waiting for the top varnish to fully cure (it could take several more days). The final waxing won't make any noticeable difference in the photos, though.


Note: there were also a whole bunch of chipping/raw wood edges that were showing on the rail over the drawer, and along the bottom shelf. Those were also touched-up with the marker.

The top. Not perfect, but very serviceable. Can you spot the two holes? I can't.

Saturday, December 15, 2012

A Quick Restoration & A Small Disaster!

I don't recall exactly when I bought this little medicine cabinet, but I'm fairly sure I shared some photos of it before (on this blog). I bought it for a few dollars (possibly even just 1$, I can't remember), and I remember it was in the basement of a "whole house contents" type sale. The kind of sale where it was likely an old lady (or couple) who lived there and passed away. I remember buying several neat things at this sale, and I bought this cabinet right off the wall. I had to unscrew it (which was luckily just 2 screws).

I'm not sure how old it is, but it's AT LEAST 1950 (I know this for a fact, see below), but more likely 1930s or 40s.

This is more or less how I purchased it: absolutely filthy. It also sat in the basement for maybe a year now.


Let me just say that these two photos (above) don't do the grime justice. It was pretty plastered with a layer of old dust, making the formerly white paint a dingy yellowish grey. The interior (which you'll see shortly) was far worse.

The mirror is not the original one (which must have broken), and this replacement (but still OLD) mirror was loose in the door, so I removed it. In doing so, I found a folded sheet of newspaper, dated April 23rd 1952.


The mirror BARELY fits in the door (it's smaller than it should be and I had to use spacers around it when I put it back in), but it has a wonderful aged look (I'm a huge lover of antique mirrors, and I have over a dozen), so I wanted to clean it and reuse it. The mirror must have been a low-end one, since the backing paint was hand painted with a brush (higher quality mirrors have a sprayed or rolled painted film on the back). The black edges appear to be in between the glass and the paint, so it's actually the silvering that is "damaged" or tarnished. It might have been originally in a frame that covered these edges... who knows.


Here's how the interior looked (I also removed the back to be able to clean inside it properly). When I said it was filthy, I wasn't kidding!


You can see how the glossy old oil paint cleaned up pretty well in that photo. I used a damp cloth dipped in ample amounts of Comet, and a little bit of dish soap as a lubricant. I went over EVERY INCH of this cabinet with this mixture. It took about 1/2 hour or so, but I was left with this:


Far from perfect, and it did nothing for the poorly painted spots (the original paint was a mustardy beige (see above), or all the paint chips, but everywhere else, the paint is now shiny and clean.

I installed one of my new repro catches on it, since it was the closest hardware that fit (including some old catches I had on hand). It looks a bit odd to have the bright brass unpainted, but unless I paint over the whole thing again, I can't match this "aged off-white" old enamel paint, so it's staying as-is. The other option might seem obvious: remove the hinges and strip those, but they are really heavily painted, and the paint around them would probably chip badly, and then I'd have to repaint the whole thing again...


Like I said, still lots of paint chips, but it's CLEAN now.


DISASTER STORY!

Alright, I've said it before, but it never stops me from doing it anyways: Don't Pick At It!

What do I mean? Well, here's a little story. As you know, I've been working on the L Room casings for the past 2-3 days, getting it ready to paint. In doing that, I was using a chisel to scrape and pry-off large chunks of drywall mud (and paint, and wallpaper bits, and specks, and staples, and...) and when I was working on the left-side window, I uncovered a "soft spot" where the wallpaper (and dozens of paint layers over it) was loose off the drywall. I already knew about this, but I didn't think it was very big, and I thought I'd ignore it.

Here's where the "Don't pick at it" comes into play. I had the choice to either ignore it and move on, or scrape away the loose stuff. Guess which option I picked?

YIKES!


Now, let me just explain to you exactly what you're seeing. See that pinkish papery section at the top with a brown edge? That's not wallpaper. That's the actual drywall paper! The portion of wall below this must have gotten wet (leaky window, or the window might have been left open in bad weather), and the drywall soaked up some water. The actual paper facing came loose off the interior plaster/fibre layer. The light fuzzy brown portion on the lower part is the interior plaster layer showing, with just "fuzz" left from the paper.

The other issue (other than the missing paper), is that now the difference in thickness is about 1/8". No I'm not exaggerating here. There's a lot of plaster/mud smeared around on the walls, maybe 2-3 layers of wallpaper, dozens of coats of paint, and that pink you see above is Calcimine.

Luckily, this old 1920s drywall is pretty hard, and it won't crumble or do anything awful with the paper layer missing, so I secured it in place with extra screws (to keep this section from flexing around).


This whole wall is absolutely TERRIBLE (one of the worst ones in the house), so I don't feel bad about just doing a "good enough" patch job here.

Coat 1:


Coat 2:


I laid on the mud fairly thick, and as evenly as possible, so I'm hoping this will be enough. I will do a rough sanding, then another "patch" coat to fill in any valleys (I know there will be some). Basically just 1-2 thin touch-up layers, and I'm calling it good.

What do you guys think? Have you had to do similar "good enough" repair jobs?

Tuesday, October 30, 2012

Front Hallway and Living Room Floor

A lot has happened with the house in the past few weeks. I am currently laid off due to a work shortage, so I've been home alone and bored. This means I've had some time to work on projects.

But first, I thought I should show off a bit more of the stuff you guys haven't seen yet.

Here are a few shots of the vanity. The first shows what the glazing process looks like. The effect in the photo looks pretty severe, but you have to remember that the first sealer coat of lacquer has been scuff sanded, so the overall door colour looks paler than normal. The glaze is also wet, so it looks darker. After the final coat, it shows up as just a slightly darker shadow in the crevices.


Here are a few shots of the main cabinet after it's been glazed and with the final coat of lacquer applied (and fully cured):


You can just barely see the glaze in the ogee detail on the toe-kick.


Here are the office built-in doors propped-up in place temporarily (just for a preview):


And the linen cupboard door:


Alright, so the first big project I tackled recently was the tear-out of the living room floor. I knew what to expect, and I ended up with no real surprises. Work started off with the removal of the large finger-joint 1/4 rounds (which is why they're in so many small pieces), and other garbage patch work.


I removed 90% of the furniture from the room, but the TV stand and the pine bookcase were too big (I had no room to put them anywhere else). I worked around those.


This large patched hole was expected...


I have no idea why there's an electrical box inset into the floor here.


I knew about the hole since this was the view from the basement:


I have an old vent that I THOUGHT originally went here, but it's about an inch too narrow for the hole. I can probably make this work by moving all the short boards near the wall inward.


The bright peacock blue visible in this corner is the original CALCIMINE paint. It is powdery and chalky, which is how I know it's calcimine, and there's nothing below it. There are several wallpaper layers and paint over it, however.


A few areas that will need annoying and painstaking patch jobs:


These were taken the following day in daylight. The floor looks absolutely terrible (worst than a barn floor) but I know that it's nice birch under this filthy crud layer.


This is where I had to stack many of the books from the bookcase. Believe it or not, but all of those fill only TWO of the three shelves in the bookcase. The cabinet it only 50"x50". With all the books in it, it's absolutely immovable even on a slippery laminate floor.


Lastly, this is just one quick and crappy photo of the latest major project, which has been the repairs and drywall work in the front (main) hallway. I decided not to make a narrow built-in around the duct stack next to the front door, so I built the framing around it and drywalled that.


I also made repairs to the dividing wall between the hallway and the staircase, as well as the office wall (in the hallway).

I also completely gutted and rebuilt the entire portion above the stairs as you go up. It was at a bad angle, and I've hit my head on it (lightly) once or twice. This was a pretty big job. I had to cut away two of the ceiling t-g boards, and I also discovered that they had stopped this "arch" piece short because they came up to the joist "X" braces. I actually had to remove the "X" braces and add other 2x3 pieces. I also had to re-cut the end of the joist to accommodate the new angle. The slightly
scary thing is that this joist isn't really well supported either. It just kind of sits there and the floor above, plus the ceiling t-g below kind of keep it in place. I added a bunch of screws on the end of the joist up into the wall over the "arch". Photos of that later.

I also started installing crown in the hallway. It's not going to be a match to the original crown mouldings. I plan to restore the original mouldings only in the office and living room, and everywhere else is getting new crown. This is the same crown as in the master bedroom (on the arch), and it matches the profile on the door and window casings (only it's larger).