Showing posts with label Built-in. Show all posts

Saturday, July 22, 2017

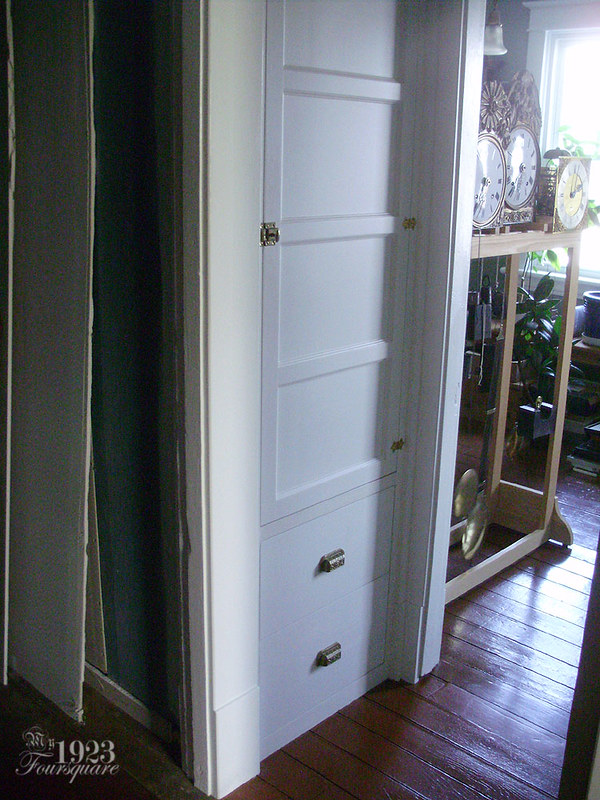
Upstairs Built-In Is ***DONE***

Yes you read that correctly.

P7110059

This has been a looooooong ongoing project that got started years ago when I demolished and rebuilt the upstairs closets. I started this in 2011!

The main box/cabinet is here:
http://my1923foursquare.blogspot.ca/2011/11/lazy-blogger.html
Then the door got built and installed in Oct 2012:
http://my1923foursquare.blogspot.ca/2012/10/front-hallway-and-living-room-floor.html
Then in Nov 2012, I got the door painted, and the hardware installed:
http://my1923foursquare.blogspot.ca/2012/11/soooooo-excited.html
Then in 2015 I made the shelves... yeah, slow and steady progress here, folks!
http://my1923foursquare.blogspot.ca/2015/10/small-side-projects-2.html

Also, before I continue, I'm aware of the "3rd Party Hosting" issues with my old Photobucket account. I don't have an easy solution at the moment (other than forking over money). I don't know if they no longer support 3rd party hosting AT ALL, or if the monthly usage is spent and it will eventually reset. I currently have 868 photos in that "problem album", and to manually save all of these, then transfer them to another photo hosting site, and then re-edit each photo in each post one by one would be a HUUUUUGGGGGE undertaking. It already takes me hours to write, edit, check, and publish regular posts, so that would take me days/weeks/months of work. I'm not sure what to do about it yet. This blog is completely free (and largely for fun) and I have no sponsors or any kind of ads on it, so I'm not really motivated to spend a huge amount of my free time to fix the problem right now, which is really unfortunate for my readers.

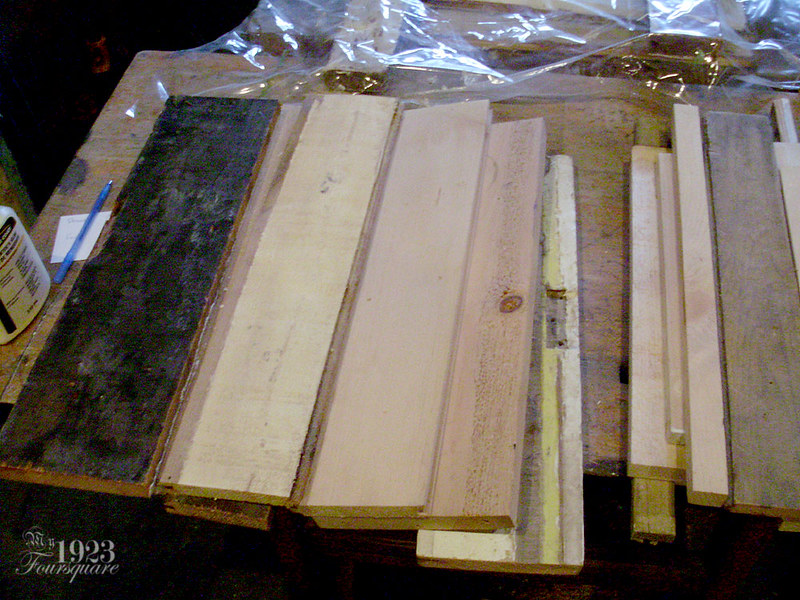
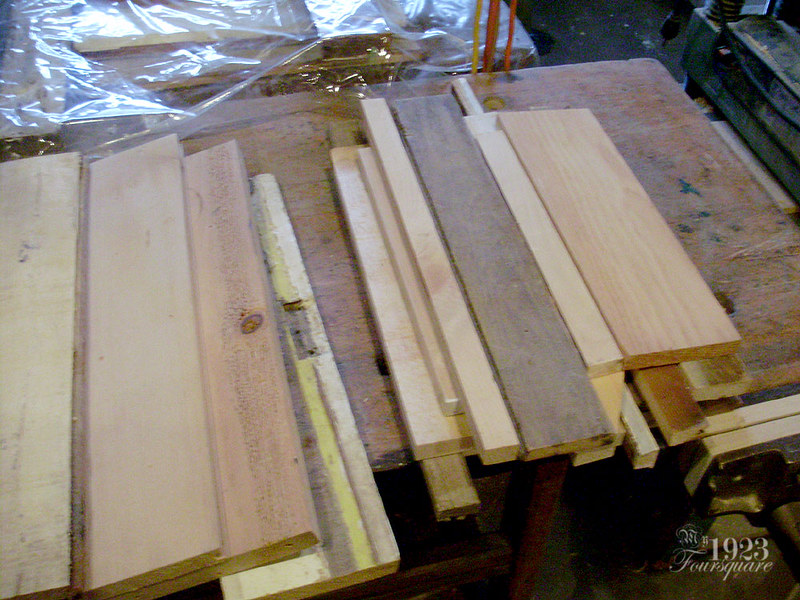
Anyhow, the drawers were the last part of the built-in to finish. Two drawer boxes, a pair of metal slides, and some drawer faces. I decided to use all kinds of short pieces of scrap wood for the drawer boxes. Not only is this a perfect place to use them, but the lovely mix of old and new wood will look great with the clear varnish. I used scrap wood on the back tongue-and-groove of my cherry bookcase, and it's one of the nicest details of the entire cabinet (which you don't even get to see when it's filled with books!)

Here's what I dug out of my stock. It is all entirely random bits of wood. Large, small, thick, thin, and a mix of pine, spruce, cedar, and fir. Some was painted, some was stained and varnished, some was water damaged, and many of these boards had nail holes from previous use as something else. You can see one of the pieces is a chunk of a pine door jamb.
P6140001

P6140002

All these were squared-up, given a pass in the joiner, and then glued into panels. Once dry, those panels were planed down until everything was smooth on both sides. I didn't really care what the thickness would end up as (because I was using so many odd sizes and thicknesses), but it ended up close to 5/8".

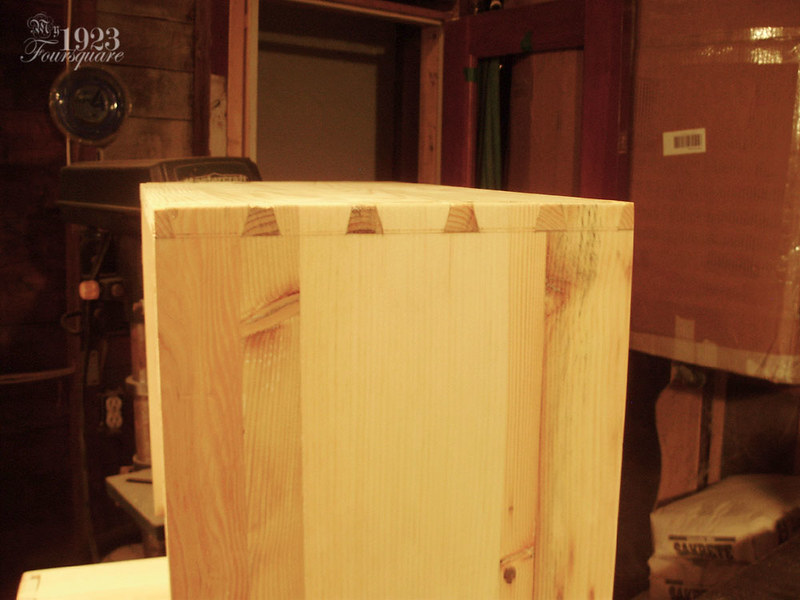
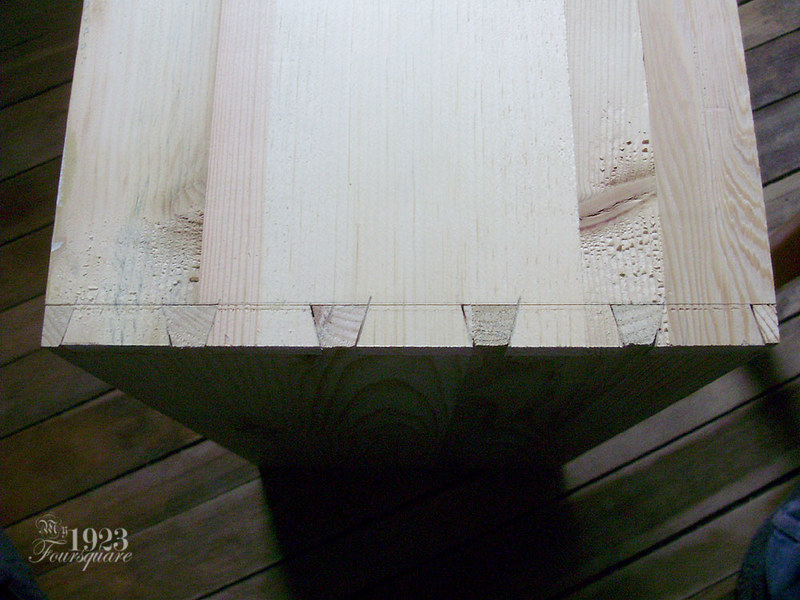
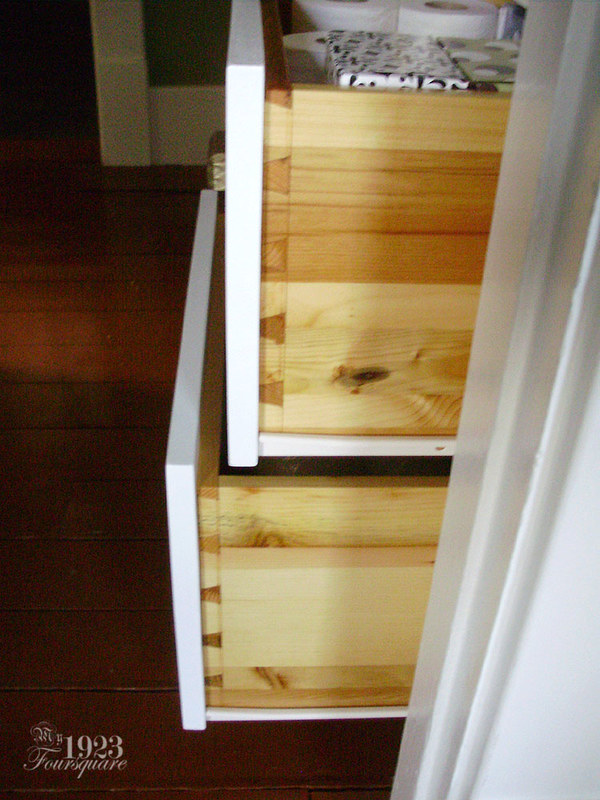
I decided that I wanted to have dovetails on these. I have a router dovetail jig that I never used, so I played around with it and even made a special base plate for my router, but I wasn't able to get good enough results with the setup I have (I need another size collar) so I decided to do HAND CUT dovetails instead. This is only the second or third time that I do hand cut dovetails, but they turned out pretty good! I used a combination of a Japanese hand saw, a scroll saw (to cut out the bulk) and a sharp chisel. You can also see some of the various wood grains in the drawer box sides.
P6200054

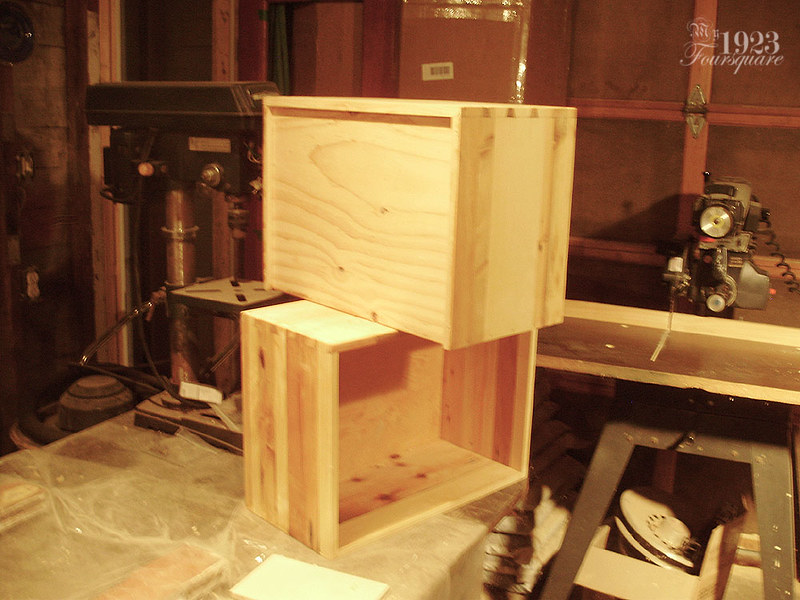
Boxes done. The bottoms are 1/4" thick Fir plywood, which was a leftover, and which will match the interior of the built-in cabinet.
P7020012

Dovetails puttied and sanded:

P7020013

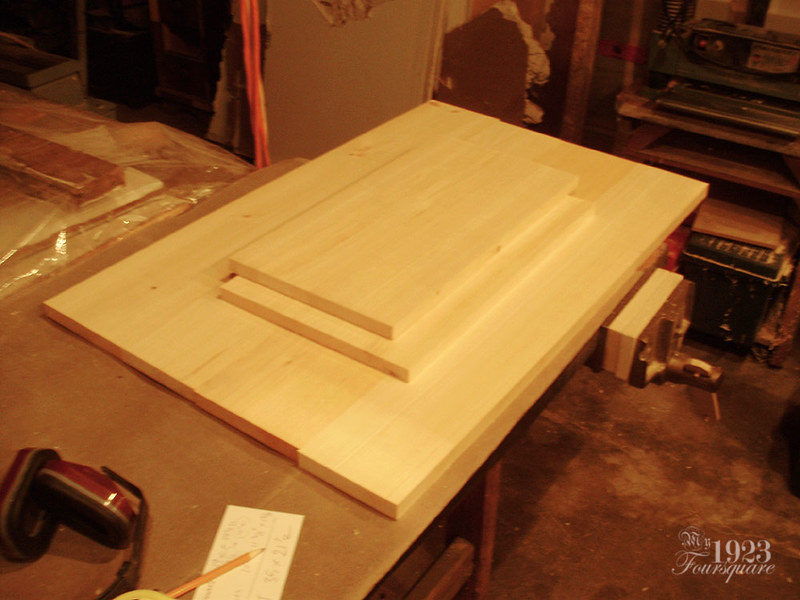
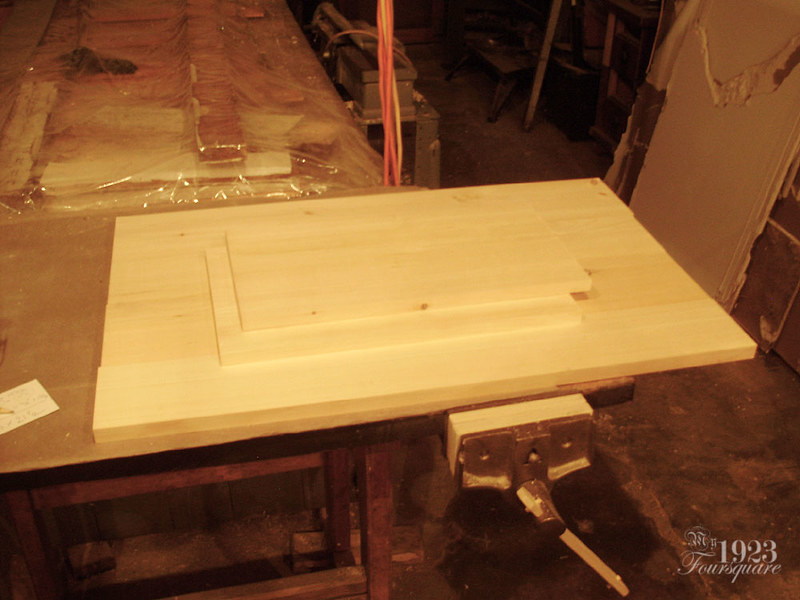
The two drawer faces are here (made from clear pine), and the other large panel is SPOILERS! Ignore it! Don't look at it! Shhhhh...
P7020010

P7020011

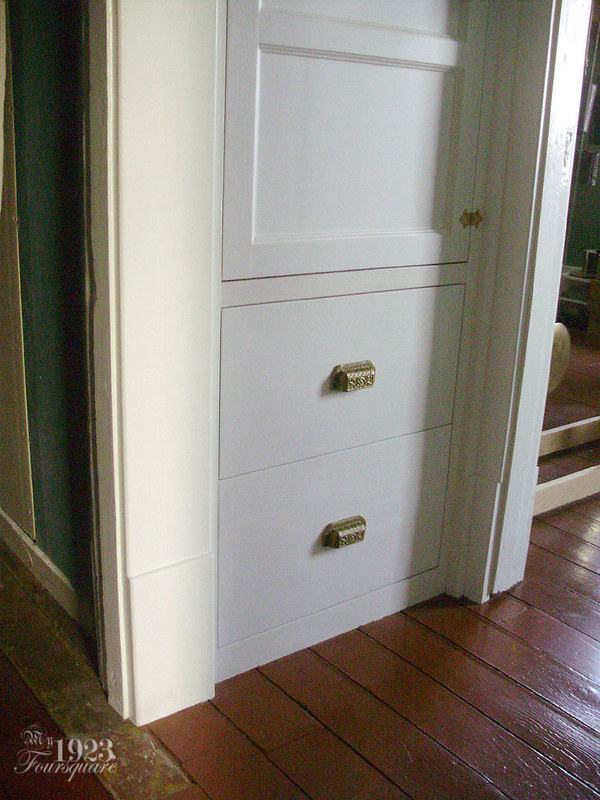
A bit of varnish, and some paint, and VOILA!
P7110055

P7110057

P7110059

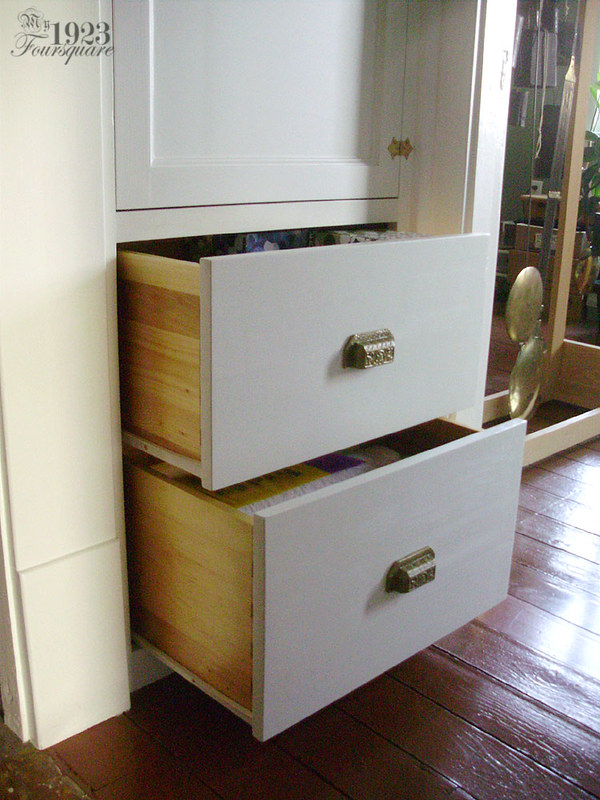
A quick side note to mention that the two drawer boxes are not the same size (neither are the faces). They are meant to look pretty much the same, but because of perspective (where you are always looking downwards), the bottom one is made larger to compensate. The bottom drawer box is about 10 1/2", and the top one is about 9". Because I wanted the same number of dovetails, they both had to be measured to different sizes using a divider/compass (using the traditional method). It's not a big deal, and it's a detail no one will ever notice, but I wanted to point it out. Also note the beautiful wood grain on the boxes!
P7110058

I agonized just a little bit over the hardware. Originally I was thinking of using two small wood knobs (two per drawer), but the drawers are not wide enough, so it would have looked dumb. Then I also had some XL wood knobs (one per drawer), but nixed those too. I had 2 or three other types of knobs and handles, but I ended up picking these cast iron cup pulls. I have 5 of them, and I kind of wanted to keep them together as a set, but since I will have similar Victorian style plates on my house doors (eventually), I thought these would match well with the rest of the overall house hardware. They were just raw grey, so I spray painted them gold, and I installed them with SLOT screws: a very important detail. If you are the kind of person who installs beautiful antique hardware with new modern Phillips screws, you make me want to cry!
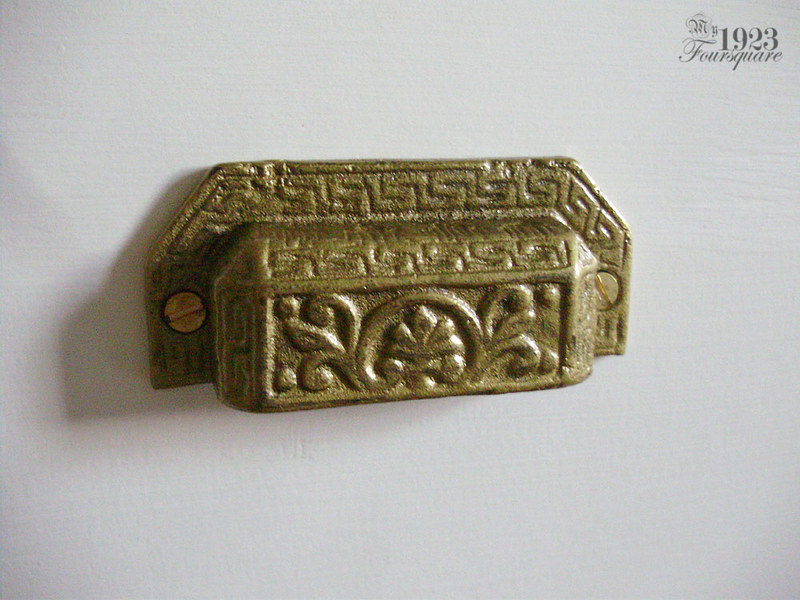
P7110054

So there we go. 6 years, piece by piece, but it's DONE now.

Sunday, October 18, 2015

Small Side Projects 2

Here's a bit of a follow-up post to the last one. I mentioned a while ago the new step that I made for my Mom's place, and here's a photo of it in place.


She absolutely loves it, and I think it turned out pretty good. It looks like it still could have been a touch higher in the back right corner, but considering that each corner is a different height, and that I had to approximate a level line using only a 2 ft level, it came out pretty good.

Another small project that I finished just this week is that I FINALLY made some shelves for the built-in upstairs. It's been years already, and I just didn't feel like doing them, but this past week they got done, varnished, and installed.

The shelves are made from matching 3/4" thick fir plywood, and the front edges are capped with about a 1" wide strip of 1/4" thick solid fir taken from an old door casing.


That's about it for now. I will be working soon on my wing chair that's currently at the shop, so it should be fun to bring that home in a week or so. This was a cheap wing chair that I found, and I've modified the frame to make it look older. I have some old plain grey upholstery fabric that I bought years ago and never used, so basically, aside from spending a lot of time on it, this chair will largely have been free.

Saturday, June 21, 2014

Before & After Photos - "L" Room

Here are the finished photos for the "L" Room, which show the room as it looked when I bought the house in 2010, and now, after a ton of work rebuilding the closet walls, repairing the window mouldings, replacing the missing mouldings for the doors, fixing electrical outlets, fixing the duct work, repairing/patching and repainting the original tongue and groove pine floor, fixing the absolutely terrible ceiling (which had been textured with drywall compound and a broom), etc.

The photos rotate counter-clockwise from the left-hand corner as you walk into the room.


The bookcase was removed because this is the only usable wall without any obstructions (windows or doors). This would be the idea spot to have the headboard of a bed. When the house was originally built this was actually a window, but now there's an attached building on this side.


Note: the interior of the closet is still unfinished drywall at the moment.


Here you can see where I rebuilt the new wall to land even with this stupid corner that they had (this doorway was not here originally).


The only drastic change to this corner was the lowering of the outlet, and repairing the sloppily installed baseboards (with 1 missing corner stake).


The floor here needed a lot of repairs. A lot of the pine boards are new, and had to be custom made to fit.


The original closets were only 16" deep, and they had been modified twice in the past. Originally they separated the two east rooms upstairs. At some time in the 40s or 50s they were opened up into a curved archway to make an upstairs kitchen and dining room, with a small broom closet at each end. After this, they were again turned back into one single long closet. I tore everything out and made this back into two closets and a built-in linen closet for the hallway. One closet is larger (the one for this large L shaped room), and the other one (only partially built) will serve the small back room in the north-east corner.


A few additional photos.

This shows the main doorway, the linen closet in the hallway, and the new closet for the "L" Room. The doorway to the right of the hallway built-in leads to the small north-east bedroom mentioned above.


Here is the newly refurbished and rewired (antique) light fixture, with antique glass shades. This fixture was bought in rough shape on eBay over a year ago, and the shades were purchased separately (also on eBay). The fixture (along with all the other ones in the house) was rewired using antique reproduction Rayon covered wire. The painted finish on the fixture also had to be redone from scratch.


Lit:


Note: for those who are curious, the wall paint is Behr's "Olivine" and the floor is "Florence Brown".

Monday, October 14, 2013

Varnish Update

Alright, so far, so good. Several things are now varnished and DONE, but there's still a few things left to do, still.

First, the two built-ins are varnished, and have the shelf hardware installed. Second, the body of the bookcase is varnished, as are the backboards, which are installed, and the doors. What's left on the bookcase are the shelves (they have 1 coat so far), and I still need to make the knobs for the upper doors, a shelf for the upper case, and the top crest. The backboard (ply) is cut, but I want to paint it teal, and I need to decide on a shade.

I also need to pick up some glass for the upper doors.

Here are some photos (minus the upstairs built-in, which I forgot):


I had originally wanted to have the cherry stained a deeper red/mahogany colour, but it would have required a lot more work (stripping and sanding additional sections), and in the end, I'm quite happy with just the clear varnish.


The office built-in (same room). Same story here. I had thought about staining the Fir plywood a shade darker, but it came out perfect with just a clear varnish on it.


These next ones show the pieces in context within the room.


Tuesday, October 08, 2013

High on Fumes

I've started on some extensive varnishing around the house, namely the two built-ins, and the bookcase (which is in the garage to help minimize the fumes).

I generally use Satin Varathane for most of my finishing projects, and I thin it for the first coat (as suggested) 10%, but I either use mineral spirits (aka paint thinner), or turpentine. I generally prefer the smell of the turpentine, but MAN, the fumes are strong this time.

I had been torn with whether to stain the Fir on the built-ins, use a tinted varnish, or just use clear (plain). I ended up just going with plain varnish and I'm SO GLAD I did.

The Office built-in in particular turned out a beautiful shade of orange, and I'm actually surprised with how dark the final colour will be. It's going to look great, but like I said: I'm really glad I didn't add stain. Hopefully the orange tone will match the refinished birch floors when I eventually do those.

The built-in in the upstairs hallway is a bit lighter, since it gets very little sunlight, but it looks pretty good too.

I still have a lot of varnishing left to do. I only did the bottoms on the bookcase, since I need to do those first before I can flip them and do the rest, so I still have the bulk of the two cases to do the first coat, then all the doors, shelves, and back boards (I'm doing just the cases for now, and when those are done, I'll do the shelves and back).

Pics soon-ish.

Saturday, May 04, 2013

Office Reveal!

Here are the photos you've been waiting to see for a while. I've wanted to have this room done for a long time. This is the one room in the house that I've spent the most time in, since I bought the house in 2010. Since the very beginning, it's been the "computer room", and for a long while, it was also my temporary bedroom. I only moved my bed out of this room after I had finished the bathroom, and then the master bedroom (early summer 2012).

The room isn't finished yet, though, but everything above the baseboards is finished (with the exception of the built-in doors/varnish). The room needed all sorts of repairs:

- New (and repairs to) electrical outlets/switch. (Link)
- Rebuild the entire door frame/jamb/mouldings. (Before Photo)
- Ceiling t-g repair and new light fixture elect. box. (Link)
- Rewired antique fixture (this one was a gift and is still one of my favourites).
- Rebuild the drywall corner. (Link) (Link) (Link)
- Patch the ceiling and floor of old duct location. (Link)
- Move duct work for heating vent from floor in the doorway to the wall (and patch floor hole). (Link) (Link)
- Remove damaged (cheap) laminate and plywood to expose original hardwood floor. (Link)
- Replacement some missing "historical" crown (custom) pieces. (Link)
- New window trim (detail) mouldings.
- New built-in cabinet to replace the earlier (poor) one. (Link) (Link)
- Custom mini access door (for phone & cable wiring in duct column). (Link)
- Painting. (This Post!)

The room still needs:

- Original floors sanded and refinished.
- Baseboards re-installed, caulked, & painted.
- Wall heat grate stripped and repainted white.
- Finish built-in doors (leaded glass), and get glass shelves cut for it.

So it's 80% done. The floor will be a fairly "big" job, but shouldn't be too hard.

Here's how the painting process came along:


If you've seen my previous painting posts, you'll notice that I prefer to "painter's tape" everything. A lot of painters prefer to "cut-in" with a paint brush, but I find the tape method to be much quicker and easier, and gives me good results. It's not perfect, and you need to take a lot of time to tape everything carefully (and straight) but this method works for me. The taping took me at least a half hour.

And yes this method uses A LOT of tape. I end up with a huge ball of used tape after it's all removed, but for me it saves me a lot of time and hassle.

A note on green painter's tape: I've found that some brands are better than others. I do NOT like the "Frog Tape" green painter's tape, since I find that it tears easily when you're trying to remove it, and sometimes it's not sticky enough to stay put. I believe the "in house" Rona brand is good, but I am not often at their end of town. The last bunch that I bought (the stuff I used on this room) was by Cantech, and worked excellently (keep in mind that the new crown moulding was freshly painted just 2 days ago, and the tape didn't peel off the paint).

I have no idea why this next photo turned out blurry.


This next photo might amuse you guys. I still had my computer plugged in, with music playing, and I didn't want to shut it off/unplug it, so I left it in place, and just moved the "desk" *cough*crummycardtable*cough* to the centre of the room, and taped around the outlet(s). The electrical outlet on this one actually needs to be changed, since it's an old dirty/scratched/partially painted old one, so I wasn't worried about possible paint smears on it (just the plug).


As I started to do the corners, I was worried this was going to be too dark. It's pretty bold.

Remember, my sample really didn't look too dark:


This is the exact same paint as on the sample board.


I decided to keep going, and hoped it wouldn't be too bad once it was dry.


The finished colour ends up looking very velvety and rich looking, which I like. It's definitely a more modern colour (which I like), and compliments the white trim well. I do love it, but I'd have liked it to be just a hair lighter. I might have to really double-check the colour I want for the Living Room before I buy it.

Final Reveal! These were taken just a half hour ago in late morning light, and I adjusted the photos in Photoshop to look as accurate as possible.


Ignore the "Box O' Crap" on the floor here.


This is the wall over the computer desk where I want to do an "art wall".


I was really excited about installing the little mini door, but I forgot that I ran out of small slot screws for the hardware, so I won't be able to install it until next week. It will have 2 butterfly hinges and a catch like the built-in doors.


I finally took some nicer shots of the antique fixture. When I took it down yesterday to paint the ceiling, I took the time to clean it, and wash the shades before putting it back up.


Lastly, here's a moody evening shot: