
Showing posts with label Walls. Show all posts
Showing posts with label Walls. Show all posts
Saturday, December 08, 2018
Staircase Walls Painted
So not much of an update, but last night and this afternoon, I got the walls of the main staircase/stairwell painted. It's a lovely shade of pale grey which turned out just how I wanted. Pics soon. I will likely just go back to Google Photos for my photos, but I need to re-familiarize myself with their system. I had moved away from them because I hated it.


Tuesday, November 22, 2016
Victorian Farmhouse - Part 17 Upstairs Hallway Ceiling
The hallway upstairs presented a bunch of really complicated problems for us. A lot of these problems are largely due to how the house was constructed. I have mentioned this before, but will repeat it here for clarity. The main floor was finished with lath and plaster (which was expensive), and anywhere that they could, they saved money by installing tongue and groove instead. This is why the living room ceiling and the lower half of the walls are all wood. I have seen old houses where there is NO plaster or drywall anywhere (tongue and groove walls and ceilings through the whole house).
Anyways, in this particular house, the plaster was largely in the entry hall with the staircase, and in the living room (now the office). The plaster goes up the staircase wall, but it ENDS right at the window in the peak. All of the walls upstairs are wood. Just wide wooden planks of barn board. Originally it was all just covered in wallpaper. Layers upon layers upon layers of wallpaper. We counted close to 15-20 layers of wallpaper in the different rooms upstairs.
Later down the line, part of the rooms had paneling or drywall added on top. The master bedroom (the pink room) has drywall, and part of the hallway (bedroom and bath side).
Now that we're trying to fix up the house, we're aiming for an updated "drywall or plaster everywhere" look. This means that we need a smooth surface on the wall that is half plaster and half barn boards.
We could NOT slap drywall on top, because it would end half way into the window, and if we did new drywall on the entire wall (down the stair wall) we would be burying most of the edge of the stairs (the wood trim), and messing up the window mouldings.
The solution that I came up with was to cover just the barn board wall with VERY THIN plywood. 1/8". This was HARD to find, but we eventually found a place that sold some. It was oak veneer on one side, and cheap mahogany on the back. The mahogany was better for what we wanted.
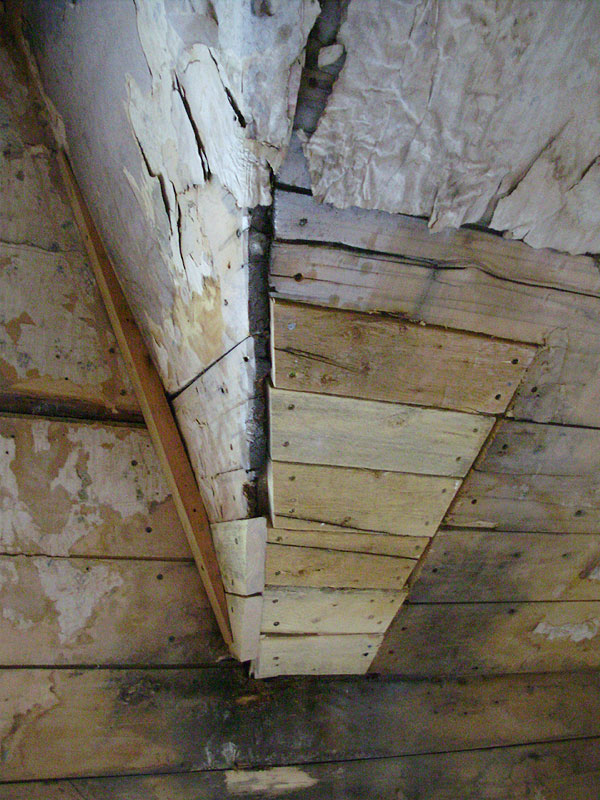
Before we installed the plywood, we had to square-up the ceiling slopes. They were INSANELY crooked, but easy to fix. The new wood in this photo was partly because this corner was rotted, and partly for when we fished some wires.
Note the huge curved dip in here. This side needed just this filler piece.
Compare it corner to corner with a ruler.
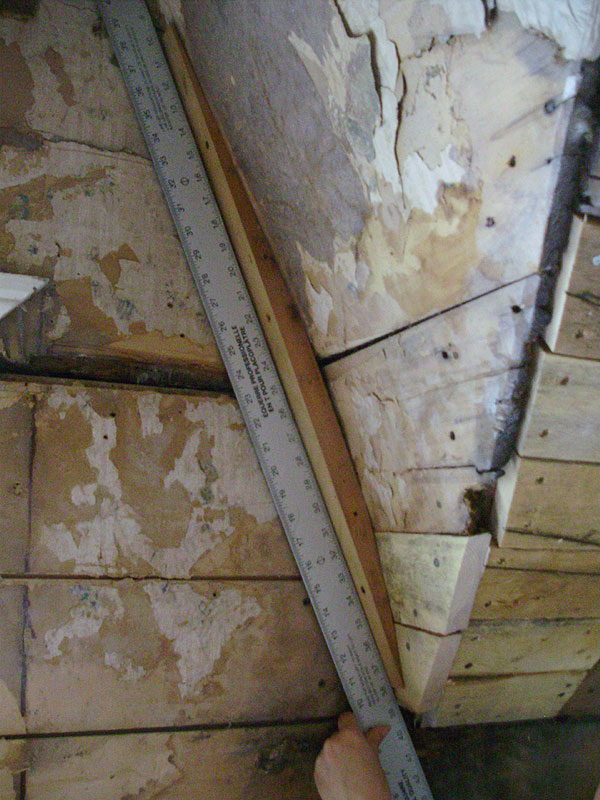
The other corner had the top corner too far inwards, so I had to make a vertical spacer, and a new piece at the top. It doesn't look that bad in the photos, but it was very very crooked in person.
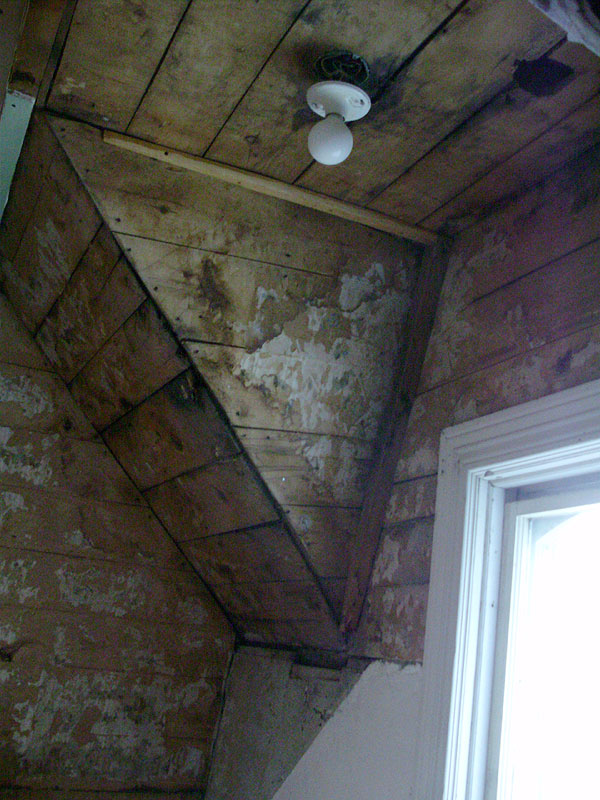
The only place we needed the special thin plywood was the window wall. Everywhere else we installed regular 1/2" drywall.
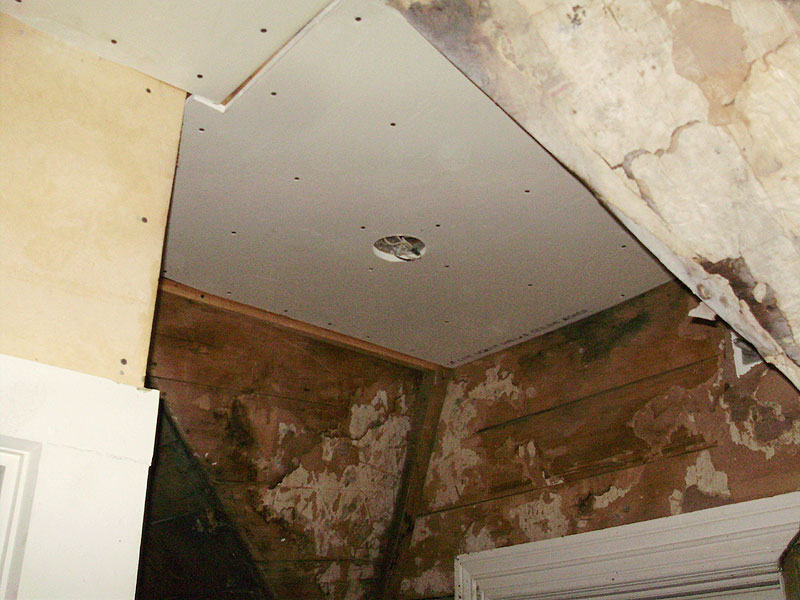
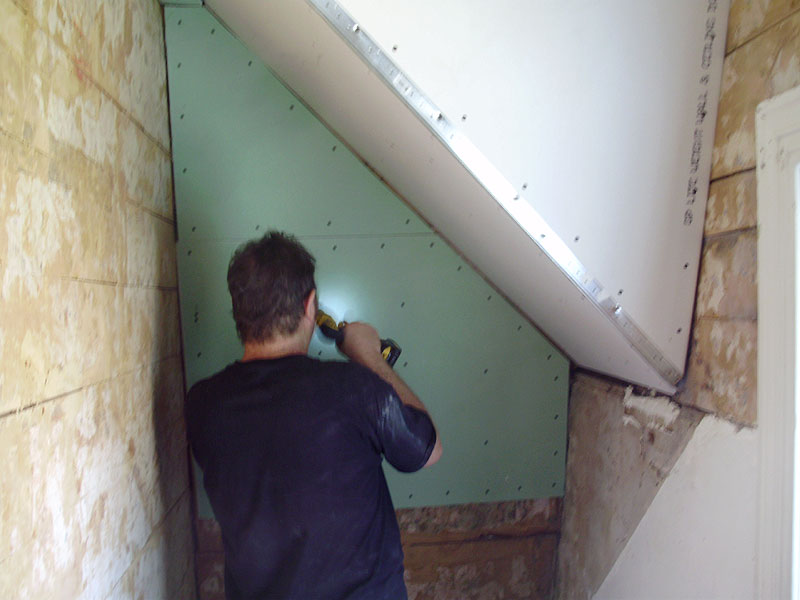
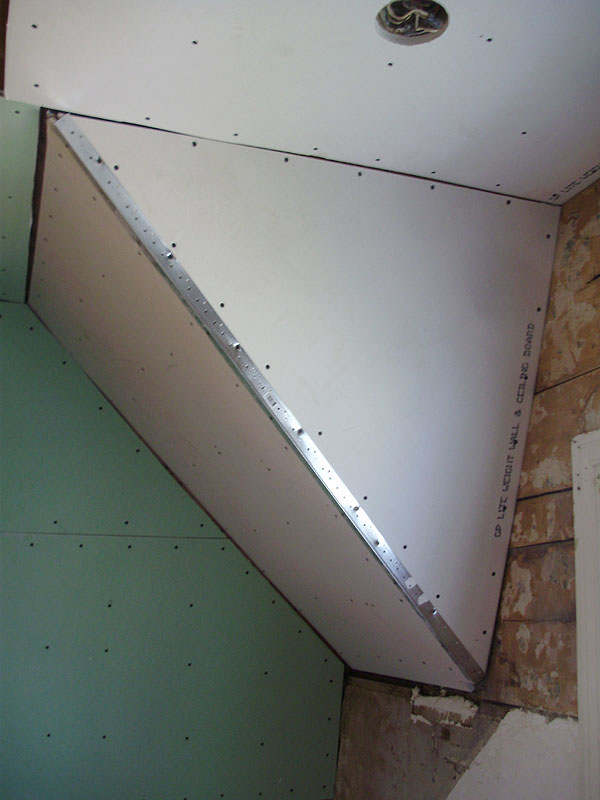
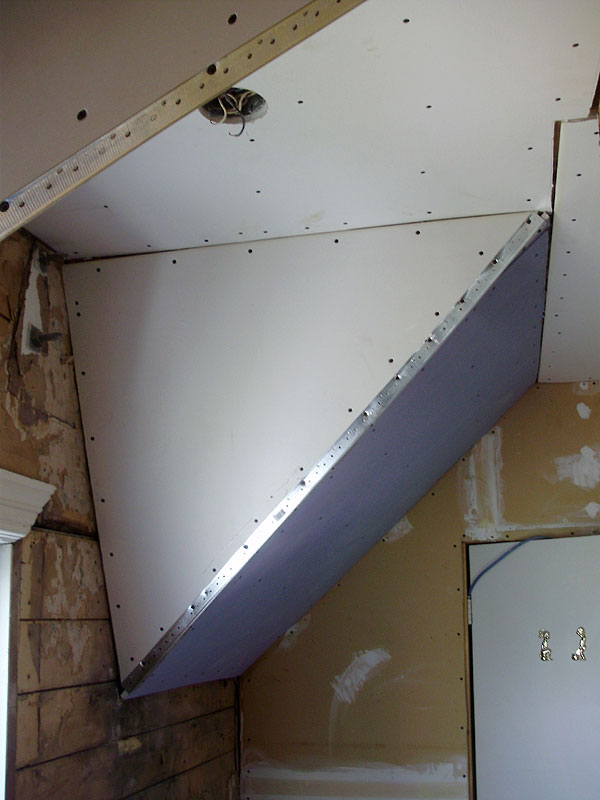
Finally here is the 1/8" plywood being installed. We used a LOT of small #4 3/4" long screws to attach this. The plan is to tape this and seam it just as it it were drywall. You can see where the plaster finishes just below the window (at the edge of the plywood).
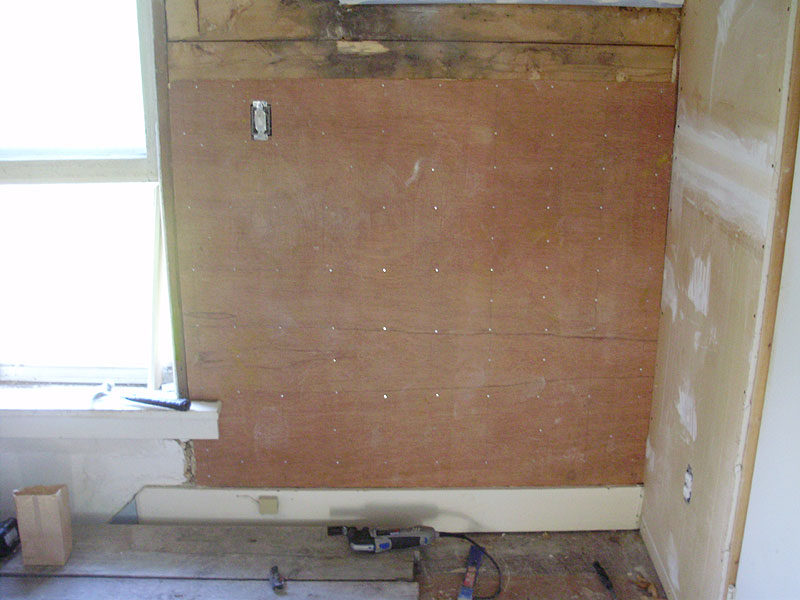
We had a similar problem on the master bedroom wall, but here we used 1/4" plywood, which will give a smoother surface (and it was cheaper). You can see the board walls above the plywood, with some of the wallpaper removed.
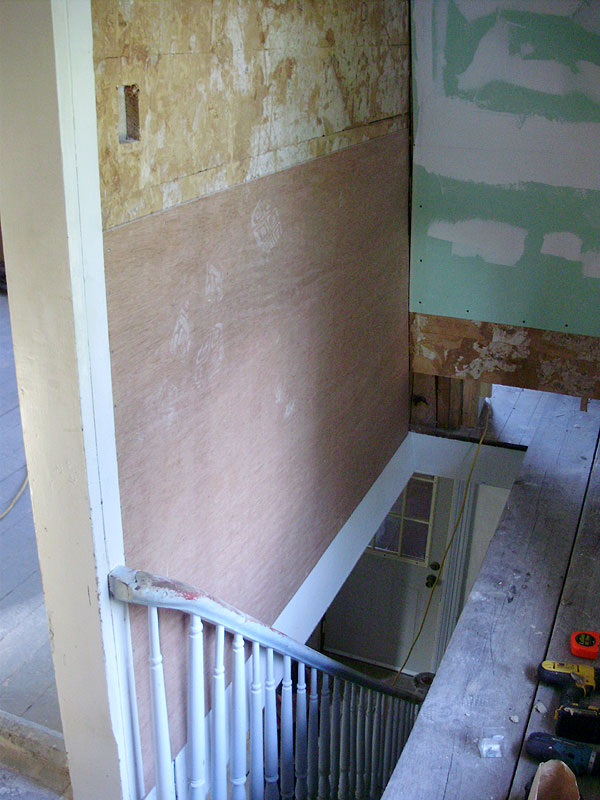
The rest of the 1/8" thick plywood on the window wall. The plaster ends about a foot down from the window top on the left. See next photo. This lines up with the bottom of the ceiling slope.
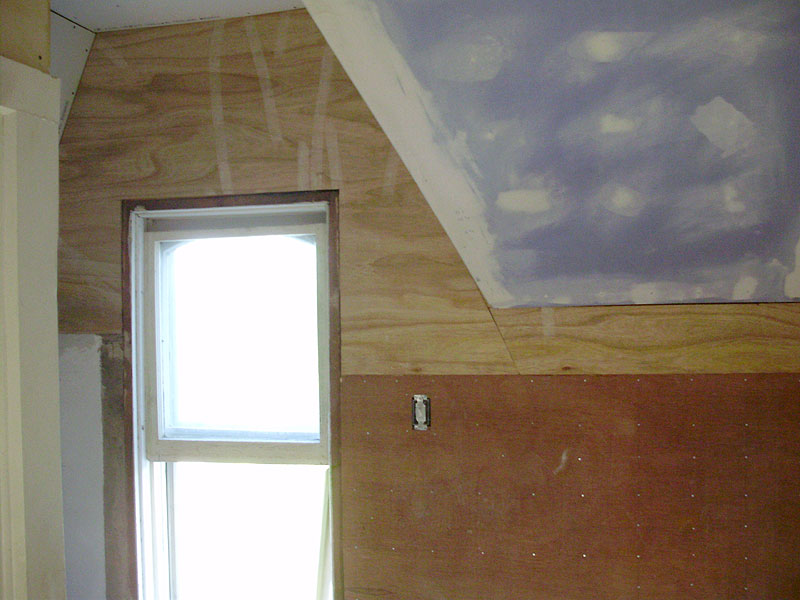
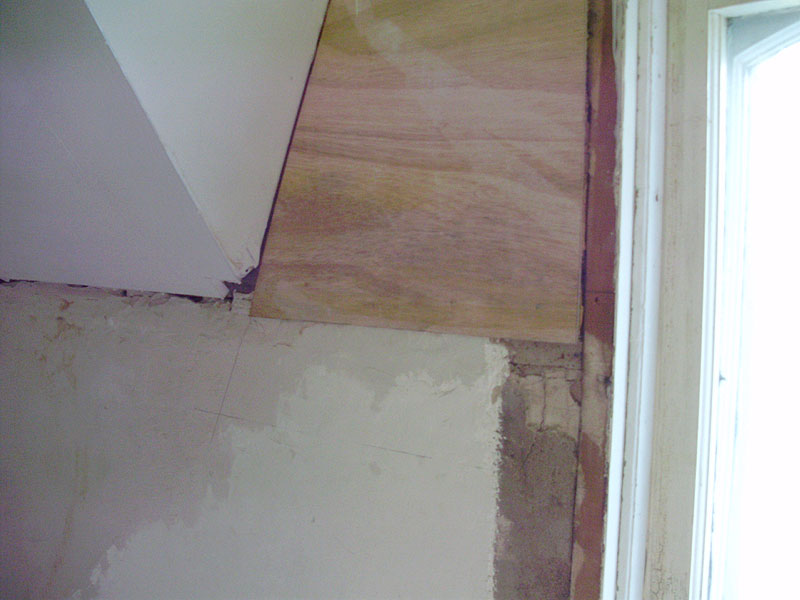
With seams taped and first layers of drywall compound added.
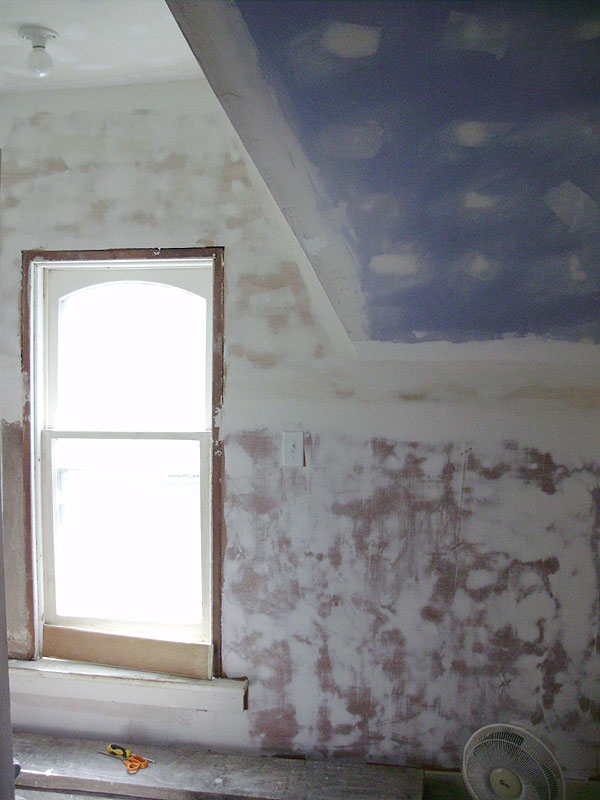
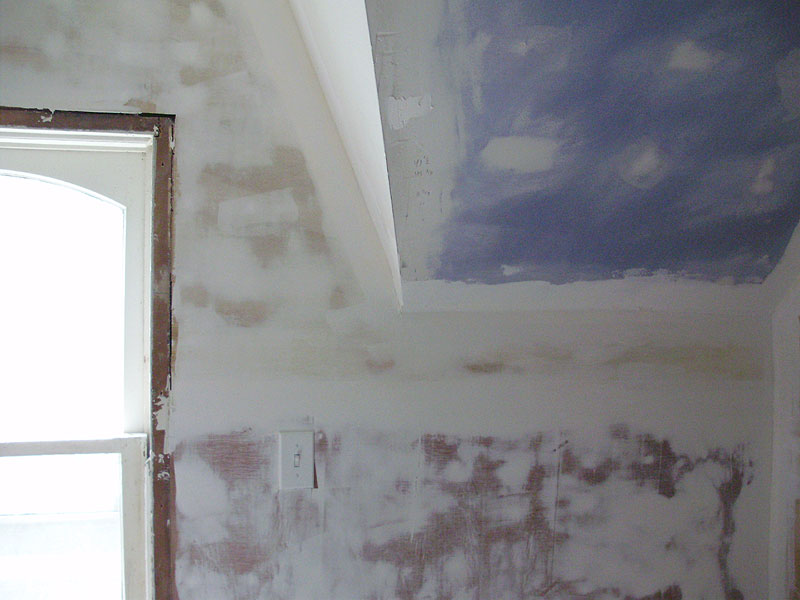
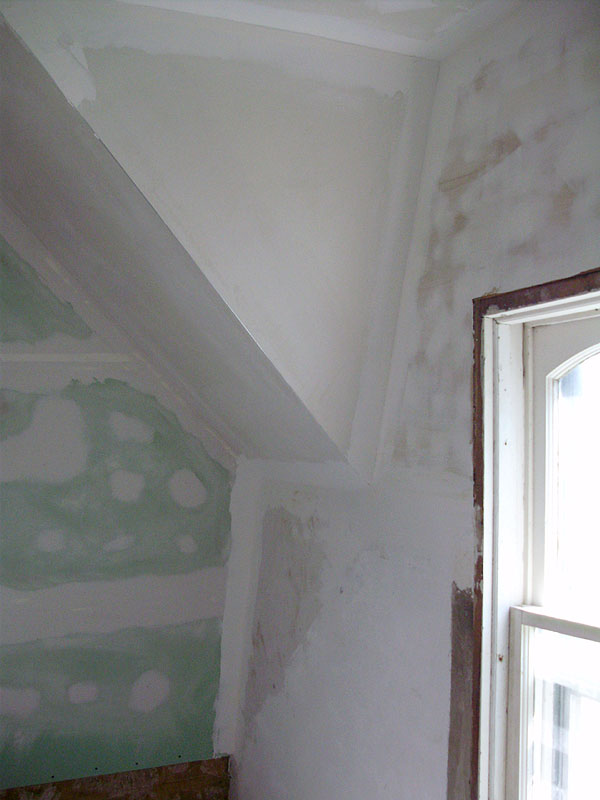
There are still touch-ups to do on the corner seams, but this is going to look really awesome once it's freshly painted!
Anyways, in this particular house, the plaster was largely in the entry hall with the staircase, and in the living room (now the office). The plaster goes up the staircase wall, but it ENDS right at the window in the peak. All of the walls upstairs are wood. Just wide wooden planks of barn board. Originally it was all just covered in wallpaper. Layers upon layers upon layers of wallpaper. We counted close to 15-20 layers of wallpaper in the different rooms upstairs.
Later down the line, part of the rooms had paneling or drywall added on top. The master bedroom (the pink room) has drywall, and part of the hallway (bedroom and bath side).
Now that we're trying to fix up the house, we're aiming for an updated "drywall or plaster everywhere" look. This means that we need a smooth surface on the wall that is half plaster and half barn boards.
We could NOT slap drywall on top, because it would end half way into the window, and if we did new drywall on the entire wall (down the stair wall) we would be burying most of the edge of the stairs (the wood trim), and messing up the window mouldings.
The solution that I came up with was to cover just the barn board wall with VERY THIN plywood. 1/8". This was HARD to find, but we eventually found a place that sold some. It was oak veneer on one side, and cheap mahogany on the back. The mahogany was better for what we wanted.
Before we installed the plywood, we had to square-up the ceiling slopes. They were INSANELY crooked, but easy to fix. The new wood in this photo was partly because this corner was rotted, and partly for when we fished some wires.
Note the huge curved dip in here. This side needed just this filler piece.
Compare it corner to corner with a ruler.
The other corner had the top corner too far inwards, so I had to make a vertical spacer, and a new piece at the top. It doesn't look that bad in the photos, but it was very very crooked in person.
The only place we needed the special thin plywood was the window wall. Everywhere else we installed regular 1/2" drywall.
Finally here is the 1/8" plywood being installed. We used a LOT of small #4 3/4" long screws to attach this. The plan is to tape this and seam it just as it it were drywall. You can see where the plaster finishes just below the window (at the edge of the plywood).
We had a similar problem on the master bedroom wall, but here we used 1/4" plywood, which will give a smoother surface (and it was cheaper). You can see the board walls above the plywood, with some of the wallpaper removed.
The rest of the 1/8" thick plywood on the window wall. The plaster ends about a foot down from the window top on the left. See next photo. This lines up with the bottom of the ceiling slope.
With seams taped and first layers of drywall compound added.
There are still touch-ups to do on the corner seams, but this is going to look really awesome once it's freshly painted!
Thursday, June 12, 2014
"L" Room Update
I just did the first coat of ceiling paint, and I also primed the new wall section. A few days ago I also installed, caulked, and primed the last section of baseboard.
I will need one more coat of ceiling paint, a few coats of white on the baseboard, then the walls can be painted.
I will need one more coat of ceiling paint, a few coats of white on the baseboard, then the walls can be painted.
Monday, May 27, 2013
Living Room :(
Well I've had a full day to look at it, and think about it, and I definitely hate it. It just doesn't blend-in well with all the other colours in the house. I'll either be repainting it, or I might try some type of stencil over it? Thoughts?

Viewed from the office:


The colour appears to be a bit more "quiet" or soft in this photo (closer to what I was hoping for).


:(
Viewed from the office:
The colour appears to be a bit more "quiet" or soft in this photo (closer to what I was hoping for).
:(
Sunday, May 26, 2013
Living Room Painted
I painted the living room today.
I have mixed feelings about the colour. I am trying to decide if I love it, or if I hate it.
- It's not too dark, which is nice, but it's BRIGHT.
- The shade of green is alright, but it might not be the best shade for the living room (which I wanted to be a bit more formal).
If I had to pick a few words to describe the colour: Pistachio ice cream.
I'll do the touch-ups tomorrow, and then post photos.
I have mixed feelings about the colour. I am trying to decide if I love it, or if I hate it.
- It's not too dark, which is nice, but it's BRIGHT.
- The shade of green is alright, but it might not be the best shade for the living room (which I wanted to be a bit more formal).
If I had to pick a few words to describe the colour: Pistachio ice cream.
I'll do the touch-ups tomorrow, and then post photos.
Monday, May 20, 2013
Misc
I was planning to go and buy the green living room paint today, and get some cheap shower curtains and paint drop-cloths (dollar store), but I forgot that today was Victoria Day.
I'll go tomorrow.
Tomorrow I might just do the paint/supply run, but this week I'm planning to get the hallway t-g ceiling painted, as well as the living room t-g ceiling and walls painted. It's a lot of painting, but it should go pretty quickly.
That's not the only painting project I'll be working on...
For months now, I've been itching to do some sort of artwork. I was going to do a gouache (acrylic) on a prepared canvas, but the canvas that I have on hand is a bit large, and it's an odd size for framing (I think is 12x16 or something and there aren't that many available frames in this size).
Instead, I'm doing a watercolour. I love watercolours, but I tend to use them in an over-saturated way, where only the very pale colours are transparent. My art teacher hated this about me, but I really just strive to get a colour match from the source image I'm using, and if it has black in it, I want pure black, rather than a translucent back.
The image I'm using is an internet find. It's a photo of a beautiful "Madagascar Moon Moth" or Comet Moth. These are similar to the large "Luna Moth" but are yellow rather than a soft green.

I actually just managed to track down the original photographer who took this photo, and I contacted him to see if he would have any objections to me using his photo. Most people don't mind if permission is asked, but sometimes you just never know.
I'll go tomorrow.
Tomorrow I might just do the paint/supply run, but this week I'm planning to get the hallway t-g ceiling painted, as well as the living room t-g ceiling and walls painted. It's a lot of painting, but it should go pretty quickly.
That's not the only painting project I'll be working on...
For months now, I've been itching to do some sort of artwork. I was going to do a gouache (acrylic) on a prepared canvas, but the canvas that I have on hand is a bit large, and it's an odd size for framing (I think is 12x16 or something and there aren't that many available frames in this size).
Instead, I'm doing a watercolour. I love watercolours, but I tend to use them in an over-saturated way, where only the very pale colours are transparent. My art teacher hated this about me, but I really just strive to get a colour match from the source image I'm using, and if it has black in it, I want pure black, rather than a translucent back.
The image I'm using is an internet find. It's a photo of a beautiful "Madagascar Moon Moth" or Comet Moth. These are similar to the large "Luna Moth" but are yellow rather than a soft green.
I actually just managed to track down the original photographer who took this photo, and I contacted him to see if he would have any objections to me using his photo. Most people don't mind if permission is asked, but sometimes you just never know.
Saturday, May 04, 2013
I Made a Hole in the Wall!
I made a nail hole in my freshly repaired and painted wall. For some, this would be horrifying, but not for me. I plan to put dozens of holes in the walls of this room.
The first was for this stunning Vienna wall clock.

Many of you will remember that I already had a similar clock in this same spot. The previous clock is a miniature, and it didn't fit the space that well. It was also off-centred on the wall because of the rebuilt drywall duct wall. I had just reused an existing nail hole in the wall, and I was able to enjoy the clock since then.
It's starting to be a bit of a shock to see some of these old photos now...

But now that the walls are done, I had planned for a larger clock for this spot.
This particular clock was a MASSIVE restoration effort. The case was infested with live woodworm beetles, and it was missing 2 pieces of moulding, the top, and all 3 finials. It took over a year to restore it, fill all the thousands of insect holes (after treating the case with a penetrating chemical insecticide), and rebuilding all the missing pieces. In the end, it has become one of my "showiest" clocks, and one that I'm happy to have in this room (where I spend most of my spare time).


For fun, here are a few "before" photos:


A lot of other clockmakers/collectors would have saved the movement and used the case as firewood, but I knew it could be beautiful again (with a lot of effort).
The parts had to be kept in my freezer until I could deal with the insects.


The first was for this stunning Vienna wall clock.
Many of you will remember that I already had a similar clock in this same spot. The previous clock is a miniature, and it didn't fit the space that well. It was also off-centred on the wall because of the rebuilt drywall duct wall. I had just reused an existing nail hole in the wall, and I was able to enjoy the clock since then.
It's starting to be a bit of a shock to see some of these old photos now...
But now that the walls are done, I had planned for a larger clock for this spot.
This particular clock was a MASSIVE restoration effort. The case was infested with live woodworm beetles, and it was missing 2 pieces of moulding, the top, and all 3 finials. It took over a year to restore it, fill all the thousands of insect holes (after treating the case with a penetrating chemical insecticide), and rebuilding all the missing pieces. In the end, it has become one of my "showiest" clocks, and one that I'm happy to have in this room (where I spend most of my spare time).
For fun, here are a few "before" photos:


A lot of other clockmakers/collectors would have saved the movement and used the case as firewood, but I knew it could be beautiful again (with a lot of effort).
The parts had to be kept in my freezer until I could deal with the insects.


Office Reveal!
Here are the photos you've been waiting to see for a while. I've wanted to have this room done for a long time. This is the one room in the house that I've spent the most time in, since I bought the house in 2010. Since the very beginning, it's been the "computer room", and for a long while, it was also my temporary bedroom. I only moved my bed out of this room after I had finished the bathroom, and then the master bedroom (early summer 2012).
The room isn't finished yet, though, but everything above the baseboards is finished (with the exception of the built-in doors/varnish). The room needed all sorts of repairs:
- New (and repairs to) electrical outlets/switch. (Link)
- Rebuild the entire door frame/jamb/mouldings. (Before Photo)
- Ceiling t-g repair and new light fixture elect. box. (Link)
- Rewired antique fixture (this one was a gift and is still one of my favourites).
- Rebuild the drywall corner. (Link) (Link) (Link)
- Patch the ceiling and floor of old duct location. (Link)
- Move duct work for heating vent from floor in the doorway to the wall (and patch floor hole). (Link) (Link)
- Remove damaged (cheap) laminate and plywood to expose original hardwood floor. (Link)
- Replacement some missing "historical" crown (custom) pieces. (Link)
- New window trim (detail) mouldings.
- New built-in cabinet to replace the earlier (poor) one. (Link) (Link)
- Custom mini access door (for phone & cable wiring in duct column). (Link)
- Painting. (This Post!)
The room still needs:
- Original floors sanded and refinished.
- Baseboards re-installed, caulked, & painted.
- Wall heat grate stripped and repainted white.
- Finish built-in doors (leaded glass), and get glass shelves cut for it.
So it's 80% done. The floor will be a fairly "big" job, but shouldn't be too hard.
Here's how the painting process came along:

If you've seen my previous painting posts, you'll notice that I prefer to "painter's tape" everything. A lot of painters prefer to "cut-in" with a paint brush, but I find the tape method to be much quicker and easier, and gives me good results. It's not perfect, and you need to take a lot of time to tape everything carefully (and straight) but this method works for me. The taping took me at least a half hour.
And yes this method uses A LOT of tape. I end up with a huge ball of used tape after it's all removed, but for me it saves me a lot of time and hassle.
A note on green painter's tape: I've found that some brands are better than others. I do NOT like the "Frog Tape" green painter's tape, since I find that it tears easily when you're trying to remove it, and sometimes it's not sticky enough to stay put. I believe the "in house" Rona brand is good, but I am not often at their end of town. The last bunch that I bought (the stuff I used on this room) was by Cantech, and worked excellently (keep in mind that the new crown moulding was freshly painted just 2 days ago, and the tape didn't peel off the paint).
I have no idea why this next photo turned out blurry.

This next photo might amuse you guys. I still had my computer plugged in, with music playing, and I didn't want to shut it off/unplug it, so I left it in place, and just moved the "desk" *cough*crummycardtable*cough* to the centre of the room, and taped around the outlet(s). The electrical outlet on this one actually needs to be changed, since it's an old dirty/scratched/partially painted old one, so I wasn't worried about possible paint smears on it (just the plug).

As I started to do the corners, I was worried this was going to be too dark. It's pretty bold.
Remember, my sample really didn't look too dark:

This is the exact same paint as on the sample board.


I decided to keep going, and hoped it wouldn't be too bad once it was dry.


The finished colour ends up looking very velvety and rich looking, which I like. It's definitely a more modern colour (which I like), and compliments the white trim well. I do love it, but I'd have liked it to be just a hair lighter. I might have to really double-check the colour I want for the Living Room before I buy it.
Final Reveal! These were taken just a half hour ago in late morning light, and I adjusted the photos in Photoshop to look as accurate as possible.


Ignore the "Box O' Crap" on the floor here.

This is the wall over the computer desk where I want to do an "art wall".


I was really excited about installing the little mini door, but I forgot that I ran out of small slot screws for the hardware, so I won't be able to install it until next week. It will have 2 butterfly hinges and a catch like the built-in doors.


I finally took some nicer shots of the antique fixture. When I took it down yesterday to paint the ceiling, I took the time to clean it, and wash the shades before putting it back up.


Lastly, here's a moody evening shot:

The room isn't finished yet, though, but everything above the baseboards is finished (with the exception of the built-in doors/varnish). The room needed all sorts of repairs:
- New (and repairs to) electrical outlets/switch. (Link)
- Rebuild the entire door frame/jamb/mouldings. (Before Photo)
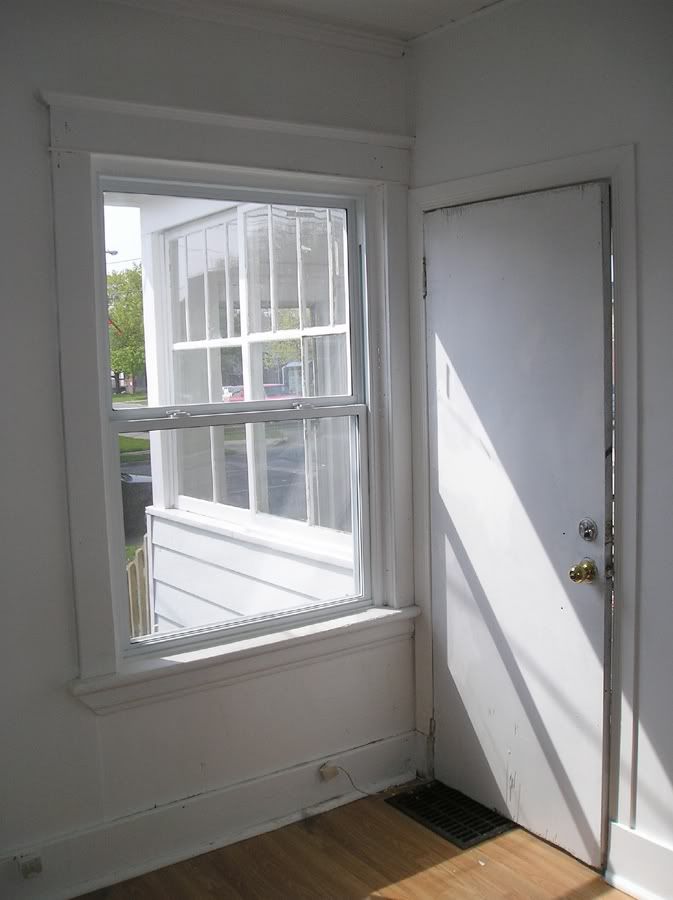
- Ceiling t-g repair and new light fixture elect. box. (Link)
- Rewired antique fixture (this one was a gift and is still one of my favourites).
- Rebuild the drywall corner. (Link) (Link) (Link)
- Patch the ceiling and floor of old duct location. (Link)
- Move duct work for heating vent from floor in the doorway to the wall (and patch floor hole). (Link) (Link)
- Remove damaged (cheap) laminate and plywood to expose original hardwood floor. (Link)
- Replacement some missing "historical" crown (custom) pieces. (Link)
- New window trim (detail) mouldings.
- New built-in cabinet to replace the earlier (poor) one. (Link) (Link)
- Custom mini access door (for phone & cable wiring in duct column). (Link)
- Painting. (This Post!)
The room still needs:
- Original floors sanded and refinished.
- Baseboards re-installed, caulked, & painted.
- Wall heat grate stripped and repainted white.
- Finish built-in doors (leaded glass), and get glass shelves cut for it.
So it's 80% done. The floor will be a fairly "big" job, but shouldn't be too hard.
Here's how the painting process came along:
If you've seen my previous painting posts, you'll notice that I prefer to "painter's tape" everything. A lot of painters prefer to "cut-in" with a paint brush, but I find the tape method to be much quicker and easier, and gives me good results. It's not perfect, and you need to take a lot of time to tape everything carefully (and straight) but this method works for me. The taping took me at least a half hour.
And yes this method uses A LOT of tape. I end up with a huge ball of used tape after it's all removed, but for me it saves me a lot of time and hassle.
A note on green painter's tape: I've found that some brands are better than others. I do NOT like the "Frog Tape" green painter's tape, since I find that it tears easily when you're trying to remove it, and sometimes it's not sticky enough to stay put. I believe the "in house" Rona brand is good, but I am not often at their end of town. The last bunch that I bought (the stuff I used on this room) was by Cantech, and worked excellently (keep in mind that the new crown moulding was freshly painted just 2 days ago, and the tape didn't peel off the paint).
I have no idea why this next photo turned out blurry.
This next photo might amuse you guys. I still had my computer plugged in, with music playing, and I didn't want to shut it off/unplug it, so I left it in place, and just moved the "desk" *cough*crummycardtable*cough* to the centre of the room, and taped around the outlet(s). The electrical outlet on this one actually needs to be changed, since it's an old dirty/scratched/partially painted old one, so I wasn't worried about possible paint smears on it (just the plug).
As I started to do the corners, I was worried this was going to be too dark. It's pretty bold.
Remember, my sample really didn't look too dark:
This is the exact same paint as on the sample board.
I decided to keep going, and hoped it wouldn't be too bad once it was dry.
The finished colour ends up looking very velvety and rich looking, which I like. It's definitely a more modern colour (which I like), and compliments the white trim well. I do love it, but I'd have liked it to be just a hair lighter. I might have to really double-check the colour I want for the Living Room before I buy it.
Final Reveal! These were taken just a half hour ago in late morning light, and I adjusted the photos in Photoshop to look as accurate as possible.
Ignore the "Box O' Crap" on the floor here.
This is the wall over the computer desk where I want to do an "art wall".
I was really excited about installing the little mini door, but I forgot that I ran out of small slot screws for the hardware, so I won't be able to install it until next week. It will have 2 butterfly hinges and a catch like the built-in doors.
I finally took some nicer shots of the antique fixture. When I took it down yesterday to paint the ceiling, I took the time to clean it, and wash the shades before putting it back up.
Lastly, here's a moody evening shot:
Subscribe to:
Posts (Atom)