
First, some of you might remember that I had mentioned we'd be following the progress on these two arm chairs:

Well, due to a bunch of problems with one of our suppliers/dealers, we have only just received the fabric TODAY. These have been sitting in the shop for over a month (which is ridiculous). Usually we can get our fabrics within 1-2 days, unless something is on back order. That said, we should be starting these two arm chairs (finally) tomorrow or next week. My boss actually started sewing the parts for them this afternoon.
You'll note that all the new photos are watermarked with the company name, since I'll also be posting them to a new blog or site, or Facebook page (or something) since the company's site isn't easy to add photos to, and it would be nice to keep a good stock of photos for potential clients to see.
I will also start to add similar watermarks to my own blog photos as soon as I finalize a nice design.
Project 1: Pair of wing chairs. These two wing chairs were actually done by my boss about 5 years ago for this client, and she decided to change them again to something different. Hooray for repeat business! Here is the before (which I actually quite liked):

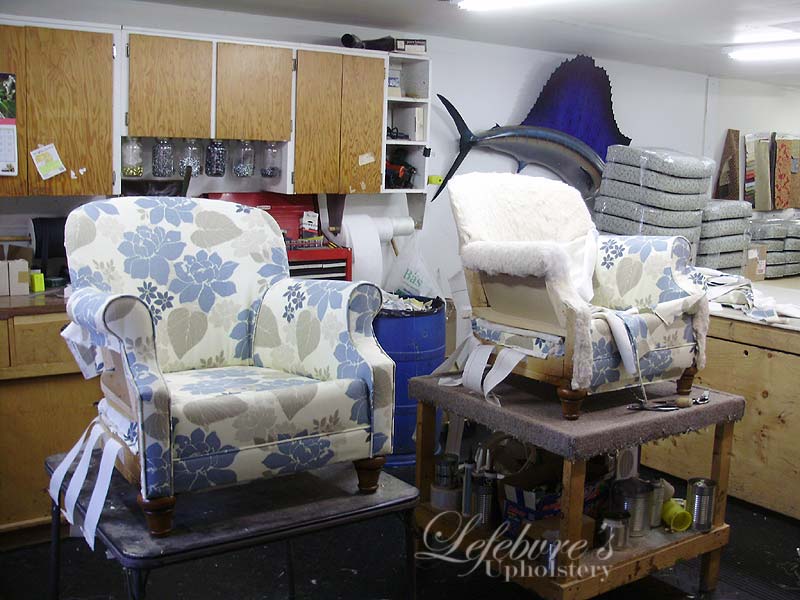
During:

On these, I was the one who did all of the coverings for the two chair frames (my boss did the cushions/sewing, etc.
After:

Project 2: Pair of Victorian reproduction chairs (and recover a set of 6 drop-in dining room chair seats (same fabric): not shown).
Before:

In typical fashion, a previous upholsterer covered over the old cover rather than remove it (as we always do). You can also see that the seat is very bumpy/lumpy.

The reason that the seat was so lumpy was because the foam had torn through the springs. There is usually a burlap or other covering/barrier over the springs to prevent this from happening. The chairs were taken down to the bare frames, and new foam, cotton/padding was installed along with the new top fabric.

During:

After (and Before for the next project, see grey chair in lower left):
Pierre did these two.

Project 3: Set of 4 ding room chairs. I was *SURE* I had a set of before photos of these chairs, and apparently it slipped my mind. They were dark grey with silver tacks (see photo above in lower left).
During:
All the tacks on the back portion are all done individually by hand. The 4 chairs took up around 1200 tacks. It seems tedious, but it went fairly quickly and easily.

After:
The fabric on these was quite fun and cheerful. The interior is a geometric pattern with greens and blues, while the back is a chenille type solid cream fabric with antique gold tacks.


Project 4: Set of two arm chairs (owned by the same lady as the 4 dining chairs above).
Before:
Green micro-suede fabric.


Again, on this chair we discovered that the previous upholsterer did not remove the deck (which shows the original fabric with the company logos removed). This was removed.

Chair stripped and ready for new fabric.

These two chairs were finished today, and I love how they turned out. I worked on the two at the same time to make sure that they both matched (all the patterns need to align perfectly). Also note the seats in the background, which we finished (back from my first day of work) we had to wait a while for that vinyl since it was on back order.
During:
After:


No comments:
Post a Comment