
I've had one or two readers who've expressed difficulties clearly reading the text in the posts due to the transparency, so I've switched it to a coordinating dark greenish black. I've also slightly increased the font sized, and switched font to "Georgia".
I had also noticed that for some reason my 600x800 photos were touching the right edges of the frames, so I've adjusted the widths again.
Hopefully that will make everyone (including myself) happy. If there's any other small bugs you've noticed, please let me know. That said, also be aware that I'm just using modified existing Blogger templates, so I'm slightly limited. For example, I haven't done any kind of checking for what the blog looks like on mobile devices.
***
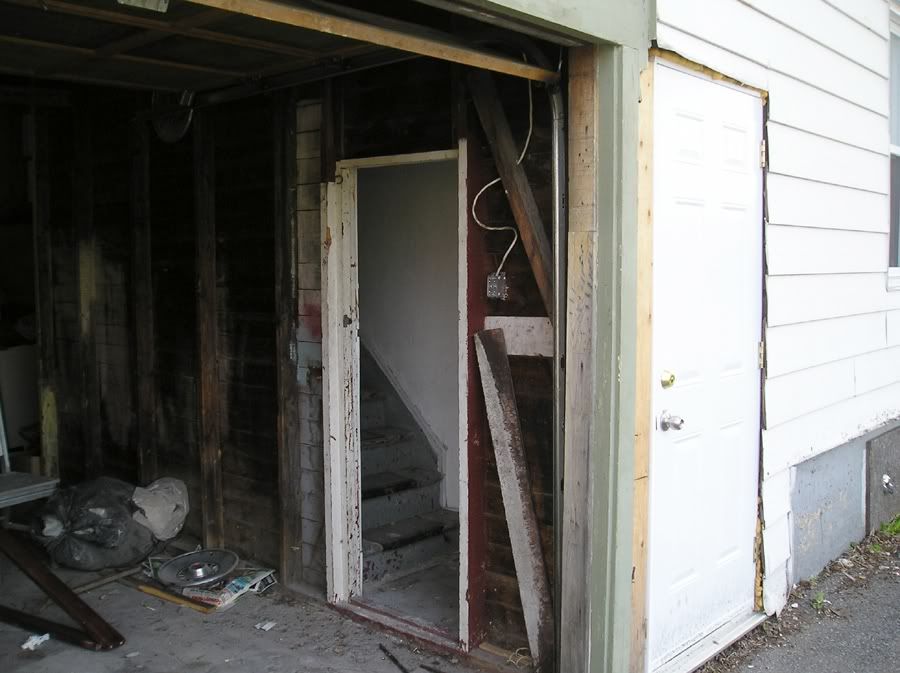
House-wise, I've continued to work in the garage by installing a beautiful salvaged door at the base of the staircase leading upstairs. There WAS a door here when I moved, but it was a recycled closet door which was too short, and it was very poorly installed.
Before:
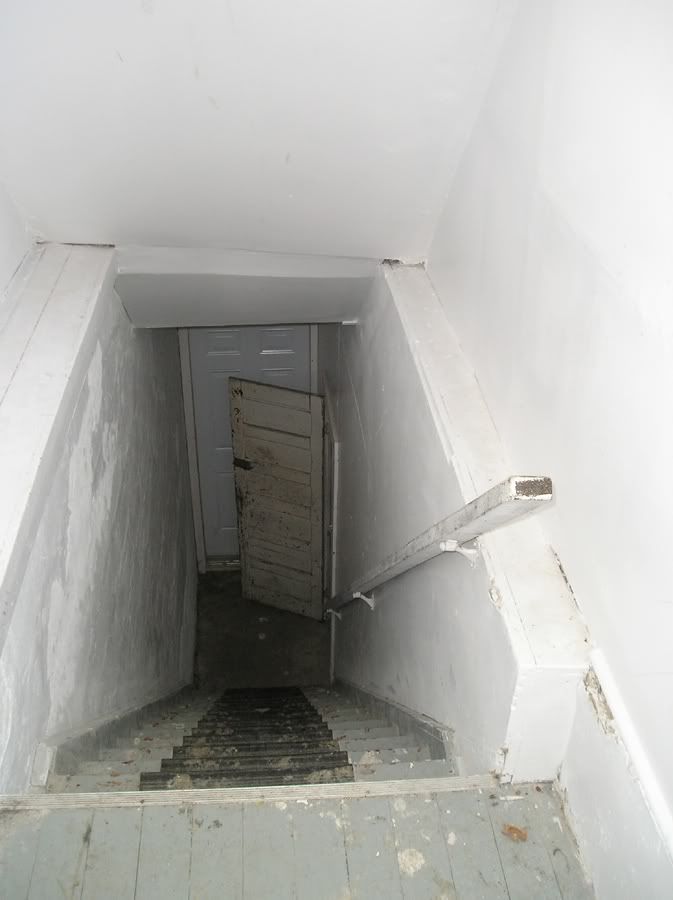
The door was hung on the inside of the stairwell, which made it really awkward:
I really want to beautify and improve the garage/shop so I'll be installing insulation, repairing the cracks in the concrete, installing wall coverings (either OSB or drywall), painting, and putting in new lights, plugs, and probably even a sub-panel.
Having a nice old door at the bottom of the stairs is part of that "beautification" process. The door opening was fairly small, so I could realistically only install a 26" door or smaller. I ended up installing a 24" door, since it was one of the nicer ones that I had, and I had nowhere else that I was planning to use it.

The door I picked is a beautiful 2 panel Fir door (salvaged from the trash just 2 or 3 houses down the street) and I removed the top panel. I will install a glass panel here.
I spent several hours over the past two days installing and tweaking this door. First, I built a new frame (jamb) for it, and then I installed the jamb into the wall opening.

I found 2 beautiful antique ball-tip hinges in my stash of antique hardware, and stripped the paint off of them. These hinges were silver, so they don't match anything else I will have in the house, so they're prefect for the shop.
The hinges were installed, and the door placed in the door opening. Before I could install the door in the new jamb, I had to re-trim the top of the door slightly.
Once I had the door fitted, I had to pick some hardware. I was going to change the really Art Deco plates that were on the door to something more plain, but the old plates were really tall and left holes and shadows. I decided to just keep the old plates for now.
For the knobs, I wanted to use the same black ceramic clay knobs I'll have (eventually) on the interior doors. The ones I used on this door are slightly oversized, so they don't match the rest of the others I have. Again - perfect for the garage.
The lockset I used was the original one from this door. I took it apart, cleaned it, and gave it a quick paint job (flat black spray paint on all the internal metal pieces for moisture protection).
If you look at the white paint on the 2x4s flanking the door, and compare it to the first photo, you can tell how much the height of the door was adjusted. This door isn't even a full "new" standard door height either. A new door is usually 80" and this one is around 78".

Isn't the old hardware just beautiful?

The door jamb still needs the stop mouldings (I have old ones I'm recycling, but I'm missing 24" for the top piece).
I'd love to hear how taking out the panel went (it looks great) - did you cut it or take the rails and stiles apart?
ReplyDeleteOn one side of the panel, one of the long strips of cove moulding was nailed in place. This is highly unusual, since it's usually all solid. It must have been a factory screw-up. Anyways, I removed that piece, then I cut the top and bottom pieces using just a craft knife (which has a thin blade). That's why there's green painter's tape on 3 sides of the opening.
DeleteThe panel was a bit too much of a tight fit, so I had to trim the top and bottom slightly to get it out.
The glass will be cut to fit loosely, the 3 mouldings will e reglued/nailed in place, and any leftover gap will get thin shim pieces slid along the glass to fill the gaps.