
When I first moved in, I had some idea of the decay on the exterior wall, but I had assumed that most of the damage was to the old Masonite siding.
The interior of the wall had been half-assedly covered over in very cheap 3/8" OSB sheeting in an effort to hide the severe structural damage to the wall (which was rotted through).
Old photo:
Back in 2011 I removed the OSB and uncovered the truth behind the condition of the wall:
http://my1923foursquare.blogspot.ca/2011/08/crapity-crap-crap.html
The space between the neighbour’s house and my garage had also been piled waist-high with trash when I first moved in. The previous owner had just tossed a whole bunch of old mouldings, door casings, and scrap wood there, along with big chunks of cement, and this had all started to rot along with large quantities of fallen leaves from the maple. Trees had also begun to grow in between the houses. It took me about a year of work on and off to finally clear out all of the alley.
http://my1923foursquare.blogspot.ca/2011/07/more-discoveries.html
So that brings us pretty much up to date. Since uncovering the wall in 2011, I’ve simply been careful with the wall, avoiding leaning anything on it, and planning to repair it as soon as time and budget permitted.
That time has finally come (and gone), and I’m so happy it’s finally DONE!
This was a H-U-G-E job, and it’s definitely not something I’d recommend to any of you as a DIY project, especially if you’re working all by yourself. That said, I’ve just finished the project by myself, so it’s not impossible. I will freely admit that there were a few moments where I was completely overwhelmed and paralysed by uncertainty about certain steps, or just by the sheer magnitude of the project. At several points, I had to just sit and stare at the work already begun and just hope that it would all turn out alright. It also helped for me to work at the wall a little bit at a time, and then take a mental break from it. This is definitely the kind of project that could result in severe panic attacks.
One of the things that made this a difficult project was that I didn’t want to remove the old rotted wall until I had the new one built inside the garage. This was mostly because I’m right in town and I didn’t want to have the wall completely open for anyone to just waltz-in and steal things (I have a LOT of valuable tools). I also didn’t want to have the wall open to the elements, since I had no idea how long it would take me to completely rebuild the wall.
If it wasn’t for that, I could have simply jacked-up the roof, knocked-down the wall, and had lots of open space to work around. Instead, I had to work carefully around the old wall.
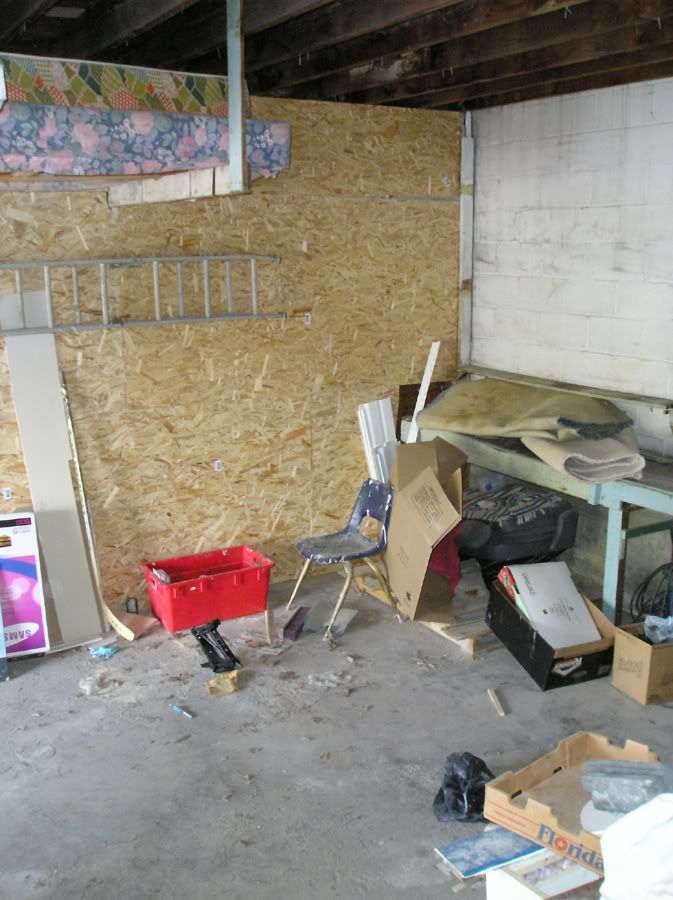
Before I start showing how I jacked-up the wall and rebuilt it, I thought I would just show a few more photos of the wall as it was before I started working on it.
Here you can see the base of the wall.

If you look at the upper arrow, you can see how the studs land flush with the edge of the concrete floor over a doubled 2x4. In the foreground, the two bottom 2x4 studs along the floor have completely rotted, and a previous owner “kicked-up” the studs onto the edge of the concrete to keep the wall from sinking and rotting further.

The photo above shows the worst section of the wall. This section corresponds with a leaky seam in the rain gutter, which continually spills water against the wall on this section. The black that is visible is the tar paper under the siding layers. The wood tongue and groove sheathing has completely rotted and fallen away, as have some of the studs.
Towards the back of the garage you could still see a section where the bottom floor studs were still visible. On the left, the stud has rotted into dirt, and on the right, a partial “shell” of a stud remains (poking it with a screw driver turns it into crumbs).

Several studs from the worst area of the wall were completely rotted and no longer providing any kind of structural support for the roof. You can also see how all the rotted tongue and groove is pulling away from the studs.

On the outside, the damage from years of improperly installed gutters, the addition of asphalt between the houses (over the bottom edge of the siding!) was taking its toll on the wall.


The first step of the repairs was to ensure that the roof was properly supported. For this, I attached a large beefy 2x8 to the ceiling about 2 feet away from the exterior wall. To determine how far up the roof needed to be jacked-up in each location, I tied a length of twine at one end of the garage, with the other end pulled taut by a 4lb clock weight. This line wasn’t perfectly level, but it was close, since the front wall of the garage hadn’t moved much, while the far (back) end was attached to the cinder-block building next door (which hasn’t moved much either). The twine therefore indicated how far the ceiling was sagging in each section. In the worst areas, it was down about 2" from where it should be.
I didn’t have any actual jacks, so the whole thing was done the "old fashioned way" simply by measuring 2x4 posts to the height needed and knocking them up with a small sledge hammer until they were vertical.
The first few were a bit terrifying, since the raising of the roof caused the edge of the roof to tear away from the top of the wall.

For some silly reason, I had thought that as I’d be raising the roof, the wall would just go up with it, but this was just absolutely stupid, and I could have banged my head on a desk. Of course the wall wasn’t going to move. IT WAS ALL ROTTED along the top edge. Duh!
Here you can see about a 1" gap between the two top (rotted) 2x4s.

No matter. I kept going, and soon enough the worst section of the roof was sitting nice and level (or very close), and it was well supported.

As the roof was rising, chunks of rotted wood and debris fell to the floor everywhere.

Originally I was going to do the new footing in 2 parts, so I started working on just the first part of the wall. Soon enough, though, Pierre (my boss at the upholstery shop) convinced me that it should be done in one continuous piece, so I changed my mind and decided to do the entire wall and footing all in one shot.
Originally I wasn’t sure how I’d support the wall to be able to do the footings, but it was Pierre who showed me how to jack-up the wall using short braces along the bottom. Pierre was also kind enough to loan me his laser lever, a 4 foot level, an impact drill, and a sawzall (reciprocating saw). All of these came in handy.

Cleaning out, cutting away, and finding a spot for all the dirt and debris from the old wall base was one of the challenging parts of this job. In the end, I gave up trying to bag all the dirt/debris, and simply tossed it all into a large cardboard box. All the old wood at the base of the wall had basically decomposed into rich black topsoil, and now I have a 500lb box full of dirt that I can’t move, and that I’m still not sure how I’m going to get rid of.

Cutting away and clearing the entire base of the 28 foot long wall was one of the most nerve wracking moments of the entire reno, since basically the entire wall was now just “floating up in the air” supported by the angled bottom supports. To ease my mind a bit, I later installed some horizontal braces to ensure that none of the “legs” would pop free or move. The whole thing (while it looked really scary) was actually very solid.

Front corner.

This photo shows a cleaned-up section of the wall base. Here you can see the original “footing” a bit, which is just a concrete lip where the doubled 2x4 sat, followed by the wall. You can also see one or two rusty nails still in the concrete. On the outside, you can also see the edge of the asphalt that was added between the houses. This asphalt was up on top of the bottom siding boards, which is just absolutely stupid.

To properly illustrate this for you, and to show how I planned to fix this problem, here is a quick drawing done in MS Paint. You can see the old original construction and the plan for the new wall. This is not to scale. In the old drawing, the tongue and groove sheathing, tar paper and brick siding aren’t shown. The two bottom 2x4s are what’s completely rotted, along with the entire bottom board(s) of siding.

Here you can see the concrete forms going in place. They’re 2x8, so this gives me a new base that’s 7 1/2" higher than before, which will keep the base of the wall dry.

I also had to add a bit of a flat/straight “edge board” along the outside edge of the wall (footing), which was tricky to do. You can see it in this photo:

Mixing and pouring the concrete footing was the worst job I’ve ever done. It was 8 hours of sheer hell that I hope I never need to go through again.
Pierre had suggested that I rent a mixer, but I had no idea how I’d get it into the garage, since the door was blocked by roof support columns, and the side door was partially blocked by a giant pile of 2x4x10s and 28 bags of concrete mix. I also didn’t want to deal with a rental company, pick up and delivery, and the added costs (remember I don’t have a car, so I would need to arrange for them to transport it).
I decided to just do the mixing by hand. I had seen videos online and it looked pretty simple/easy. I bought a short garden shovel, and a heavy duty plastic storage bin, since I couldn’t find any places in town that sold concrete mixing tubs.
I would say that the first half dozen bags went fairly well, but after about 10, I was getting very tired and sore. The bags weigh 66lbs (30kg) each, but that wasn’t the worst part. What was really killing me was the mixing. It was very hard on my arms/wrists/hands.


I started at something like 1:30pm, and didn’t finish until nearly 9pm. I only took about two 10 minute breaks, because once you start, you can’t really stop since the concrete starts to set up in a few hours. In the end, I needed 26 1/2 bags to fill my new footing.
The next day or two were spent recovering.


The concrete was covered in leftover Styrofoam floor padding, and left to cure for several days. Once I felt that it was cured enough, I installed the base plates (pressure treated 2x4s over a special foam barrier). The base plate studs were anchored in place by foundation bolts that I had embedded into the concrete every 4 feet.
Once the base was installed, I transferred all the wall support braces one by one so that the weight of the old wall was now on the new base plate. This freed up leg (and ladder) space from all the braces.


The next part was to remove the top of the wall and install the double top plates.
More mess.

The footing had been planned out perfectly using a laser level, and the top plates were aligned to match up with the base. Instead of having the laser level on for very long periods of time, I moved over my previous twine guide wire to the exact spot I needed for the top plates. You can spot it in the photo below.


With both the top and bottom plates ready, some measurements were made, and the studs were cut and fitted. In the end, I was off by just about 1/2" at the back end, just on the last 4 feet of wall. I was also lucky that the old wall had studs every 24" and that nearly none of them lined up with the new stud locations.


The new supporting wall was now done, and all that was left was the removal of the existing wall, new siding, and fascia repairs.
Continue in Part 2.
It is a good thing you were able check the extent of the damage before it was too late. I cannot imagine the relief you felt when you finished repairing the wall. You did a great job repairing it by yourself. I would have had to call in a friend or professional to help with such a big project.
ReplyDeleteGiovanni @ Coastal Contract Hardware