
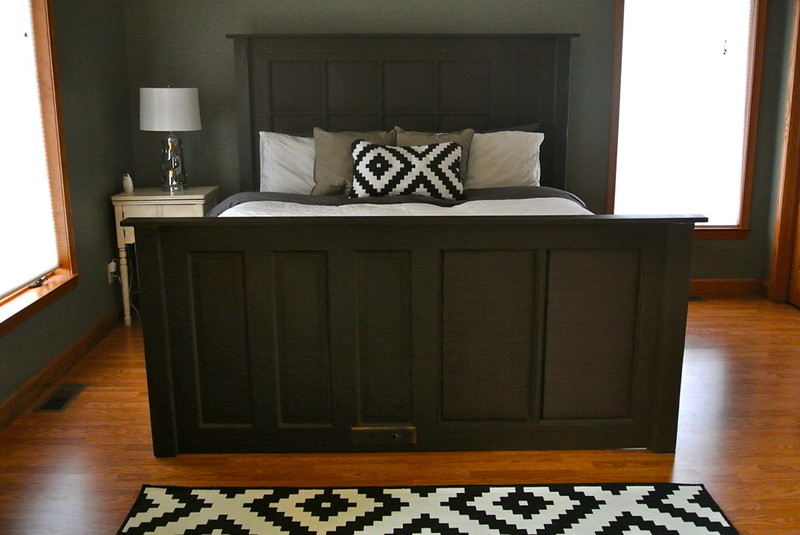
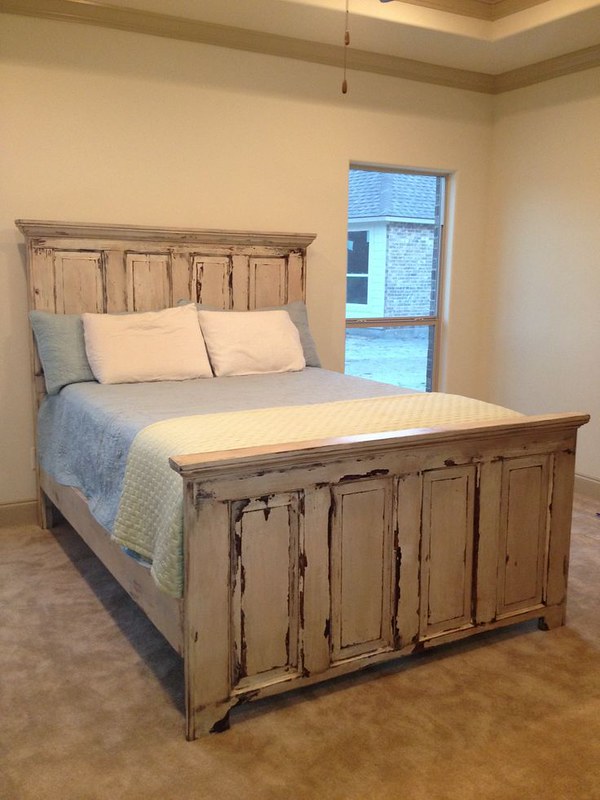
So I've been wanting to build a new Queen sized bed (or buy an old one) for a few years now. Pretty much since I bought the new mattress in 2012 (http://my1923foursquare.blogspot.ca/2012/05/new-mattress-last-weeks-work-on-porch.html). The bed I built (which you can see above) is not really what I originally wanted to build, but it's a pretty decent bed for now. My original plan was to build a 4 poster bed (and I still kind of want to... eventually). I was getting to the point where I was really sick and tired of sleeping on the floor, though. My second option was to build a panel bed (which are pretty simple to build). Panel beds are even easier to build if you're using recycled doors.
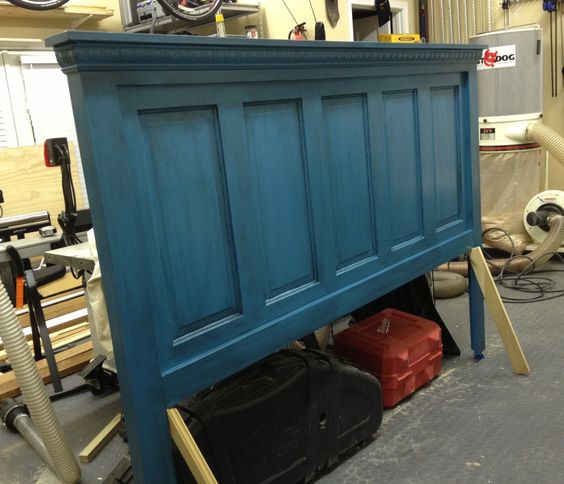
Here are some beds that are made using antique doors. There seems to be a pretty wide variety of looks and finishes when it comes to beds made from recycled doors. From really simple, to giant and clunky, to really rustic. There's pretty much a style for everyone.
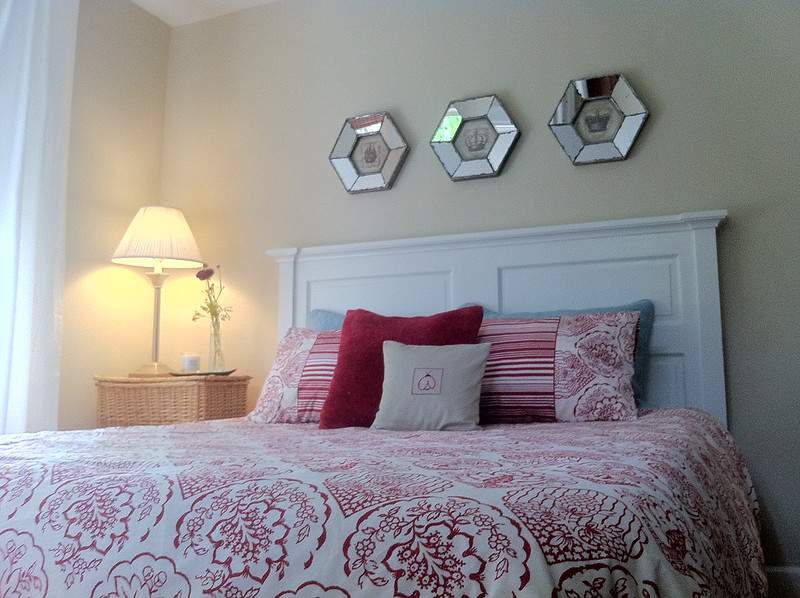
Here's a simple headboard with a large crown (painted):

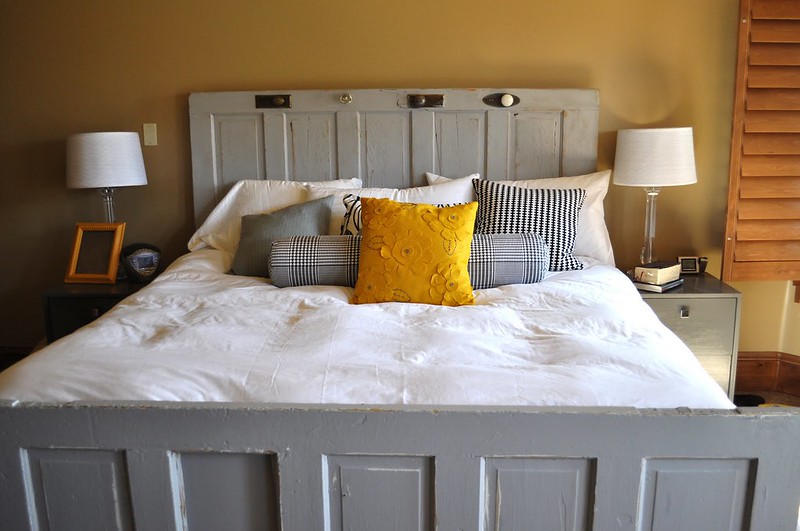
This one is a bit awkward and "lazy" with no added trim, no cutting, or any modifications. Just 2 old doors and bed hardware in between. Not my favourite look, but it could work well depending on your decor. I do like the light grey:
Another headboard with crown, this one with the door inset slightly within a frame:
This one is neat, but it also kind of drives me crazy because it's completely asymmetrical and mismatched. It also seems like they used rather wide doors, which makes the foot board rather tall:
This one is quite nice, but I'm not a huge fan of the shabby chic look. It would look awesome in a "French" styled room:
I kind of love this because of how it's styled, but it doesn't seem the most practical, since the doors look like they are just loose/leaned. Old doors could easily be mounted to the wall, though, so if you like this look, it's very easy to pull off:

This one is nice, but the columns seem a bit too big. I assume it was to be painted, but I didn't find another photo of it. It also looks like a King size:
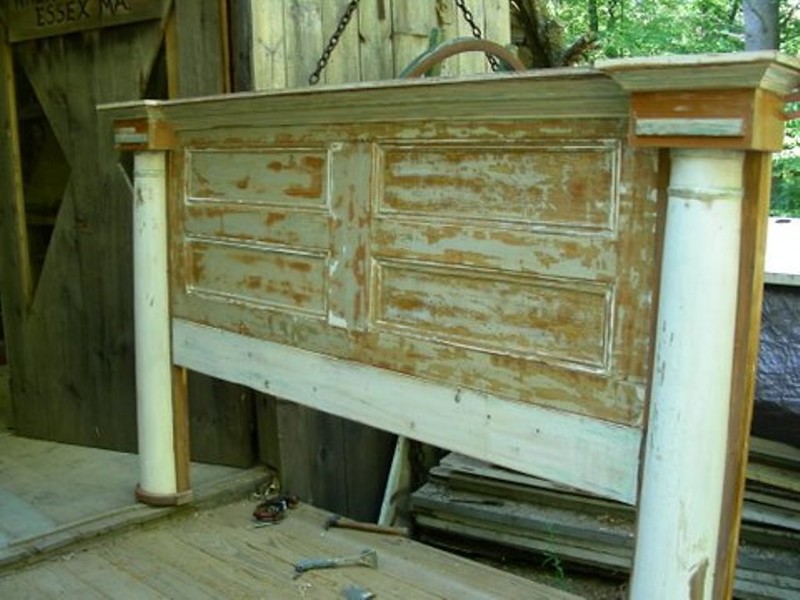
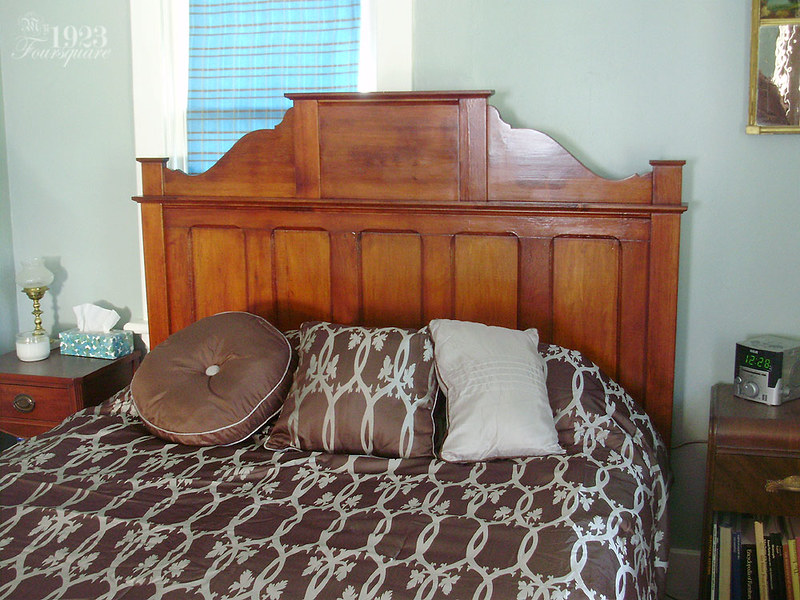
This one is really nice and simple. Also just a headboard. It was made by friends over at Old Town Home:
Tutorial here:
https://oldtownhome.com/2011/5/18/Opportunity-Knocks-Transforming-an-Old-Door-into-a-Headboard/
My primary inspiration for the bed I built was this particular one from one of my books:
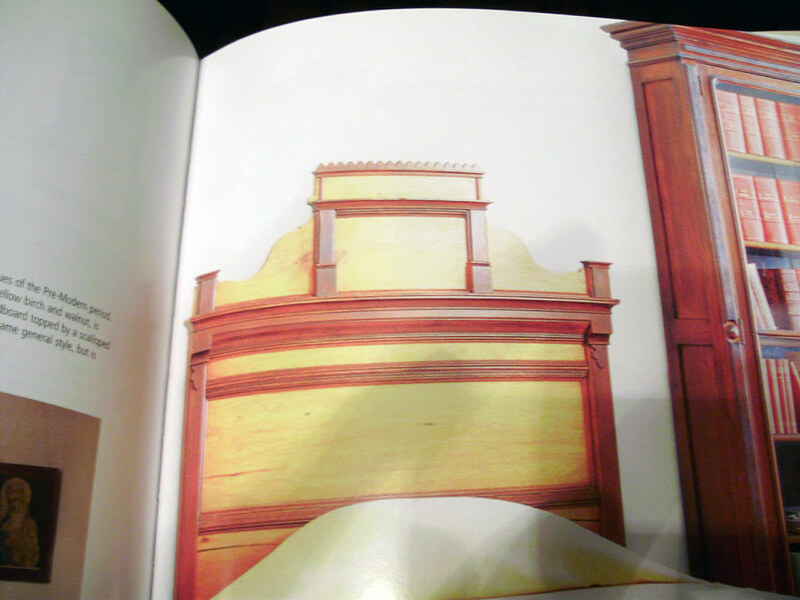
It also closely resembles this Eastlake one:
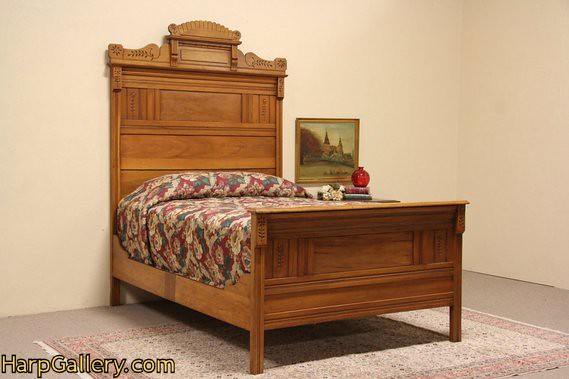
Obviously since I was using some salvaged doors, the bed couldn't be an exact copy. I also didn't make it quite as detailed with all the small mouldings, pillars, and plinths. I went for almost the same shape, but slightly simplified.
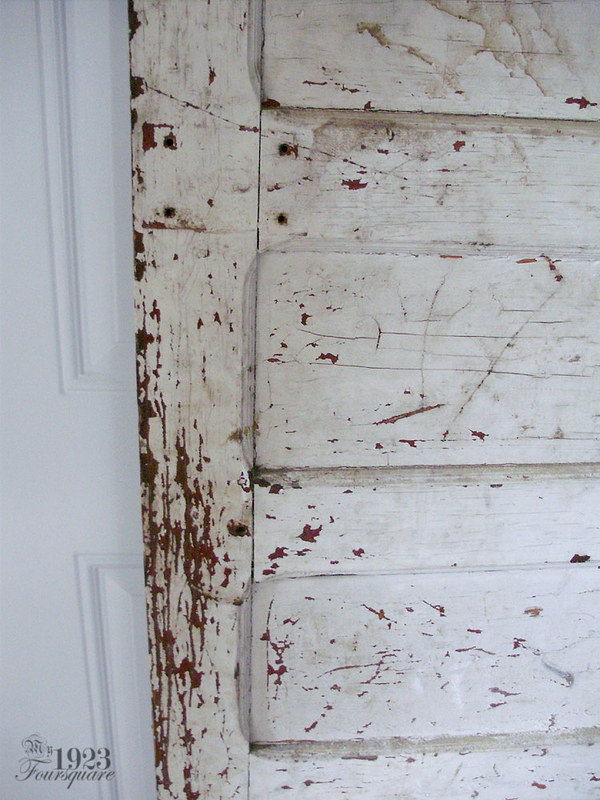
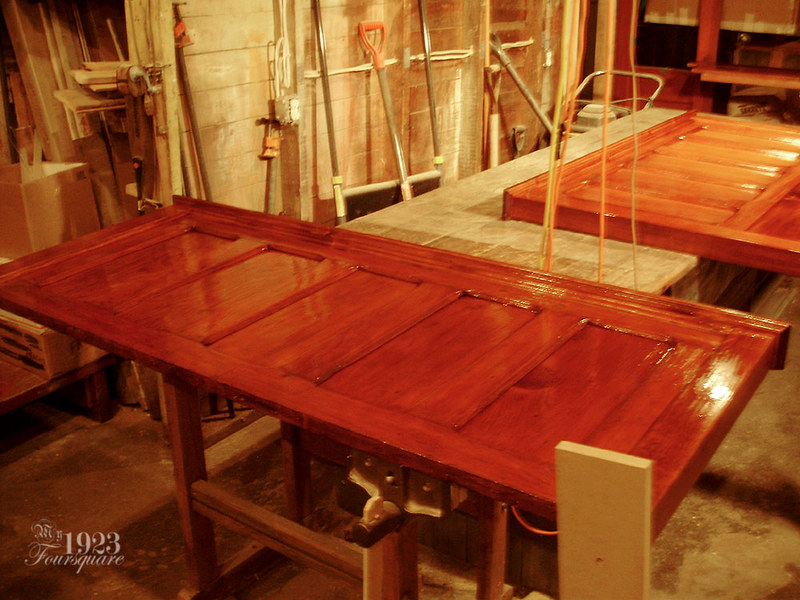
These were the two doors I decided to use for the bed. These are doors that had originally been closet doors in the house. I'm really not sure what kind of door handles they had, because they aren't drilled for normal mortise locks. The doors were in TERRIBLE shape, and they also didn't perfectly match the style of the other larger main doors (these have rounded panel corners, where the main doors had squared panel corners). These had also been chopped and hacked around the edges, and one of them was falling apart.
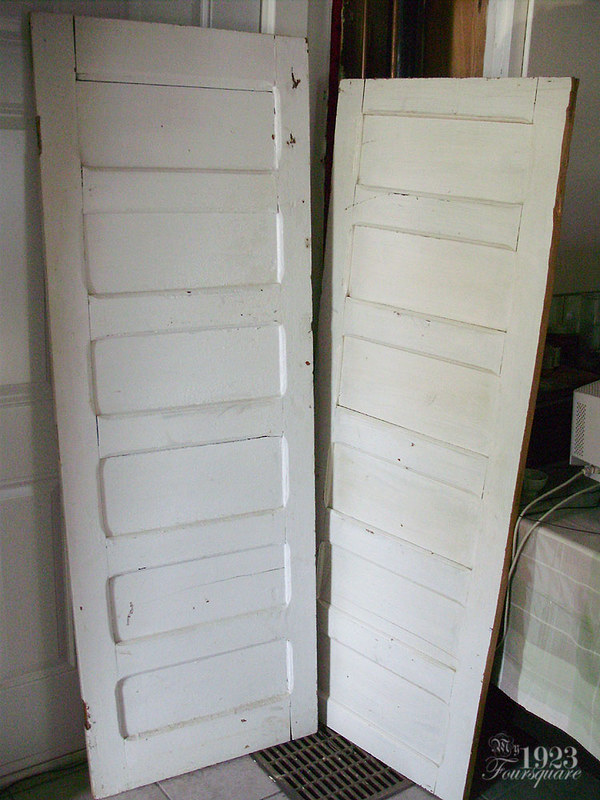
Lots of paint, damaged bits...
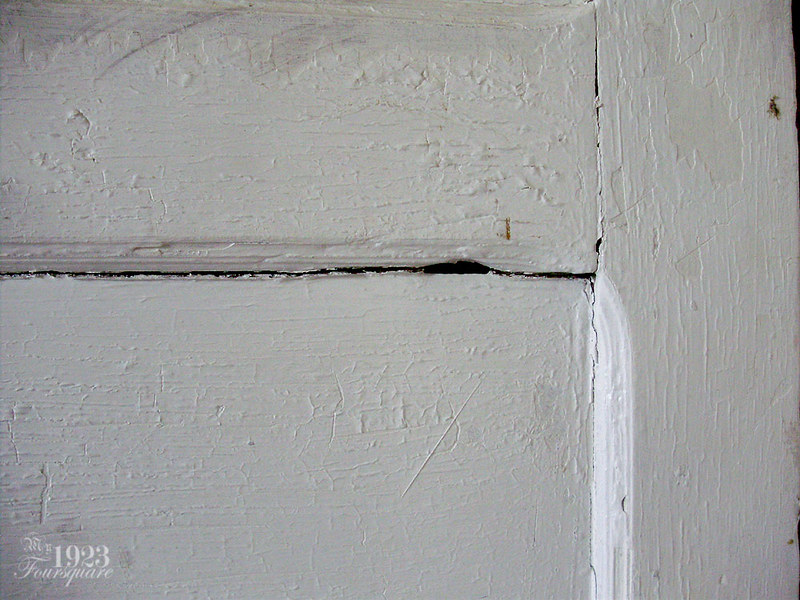
Butchered edges:
The other two sides:

These had to be stripped (obviously), so I tried my normal method (using chemical stripper) but it was working terribly, and slowly. A heat gun turned out to work INFINITELY better, and I was able to take 99% of the paint off with the gun, then scrub and clean the rest off with the chemical stripper and a rinse.
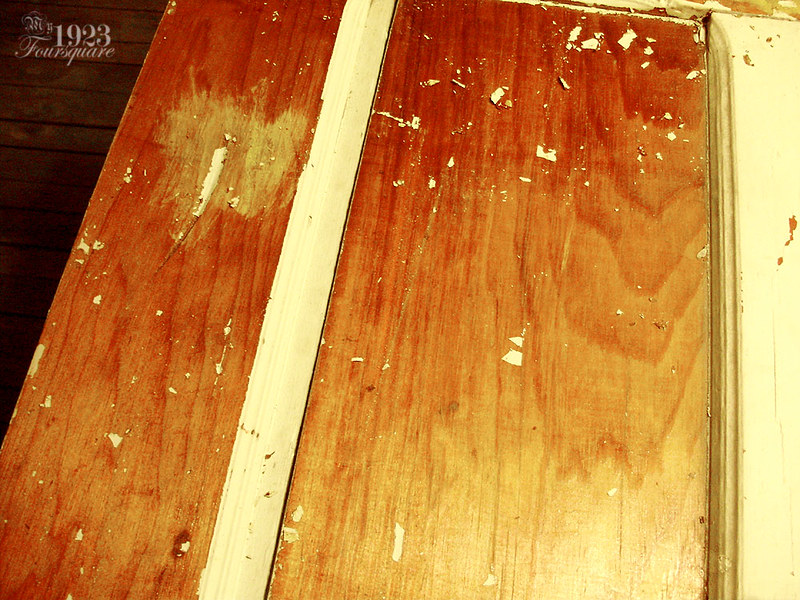
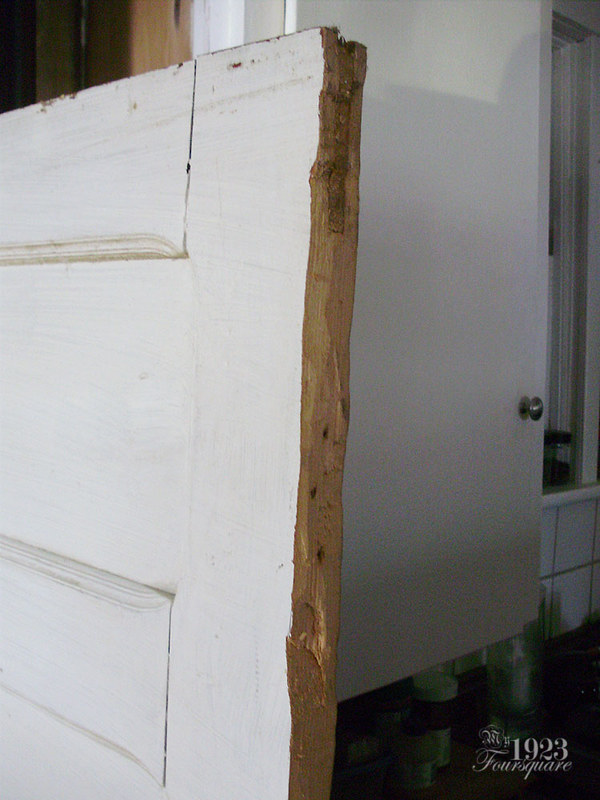
One of the two doors had to be taken apart to reglue it, so I stripped that one in pieces. This second one I only stripped the portion I would be using. One panel would get sawn off.
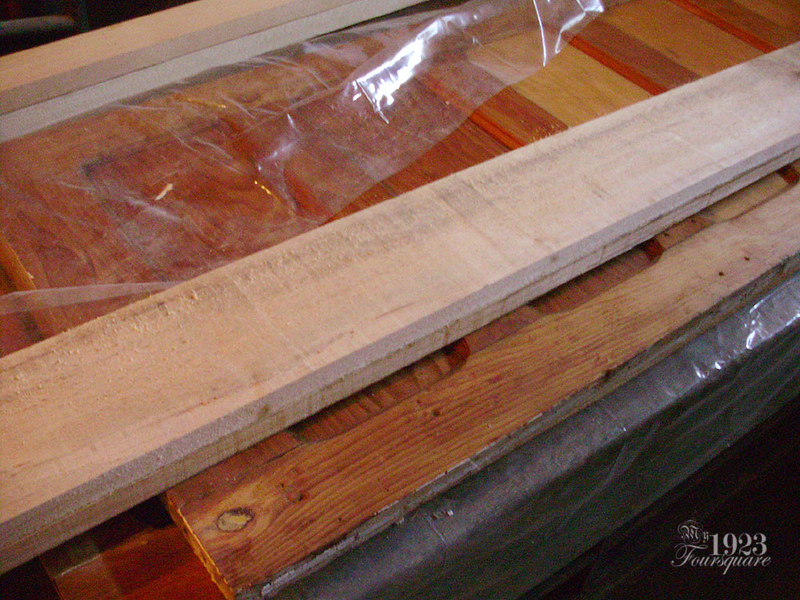
I was able to find a few sections of nice clear old 2x4s and scrap wood for the posts (I think it was half thick pine, and half a nice 2x4).
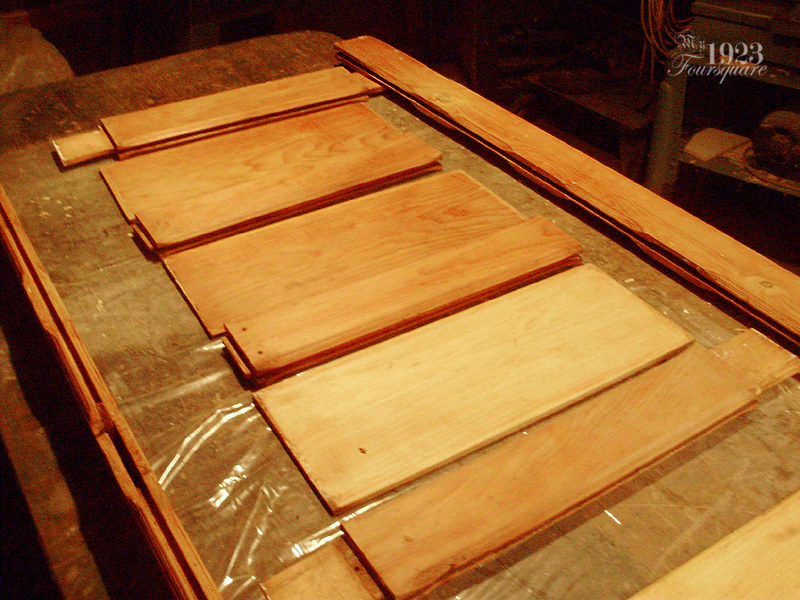
Two 6" boards of 1" thick rough pine for the bed rails (before planing and sanding).
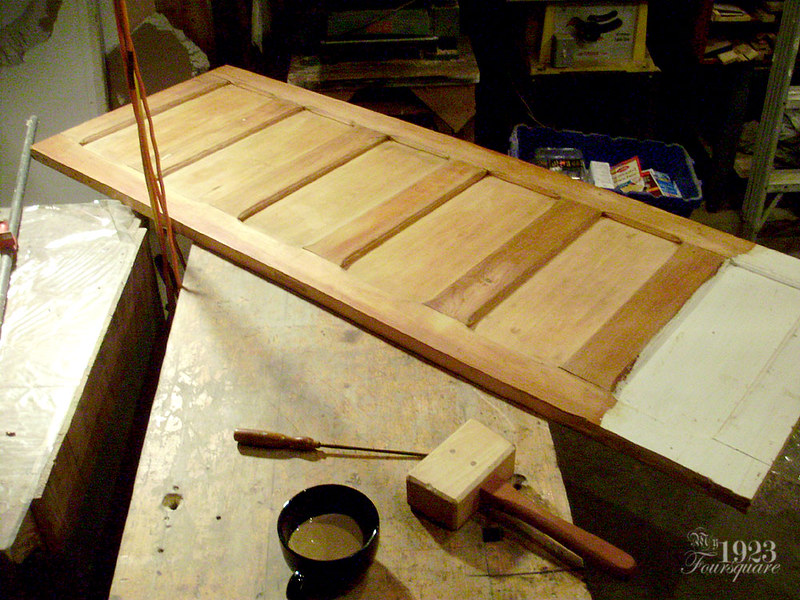
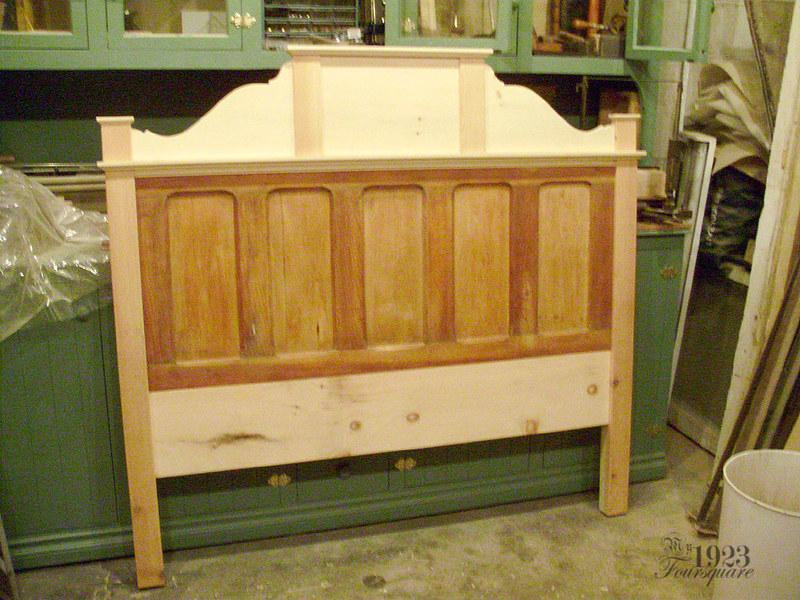
Here are the doors after trimming the 4 edges, and with the 4 posts installed. You can see how all the posts have nicer boards on the fronts, and lighter (spruce) boards on the backs. The panels were fixed to the posts with four 3 inch screws drilled into 3/8" holes, which then had wooden plugs glued in them and sanded flush.
Top boards and mouldings applied. The tops were glued in place, and nailed down with old square nails (just because I have them, and they make the bed look old). You can also see how the doors are made of mis-matched woods. The foot board panels on the left are fir, but the others are all pine. I believe the door rails are fir as well.
Blurry detail shot. These are fairly standard router bit profiles. A Roman ogee, and regular ogee.

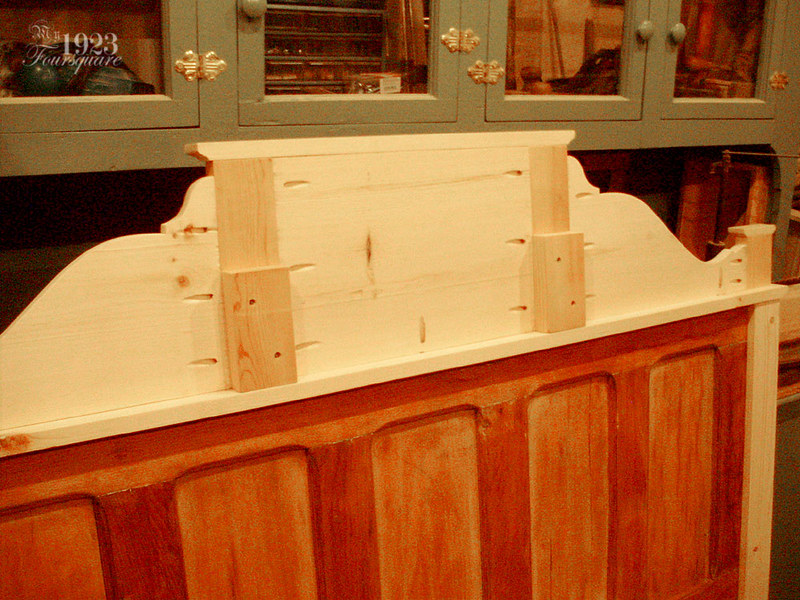
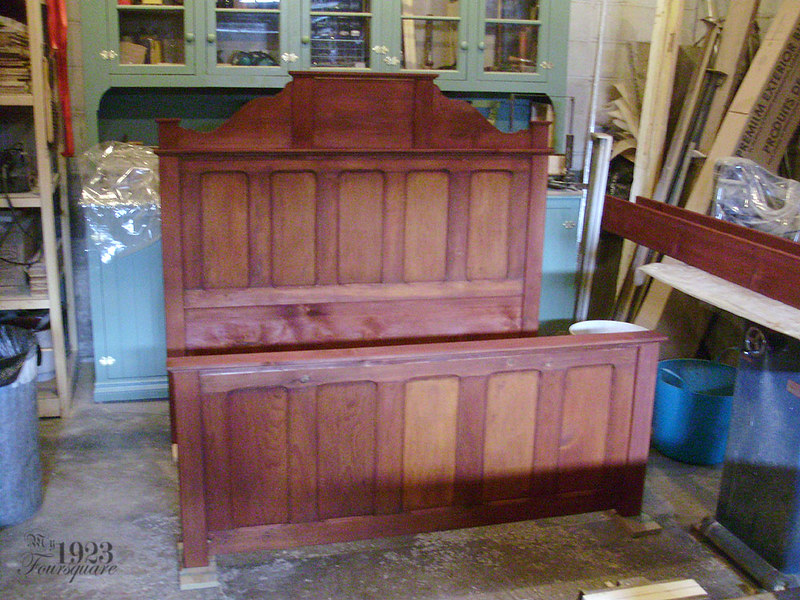
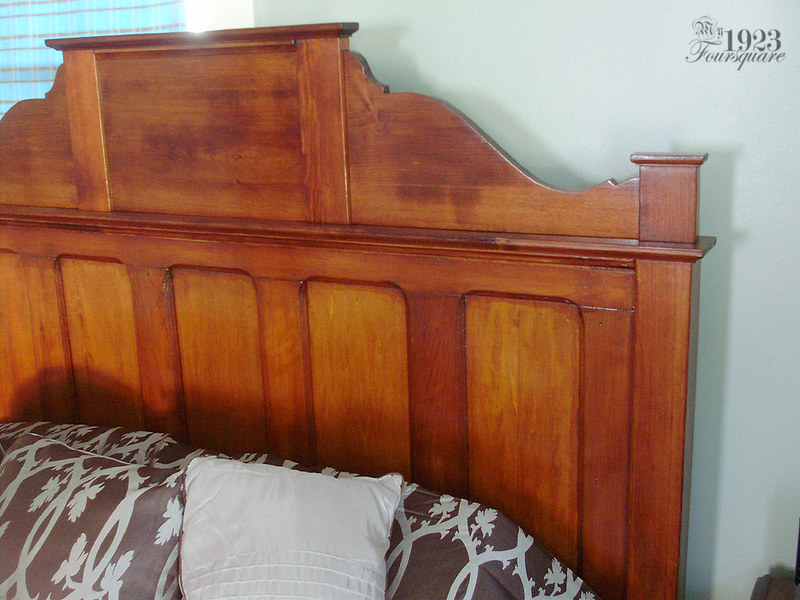
Top crest. The crest was all made from similar scrap pieces (new and old wood), and matching profiles. The majority of the crest was assembled with pocket screws. It is held to the bed top with 3 screws, so that it can easily be removed (because the headboard is both huge and heavy). The wide pine board at the base was also attached with pocket screws. This is only meant as a stopper for the mattress. I used a fairly crappy board with lots of knots and a crack (it won't be visible).
This shows the rear construction. The two blocks that stick out prevent the crest from rocking backwards.
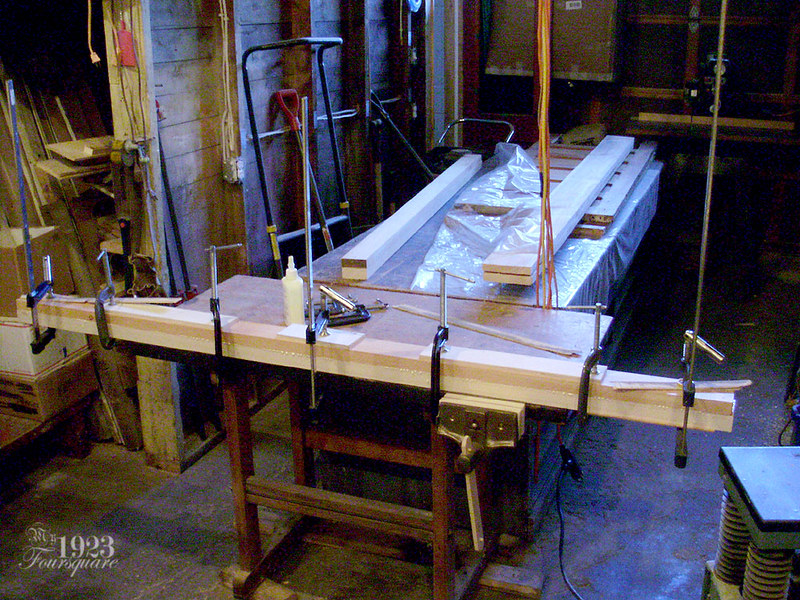
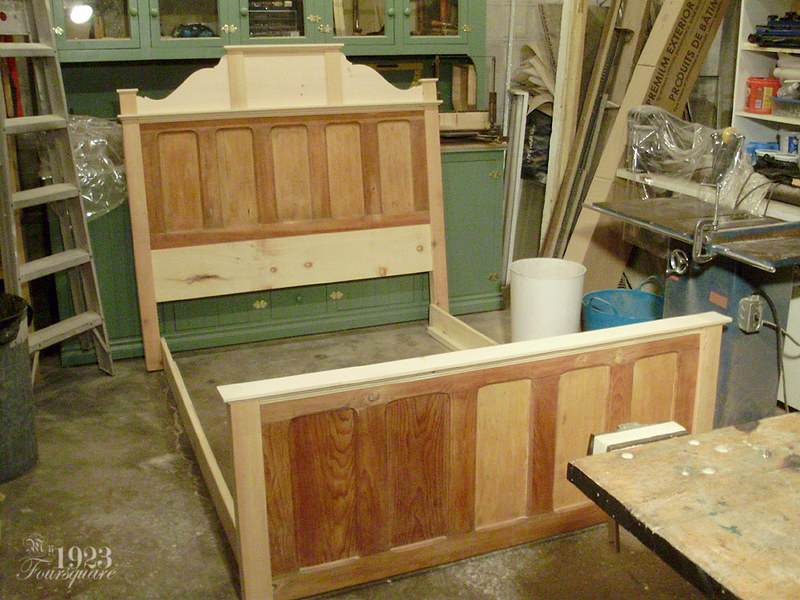
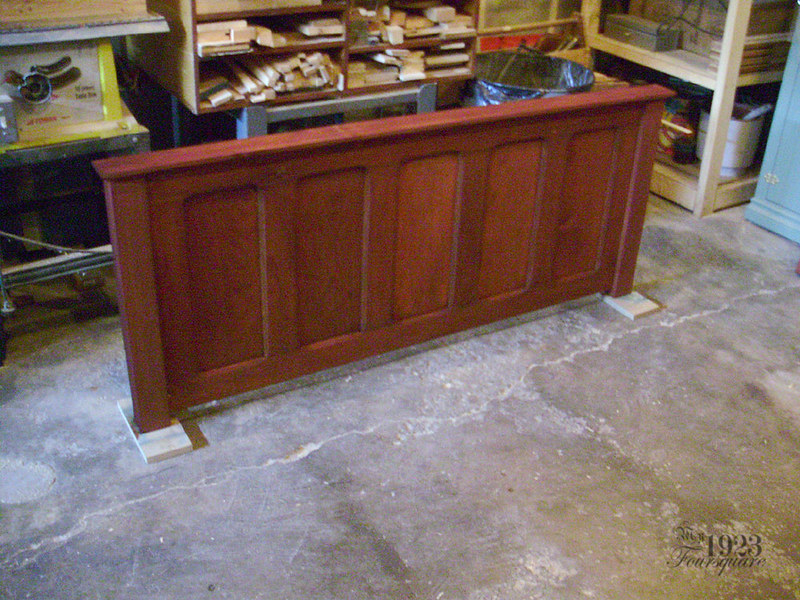
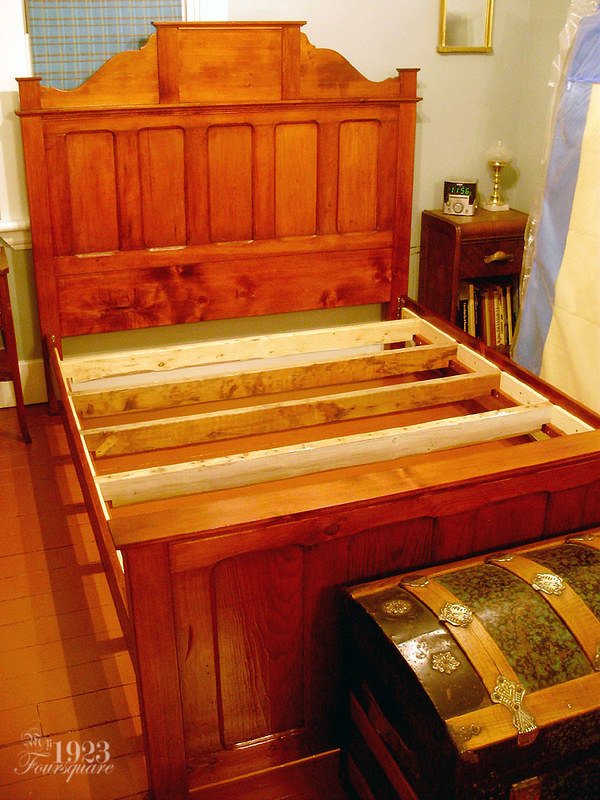
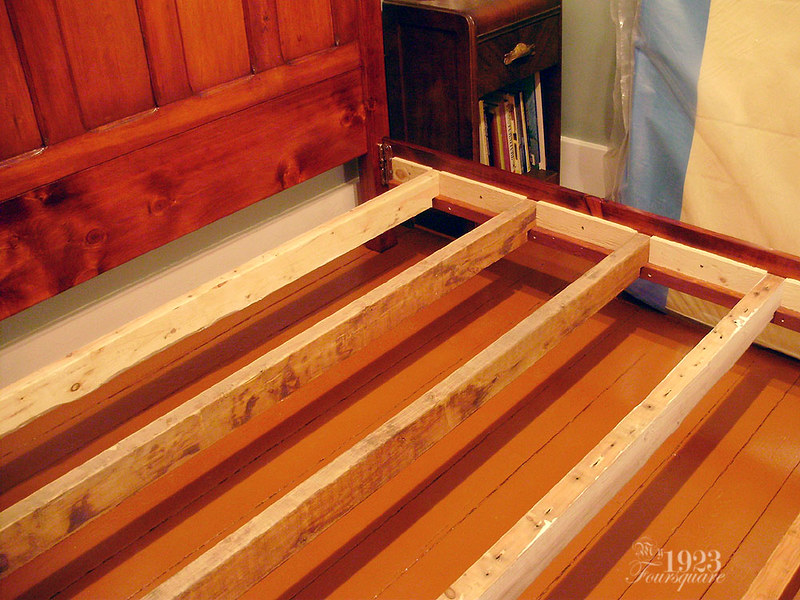
Preview of the bed before finishing. You can see the rails, which I didn't really photograph. They are about 6" x 80", and they have a beefy 1 1/4" square section of blocks glued and screwed along the base.
Because this bed has multiple different wood species, as well as old, really dry wood, alongside brand new pine, I wanted to make sure that the stain I was using would work well and match with everything. This is really obvious in the above photo. I decided to use a water based aniline dye on this. Aniline dye is pretty tricky to use (I would not recommend it to beginners) but one of the advantages is that if you apply a second layer you can darken sections and make everything blend/match.
This sample shows:
1 - Brand new pine
2 - Antique pine
3 - Old fir door rails
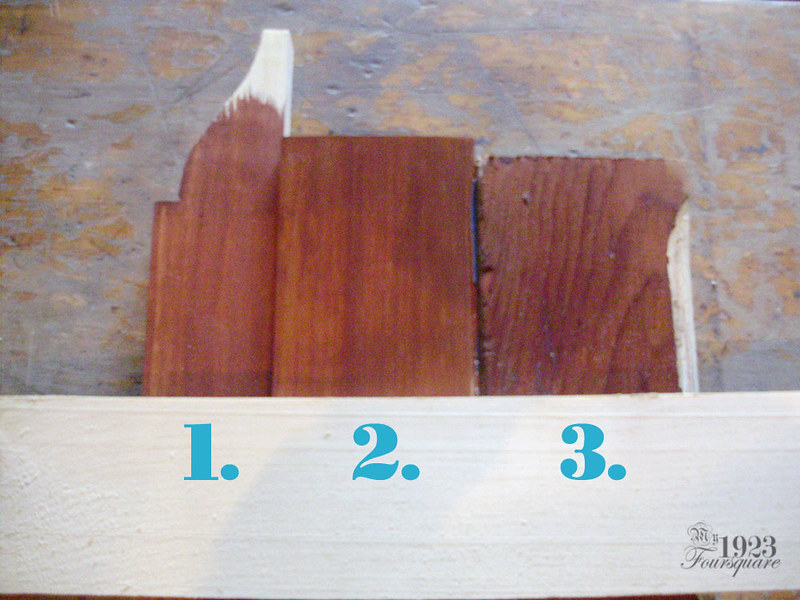
Blurry, but this shows the foot board after staining. You can see that the two left panels (the fir ones) don't quite match. I ended up giving the 3 lighter panels (but nothing else) a second coat of stain. Otherwise everything ended up matching pretty well!
Another note on using aniline dye (should you ever try any). Once it dries, it WILL look awful. It will not look the right colour, and you might be disappointed and sad, but it's only an illusion. Once the varnish it applied, it will once again look like when it was freshly applied (wet).
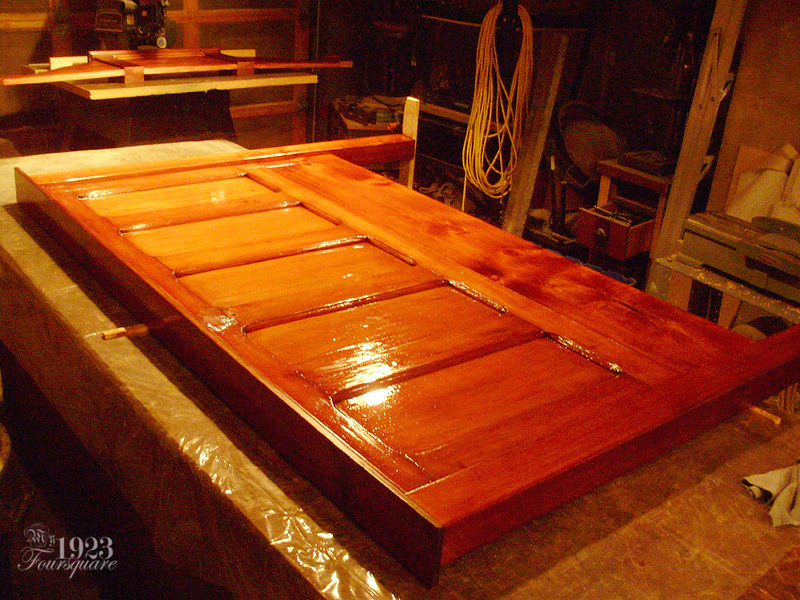
Finishing on this was a pain. The polyurethane I used was a bit thin and runny, and I could only do one thin coat at a time. It was also taking a very long time to dry (maybe the can was a bit old?) I also ended up with a few runs, so then I did one SIDE at a time, leaving the sections lying down. It took THREE coats (over a week). Usually 2 coats is plenty, but it was still looking rather blotchy with 2 coats.
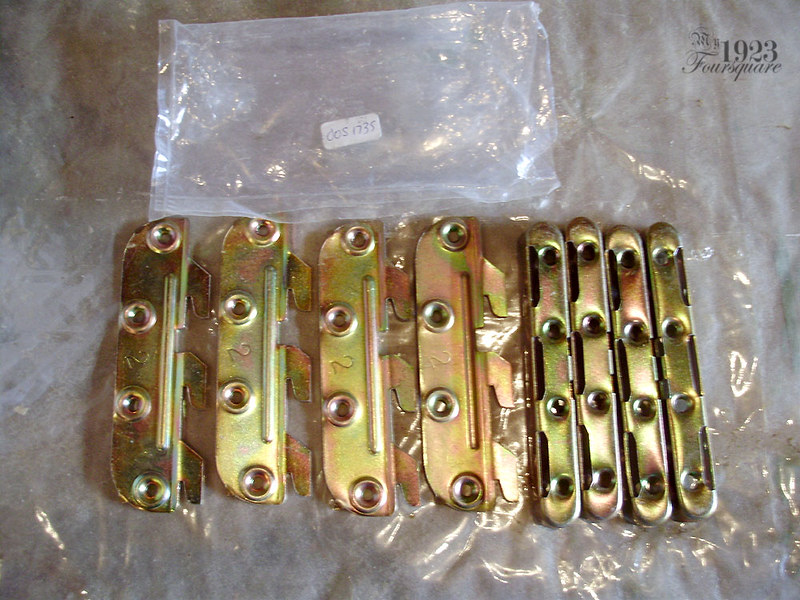
Another small hiccup that happened is that the hardware I had bought for the bed (over 5 years ago) was packaged incorrectly and it had all right side hooks! This system has the hooks screwed flush onto the rails, with the actual hooks offset (bent outwards slightly), so they aren't reversible. There are usually two #1 hooks (left) and two #2 hooks (right). I contacted the company and they sent me a new set, but I had to wait a few days for them to arrive.
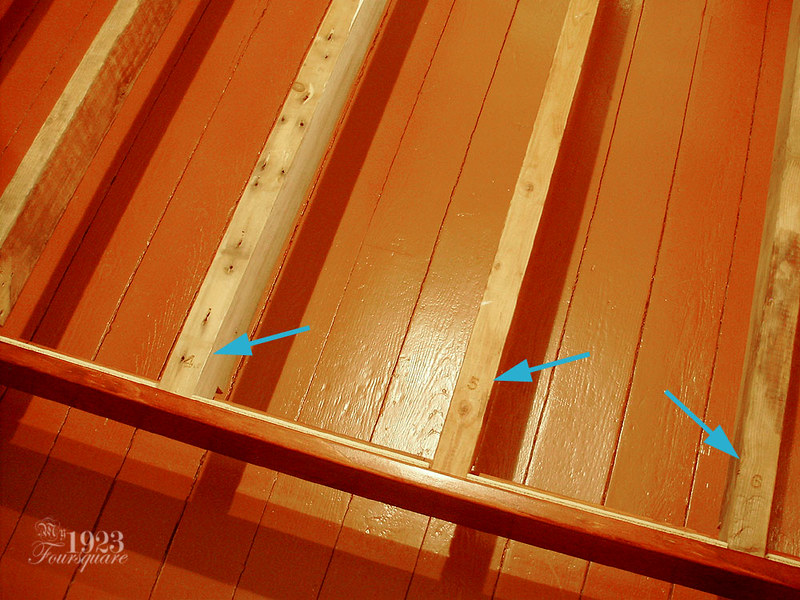
The rack system I ended up using were a number of scrap 2x4s that were notched to fit the height I wanted. These sit on the rails, and I added some plywood spacers between them (to make sure they stay vertical). This system can be changed to suit a box spring application instead (my setup is a mattress only - no box spring). Because the 2x4s are all different widths/sizes, I numbered them with a punch set. On top of the 2x4s are two sheets of thin plywood lined up so that the seams fall on one of the 2x4s.
You can also see how the bed hooks work (kinda). They're designed as top-mount, so they could be raised or lowered if I ever end up with a different mattress in here. It would leave screw holes behind, but those could be hidden fairly easily.
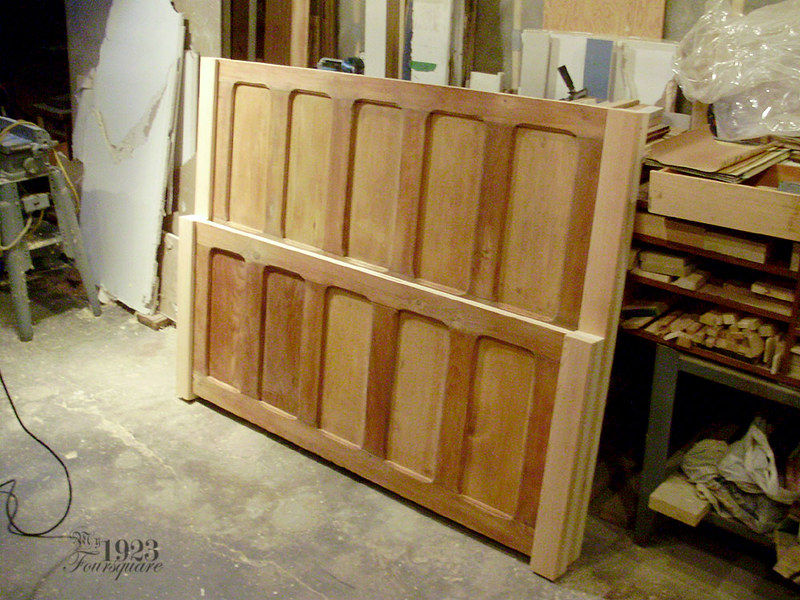
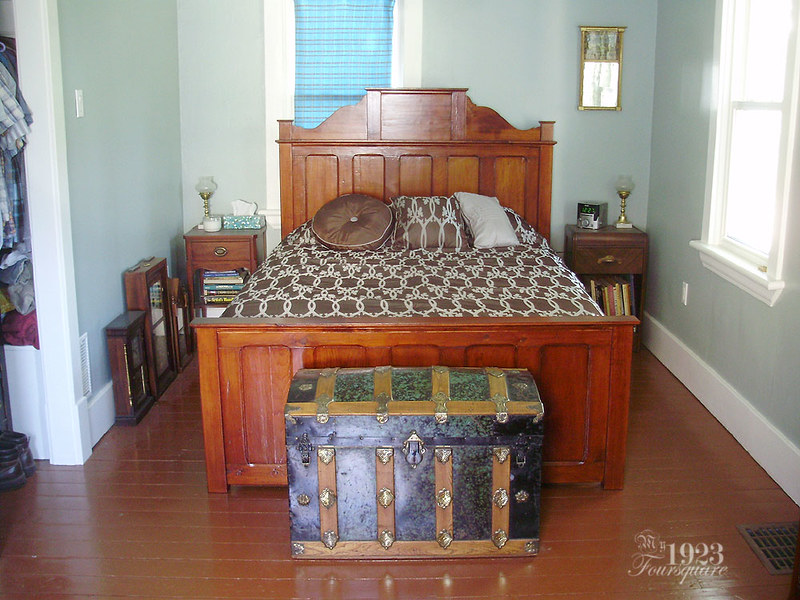
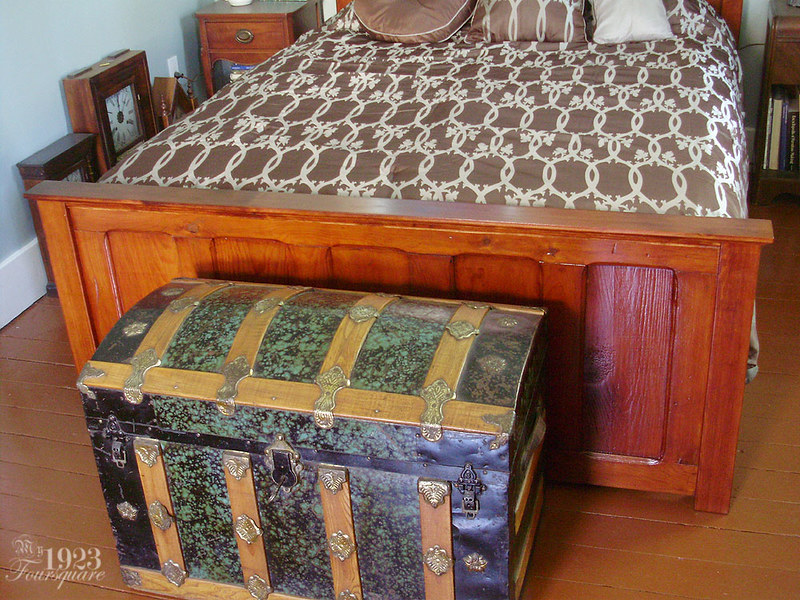
FINISHED BED! :D
I should also add that there were a few spots with leftover white paint from the stripping. These areas were touched-up with brownish-red paint after the staining was done (before varnishing).
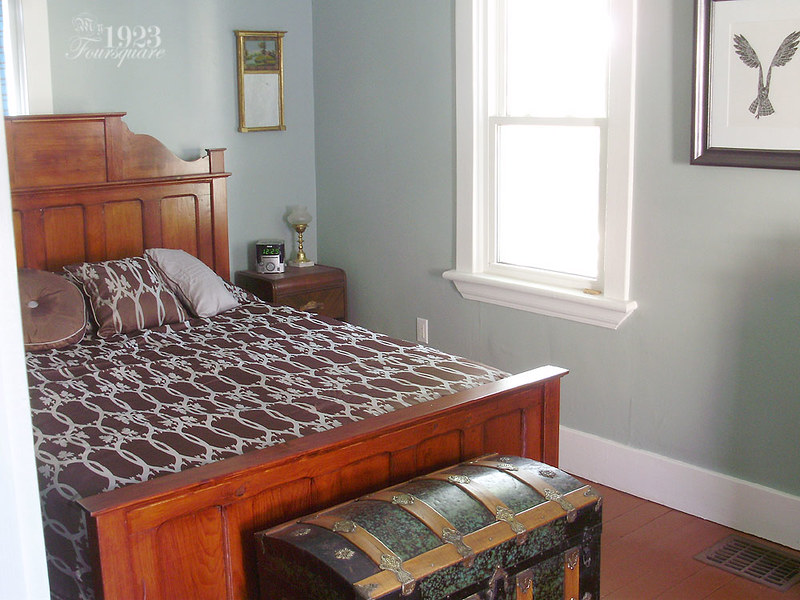
I'm really happy to finally be off the floor.
Wow. That's really impressive. Well done!
ReplyDeleteThanks. :D
DeleteVery nice work! I have a soft spot for Eastlake styles (furniture and houses), and I like your design inspired by it. It's classic and would go well with many styles.
ReplyDeleteI'm generally skeptical of recycled door projects, especially since I have had to hunt down matching vintage doors in both houses weve owned, and hate to think people chopping them up because of Pinterest. In your case, however, it was not only a successful design outcome, but a worthwhile use of doors otherwise beyond their original function.
Very inpreasive work on the stripping and finishing too. The mismatched species on the panels seems to conform that they were originally built paint-grade, yet your masterful staining made them look great. I wish more people knew about the paint touch-up truck for buried bits of paint. I've seen too many well-intentioned stripping jobs marred by flecks of paint sealed in by the final varnish.
Finally, the rounded corners on the panels are curious. It's generally an indication of the profile being routed after assembly, but I've never seen it before on old millwork, especially doors. How were the rails and stiles jointed? Were they square butt joints with dowels rather than cope and stick?
Thanks!
DeleteI feel the same way about lots of old doors, but the sad reality is that hundreds (or more) go in the trash on a daily basis across the country. Some go to salvage yards, some get saved, but a good number go to the landfill. With that in mind, I really don't mind if a handful of people decide to convert them into beds or other projects. I would PREFER people save their original doors, but people are lazy, and not many people want to pay to have them refinished either. Not when you can get a new 40$ hollow door.
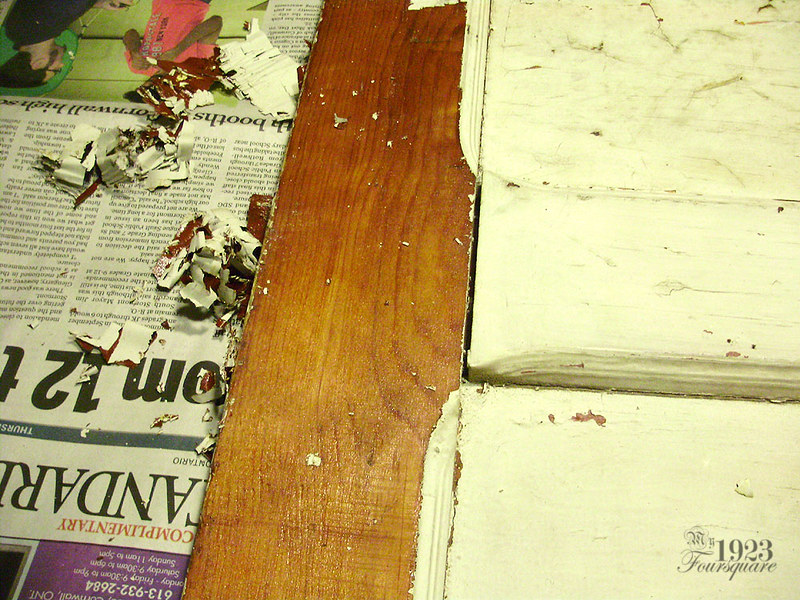
As for the construction, it *seems* lazier to do them with the rounded corners, but in reality it is just as much of a pain. The doors are made with a standard mortise and tenon design, with a full through-mortise at the bottom, centre (near the handle), and top. The other 3 cross pieces have a short tenon (only about 3/8" or so). They must have dry-fitted the door, routed it, then reassembled it with the panels afterwards. I HAVE seen a fair number of these (as well as much more complicated designs).
You can see the construction in the photo where the door is split apart. The top and bottom tenons are haunched.
Well, for the 4,897 time since reading your blog I am agog.
ReplyDeleteFabulous! You are my hero!
Thanks Ross. I can't say this was a quick project though. I started stripping the doors months ago. I'll also (eventually) be building an antique restoration/repro bookcase/cabinet with a pair of antique cabinet doors. So far I've only built the face frame for it.
DeleteWhoa... that is amazing my man. I've been admiring your handiwork for awhile now but it's been a few months since I've seen your latest work. Stunning as usual. If you don't mind me asking what chemical stripper did you use on the doors? I'm stripping some similar doors and having a hell of a time removing the left over gunk post heat gun.
ReplyDeleteI just used Poly Supa Srippa (the most common brand here). Store brand works too. Get one that is "gel" if possible.
DeleteThat looks great! Terrific work as usual. I have a new appreciation for fir and other wood species. Great work on matching.
ReplyDelete