
First, I finished rewiring the lovely old light fixture from Mrs.D, then I tested it, took it back down, and redid both the ceiling electrical/box, and the light switch.
This was the fixture's interior "before" shot, with the original old wiring (still in usable shape, but for safety/peace of mind I don't usually reuse the old wire, since it tends to break/fray at all the joints). On one of the first fixtures I rewired, I had thought that these "hockey tape looking connections" were a poor attempt at a rewiring job, but this is how all the original wiring was done. I unwrapped on of these, and inside, all the wires are tightly wrapped/twisted together, and soldered before being wrapped in the old fashioned electrical tape. Also note that half the wires were differentiated with small knots in the wire (I didn't check weather these were the hot or neutral wires).

I also found out that this fixture is also another one that is the same sort of copper colour that was popular at the time. The shade holder I'm holding is one of the "new old stock" ones that I bought on eBay and the paint on it is still fresh/clean, like the centre part of the pan for the top of the fixture (on the right). This same colour is used on the one in the living room, both ones for the bedroom, and on this one. The only different paint finish I have is the dark green/gold one in the dining room. The other oddballs are just tarnished brass.
Also note that this fixture has 3 colours. The main body is copper (paint), with brass (unpainted) sections, and then there are also a few highlights in a dark brown (paint). Also note how dirty and dusty some of the painted parts were. Some did not clean up too well, so I had to add a clear paste wax over them and buff them a little.

Here's the fixture fully rewired. I decided to sign it. I also used light brown spray paint on the exposed sections of wire for this fixture, since the gold rayon was too flashy for this one.

Temporarily hung from a hook for testing.

I wasn't sure weather or not I had some before photos of the crappy attempt at the ceiling patch they did when they redid the electrical, so I took some photos before yanking it down.
They just used any convenient scrap wood and SCREWED it into the joists. Then they slathered it with putty and painted it. Both the Office and Living Room were done like this.
ALSO, While taking down some of the boards, I found proof that the wall that makes up the hallway was added later. I found the original light fixture location, which would have been in line more or less with the centre of the window. I already knew the wall wasn't likely original, just because of the way that it was built around part of the window casings and the kitchen door, but now I know for sure.

It looked especially bad around the fixture area.

I'll come back to the ceiling later. I decided that if I was going to have to shut the power off (remember that this room is being used as my temporary bedroom and computer room), that I was also going to redo/fix the switch. Since this is a 4 bulb chandelier, I won't often want to have it cranked up, so I want to have a dimmer on it.
I started taking off the plate, but then grabbed a photo (which is why the plate screws are missing in the pic).

The photo doesn't really do it justice, but the blobs of filler/putty/mud are sticking out from the wall about 1/4". this would NOT do. Turns out that the stud in the wall has a major bow/twist in it, and they couldn't manage to install the box properly, even WITH a shim in there. Also, for whatever stupid reason, this light switch was WAY too high on the wall. Nearly 60" off the floor to the centre.
Now, this is an old house, so because of the fire wall bracing inside the walls, they put some of the switches rather high on the walls, which is ok with me, but 60" is insanely high for nothing. The highest one after this is about 53", 52" etc, and standard is 48" to the centre. The nearest two switches are at 48" (hallway) and 52" (next to front door for the porch light), so I went with 52".
At first, I was just going to see if I could shift the box and just sand the drywall, but if you look near the red lines on this pic, you'll see where the joint cracked. ALL of this was just patched with tons of mud. It must have taken FOREVER to dry. Some pieces were about golf ball sized.

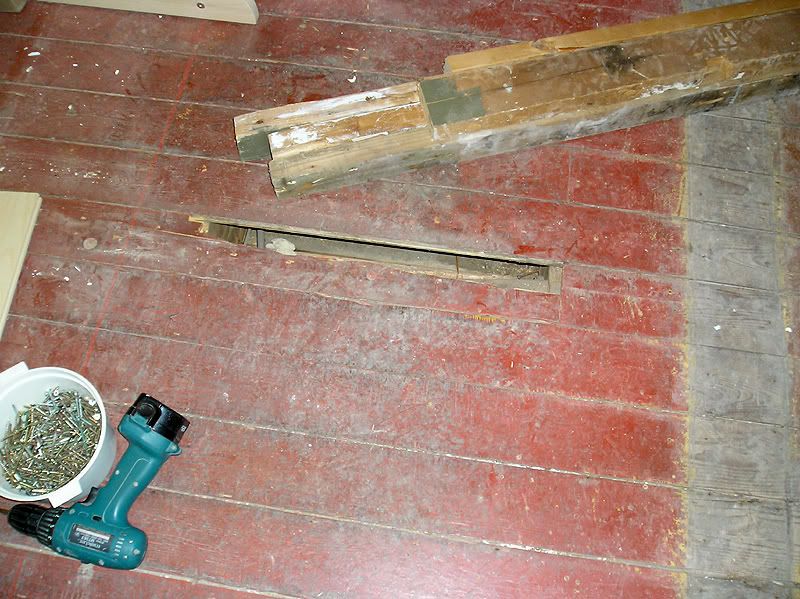
Once removed, this was how big the hole was.

I can't tell you enough times how much I LOVE my multi-tool. It gets used in nearly ever single home DIY project I do. Here, it was used to cut drywall, and to cut the old t-g ceiling boards.

I cut the hole to lower the switch and squared it up. I also added a thin piece of scrap plywood to anchor the drywall on the interior edge. The screws on the right are sunk back because this scrap piece of drywall was an "edge piece" with the taper for mudding the joint.

Yes it looks like utter crap now, and I'm not the best mudder, but the first coat is always the cruddiest looking, and I'll likely need to do one more, possibly two, but it will look great, I promise.

So back to the ceiling. I yanked out the main crappy board, which was this funny looking piece of wood (I couldn't even guess the species unless it was some kind of diseased plank of cedar or something, since it was all a bunch of small oval spots on the interior). Then, since they had butchered the edges of the two adjoining t-g board so badly, I also had to yank those. So 2 narrow boards, and one wide, and in the living room it was one wide and one narrow. Since all the ceiling work is done, now I have no excuse to delay replacing the t-g boards, so I might work on them next week (either at home or at work).
In between the floors is a ton of old dust and cobwebs, so this was a dirty and dusty job. This was some of the aftermath:

And here is the chandelier all installed and ready to use (still have no switch for it yet, or shades). It looks AWESOME. I had to go out and buy a "special" bracket to mount it to the ceiling box. It's just a standard looking strap, but it has the larger half inch threaded hole with coarse threads.
While I was out, I also bought 10 sheets of drywall, and 2 sheets of plywood. And DAMMIT, I ***JUST*** remembered that I forgot to order the 2x3s I needed. This was to continue work on the upstairs closets/walls in the "L" Room/Guest Room. They're only delivering it next Saturday, so I can always go back and add that to the delivery.

With the ceiling boards popped out, I now have a hole that looks into the upstairs bedroom, though this board: http://i1018.photobucket.com/albums/af308/clockmaker15/HOUSE/P1010717.jpg

Looking down a bit, you can see the tops of two of my clocks (this was after cleaning everything), and the completely redone door casings for the doorway.

And since I know people will want to see the whole clocks (the above photo was meant to catch part of the fixture in the same photo), here:

The one on the left is a nearly mint condition 100% original Ansonia clock from around 1860, and next to it is a refinished and repaired (and much more pedestrian) Waterbury Ogee clock from around 1870, which has a temporary decal in the door (in a clear bag, which is why it looks wrinkled), which I haven't adhered to the glass yet. It's a gold transfer that will get adhered to the door, and painted (reverse painted) in a few colours. It's been like this for a few years... The ogee was my first antique clock purchase off eBay, and after a whole bunch of different repairs, it's an extremely reliable timekeeper, and I use the built-in alarm to wake up in the mornings for work. It's VERY LOUD.
The antique dresser is part of my bedroom set, from around the 1920s. It's solid walnut and I adore it. Someday I'll fix all the nicks and scratches on it with shellac. There was a time when I had thought about refinishing them, but now I'd NEVER do this. The finish is original, and since it's shellac, it can easily be touched up. The side of the dresser and one of it's cabriole legs can be seen in the "Aftermath" photo above.
Also, CANDY CORN! :D
Holy crap - amazed again!
ReplyDeleteIs that an old piece of knob-and-tube wiring up there in the ceiling space?
Yep, all the original wiring from when the house was built was knob and tube, and a lot of it was left behind inside walls and between floors. There's all kinds of ceramic insulators and tubes in the basement and attic, too.
ReplyDeleteI was actually surprised to see how well made the wire is. When I saw the large black cables (about 1/2" diameter) I thought they were for a double wire, but they are for a single wire, but basically just in a double jacket. The interior copper wires also appear to be pre-tinned (since most electrical connections were soldered). I've kept samples of it.
Hi JC,
ReplyDeleteI'm so proud to see the old light fixture, cleaned up, re-wired, and thoughtfully signed by you, the restorer. I had to chuckle though, looking at your "silver" bandaid. Is that what I think it is? A silver bandaid for super heros? You're my hero. You make your projects look like fun. What an inspiration!!
Love the wonderful old clocks. Someday, I'll make a visit to see your old four square.
Mrs.D
Mrs. D.
ReplyDeleteThe Duct Tape "Band-Aid" is actually because I'm trying to get rid of a wart on my thumb. It's not working that well (I read online that Duct Tape is supposed to help them go away faster).
Glad you're happy to see the light fixture all done. It really does make a huge improvement in my enjoyment of this room. This is the room I spend the most time in (at the moment) because of the computer, but having the light on a dimmer makes it great (I love low lighting or candle light).
You're more than welcome to drop in if you're ever in the area! :)