It all started when I just wanted to scrape-down the excess putty left on the wall after I had removed the drywall column (cold air return) in the living room. See this thread for info on that: http://my1923foursquare.blogspot.com/2011/10/major-october-update.html
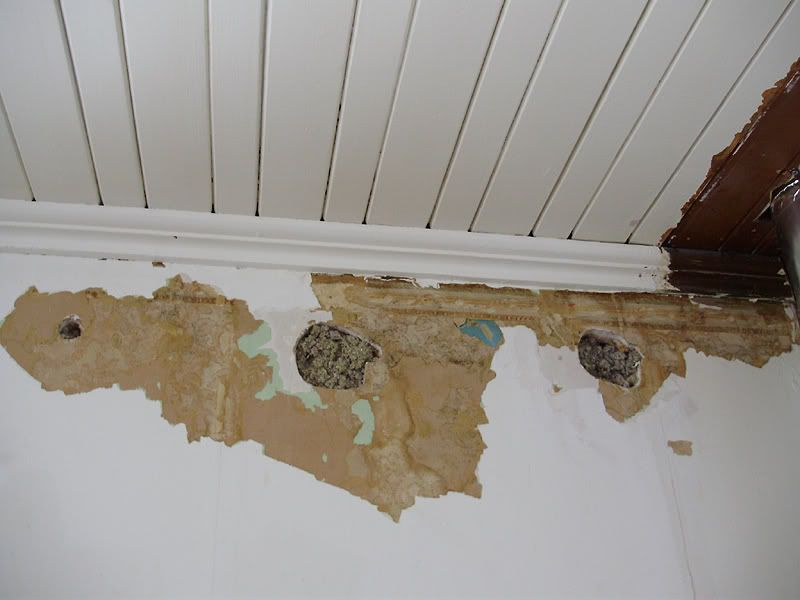
When I started to scrape, however, a few pieces of paint-covered wallpaper tore off with it. I decided to keep tearing a small section, and then I ended up with this:

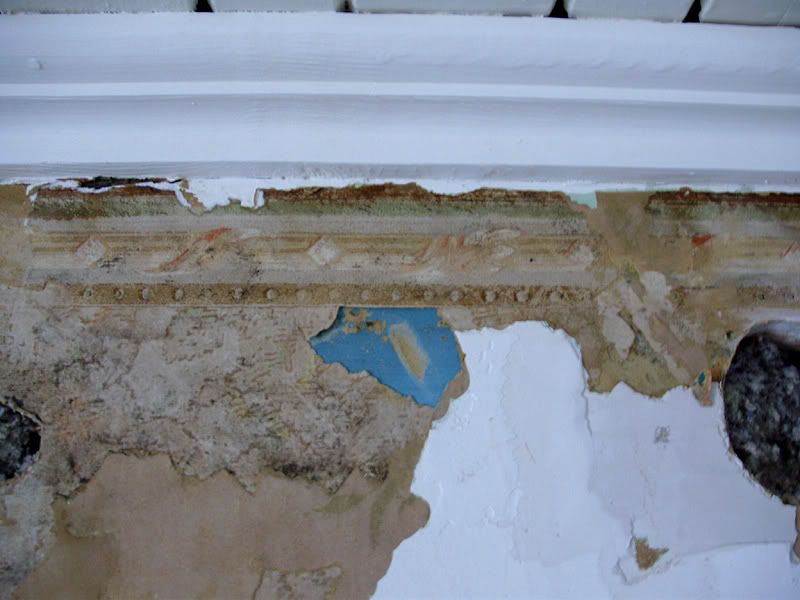
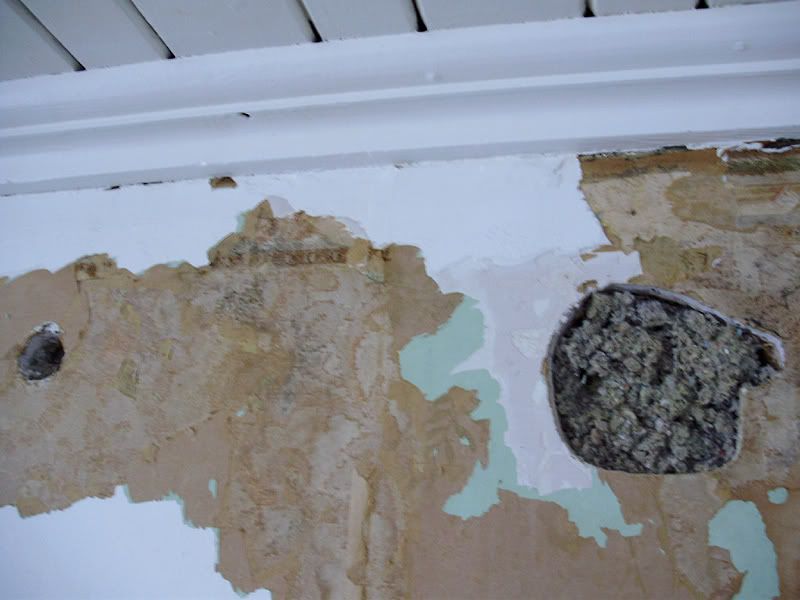
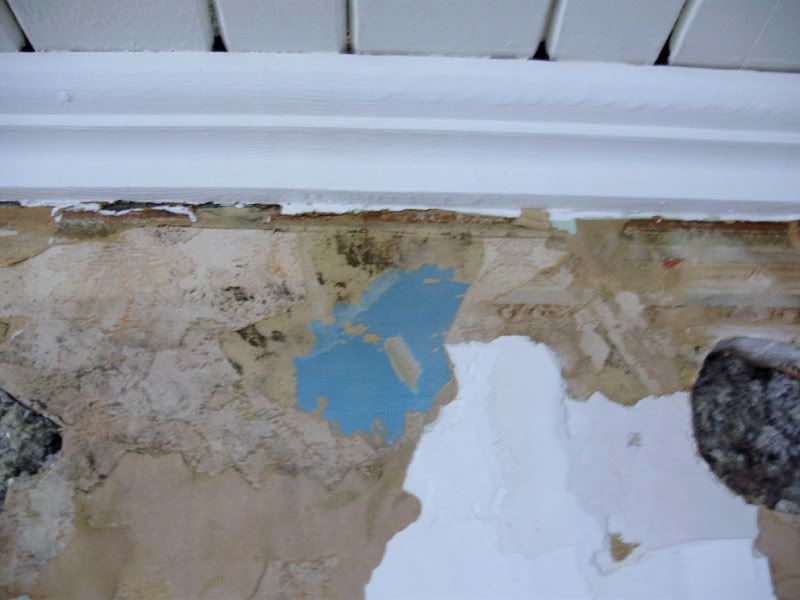
As you can see, I uncovered MANY layers, and with it, revealed some old wallpaper, several different paint colours, and even the ORIGINAL colour!
The rather bright peacock blue that you see in the centre here, is the original CALCIMINE paint over the original drywall (the brown scrape in the centre is the drywall paper).

You can also see one original wallpaper design, along with a rather small top border (no more than 3" wide). The colours on it are rather pale greens, oranges, and beige.
There's also some of that wonderful mint green that seems to be found in ALL older homes.


Now, I probably COULD fairly easily scrape down both exterior walls down to the calcimine blue, but then I'd have the problem of trying to paint over it. Apparently not much will stick to it, so I could end up with some major problems. Another issue is that I've already repainted and caulked (and generally beautified) both windows, and if I were to scrape everything down, I'd probably end up screwing-up all the edges with chips and peeling bits. Not to mention all the work.
I'm also sure you noticed the large (unevenly sized) holes that they made for the blown insulation. For a long time I've wondered how it was done (from the inside or the outside) but now I know. The patches aren't expertly done, but the walls are just so uneven and bumpy that I never noticed the holes were there. I'll have to re-patch those two properly.
So yeah, this is one project I *WON'T* be tackling. I'm just going to putty over it and ignore it. I do want to be DONE with renovations at SOME point. *eye roll*

I love the blue color. The green, not so much. It's a little pale for me. Since you've seen both of those colors from the past, would you consider painting the room one of them?
ReplyDeleteI actually really like the blue (although I think it might be a bit too bright), but I already really want green for the living room. I have a specific green already picked out, which is not the same as that mint green. It's actually a colour that my aunt painted in her house that I absolutely love, and it will go well with my other colours so far.
ReplyDeleteI like the wallpaper border. I wallpapered my bathroom (the only room in my house to be wallpapered), and I believe I actually made the border more elegant by uniformly trimming about an inch off of it(It was stepped bands of moulding.).
ReplyDeleteSo funny, we have that same mint green all over our house too. I just don't get how it was such a popular color. Any chance it was an old style primer? I mean, we see it on EVERYTHING!
ReplyDeleteI so enjoy uncovering old things like this, even if it means causing more work in the long run.
(Alex) Oh you just wish that were true. I happen to have a nice antique birch table (that I stripped and haven't finished working on) that was a lovely shade of mint green:
ReplyDeletehttp://img.photobucket.com/albums/v473/sooth15/LiveJournal/MerildaTable04.jpg
I also have a really nice pressed-back chair (which is staying painted) in a nice shiny mint green (no pic other than this one, where it's in the front: http://i1018.photobucket.com/albums/af308/clockmaker15/HOUSE/DiningFixture10.jpg)
Eventually you might like those guys...
ReplyDeletehttp://www.tockay.com/en/produits
They sell all kinds of environmentally friendly traditional paints, including the modern equivalent of calcimine (their Vega Clay Paint is basically the same stuff by a different name). You could try to paint over the old calcimine with new, but it's hard to tell if that would work. In my personal experience, calcimine sticks to drywall MUCH better than to plaster, so it might work. On plaster I'd strongly recommend to wet and scrape off all old calcimine - had big chips coming off much too often! In Austria where I live painters used it for interior painting until very recently and maybe some still do. Until a few years ago it was also available at all DIY stores, but now Molto unfortunately dropped it. As I already said on the OHW forums, I'm a big fan of calcimine because it hardly smells at all, doesn't contain ANY toxic ingredients (you could probably drink it I guess) and even if you happen to forget a brush or roller for months you can still wash it out. I wouldn't use it on surfaces like to get splashed with water or wiped down though (even though we made the mistake of not tiling our shower high up enough, so the painted wall gets splashed on a daily basis and still looks decent after 8 years).
It’s really frustrating how simply scraping off some paints can ruin an entire area. Sometimes, naughty hands should be tied somewhere. Haha! Anyway, I'm thinking that blue is a perfect color choice. So, how’s it now?
ReplyDeleteDean Ford
That's the living room, which is now a light green.
Delete