
Here's the work on the built-in. The grooves look like they're rectangular because of the plywood effect, but they are definitely V grooves. Unfortunately the first photos are blurry, but they're all I have.
The V grooves were just marked out at 3" intervals (centred on the board), and I set up the router with just an MDF straight-edge (actually a baseboard piece).


Here's the issue I'm dealing with regarding the old drywall at the ceiling in most fo the upstairs. Basically, back then, they only nailed it in place around the edges of the sheets, and a bit down the centre, so over time, under the weight, it has all sagged in rounded sections. My solution is to add new drywall over the old (for several different reasons which I won't go into). To do this properly, I still need to snug-up the old drywall back flush, so I used washers and drywall screws. You can see just how terrible the ceiling looks here.
This is in the Guest Bedroom (aka Laundry Room).

The ceiling in the bathroom was just as bad. I covered over it the same way. The ceiling in the hallway, staircase, and half of the MB have already been previously capped over with new. One half of the MB is sagging a bit, but I left it as-is.
The L Room, however, is a whole other nightmare. Some dipshit smeared a thick layer of plaster over all the awful old ceiling using a BROOM. Doesn't that look just awesome?


So fortunately, most of it chips off pretty easy, so I started on that a few months ago, and did a whole lot more this past week.


FUN. The worst, however, is that I think they replaced one full 4x8 sheet, and it was unpainted when they added the plaster, so it will be an insane nightmare to try and chip that crap off.
Here's some random shots of the recent drywall and closet work between the Guest Bed and L Room.

This is the outline of the Guest Bedroom closet. Obviously it won't be functional until the chimney is gone, but I'm really hoping I can get that removed next year?

From the Guest Room side:


PS: I've been reusing some spare pieces of the waterproof (blue) drywall leftover from the bathroom reno, along with new sheets of regular drywall, so that's why there are random blue sheets.
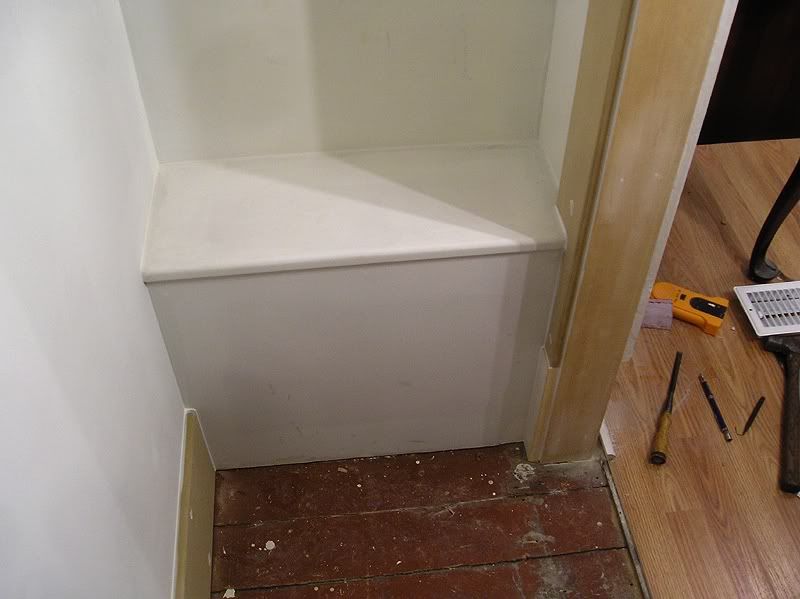
This shows the inside of the L Room closet, over the built-in. There's a decent amount of space up there, and there will be a wooden shelf mounted over the top (since drywall would eventually get damaged too easily). It should look quite similar to what I did for the duct work in the MB closet (see here: http://i1018.photobucket.com/albums/af308/clockmaker15/HOUSE/PB018430.jpg) only MUCH higher.

Wow, so much work. Do you have any idea of a finish date for all of this? Do you think it will be a forever project with no end? Maybe sometimes it feels like that. I was wondering the other day how to go about framing in a room when there is already wood floor installed over the subfloor. I am looking at a house to purchase that has two entrances to the formal dining and formal living. I want to close one entrance off in each of those rooms. One to make into an office, and one to make into a studio. It looks like from your closet pics that I can just put my bottom plate right on top of the wood floor without cutting it out and framing to the subfloor instead. I like that idea, it saves a lot of possible collateral damage to the surrounding wood floor.
ReplyDeleteHi, I figure that it will take me at least 5 years to get most of all the rooms done (repair the trim, fix the walls, and paint), but I'm not sure how long it will be before I do major work, like the kitchen.
DeleteAs for your issue, you can absolutely just go ahead and fill the door opening with a "mini wall" and drywall over it. If you do, I would suggest that you just simply remove the door casings (and save them) then install the studs in a way that doesn't overly damage the existing doorway (in case you, or a later owner would ever want to switch it back). You also might not even need to nail anything to the floor. The floor could remain entirely undamaged. 2x4s are not that flexible, and unless the opening is wider than, say, 6 feet, you could definitely get away with not nailing it to the floor. As long as it's secure on the 3 other sides, it should be fine.
That's a good idea, not nailing to the floor. I hadn't even considered that. The doorways are approx. 48" wide, so flexing of the bottom plate shouldn't be a problem. Thanks for the tip.
DeleteJC, I always enjoy looking at your work. Five years might sound like a long time, but you will be living inside a jewel box when you're finished.
ReplyDeleteI've spent the past month and a half repainting the outside of my house. I find that if I don't rush it and just do it at my own speed (three or four hours a day) that the project is downright enjoyable. Of course, when I say repainting, I really mean scraping, sanding, recaulking, stuccoing, spackling, priming and painting!
hi, wow ... I am so envious of your woodworking skills. Its really evident how much care and detail attention you are putting in to your home.
ReplyDeleteI did want to ask: It seems you are creating most of your wood trim moldings from stock lumber. That little ogee molding at the top of your doorways - are you making that yourself or buying it pre-made ? Sadly, one of the POs in my home removed all of those moldings from the first floor windows and doors and I have been looking for it without success. I also considered making it, but have severely limited tools (i dream of having a table saw ...). Any advice you can give is welcome. Jim
Jim,
DeleteYou have a wonderful old house, and I'm subscribed to your blog.
The good thing about working as a cabinetmaker in a very well equipped workshop means that I have access to a huge selection of specialty tools, including shapers, routers, and even a moulding machine. Our shop is actually the only one in the area that makes curved casings (for round, oval, or arched windows).
That said, yes I made all the custom moulding myself because I wanted a nearly 100% match to my existing mouldings w/o paying to get a custom knife made for the moulding machine. This meant that I had to use various setups and cutters in a shaper. It took me something around 4 hours to make ~100 feet of mouldings.
There ARE several commercial moulding companies that still carry nearly identical (in style and shape) door crown mouldings, but they tend to be hard to find. I was considering ordering some nearly identical trim from this company in Ottawa. Check out these one examples of what might be available:
This one would need to be mounted over a rectangular top piece, and you'd have triangular gaps above, but it's about the right size:
http://www.mountainmoulding.com/product_detail.cfm?ProductID=471&ProductType=5
This one is much closer to the shape of the original, but a bit thinner at only 3/4" (mine are 1 1/8"x 2 1/4"ish:
http://www.mountainmoulding.com/product_detail.cfm?ProductID=264&ProductType=6
Etc.
This was my original post regarding the mouldings I made:
http://my1923foursquare.blogspot.com/2011/07/mouldings-and-cabinet-update.html
I have the same header in my house as you do in yours, JC. PO's cut off the top moulding on a couple of the headers. I have found a company that makes this moulding and other header mouldings. It is Timberline in Allanburg (St Catharines). Their number is 905-384-2999.
DeleteThey are making headers for me to replace the cut ones in the bathroom and I am putting them back in the kitchen that they removed.
Timo