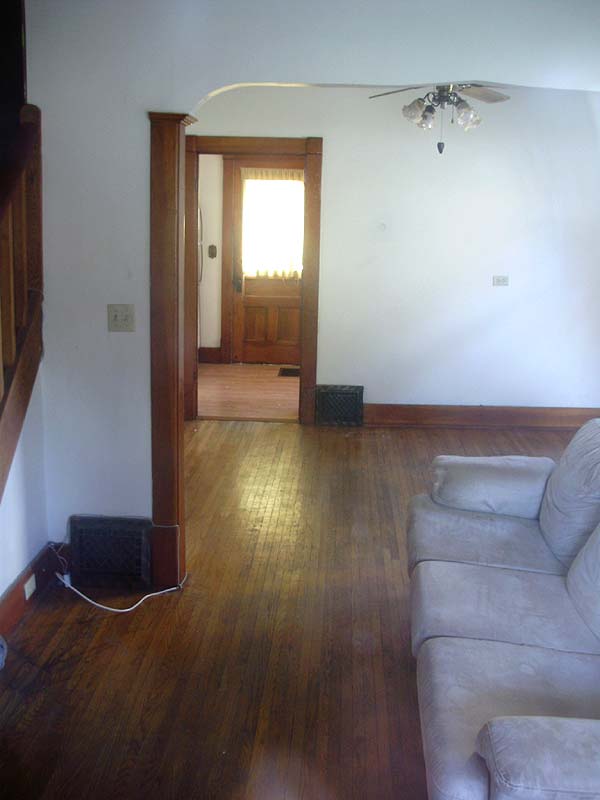
Well, several months' worth of work has come to an end for the year. I won't even pretend like there isn't still a TON of work left to do on the porch, but the part that shows the most is done, and it looks pretty again.
Here's a photo from back in May 2012, as a starting point.

And this is how it looks NOW!
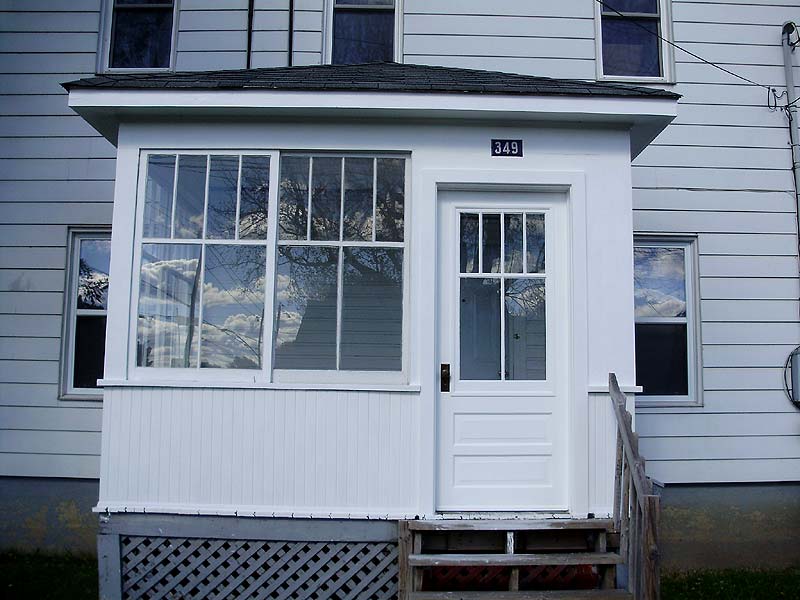
Getting up to this point was no easy task. It involved many steps, including some demo, rebuilding the door jamb, replacing the exterior wood t-g, lots of puttying/silicone/gap-filling, and tons of painting.
The last few updates that I made on the porch were several months back, and included the removal of the old aluminum siding, and the beginning of replacing the t-g. You can visit those posts here:
New Mattress & Last Week's Work on the Porch - May 26th
Ongoing Porch Repairs - August 7th
Porch Restoration Progress - Aug 11th
Porch Door Rehab - August 18th
Porch Progress Thus Far - August 19th
Porch Painted (First Coat) - August 26th
Porch Door - September 3rd
Porch Door Update & Misc. - September 8th
Painting - October 8th
Alright, assuming you're all caught-up, here's where I last left you guys hanging.
I had been itching to scrap this atrocious (and damaged) aluminum screen door ever since I bought the house. Taking it off, and tearing out all the ugly 2x4s and other scrap wood blocks from the original opening was a great moment for me in this reno.


The door only stayed there for a few hours. I know someone took it for the metal, but I really didn't want to deal with it (having to take it across town to the scrappers). I was happy to see it go.
In the process (removing the door and added wood), I discovered that the original porch door was hinged on the interior, and opened on the opposite side (which makes a HELL of a lot more sense. I had noticed the hinge notches (holes) before, but I wasn't sure if they were added later, or from a second door. But there was only ever one door.
The problem with the door jamb, however, was that it was damaged, as well as coated in thick flaking oil paint (bright yellow). So I decided to start fresh and build a new door jamb the same as the original.

I also decided to replace the door casings, since I did not want them notched around the window sills (as they were originally - even though it looked kind of stupid this way).

I thought about changing the style of the casing, or dressing it up a little bit, but in the end, I decided to keep it very close to the original, which is very very plain.
Once I had my jamb in place, I hung and fitted the door frame, which had been completely reglued and reassembled (and partially sanded).

At this point, I painted the first coat, since I was getting tired of dealing with the plastic tarps/weather.


It was at this point where I had dropped the can of shellac sealer all over the steps/floor and all over myself (see "Porch Painted (First Coat)" above).


Before I did the second coat, I bought and installed the bottom trim moulding. This was not the moulding I originally planned to use, but the one I wanted was too wide, and the boards along the front edge of the porch are uneven. This would have looked really bad with the wider moulding.
It was a tedious pain in the rear end to hand-fill each and every little triangular opening in the t-g without making a mess/blobs.


Once the silicone (acrylic paintable DAP) was dry, I gave the mouldings a quick seal and first coat before painting a second coat over the entire porch.


You might notice that I did not yet add the top mouldings yet. This is because I'm planning to completely replace all the sills next year.
A lot of prep (not shown) was done on the porch before painting, including some gap-filling along the crown moulding, under the fascia edge, and in a ton of nail holes and the occasional small knot.

Fitting the mortise lock took quite a while, since I used a traditional brace (old crank-style drill) and chisels. Probably a few hours' worth of work by itself. The lock/handle/knobs are a salvaged set (ie: FREE!)

Although fitting a strike plate might seem like a difficult job, this was actually REALLY easy (for me), and I got amazingly nice results (nice crisp outline). All I did was face-screw the plate to the wood, score the wood around the perimeter with a blade. Then I removed it, and used a router with a flat bottom 1/4" cutter and nibbled away just close to the score line. A few quick passes with a chisel, and BAM! Done! Two more less fancily cut holes were made with the same router bit for the latch and bolt. The line you see in the photo is a pencil line. And NO the Robertson screws were NOT reused. Slot head screws all the way!

Getting there...

The house numbers were re-installed after the second coat was fully dry.
Quick side note: The entire porch (2 coats) were done entirely by 3" paintbrush. I did not use a roller anywhere. Same with the door.
I covered some of the window-making process in a previous post. See: "Porch Door Update & Misc.".

I added a moulded frame for the window, as well as a drip-edge at the bottom made from the same moulding. I used clear pine for this. DO NOT USE FINGER-JOINT WOOD OUTSIDE. I have seen this done before, and even if it's well painted, it will NOT last. All the joints will come apart from the moisture/temperature. Use good stuff for exterior work.
The reason for the frame is that I was imitating the look of a door with a removable window insert. The interior side of the door is made to look like a panel (see detail photos farther down).

Making sure the insert fit nicely.

After routing the frame (one side with a detail, the other with a groove for the glass), installing the glass, puttying, and drying, came the painting phase. 4 coats per side. I had tried to cheat and skip the primer, and the cedar bled through the first coat, so basically I did white topcoat (fail), BIN shellac sealer (one heavy coat + touch-ups), then 2 coats topcoat porch paint.
It was getting cool in the unheated garage, so the door got painted on my dining room table.


Put the hardware back on (my favourite part), and install!


Here you can see how the inside of the door looks. The window is sunk-in slightly, and it has a bead around the edge that matches the one around the lower panels. I still have the entire porch interior to do, including the door casings.


Note: I used the same mouldings everywhere. The door's stop moulding on the jamb is the same as the one used around the window, and for the drip edge.

TOTAL APPROXIMATE COST:
I thought I would give a rough estimate of what I spent on this reno.
Bin Sealer: 2 small cans at ~18$each
24' pine moulding: 24.50$
5 lengths pine moulding: 26.30$
1x5x6 pine (2): 19.30
5/4x6x8 cedar (2): 19.20$
Paint (2): 40$each (still have 3/4 of a can)
Shims: 3.50$
Nails: 4.00$
Pine 1/4 round (3): 21$ (did not use but I'll need it for the interior next year)
Pine t-g 6' lengths (27): 83.43$
Pine t-g + additional 3: 9.27$
Pine 2x4x8 (2): 5.30$
Cedar 2x6x8: 11.98$
Pine 1x4x8 (4): 22.96$
Pine 1x4x6: 4.30$
Hinges (2): 2.58$
Putty: 6.98$
Dap Acrylic silicone (let's guess 3 tubes): 6.50$
Glass: 14$
Free items:
- Old cedar door
- Lock, knobs, backplates, and screws
- 4 upper panes of old glass
I think that's about all of it, which gives a rough total of: 401.10 plus taxes gives around 450$.
NEXT YEAR:
- Replace bottom frames/lattice
- Replace stairs/railing
- Replace sills
- Rehab windows
- Interior door casings
- Paint interior floor
- Paint interior porch
- Front door (probably)
- Fix ceiling hole
To give you an idea of how bad the bottom looks, here are a few detail shots:


Alright that's it for now. I'm too tired to re-read and edit this so if there are any glaring mistakes of things that seem confusing, please tell me and I'll fix them.