Monday, November 07, 2011

Recent Photos

I took some photos over the weekend of stuff that's "in progress" around the house. Some are not exciting, like the photos of patched floor boards, but everyone likes photos, so I'm posting them anyways.

First up is this stupid thing that's been drying for 2 1/2 weeks and shows no signs of being dry enough any time soon *grumble*.

Photobucket

The putty on it is still soft and icy cold to the touch (meaning it's still pretty moist inside). I've kept it in the upstairs bedroom since I thought it would dry nicely, but I guess not. By the feel/look of it I'm gonna assume it will be ok to paint in 4 weeks (1 1/2 weeks from now)-ish.

The closet shelf.

Note (and I know it's hard to see in the photos) that I was very picky about how nicely finished and "fitted" that I wanted the shelf to look. The supports are notched down so that the finished shelf is level with the sides of the support, and the edges are routed with a decorative "Roman Ogee" to echo the trim on the windows (and that I'll reuse elsewhere to match). I also rounded the front of the plywood shelf.

Photobucket

Photobucket

Photobucket

Then I took a better shot of the partially built closet wall. Please ignore the huge piles of furniture/junk:

Photobucket

Repaired t-g patches:

Photobucket

They're not all done yet.

Photobucket

Photobucket

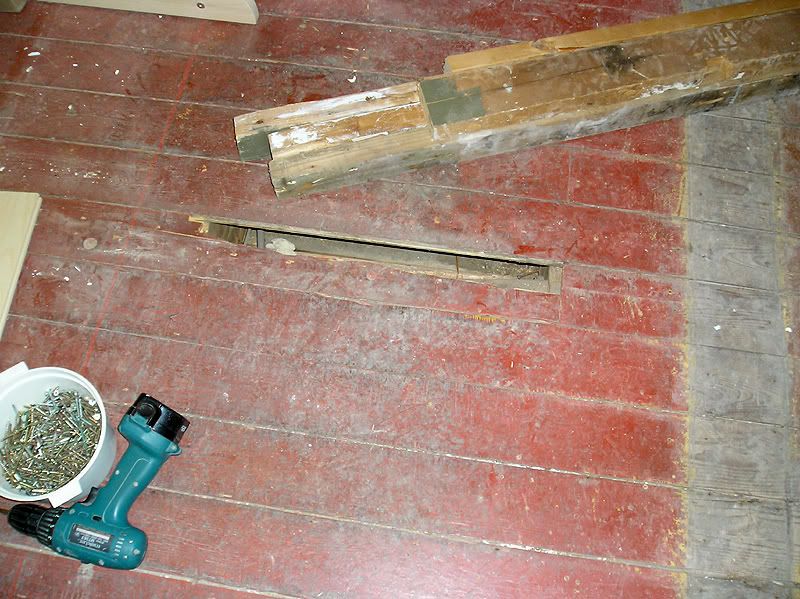
I started to do around this vent but the gaps in the floor are so wide that I'll need to modify my boards to make them wider. As-is they're the same size as the originals, but the floor has shifted so much in this spot that if I use them as-is they will barely interlock (weak joints) and I'll have HUGE gaps between the boards.

Photobucket

Here are a bunch of photos I was not planning to take/show until the Master Bedroom was done, but since it's taking FOREVER, and I probably won't have the floor done until next spring due to the fumes, I figured I'd show it off now, and again later.

Still left to do is to finish the painting in the closet, rewire/repair the matched antique light fixtures & put them up, and paint the floors. I also need to hook-up the other cold air return.

Photobucket

Photobucket

Photobucket

Photobucket

The doorway visible in the hallway is the bathroom door.

Photobucket

Lastly, I was really tired of not having many of my clocks up and running, and I missed one in particular. I was going to wait to put up the wall ones until I knew where I wanted them (to avoid unnecessary holes in the walls), but I decided to put this one up. It's one of my favourites.

Info: The clock is a miniature (very hard to find) spring Vienna (not a true Vienna regulator, since those are always weight driven). From top to finial it's only barely 23". The quality of the mechanism and parts (mounting bracket, pendulum, nuts/bolts) on this clock are also phenomenal. Best of all, I got in on eBay for a song.

Here you can see it (taken from the same angle as I see it while sitting at the PC) hanging in the wall of the Office over the computer (you can see my dusty webcam), illuminated by the soft orange glow of my old light fixture.

Photobucket

More detailed photos of this clock are here:
http://s1018.photobucket.com/albums/af308/clockmaker15/#!cpZZ3QQtppZZ16

Saturday, November 05, 2011

Closet Shelf

I finally FINALLY installed the shelf in the MB closet. It's been what? a year? Yeah. Something like that. But I only ordered the plywood about a week ago.

And I'm sick, so it's surprising that I did anything at all today. I've got some kind of fever mixed with postnasal drip. Not fun.

Now the shelf just needs to be caulked (which I might do tonight), primed, and painted, and then the whole closet can be given a final coat of white.

I'm also planning to start building the built-in for the upstairs hallway. Part of the sheet of plywood that I cut for the shelf will work out nicely to make the sides for the built-in.

Thursday, November 03, 2011

Progress Pics

Here are a few shots from this evening.

The first pieces to go up were the 2x3s along the ceiling. To line up the floor pieces, I decided to use a good old fashioned plumb bob. I happen to have one that I picked up at a yard sale a few years ago (never actually thinking I'd ever need to use it), and it worked great!

Photobucket

I just tacked a nail on the edge of the upper 2x3 and hung the bob. I did this to line up both pieces.

For the wall pieces, I started by framing out the door where I wanted it. I found that there was a pretty decent sag in the ceiling, so I actually cut the studs to the same length as the outside wall measurement, and then hammered/forced them in place (thus shifting/leveling the ceiling).

Photobucket

The rest of the studs will be set up in a continuous pattern (ignoring the location of the door frame), so I need to figure out the best place to start them (from the door vs the outside wall).

This isn't the best shot, but you can kinda see how nice and straight the wall is (so far).

Photobucket

Tuesday, November 01, 2011

Floors

I've been doing some more patching here and there in the L Room, little by little. I want to start the new wall soon.

Tuesday, October 25, 2011

Bye Bye Plywood~

Alright, I *was* going to do some work on the floors upstairs in the "L" Room, but instead I ended up cutting all that scrap 1/4" plywood that's been in the stairwell and garage for months now (some over a year). It took a good hour, but it's finally all GONE. It's bundled and awaiting tomorrow morning's garbage pick-up.

Monday, October 24, 2011

Office Light Switch - DONE

I'm so happy I finished another little project.

My friend Larry commented about the knob and tube, so here's a better photo.

Photobucket

Mud coat number 2:

Photobucket

Scratch coat number 3:

Photobucket

Then a quick coat of primer, and a quick coat of crappy white semi gloss (stuff I can't use since I got "Medium Base" instead of "White", so it's all milky and crappy), and voila!

Photobucket

Overall not a huge amount of work, and it took only 3 days of on/off sanding, puttying, and quick painting. The white paint is just to protect the wall until I actually finish this room (later on) and paint it (probably a taupe or some other Earthy relaxing colour).

Saturday, October 22, 2011

Yard Sales

This is the dimmer I'll be installing. I have an identical one already in the living room. Gotta love yard sales!

Photobucket

I've probably had these dimmers for over 5 years, but I KNEW how pricey they are, and I KNEW I'd eventually be using them.

Office Light Fixture, Ceiling, & Electrical

I actually got stuff done this afternoon! More than I had expected, too.

First, I finished rewiring the lovely old light fixture from Mrs.D, then I tested it, took it back down, and redid both the ceiling electrical/box, and the light switch.

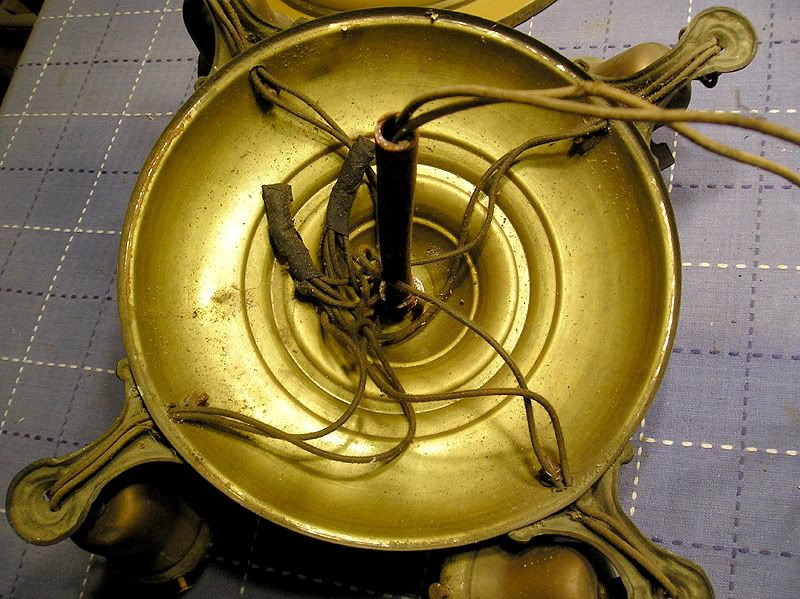
This was the fixture's interior "before" shot, with the original old wiring (still in usable shape, but for safety/peace of mind I don't usually reuse the old wire, since it tends to break/fray at all the joints). On one of the first fixtures I rewired, I had thought that these "hockey tape looking connections" were a poor attempt at a rewiring job, but this is how all the original wiring was done. I unwrapped on of these, and inside, all the wires are tightly wrapped/twisted together, and soldered before being wrapped in the old fashioned electrical tape. Also note that half the wires were differentiated with small knots in the wire (I didn't check weather these were the hot or neutral wires).
Photobucket

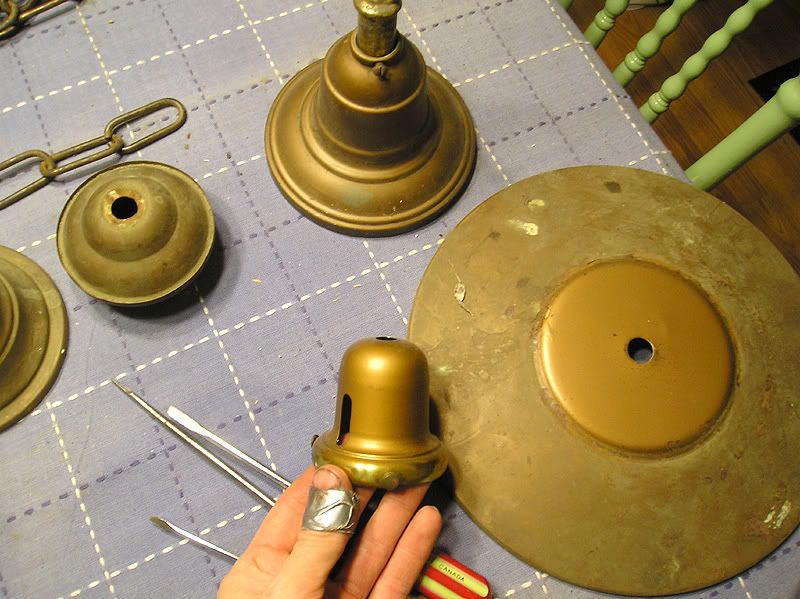
I also found out that this fixture is also another one that is the same sort of copper colour that was popular at the time. The shade holder I'm holding is one of the "new old stock" ones that I bought on eBay and the paint on it is still fresh/clean, like the centre part of the pan for the top of the fixture (on the right). This same colour is used on the one in the living room, both ones for the bedroom, and on this one. The only different paint finish I have is the dark green/gold one in the dining room. The other oddballs are just tarnished brass.

Also note that this fixture has 3 colours. The main body is copper (paint), with brass (unpainted) sections, and then there are also a few highlights in a dark brown (paint). Also note how dirty and dusty some of the painted parts were. Some did not clean up too well, so I had to add a clear paste wax over them and buff them a little.
Photobucket

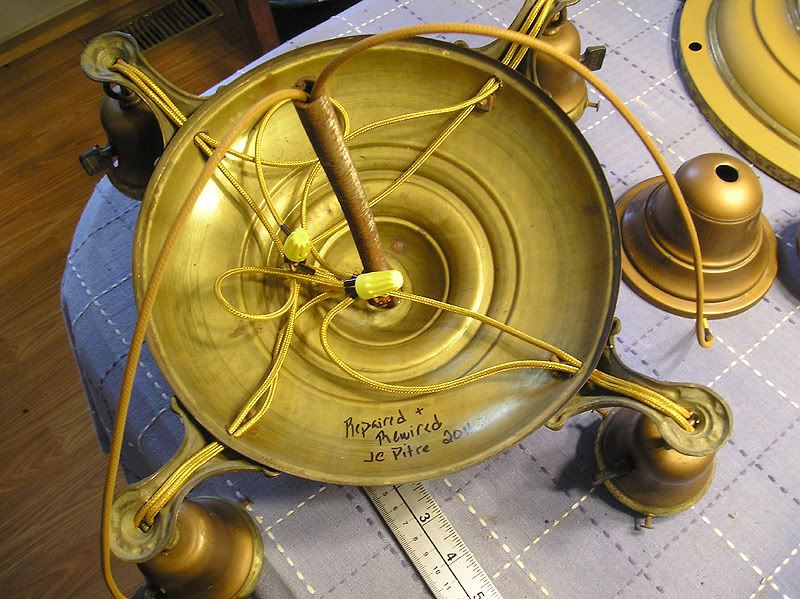
Here's the fixture fully rewired. I decided to sign it. I also used light brown spray paint on the exposed sections of wire for this fixture, since the gold rayon was too flashy for this one.
Photobucket

Temporarily hung from a hook for testing.
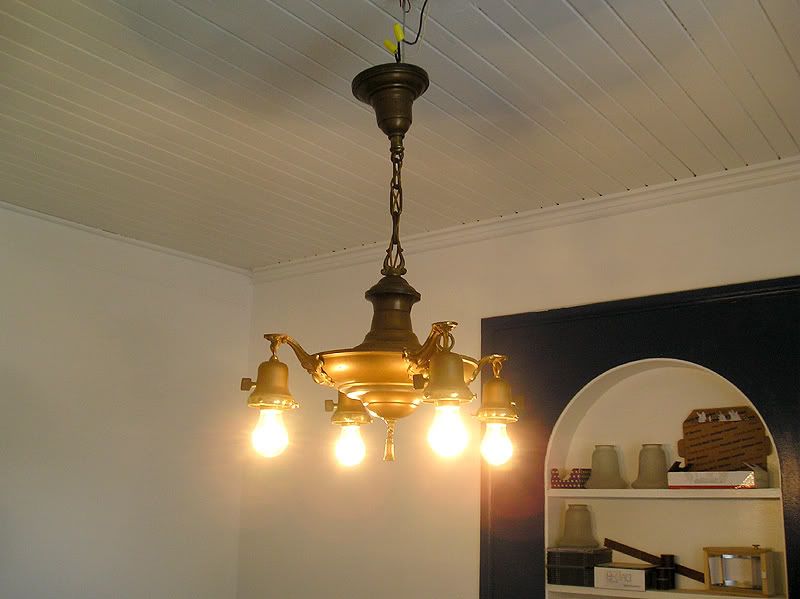
Photobucket

I wasn't sure weather or not I had some before photos of the crappy attempt at the ceiling patch they did when they redid the electrical, so I took some photos before yanking it down.

They just used any convenient scrap wood and SCREWED it into the joists. Then they slathered it with putty and painted it. Both the Office and Living Room were done like this.

ALSO, While taking down some of the boards, I found proof that the wall that makes up the hallway was added later. I found the original light fixture location, which would have been in line more or less with the centre of the window. I already knew the wall wasn't likely original, just because of the way that it was built around part of the window casings and the kitchen door, but now I know for sure.
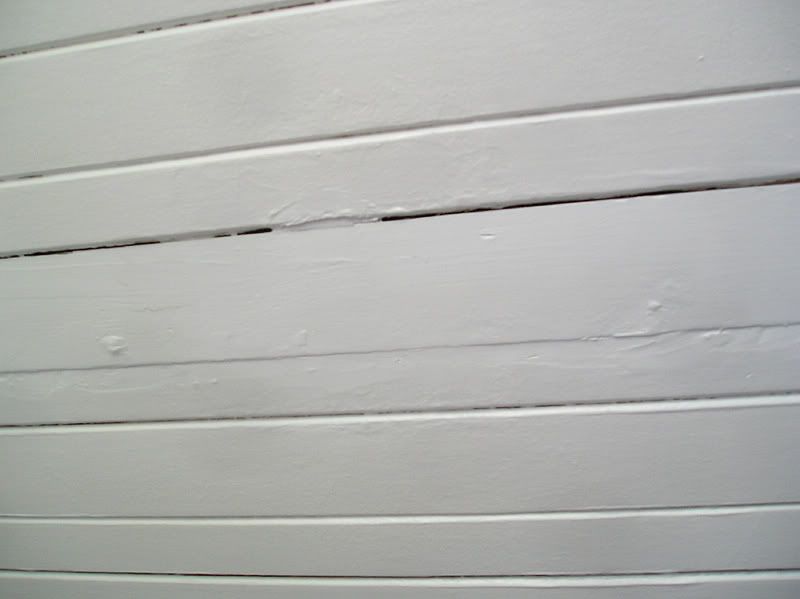
Photobucket

It looked especially bad around the fixture area.
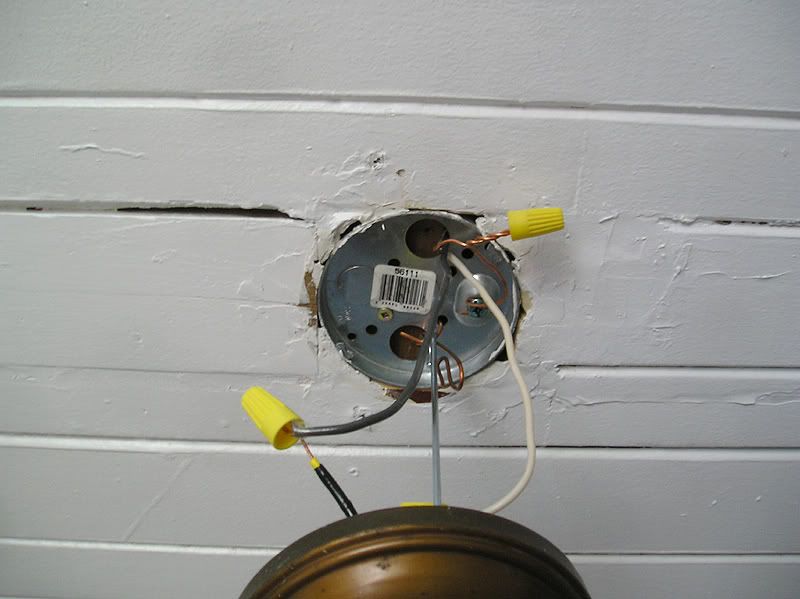
Photobucket

I'll come back to the ceiling later. I decided that if I was going to have to shut the power off (remember that this room is being used as my temporary bedroom and computer room), that I was also going to redo/fix the switch. Since this is a 4 bulb chandelier, I won't often want to have it cranked up, so I want to have a dimmer on it.

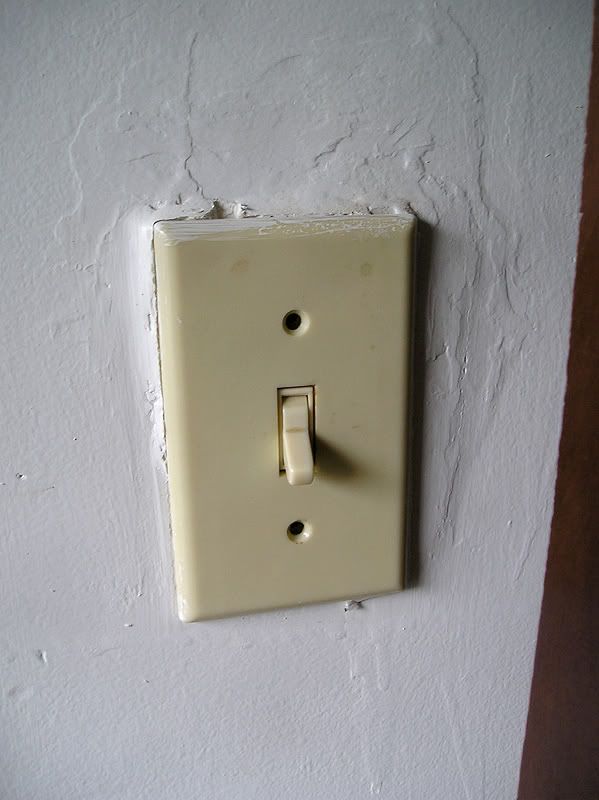
I started taking off the plate, but then grabbed a photo (which is why the plate screws are missing in the pic).
Photobucket

The photo doesn't really do it justice, but the blobs of filler/putty/mud are sticking out from the wall about 1/4". this would NOT do. Turns out that the stud in the wall has a major bow/twist in it, and they couldn't manage to install the box properly, even WITH a shim in there. Also, for whatever stupid reason, this light switch was WAY too high on the wall. Nearly 60" off the floor to the centre.

Now, this is an old house, so because of the fire wall bracing inside the walls, they put some of the switches rather high on the walls, which is ok with me, but 60" is insanely high for nothing. The highest one after this is about 53", 52" etc, and standard is 48" to the centre. The nearest two switches are at 48" (hallway) and 52" (next to front door for the porch light), so I went with 52".

At first, I was just going to see if I could shift the box and just sand the drywall, but if you look near the red lines on this pic, you'll see where the joint cracked. ALL of this was just patched with tons of mud. It must have taken FOREVER to dry. Some pieces were about golf ball sized.
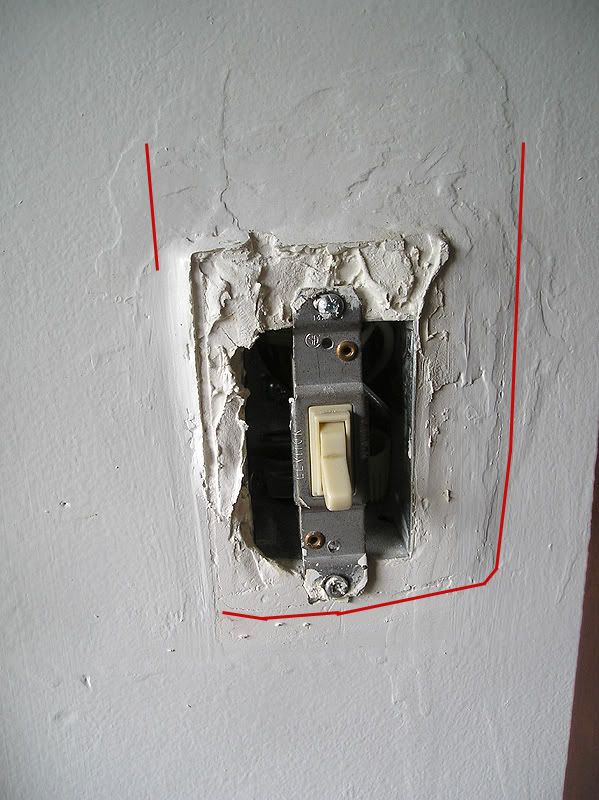
Photobucket

Once removed, this was how big the hole was.
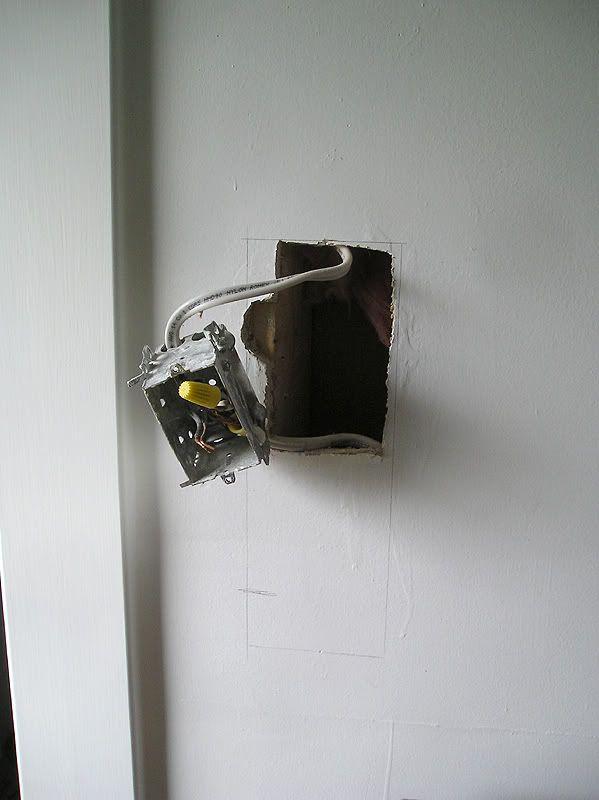
Photobucket

I can't tell you enough times how much I LOVE my multi-tool. It gets used in nearly ever single home DIY project I do. Here, it was used to cut drywall, and to cut the old t-g ceiling boards.
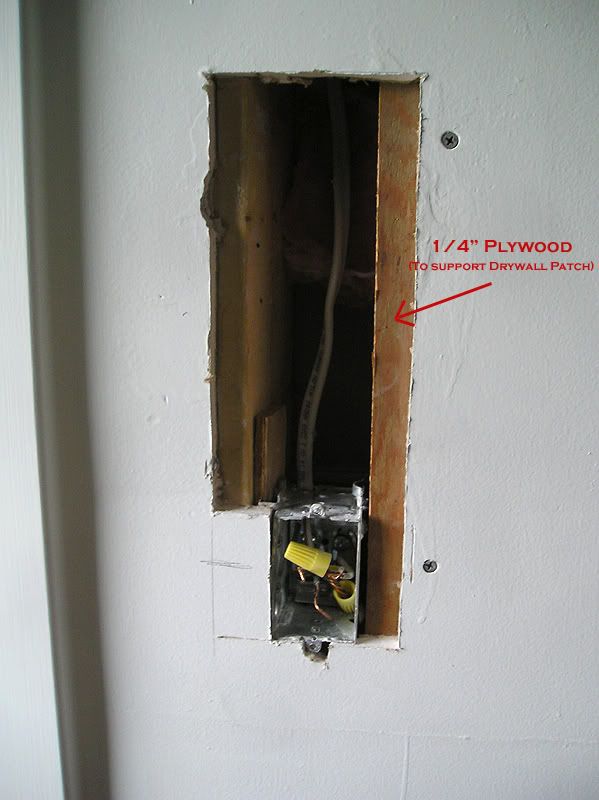
Photobucket

I cut the hole to lower the switch and squared it up. I also added a thin piece of scrap plywood to anchor the drywall on the interior edge. The screws on the right are sunk back because this scrap piece of drywall was an "edge piece" with the taper for mudding the joint.
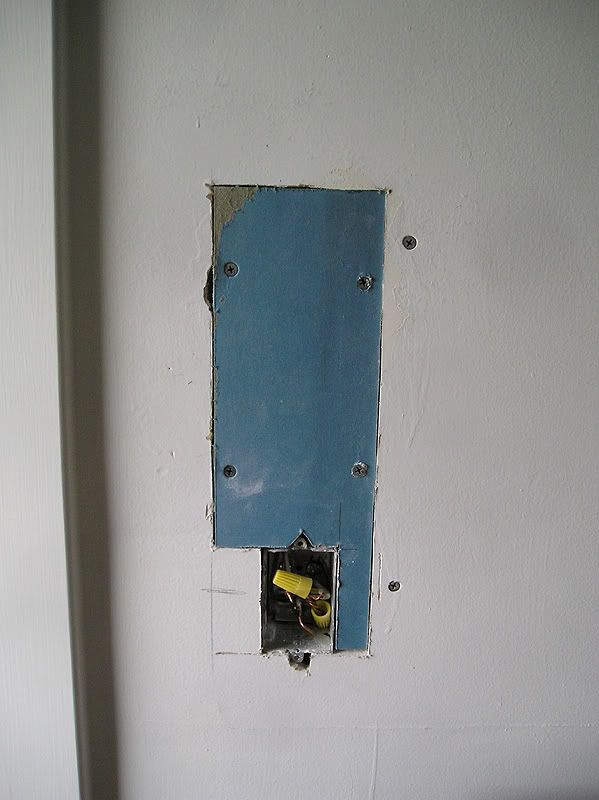
Photobucket

Yes it looks like utter crap now, and I'm not the best mudder, but the first coat is always the cruddiest looking, and I'll likely need to do one more, possibly two, but it will look great, I promise.
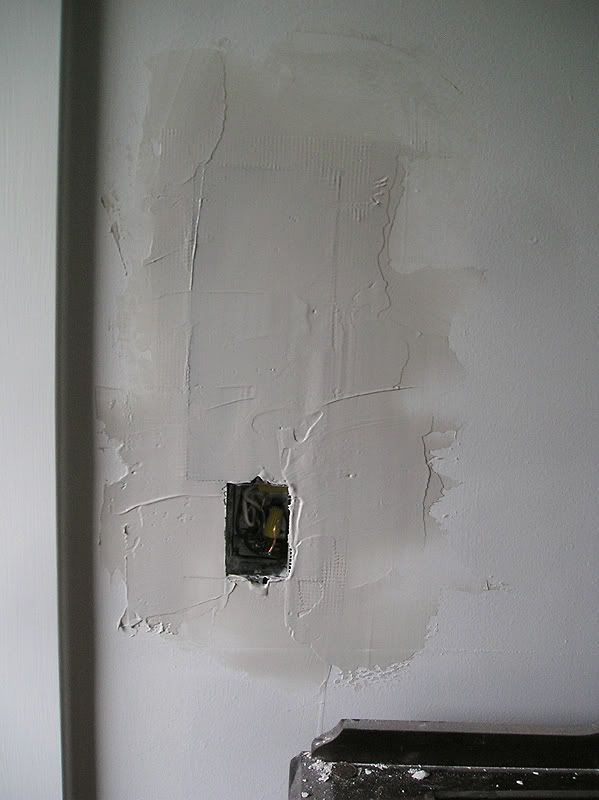
Photobucket

So back to the ceiling. I yanked out the main crappy board, which was this funny looking piece of wood (I couldn't even guess the species unless it was some kind of diseased plank of cedar or something, since it was all a bunch of small oval spots on the interior). Then, since they had butchered the edges of the two adjoining t-g board so badly, I also had to yank those. So 2 narrow boards, and one wide, and in the living room it was one wide and one narrow. Since all the ceiling work is done, now I have no excuse to delay replacing the t-g boards, so I might work on them next week (either at home or at work).

In between the floors is a ton of old dust and cobwebs, so this was a dirty and dusty job. This was some of the aftermath:
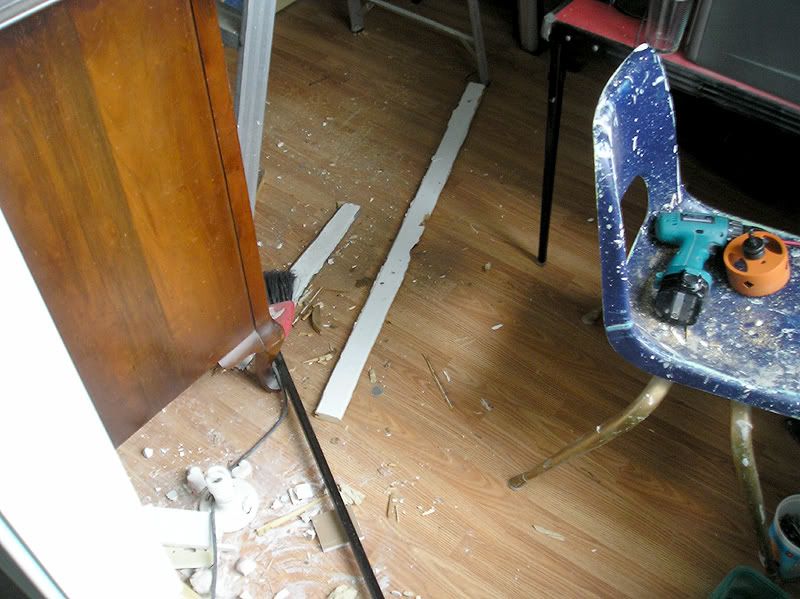
Photobucket

And here is the chandelier all installed and ready to use (still have no switch for it yet, or shades). It looks AWESOME. I had to go out and buy a "special" bracket to mount it to the ceiling box. It's just a standard looking strap, but it has the larger half inch threaded hole with coarse threads.

While I was out, I also bought 10 sheets of drywall, and 2 sheets of plywood. And DAMMIT, I ***JUST*** remembered that I forgot to order the 2x3s I needed. This was to continue work on the upstairs closets/walls in the "L" Room/Guest Room. They're only delivering it next Saturday, so I can always go back and add that to the delivery.
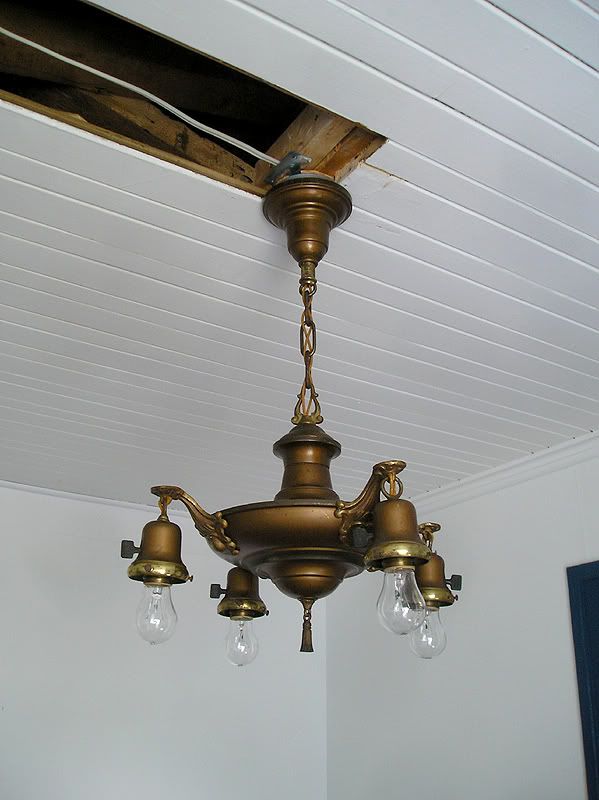
Photobucket

With the ceiling boards popped out, I now have a hole that looks into the upstairs bedroom, though this board: http://i1018.photobucket.com/albums/af308/clockmaker15/HOUSE/P1010717.jpg
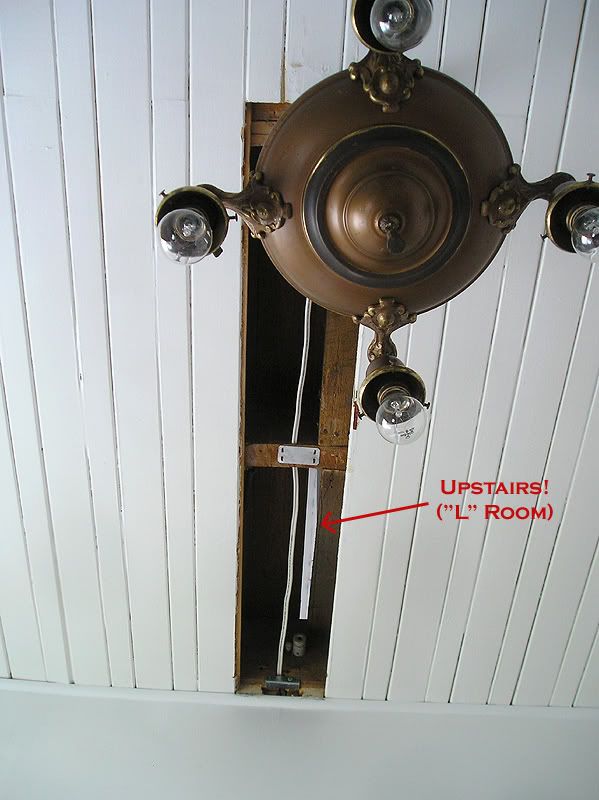
Photobucket

Looking down a bit, you can see the tops of two of my clocks (this was after cleaning everything), and the completely redone door casings for the doorway.
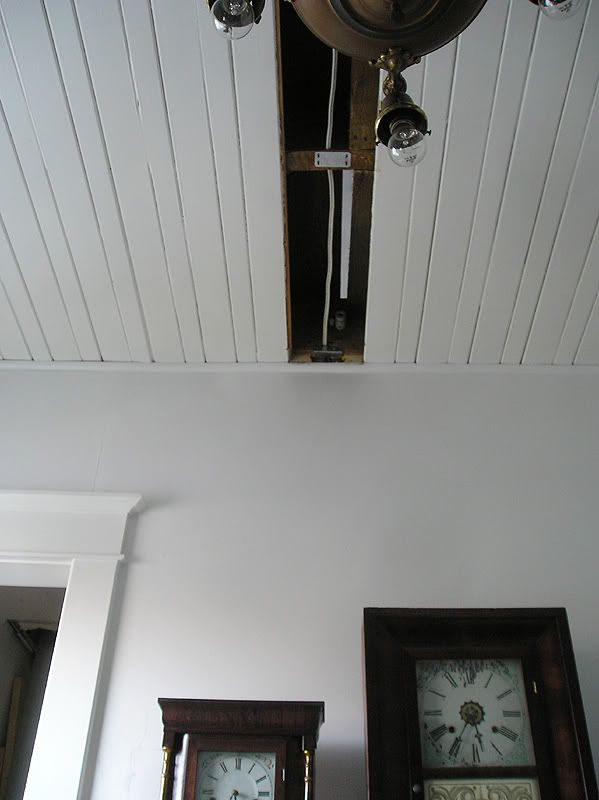
Photobucket

And since I know people will want to see the whole clocks (the above photo was meant to catch part of the fixture in the same photo), here:
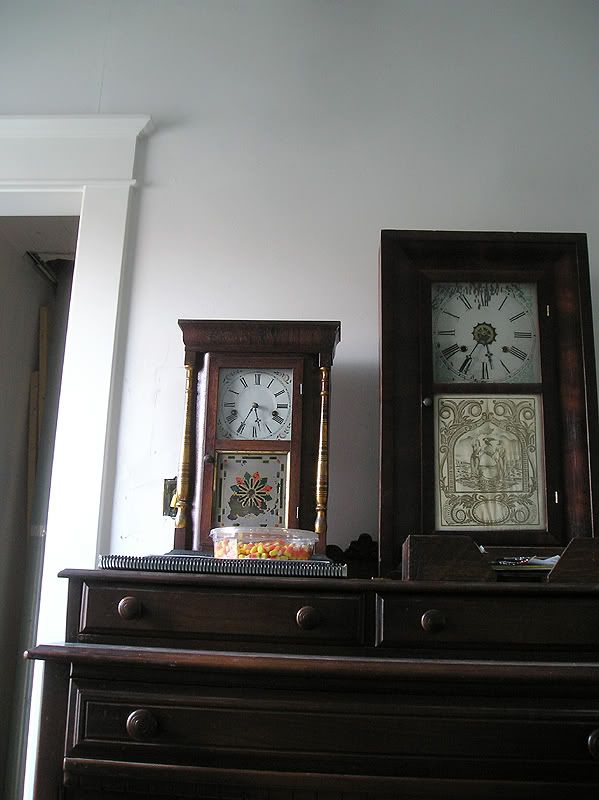
Photobucket

The one on the left is a nearly mint condition 100% original Ansonia clock from around 1860, and next to it is a refinished and repaired (and much more pedestrian) Waterbury Ogee clock from around 1870, which has a temporary decal in the door (in a clear bag, which is why it looks wrinkled), which I haven't adhered to the glass yet. It's a gold transfer that will get adhered to the door, and painted (reverse painted) in a few colours. It's been like this for a few years... The ogee was my first antique clock purchase off eBay, and after a whole bunch of different repairs, it's an extremely reliable timekeeper, and I use the built-in alarm to wake up in the mornings for work. It's VERY LOUD.

The antique dresser is part of my bedroom set, from around the 1920s. It's solid walnut and I adore it. Someday I'll fix all the nicks and scratches on it with shellac. There was a time when I had thought about refinishing them, but now I'd NEVER do this. The finish is original, and since it's shellac, it can easily be touched up. The side of the dresser and one of it's cabriole legs can be seen in the "Aftermath" photo above.

Also, CANDY CORN! :D

Wednesday, October 19, 2011

Major October Update (Part II)

Alright, so as I was saying last night, I started working on the "L" room* upstairs. The plan is pretty simple: Rebuild the closets (which were too tiny to be useful), redo the floors, redo the ceiling (new drywall), and general stuff like clean-up the mouldings, patch the walls, paint, etc.

* Note: I only call it the "L" room because it's L shaped.

I had started to tear down the closet walls ages ago, but I did a lot more work recently by opening-up the hallway wall. The reason for this is to add a built-in linen closet. The house has very little storage space other than the basement, so I wanted a spot near the bathroom to store bath towels, bedsheets, toiletries and other items.

Here's the spot where the built-in will go. I originally wanted to make it almost up to the ceiling, but I took a look at all sorts of gathered photos of old 1920's built-ins, and none except for very rare exceptions were taller than an average door, so I plan to make this one the same. This means that all 3 openings will be done in one set of continuous casings(mouldings), with the doors to the spare/guest room, and the "L" room on each side.

This is viewed from the bathroom door (the doorway to the right is the main staircase).

Photobucket

Doorway to the "L" room:

Photobucket

From the "L" room looking towards the bathroom:

Photobucket

Photobucket

From guest room (aka Laundry room):

Photobucket

The ceiling in the "L" room will be a fun job. I plan to drywall over this, but some of the plaster/mud that they added is caked-on super thick in places. If it's still fairly easy to scrape off, I might take it all down, otherwise I'll keep going until I'm at a relatively thin spot.

Photobucket

I also started to patch the floor. These are spots left to fix.

Photobucket

Photobucket

Photobucket

Lastly is the porch window. I removed the porch window in spring or early summer so that I could replace the missing muntin in the bottom (see main blog photo for the before).

I don't think I posted about the muntin repair here, so here's a very quick recap.

Match the profile (as close as possible) on some clear pine. In my case, I was able to do it entirely on the table saw (close enough profile that no one will notice a difference).

Photobucket

Carefully cut and notch your pieces to fit (measure carefully, and aim for a snug fit).

Photobucket

Photobucket

Glue, clamp, putty, sand, prime.

Photobucket

Photobucket

So yeah, fast forward to Monday night, when I finally decided to install the glass and do the glazing. I did the top 2 1/2 panes on Mon night, and the large bottom 2 last night. For an idea of size, the window is 3 feet wide by 5 feet high.

Photobucket

The glazing job isn't perfect, but the entire window is in rough shape, with many edges gouged, chipped, puttied, filled and re-filled, etc. But the new centre muntin one looks great!

Photobucket

This is what the porch has looked like pretty much all summer/fall. Notice all the dead leaves starting to drift in by the opening.

Photobucket

I have the window in the MB (since there's lots of room to work), so I'm hoping that the crappy Dap33 will dry in a week or so. I'd like to paint and install the window before winter.